Fascia Board Replacement Cost: What You Need to Know in 2026
- William McKracherne
- Feb 2
- 14 min read

Fascia boards might seem like a minor detail, but they’re the unsung shield that keeps your roof and siding working together. If they’re warped, rotted, or just plain ugly, they can let water seep in, cause mold, and ruin your curb appeal. That’s why most homeowners get surprised when the cost of a fascia board replacement pops up in their budget.
The price tag can swing from a few hundred dollars for a DIY trim job to several thousand when you bring in a pro. Material is a big driver: vinyl and composite boards are cheaper than solid wood or aluminum, but they also vary in lifespan. Labor costs are the other half of the equation—roughly 30–40% of the total on average.
Take a 2,000‑square‑foot home in a humid climate, for example. A full fascia overhaul might run $2,800 to $3,200 if you opt for composite panels and a mid‑range contractor. Swap to premium cedar or aluminum and you’re looking at $4,500 to $5,500—plus a higher labor rate for the extra skill required.
So, what’s the red flag that tells you it’s time to replace? A cracked board that’s no longer flat, a board that’s pulled out of its fasteners, or any sign of rot or water damage are all non‑negotiables. If you notice a drip line or moldy corners, that’s your cue to act—waiting only amplifies the cost.
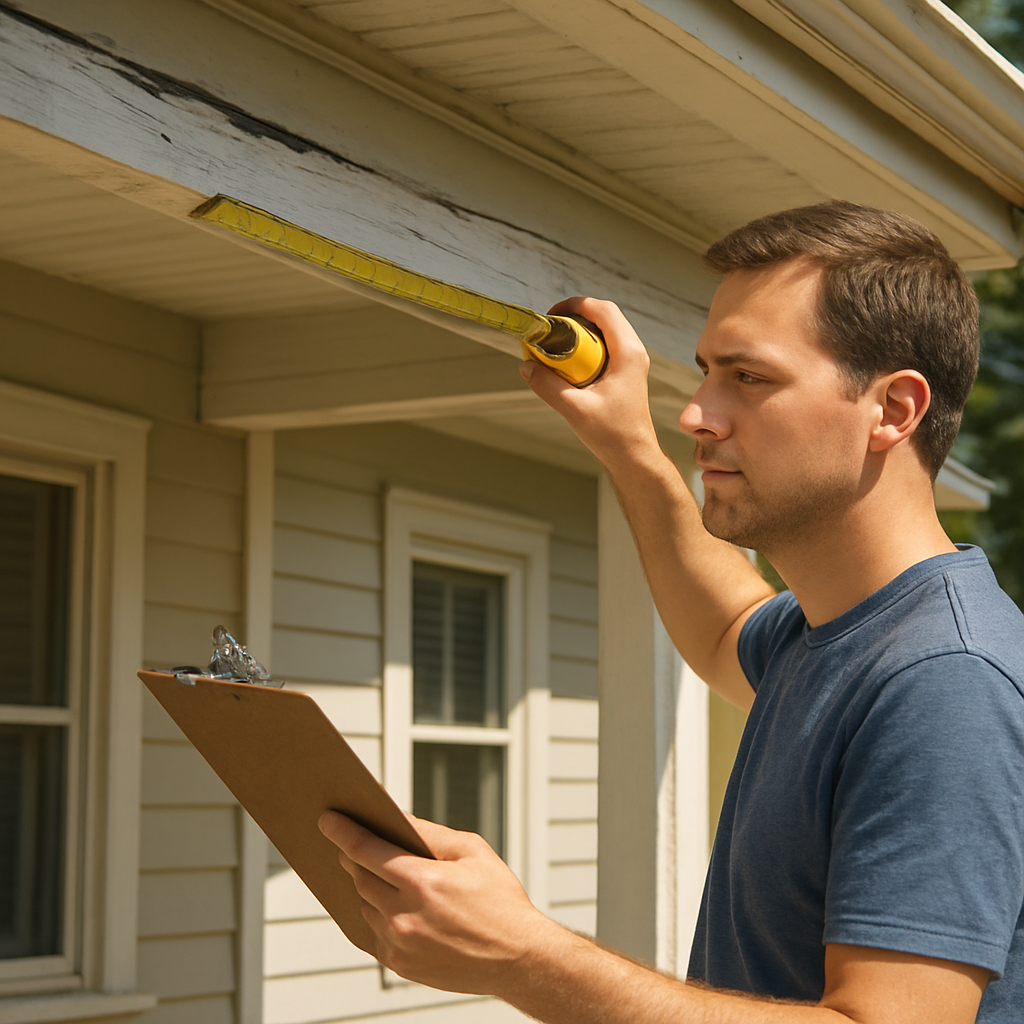
Start by pulling up a few boards and measuring the width and height of the panel you need to replace. If it’s a standard 5‑by‑10 foot board, the math is simple. But if you’re dealing with irregular shapes or hidden structural work, a professional inspection can save you from a costly mistake.
The next step is to estimate the cost before you sign the contract. LGFMH’s Free Fascia Board Replacement Cost Calculator lets you plug in your material choice, board size, and labor rate to get a ball‑park figure. It’s a quick way to see if DIY will keep you under budget or if a contractor is actually a better deal.
If DIY is your route, grab a jigsaw, some good‑quality screws, and a sealant that’s rated for outdoor use. Work in the early morning or late afternoon to avoid the heat, and always wear safety gear—gloves, goggles, and a dust mask will keep the job clean and safe.
If you decide to go the contractor route, shop for quotes from at least three licensed firms and compare their material proposals. A reputable contractor will give you a line item for materials, labor, and disposal—so you know exactly where the money goes.
While you’re re‑imagining your home’s exterior, think about lighting. A fresh fascia panel paired with a subtle LED accent can transform the look of your front porch after dark. LED Artistry lighting can help you pick fixtures that complement the new fascia and boost your curb appeal.
Now that you’ve got a handle on the numbers, the next step is to budget for the whole project—materials, labor, and any ancillary work like trimming or paint touch‑ups. Reach out to a local contractor or use our calculator to lock in a realistic estimate, then take a deep breath and get started. Your home’s new fascia will keep you dry, look great, and give you peace of mind for years to come.
TL;DR
When it comes to fascia board replacement cost, the key is understanding that material choice, labor rate, and hidden prep work drive the final bill. By comparing DIY versus professional options, checking local contractor rates, and using our quick calculator, you’ll know exactly how much to budget and avoid surprises.
Step 1: Assess the Damage and Gather Materials
Picture this: you’re standing at the edge of your roof, squinting at a warped fascia board that’s already leaking into the porch. It’s not just an aesthetic issue; it’s a warning sign that the rest of your exterior might be at risk. So, the first thing you do is check for the classic red flags: cracks, loose fasteners, or that unmistakable musty smell of rot.
Start by pulling a few boards aside—just enough to see what’s going on. Measure the width and height of the panel you’re replacing. If you’re in a 5‑by‑10 foot range, you’re in familiar territory; but if the shape is irregular, that’s a signal to double‑check the dimensions before you buy anything.
Next, gather your gear. For a DIY approach you’ll need a jigsaw (or a hand saw if you’re old school), good‑quality outdoor screws, a drill, a measuring tape, and a sealant rated for exterior use. If you’re leaning toward a pro, a quick call to a local contractor will let them scout the area and suggest any additional prep work—like removing old nails or sanding the surface.
It might sound like a lot of prep, but it’s worth the effort. Think about how much money you’ll save by catching a small leak early, instead of waiting until water has seeped into the attic and you’re paying for a full roof repair.
Now that you’ve got the board measured and the tools in hand, it’s time to decide on material. Vinyl and composite are budget‑friendly and easy to work with, but if you want that classic wood look, you’ll need cedar or pine, which cost more and require a little extra care during installation.
Want to keep an eye on your budget? Use the Free Fascia Board Replacement Cost Calculator on our site. Just plug in the board size, material type, and local labor rate, and you’ll see a rough estimate. That way you won’t be surprised by a cost that spikes when the contractor pulls out a hidden fee for extra prep work.
In our experience, the biggest hidden cost is often the labor required to remove the old board and properly seal the new one. A skilled contractor will give you a line item for each, so you can see where the money is really going.
Don’t forget safety—gloves, goggles, and a dust mask will make the job feel a lot less like a chore and more like a small adventure.
Ready to tackle the first board? Grab your tools, step outside, and remember the checklist: damage check, measurement, material choice, safety gear, and budget calculator. That’s the groundwork that will make the rest of the replacement smoother and keep the project under budget.
Step 2: Remove the Old Fascia and Prepare the Surface
Alright, you’ve got your new board measured and your budget set. Now it’s time to take the old fascia off the table—and make sure what’s left is ready to hold the fresh piece in place. Let’s break it down step‑by‑step, so you feel confident every step of the way.
Gather Your Tools
First, line up the essentials: a sturdy ladder, a utility knife, a drill with a flat‑bit screwdriver bit, a pry bar, a tape measure, and a safety kit—gloves, goggles, and a dust mask. If you’re working with wood, you’ll also want a good pair of pry saw blades to keep cuts clean and avoid splintering.
Safe Work Practices
Before you even touch a single screw, check that your ladder is on even ground and that the roof is dry. A wet surface can turn a quick job into a safety hazard. Wrap a towel around the ladder rung and tighten it; it’s a small step that saves a lot of trouble later.
Do you remember the last time you tried a DIY roof job? A little over‑confidence and an overlooked safety step can turn a simple task into a mess. Don’t skip the safety gear—your eyes and hands deserve it.
Removing the Old Board
Start at the corner nearest the roofline. Use the pry bar to gently lift the fascia until you feel the screws or nails give way. Don’t force it; if the board is stubborn, give a little tap with a hammer to loosen the fasteners.
Once the board is loose, slide the pry bar along the edge to free it from the joist or framing member. Keep the pry bar level to avoid damaging the underlying structure. If you’re working with a composite panel, be careful not to crack the material; a smooth, steady pry keeps the edges intact.
When you’ve got the board out, take a moment to check the joist behind it. Look for cracks, rot, or loose screws that could compromise the new fascia. This is a good time to replace any damaged framing—save yourself a headache down the road.
Inspecting the Underlying Structure
Now that the old fascia is off, you can see the raw wood or metal that holds it. Use a flashlight to scan for hidden decay. A small, damp area can mean a bigger problem if left unchecked.
Feel the joist with your fingertips—soft spots or wobble? Those are signs of rot. If you spot any, trim the damaged section or replace it entirely before you install the new fascia. A solid base means your new board will stay in place longer and keep water out.
Prep for New Install
With the old board out and the underlying structure inspected, it’s time to prep for the new panel. Clean the area of any debris, dust, or old sealant. A clean surface ensures that new screws will grip properly and that the sealant will bond well.
Measure the exact dimensions again—now that you’re at the spot, small changes can occur from settling or previous cuts. Double‑check the length and height to make sure the new board will fit snugly.
When you’re ready, lay the new fascia flat against the joist. Apply a high‑quality exterior sealant along the seam, then drive stainless‑steel screws every 12 to 16 inches. The stainless steel prevents future rust, which is a major cost‑saving factor over the life of the board.
Finally, run a quick water test by sprinkling a few drops of water along the newly installed fascia. If the water beads and runs off, you’re good to go. If it seeps in, you may need to re‑seal or adjust the fasteners.
So, what’s the takeaway? Remove the old board carefully, inspect the framing, clean the area, and install the new board with stainless‑steel fasteners and proper sealant. A little patience and attention to detail keeps your fascia— and your roof—dry for years to come.
Step 3: Install the New Fascia and Estimate the Total Cost
Now that you’ve got the fresh board ready, it’s time to lay it down and see how the numbers add up. This step blends hands‑on work with a quick cost check so you’re never surprised by a hidden fee.
Start With a Solid Foundation
Before you even touch the new panel, double‑check that the joist underneath is clean and sturdy. A little debris or rot can cause the new fascia to wobble and will inflate your labor costs later. Give the frame a quick wipe and, if you spot a soft spot, replace the damaged wood.
When the base is solid, lay the new fascia flat against the joist. Run a straight edge along the top to make sure it sits perfectly level—this small step saves you from mis‑cut panels that could cost extra square footage later.
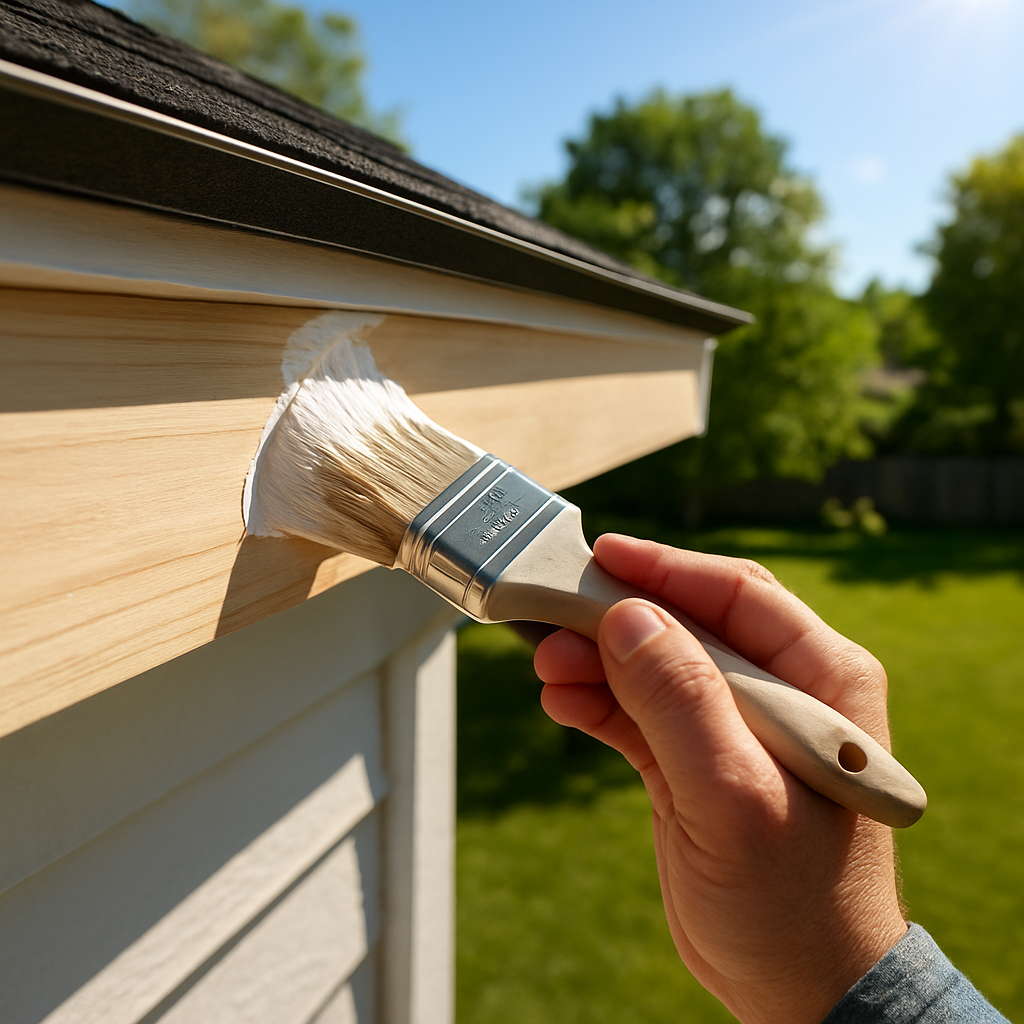
Seal the Deal with Quality Sealant
Apply a high‑grade exterior sealant along the seam where the board meets the joist. Think of sealant as the invisible shield that keeps rainwater from finding its way into the attic. A good job now means fewer future repairs.
Use a paintbrush or caulking gun to spread the sealant evenly; a thin, even layer is more effective than a thick, lumpy one. Once the sealant is in place, let it set for at least 24 hours before driving screws.
Fasten with Stainless‑Steel Screws
Stainless‑steel screws are a game‑changer. They resist rust, which translates to longer lifespan and lower maintenance costs. Drive a screw every 12 to 16 inches along the edge, keeping the head flush with the board.
Remember: the right screw length matters. Use one that’s long enough to anchor into the joist but short enough to avoid drilling into the roof deck. A quick visual check—does the screw head sit level? If not, you’re likely over‑drilling.
Water Test: The Quick Reality Check
Once the board is secured, sprinkle a few drops of water along the seam. If the water beads and runs off, you’ve got a solid seal. If it seeps in, re‑apply sealant or tighten a loose screw. This simple test saves you from a future leak that could cost thousands.
Crunch the Numbers: What Does It Cost?
The total cost of installing a fascia board comes down to three main ingredients: material, labor, and fasteners/sealant. Use the cost per linear foot data from Homewyse's cost estimates as your starting point. They report $8.53 to $13.02 per linear foot for basic mid‑range work in 2026.
Multiply that figure by the exact number of linear feet you’re installing. Add roughly 15‑20% for fasteners, sealant, and disposal. Finally, include labor—most contractors bill $50‑$80 per hour, depending on local rates and project difficulty.
For example, a 200‑linear‑foot run of vinyl fascia might look like this:
Option | Estimated Cost for 200 ft | Notes |
Vinyl | $2,100 – $2,600 | Lowest upfront cost, easy to install |
Composite | $2,700 – $3,200 | Higher durability, slightly more labor |
Wood (Cedar) | $3,400 – $4,000 | Best curb appeal, requires sealing |
Keep in mind that regional labor rates and any special prep work—like removing old trim or repairing framing—can bump these numbers up or down. If you’re on a tight budget, consider a DIY approach with the right tools and protective gear. But if you’re unsure about the roof structure or the local weather patterns, a professional can provide a more accurate quote and reduce risk.
Checklist Before You Finish
Verify all screws are tight and head level.
Run the water test again after the sealant has cured.
Check that the new fascia flushes with existing trim.
Record the final linear feet and any extra fastener or sealant used.
Document the total hours spent on the job.
By following these steps, you’ll install a fascia that keeps your roof dry and your curb appeal sharp—while staying on budget. And you’ll know exactly how each dollar was spent, turning the mystery of fascia board replacement cost into a clear, manageable figure.
Step 4: Finishing Touches and Budgeting for Extras
After the new board sits snug against the joist, you’re almost at the finish line—just a few extra touches and a final cost check keep the whole job tidy.
First, give the sealant a chance to dry. A 24‑hour cure gives a smooth, watertight layer that’ll last years. If you’re rushing, a quick 4‑hour set can work, but you’ll pay the price with a less reliable seal.
Paint or Finish? What’s the Right Call?
Vinyl and composite boards already come painted, so most homeowners skip extra paint. Wood, especially cedar, needs a coat that matches your siding palette. Think of it as the last brushstroke on a canvas—small details can elevate the whole look.
In our experience, a two‑coat finish on cedar cuts the need for re‑paint in the first 5‑7 years. If you’re in a high‑humidity zone, add a weather‑resistant coating for that extra shield.
Budgeting for Extras: A Practical Checklist
Here’s a quick list you can cross‑check as you wrap up:
Sealant – $20 to $40 per gallon
Paint or stain – $30 to $70 per gallon
Fastener replacement – $5 to $10 per screw
Trim or fascia caps – $15 to $25 per foot
Hardware for decorative moldings – $10 to $30 per piece
Add these to your running tally and you’ll see how a few small extras can bump the project cost up 10‑15%—but they’re usually worth the investment.
Does It Matter How You Finish?
Absolutely. A well‑finished fascia not only looks sharp; it protects your roof. A loose trim piece can let water seep in, forcing you back into a repair cycle that adds hundreds more to the bill.
That’s why many of us recommend a single, sturdy fascia cap at the corners. It seals gaps and gives a neat, professional look with minimal extra cost.
Final Water Test and Documentation
Run a light spray along the seams one more time. If the water beads and rolls off, you’re good to go. If it soaks in, tighten screws, re‑apply sealant, or adjust the board angle.
Once satisfied, document the job: note the linear feet installed, the number of screws used, and any extra materials purchased. This record becomes handy if you need to justify the final invoice or track future maintenance.
Remember, the total fascia board replacement cost is a moving target: material, labor, and these finishing touches all play a part. By staying mindful of each detail, you keep the budget predictable and the roof dry.
When you’re pulling the final numbers together, keep a running spreadsheet. Even a simple table with columns for material, labor, fasteners, and paint saves you from mis‑spending. Jot down the linear feet again, multiply by the per‑foot cost, and add the extras. That way, if the contractor quotes a higher price, you’ll know exactly where the difference lies.
Also, ask your contractor for a line‑item invoice before the work starts. A clear itemization—materials, labor, disposal fees—lets you double‑check that the final bill matches the estimate. If something looks off, bring it up early. Most reputable firms will happily explain the numbers; that’s part of their service promise.
Finally, think of this project as an investment in your home’s longevity. A solid fascia keeps your roof dry, prevents mold, and boosts curb appeal—benefits that add resale value over time. So, even if a few extras feel like a bump in the budget, the payoff is real and lasting.
Conclusion
We’ve walked through every nail, every screw, and every dollar that goes into a fascia board replacement.
What sticks out most is that the cost is not a mystery – it’s a simple recipe of material, labor, and a dash of prep work.
If you’ve measured the linear feet, checked the board for rot, and got a clear line‑item estimate, you already own the playbook.
So, what should you do next? Double‑check the numbers, ask for a written quote before any work starts, and keep a running spreadsheet.
That way you’ll spot a rogue line item faster than a leak can show up on your porch.
Remember that a well‑installed fascia is a long‑term investment – it keeps the roof dry, stops mold, and actually adds resale value.
Even if a few extra fees pop up, the payoff is real and lasting.
Take the next step with confidence: pull the final numbers, lock in a contractor or DIY kit, and finish with a water test to seal the deal.
When you’re done, you’ll have a clear budget, a dry roof, and a curb appeal that makes neighbors jealous.
That’s the takeaway we love to hear from homeowners who finish job on time and budget.
FAQ
What does fascia board replacement cost really include?
The term covers three main things: the material itself, the labor to install it, and a small prep fee for cleaning, trimming, and sealing. Think of the material as the core of the bill—vinyl, composite, wood, or aluminum each pulls a different price. Labor usually takes 30‑40% of that figure, and the prep part can bump the total by 5‑10%.
How much does a typical fascia replacement run for a 2,000‑square‑foot home?
In 2026 a mid‑range job usually falls between $2,800 and $3,200 when you pick composite panels and hire a licensed contractor. If you go with premium cedar or aluminum, the cost can climb to $4,500–$5,500. The big difference comes from the material’s price per linear foot and the extra labor needed for more complex framing.
Can I estimate the cost myself before calling a contractor?
Absolutely. Grab your tape measure, count the linear feet you need, and look up the per‑foot price of your chosen material. Add roughly 15‑20% for fasteners, sealant, and disposal. Then factor in local labor rates—most firms charge $50‑$80 an hour in 2026. If the numbers look reasonable, you’re ready to negotiate a fair quote.
What’s the biggest hidden cost that can trip up a homeowner?
Often it’s the prep work: removing old boards, checking for rot, and correcting framing flaws. If you overlook a loose joist or hidden mold, the contractor may add a surprise line item for repairs or extra materials. That’s why a clear, itemized estimate—materials, labor, disposal, and prep—is essential before any nails hit the wall.
Should I buy a DIY kit or hire a pro for the replacement?
It depends on your comfort level and the project scope. DIY kits are great for simple, straight‑line runs on good‑condition framing. But if you’re dealing with irregular shapes, damaged framing, or a humid climate that can accelerate rot, a professional’s eye can save you money in the long run by avoiding costly mistakes.
How can I keep the fascia board replacement cost low without sacrificing quality?
Start with a material that balances price and durability—composite panels are often a sweet spot. Use stainless‑steel fasteners to prevent rust, and choose a reputable contractor who provides a written line‑item invoice. Also, plan the project during a dry season; wet weather can delay work and raise labor costs.
What should I check after the job to make sure I’ve paid the right amount?
Ask for a final invoice that lists each item—board type, linear feet, fasteners, sealant, and labor hours. Compare it against your initial estimate. Run a quick water test at the seam; if it runs off cleanly, the installation is solid. If you see leaks or uneven cuts, bring it up immediately so adjustments can be made before the bill is finalized.


Comments