How to Waterproof a Basement Wall: Step-by-Step Guide for a Dry Home
- William McKracherne
- Feb 6
- 16 min read

Ever stood in your basement on a rainy day and watched water creep up the walls like it’s trying to claim new territory? It’s that uneasy feeling that something you thought was solid is actually leaking, and you’re left wondering if the problem will ever stop.
We’ve all been there – the musty smell, the damp patches, and the creeping fear that tomorrow’s storm will turn your storage space into a mini lake. The good news? You don’t have to live with it. Understandinghow to waterproof a basement wallstarts with recognizing the most common culprits: exterior water pressure, interior moisture, and tiny cracks that act like secret doors for rain.
Take Sarah, a homeowner in Tampa who noticed brown stains spreading after a heavy rain. She thought a simple paint job would do, but the water kept coming. What she needed was a systematic approach: seal the exterior, manage surface runoff, and reinforce the wall itself. After installing a proper drainage system and applying a waterproof membrane, the stains vanished and her basement stayed dry even during the next tropical downpour.
So, what does a solid waterproofing plan look like? First, evaluate the outside – gutters, downspouts, and grading. If water pools near the foundation, it creates hydrostatic pressure that forces moisture through any weak spot. A quick fix is to ensure gutters direct water at least six feet away from the house. For more stubborn situations, consider a Step-by-Step Guide to Gutter Splash Guard Installation to keep splashing water from overwhelming your drainage.
Next, turn your attention to the wall itself. Clean the surface, fill cracks with hydraulic cement, and apply a liquid waterproofing membrane. Let’s break it down into three actionable steps you can start today:
Inspect and repair exterior grading; slope soil away from the foundation.
Install or upgrade gutters and splash guards to channel water safely.
Apply a high‑quality waterproof coating, followed by a vapor barrier if needed.
And don’t forget the finishing touches. Once the wall is sealed, adding proper lighting not only makes the space more usable but also highlights any remaining moisture issues early. A partner like LED Artistry can help you install energy‑efficient fixtures that brighten the basement without adding heat that could affect the new waterproofing.
By following these steps, you’ll move from a soggy, stressful basement to a dry, functional space you can actually enjoy. Ready to take the first step? Grab a flashlight, check your gutters, and let’s get that wall sealed for good.
TL;DR
Want a dry basement without endless leaks today?
Follow our quick three‑step plan—grade the soil, upgrade gutters or splash guards, and seal walls with a waterproof coating—so you can finally enjoy a dry, usable space instead of a soggy mess, a simple routine you can start today without costly excavations.
Step 1: Inspect and Prepare the Basement Wall
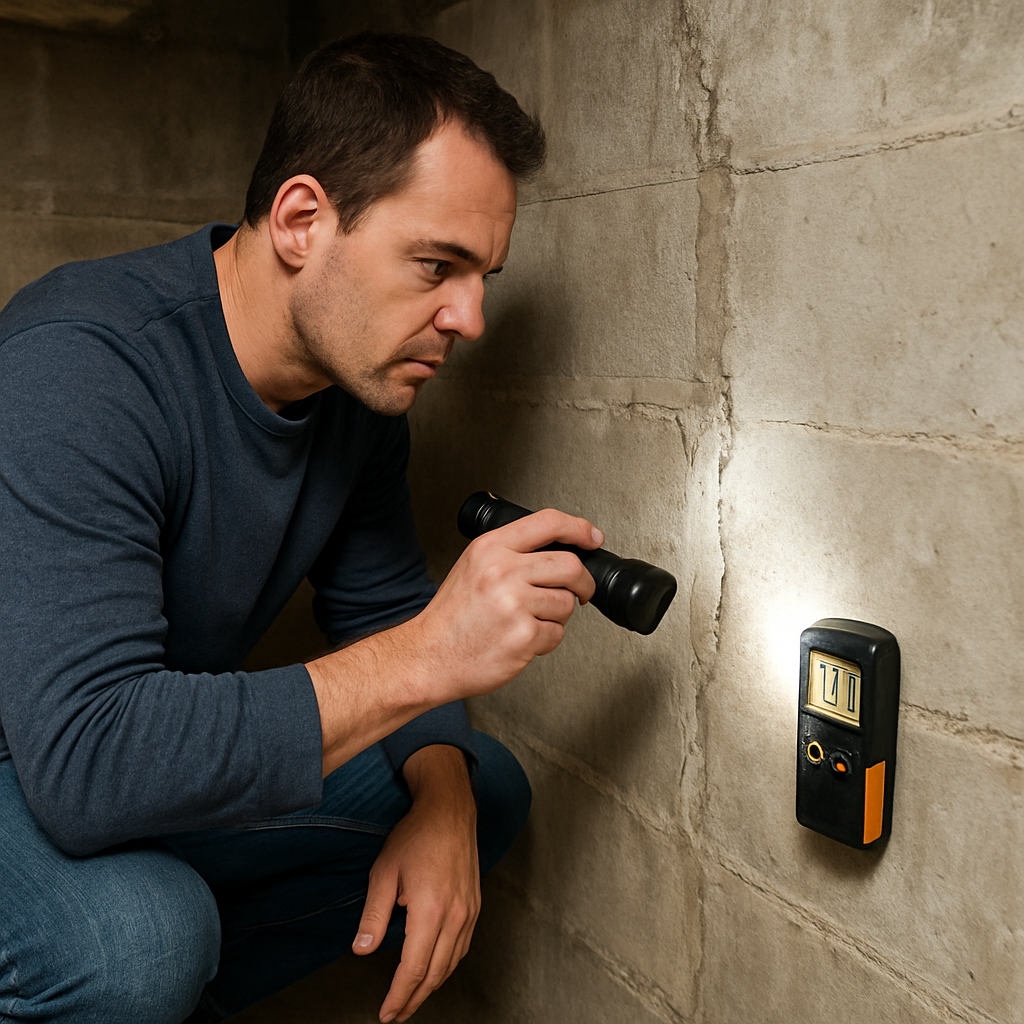
First thing's first – before you splash any waterproofing product on the wall, you’ve got to know what you’re dealing with. Grab a flashlight, a sturdy pair of gloves, and walk the perimeter of your basement wall like you’re on a low‑key treasure hunt.
What you’re looking for are the little tell‑tale signs: cracks that look like hairline fractures, damp patches that feel cool to the touch, and any flaking paint that’s begging for a closer look. Those spots are the entry points for water, and if you miss them, the whole waterproofing job can feel like putting a Band‑Aid on a leaky pipe.
And don’t forget the floor. A sagging concrete slab or a puddle that never seems to dry tells you the wall’s not the only culprit – water might be seeping up from below. A quick test? Tape a piece of clear plastic sheeting to the wall and seal the edges with painter’s tape. Leave it for 24 hours. If moisture collects on the inside of the plastic, you’ve got condensation issues that need ventilation before you seal anything.
Cleaning the surface
Once you’ve spotted the problem areas, it’s time to clean. A stiff‑bristle brush, a garden hose (on low pressure), and a bucket of trisodium phosphate (TSP) will do the trick. Scrub away any mold, mildew, or old paint until the concrete or brick shows its true colour. Rinse lightly and let the wall dry completely – you’ll know it’s ready when it feels warm, not cold, to the touch.
Pro tip: If you’re in a humid climate, consider using a dehumidifier in the basement while the wall dries. It speeds up the process and prevents new moisture from settling back onto the surface.
Repairing cracks and gaps
Now comes the satisfying part – filling those cracks. For hairline cracks, a quick‑mix hydraulic cement works like magic. Mix it according to the package, push it into the crack with a putty knife, and smooth it out. For larger gaps, you might need a backer rod before applying the cement, ensuring the repair is level with the surrounding wall.Don’t rush this step. A well‑filled crack is the foundation of a waterproof wall, and skipping it is the same as leaving a window open during a storm.
While you’re at it, check any embedded metal ties or anchors. If they’re rusted, they’ll eventually corrode and create new pathways for water. A quick sandblasting or a rust‑inhibiting primer can extend their life.
Preparing for the waterproof coating
With the wall clean and repaired, you’re ready for the coating. But before you roll out a liquid membrane, make sure the surface is uniformly dry. Use a moisture meter – aim for a reading below 12% in the concrete. If the reading’s higher, give the wall more time to dry or improve ventilation.
And here’s a little secret from our crews at LGFMH Construction: we like to prime the wall with a thin layer of primer designed for the specific waterproof membrane we’ll use later. It helps the coating adhere better and gives you a more durable seal.
Ready to see how the whole process looks in action? Check out the quick walkthrough below.
After the video, you’ll have a clear picture of each step – from inspection to the final seal.
Now that your wall is clean, cracked, and primed, the next step in our three‑step plan is to apply the waterproof coating. Stay tuned for the next section where we break down the best products, tools, and techniques to get that wall sealed tight.
Step 2: Clean and Repair Cracks
Now that you’ve scoped out the problem areas, it’s time to roll up your sleeves and actually get the wall ready for a waterproof seal. This is the part where a little elbow grease makes all the difference.
Clear the Surface
Start by sweeping away loose dust, cobwebs, and any flaking paint. A stiff‑bristle brush does the trick, but a shop‑vac can save you a lot of back‑handed scrubbing.
Next, mix a mild detergent with warm water and scrub the concrete. You’ll notice a dull film where years of moisture have settled – that’s what you want to dissolve.
Rinse thoroughly with a garden hose or a bucket of clean water. Let the wall dry completely; a fan or open windows can speed things up, but patience is key. If the surface feels cool to the touch, it’s still sweating out moisture – wait until it’s warm and dry before moving on.
Does this feel like a lot? Trust me, skipping a proper clean leads to a waterproof coating that peels after the first rain.
Inspect for Hidden Issues
While the wall is drying, glance for efflorescence – those white, powdery spots that signal water traveling through the masonry. Lightly brush them away and note where they appear; they’re clues to the most vulnerable sections.
Wear a dust mask and safety glasses. Concrete dust can be irritating, and you’ll thank yourself later when you don’t have itchy eyes.
Choose the Right Repair Material
Small hairline cracks (under ¼ in.) are best tackled with hydraulic cement. It expands as it cures, sealing the gap tight. For cracks wider than ¼ in., a flexible epoxy filler offers durability and movement accommodation.
In our experience at LGFMH Construction, pairing hydraulic cement with a thin‑layer of epoxy on larger joints gives a seamless bond that lasts through seasonal expansion.
Step‑by‑Step Crack Repair
1.Prep the crack.Use a cold‑chisel and hammer to widen the crack slightly – about ¼ in. deep and a few millimetres wide. This gives the filler something to grip.
2.Clean the opening.Blow out dust with a shop‑vac or compressed air. A clean groove ensures the cement adheres properly.
3.Mix and apply.Follow the manufacturer’s water‑to‑cement ratio, usually a peanut‑butter consistency. Pack the mix into the crack with a trowel, over‑filling slightly.
4.Shape and smooth.While the cement is still tacky, strike the surface with a putty knife to level it with the surrounding wall.
5.Cure.Keep the repaired area damp for the first 24 hours – a mist spray works well. This prevents premature drying and cracking.
6.Sand.After the cement has fully cured (usually 24‑48 hours), sand the spot smooth with a medium‑grit sanding block.
For epoxy, the steps are similar, but you’ll need to work faster because the resin sets in minutes. Mix the two components, apply, and shape before it hardens.
So, what’s the bottom line? A clean, crack‑free surface is the foundation for any waterproof membrane to cling to.
Quick Checklist
Task | Tool/Material | Pro Tip |
Sweep & brush | Stiff‑bristle brush, shop‑vac | Work from top down to avoid re‑dropping dust |
Wash surface | Mild detergent, hose | Rinse until water runs clear |
Repair cracks | Hydraulic cement or epoxy filler | Moisten small cracks before applying hydraulic cement |
Once you’ve completed these steps, the wall is primed for the waterproof coating you’ll apply in the next phase. You’ll notice the difference the very next time it rains – no more damp patches, just a solid, dry basement you can actually use.
Step 3: Apply Sealant and Primer
Now that the cracks are dead‑set and the surface is smooth, it’s time for the real glue that holds everything together – the sealant and primer combo. Think of it as the handshake between your wall and the waterproof membrane.
Why a primer is non‑negotiable
If you’ve ever tried to stick a poster to a dusty wall, you know the frustration. The same principle applies to waterproofing. A good primer seals pores, locks down dust, and creates a uniform surface for the sealant to cling to. Without it, even the best membrane can peel or bubble when moisture shows up.
In fact, professionals say the primer is the “invisible bond” that makes or breaks a system. That’s why we never skip this step, even if you’re in a rush to get the basement dry.
Picking the right primer for a basement
Basements are usually damp, so you need a primer that can handle moisture. The H2O Supplies cheat sheet breaks primers into families – acrylic, water‑based epoxy, PU, and SBR. For most below‑grade concrete that’s still a little wet, a water‑based epoxy primer is the sweet spot. It will bond to damp concrete and lay down a moisture‑resistant film.
If your walls are completely dry after the cure period, an acrylic primer works fine – it’s fast‑drying and low‑odor, perfect for indoor use.
Here’s a quick decision tree:
Surface dry and porous? – Acrylic primer.
Surface damp or “green” concrete? – Water‑based epoxy primer.
Surface dense or smooth (like a polished slab)? – PU primer.
Need a reference? Check out the waterproofing primer cheat sheet for a detailed match‑up.
Applying the sealant
First, stir the sealant gently – you don’t want to introduce air bubbles. Then, using a 150‑mm paint roller or a brush, spread a thin, even coat over the primed area. Work in sections no wider than a foot so the material stays wet enough to level out.
After the first coat dries (usually 30‑45 minutes for water‑based products), lightly sand with 120‑grit sandpaper. This “key” the surface and helps the next layer adhere better.
Apply a second coat perpendicular to the first. This cross‑hatch method fills any micro‑gaps and builds a robust barrier.
Tips for a flawless bond
– Keep the room temperature between 18 °C and 24 °C. Too cold and the primer will take forever to cure; too hot and it can skin over.
– Ventilation is key. Open a window or run a fan, but avoid direct drafts that dry the surface unevenly.
– If you notice any “fish‑eyes” (small pinholes) after the primer dries, sand them smooth and re‑coat that spot before moving on.
– For tricky corners, use a small angled brush. It’s easier to get the sealant into the crevice without over‑applying.
When the sealant is fully cured – typically 24 hours for most water‑based products – you’re ready for the waterproof membrane. You’ll notice the wall feels slightly tacky, a sign the primer‑sealant combo is doing its job.
Bottom line: skipping or skimping on the primer is like trying to paint over a cracked canvas. Take the extra 15‑minutes now, and you’ll save hours (and a lot of frustration) later when the water stays exactly where it belongs – outside.
Step 4: Install Waterproof Membrane
Now that the primer and sealant have cured, it's time for the star of the show – the waterproof membrane. This thin, flexible sheet is what actually stops groundwater from seeping through your basement wall.
You're probably thinking, “Do I really need a specialist?” In our experience at LGFMH Construction, a homeowner who follows the proper prep can achieve a professional‑grade barrier with just a roller and a bit of elbow grease.
Gather your tools and materials
Before you unroll anything, make sure you have:
Waterproof membrane (self‑adhesive or roll‑out type)
Primer recommended by the membrane manufacturer
Roller with a medium‑nap cover
Detail tape for seams and penetrations
Utility knife, measuring tape, and a clean cloth
Having everything at arm’s reach saves you from scrambling mid‑job and helps keep the surface clean.
Step‑by‑step installation
1.Clean the wall again.Even a speck of dust can create a bubble later. Wipe the surface with a damp cloth, let it dry, and check for any missed cracks – patch them with a non‑shrink grout.
2.Apply a thin coat of primer.The polyguard guide recommends using a water‑based adhesive like Polyguard 650 WB for optimal grip ( waterproofing membrane installation guide ).
3.Start at the bottom.Unroll the membrane from the lowest point of the wall and work upward. Overlap each new strip by at least 6 inches (15 cm); this overlap is the secret to a watertight seal.
4.Press and smooth.Use the roller to push the membrane onto the wall, working from the centre outward to squeeze out air pockets. If you feel a bubble, lift the section, re‑position, and roll again.
5.Seal seams and penetrations.Apply Polyguard Home Stretch™ Detail Tape (or any compatible tape) over every overlap, corner, and pipe sleeve. Press firmly so the tape adheres without wrinkles.
6.Protect the membrane.Once the entire wall is covered, lay a drainage board or insulation panel on top. This layer shields the membrane from punctures when you backfill the soil.
7.Backfill carefully.Fill the excavation in 2‑inch layers, tamping each layer lightly. Avoid large stones that could puncture the membrane.
Quick sanity check
After you step back, run your hand over the wall. It should feel uniformly smooth, with no raised edges or visible gaps. Any raised seams mean you missed an overlap – go back and press those areas again.
Does this feel like a lot? Think of it as laying a giant, waterproof wallpaper. One mis‑aligned strip can let water sneak in, just like a torn wallpaper lets drafts slip through.
Tips for tricky spots
Corners:Cut the membrane a little larger than the corner, then fold it neatly and tape the seam.
Window wells:Cut a precise opening, then wrap the membrane around the well and seal with detail tape.
Cold weather:If the concrete surface is below 10 °C (50 °F), wait for a warmer day or use a low‑temperature primer. The membrane won’t bond well to a frosty surface.
Wet conditions:Make sure the wall is completely dry before you start. A quick heat gun or a sunny afternoon can speed up drying.
What’s next?
Once the membrane is in place and the backfill is compacted, give the system a day to settle, then run a simple “water test” by spraying the exterior wall with a hose. No moisture should appear on the interior side.
If you see any leaks, locate the spot, cut out the offending piece, and reinstall – it’s easier to fix now than after the floor is finished.
With the waterproof membrane installed, you’ve built the core defense that will keep your basement dry for years to come. The next step is to finish the interior with drywall or flooring, confident that the wall is sealed against every drop.
Need a visual refresher? A quick video walkthrough shows the roll‑out technique in action ( quick video walkthrough of membrane roll‑out ).
Step 5: Finish and Maintain Your Waterproofed Wall
Alright, you’ve rolled out the membrane, sealed every seam, and backedfill is in place. Now comes the part most people skip: finishing the interior and keeping that seal intact for years to come.
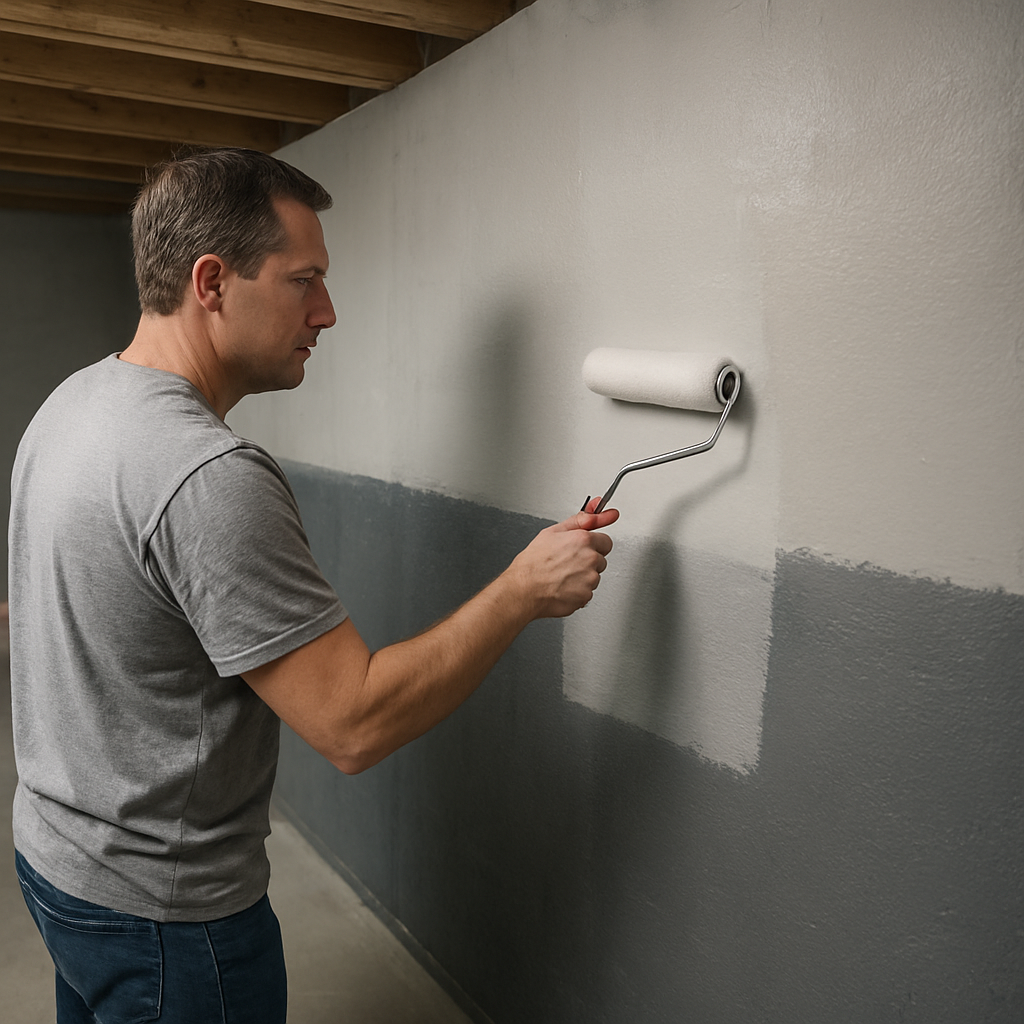
Choosing the right finish
First things first – you want a finish that won’t compromise the waterproofing layer. That means avoiding heavy, moisture‑trapping paints. A water‑based, low‑VOC interior paint works great because it lets the wall breathe while still looking crisp.
In our experience at LGFMH Construction, we often recommend a thin coat of a masonry‑grade primer before the paint. It creates a uniform surface and helps the paint adhere without peeling later.
Step‑by‑step finishing guide
1.Let the membrane cure.Give it at least 24‑48 hours, depending on temperature. If the wall still feels cool to the touch, wait a bit longer.
2.Lightly sand the membrane.Use 120‑grit sandpaper just to knock down any high spots. You don’t want to sand through the membrane – just smooth the surface.
3.Apply a compatible primer.Roll on a thin layer, let it dry per the manufacturer’s directions, then give it a quick sand for extra “key”.
4.Paint.Two coats are ideal. The first coat acts as a seal, the second gives full coverage. Use a roller for large areas and an angled brush for corners.
5.Seal joints and penetrations.Around light fixtures or pipe sleeves, run a bead of a flexible, paint‑compatible sealant. It adds an extra barrier against any future moisture.
6.Install interior drainage if needed.In especially wet climates, a simple interior French drain or a perimeter sump pump can act as a safety net.
Real‑world example
Take a family in Dayton who finished their waterproof membrane in early spring. They followed the steps above, used a low‑VOC primer, and chose a light gray paint that reflects indoor lighting. Six months later, after a heavy rainstorm, the interior stayed bone‑dry. The secret? They didn’t skip the primer, and they added a small sump pump in a corner that activates only when water levels rise.
Maintenance checklist – keep the wall happy
Even the best waterproof system needs a little love now and then. Here’s a quick monthly routine you can stick on your fridge:
Inspect the interior for any new stains or damp spots. If you spot a faint ring, wipe it dry and check the surrounding area.
Run a hose on the exterior wall once a year (after the membrane has cured) and watch for any leaks inside.
Check sump pump operation (if you have one) before the rainy season. A quick test run will tell you if the float and switch are working.
Ventilate the basement regularly. A dehumidifier set to 50‑55 % relative humidity prevents condensation on the walls.
Does this feel like a lot? It’s actually a handful of minutes each month, and it saves you from a costly flood later.
When to call in the pros
If you notice water seeping through after a big storm, or if mold starts to appear despite your best efforts, it’s time to bring in a professional. A quick site visit can pinpoint a missed crack or a compromised seam that you might have missed.
Remember, the goal isn’t just to make the wall look good – it’s to protect your home’s structure and your family’s health.
So, what’s the next move? Grab that primer, roll out a couple of coats of paint, and set a reminder on your calendar for a quarterly check‑up. It’s a small habit that pays off in peace of mind.
Conclusion
So you’ve walked through every step of how to waterproof a basement wall, from inspection to the final paint coat. At this point the wall is sealed, the membrane is snug, and you’ve set up a simple maintenance rhythm.
What does success look like? Imagine turning on the lights after a heavy rain and seeing dry, clean concrete instead of the familiar dark streaks. That peace of mind is the real payoff.
Key takeaways
Prep the surface thoroughly – dust, cracks, and moisture are the enemy.
Choose the right primer and sealant for your wall’s condition.
Install the waterproof membrane with overlapping seams and tape every joint.
Finish with a breathable paint and schedule a quarterly visual check.
If you ever hit a snag – a stubborn leak, a hidden crack, or just a question about product choice – remember that a quick call to a local pro can save you days of guesswork. In our experience at LGFMH Construction, a timely inspection often catches issues before they become costly repairs.
Ready to lock that moisture out for good? Grab your tools, set a reminder for your next check‑up, and enjoy a dry basement that’s ready for anything 2026 throws at it.
FAQ
What’s the first thing I should check before I start how to waterproof a basement wall?
Start with the moisture level. Tape a 2‑foot square of plastic to the wall for 24 hours; if it stays dry you’ve got a good baseline. While you’re at it, look for cracks, efflorescence, and any pooling water outside the foundation. Spotting those issues early saves you from re‑doing the membrane later.
Do I really need a primer if I’m using a self‑adhesive membrane?
Yes, even self‑adhesive membranes benefit from a thin primer coat. The primer seals the concrete pores and gives the membrane a tacky surface to cling to, which prevents air bubbles and seam lifts. In our experience, a missed primer is the most common reason a DIY job leaks after the first rain.
How often should I inspect my waterproofed wall after the project is done?
Give it a quick visual check after the first heavy rain, then set a quarterly habit. Look for new stains, damp spots, or bulges around joints and pipe penetrations. A simple 5‑minute walk‑around each season catches problems before they turn into costly repairs.
Can I use interior paint over the membrane, or will that trap moisture?
Use a breathable, low‑VOC interior paint that’s rated for masonry. It lets any residual moisture escape while still giving you a clean finish. Avoid oil‑based paints—they create a film that can trap vapor and eventually cause peeling.
What’s the best way to seal around pipes and electrical boxes?
Cut the membrane to wrap the pipe, then apply a flexible, paint‑compatible sealant over the joint. For larger penetrations, install a rubber sleeve before sealing. This double‑layer approach handles slight movement and keeps water from sneaking in around the edges.
Is it worth hiring a pro for the membrane installation, or can I do it myself?
If you’re comfortable handling heavy rolls, a roller, and a bit of detail tape, you can pull it off yourself. The trickiest part is getting a flawless overlap; a professional will have the tools and experience to avoid bubbles. We often see homeowners save time and peace of mind by calling LGFMH Construction for a quick consultation.
What should I do if I notice a leak after the membrane has cured?
First, locate the wet spot and mark the surrounding area. Cut out the compromised section of membrane, clean the concrete, re‑prime, and reinstall a fresh piece with overlapping seams. Then run a hose test on the exterior to confirm the repair before you finish the interior finish.


Comments