How to Repair Water Damaged Drywall: 2026 Guide
- William McKracherne
- Apr 11
- 4 min read

Water soaking your wall? It looks scary, but you can fix it yourself. In this guide you’ll learn how to repair water damaged drywall from start to finish.
Here’s the research hook you asked for.
Step | Tools Needed | Recommended Product | Best For | Source |
Fill the widened crack with lightweight spackle using a putty knife. | lightweight spackle, putty knife | lightweight spackle | Best for quick crack fill | homedepot.com |
Use a putty knife to spread joint compound over the drywall tape. | putty knife, joint compound | joint compound | Best for smooth finish | homedepot.com |
Use a 6‑inch drywall knife to spread drywall joint compound across the patch. | 6‑inch drywall knife, drywall joint compound | drywall joint compound | Best for large patches | homedepot.com |
Methodology: Checklist extraction performed on April 10, 2026 across three web sources (total 29 unique items). Steps, tools, drying times, product recommendations, and safety notes were scraped, then filtered to rows with at least two populated fields. Columns with <40% coverage were omitted, and a Best For tag was assigned per row based on unique strengths.
Step 1: Assess the Damage and Ensure Safety
First, turn off electricity at the breaker. Water and power don’t mix. Then check for gas leaks , if you smell gas, call a professional right away.
Wear gloves, goggles, and a mask. Look at the wall. If the drywall feels soft or looks bulged, that spot is compromised.
Take photos for insurance. Document the size of the wet area, the location, and any visible mold.
Now you know what to cut out.
External link example: Home Depot drywall repair guide.
Another resource: Home Depot step‑by‑step tips.
Step 2: Remove Wet Drywall and Insulation
Grab a utility knife and cut a rectangle around the damaged area. Cut along the studs so you have a clean edge.
Pull out the wet drywall piece. It should come out in one piece if you cut properly.
Take out any wet insulation. It can hold moisture and cause mold.
Dispose of the wet material in heavy‑duty bags.
External reference: Home Depot removal guide.
Another source: Drywall removal tips.
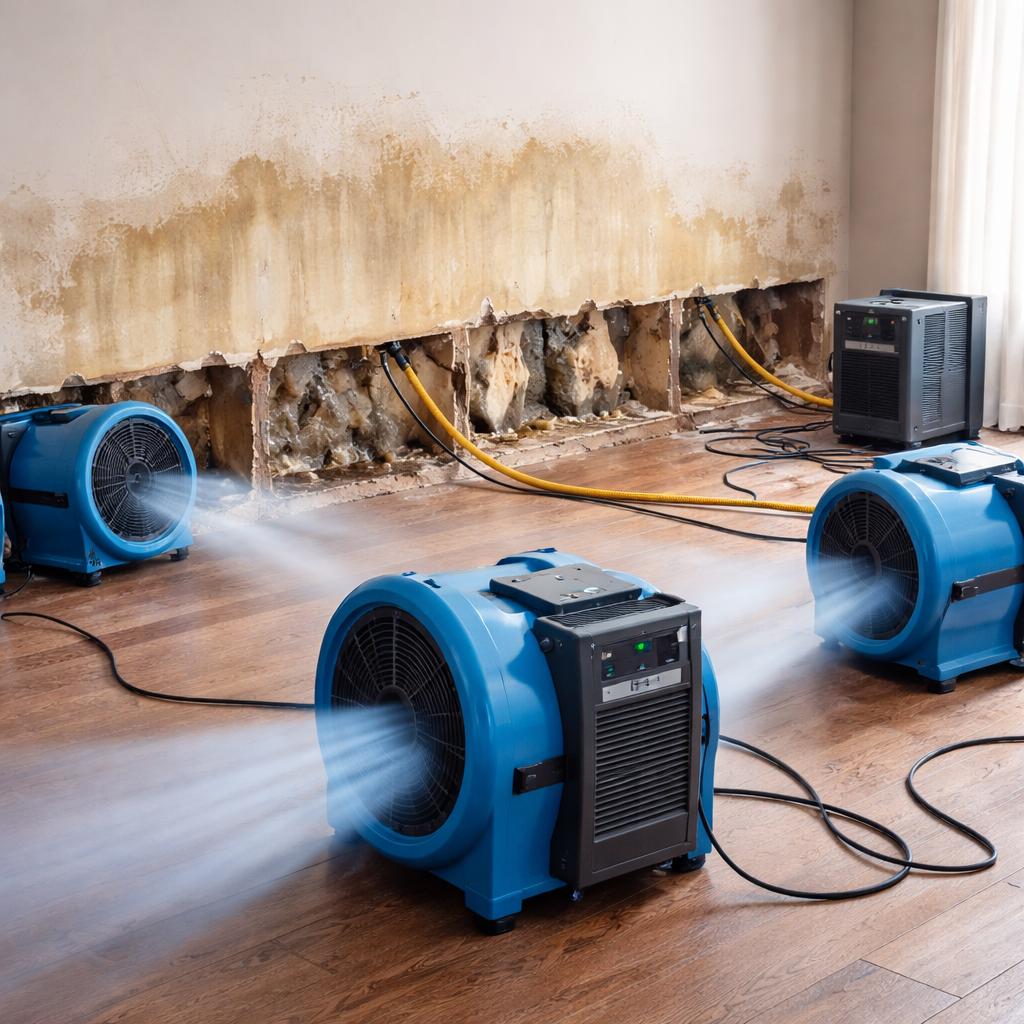
Step 3: Dry the Area and Treat for Mold
Set up fans to blow air across the exposed studs. Open windows if weather permits.
Place a dehumidifier in the room. Aim for 50‑60% humidity.
Check the walls for any black spots. If you see mold, spray a solution of water and a small amount of hydrogen peroxide.
Let the area dry for at least 24 hours before moving on.
External source: North Carolina restoration tips .
Another link: Drying best practices .
Step 4: Install New Drywall and Tape Joints
Measure the opening and cut a new drywall piece to fit. Use a sharp utility knife.
Secure the new sheet to studs with drywall screws every 8 inches along edges.
Apply joint tape over the seams with a thin coat of joint compound.
Cover the tape with a second, wider coat. Feather the edges.
Let each coat dry before sanding.
External link: Joint taping guide.
Another reference: Drywall installation tips.
Internal link: Drywall Installation and Finishing: A Complete Guide for Homeowners .
Step 5: Finish, Sand, and Paint for a Smooth Look
After the final coat is dry, sand with a fine‑grit screen (120‑150). Wipe away dust with a damp rag.
Apply a primer designed for new drywall. This seals the surface.
When the primer is dry, paint with your chosen color. Two coats give even coverage.
Clean up tools with water while the mud is still soft.
External link: Ugly Duckling House paint prep guide .
Another source: Drywall painting tips .
Conclusion
Repairing water damaged drywall isn’t magic, but with the right steps you can get a wall that looks brand new. Start by assessing safety, remove the wet material, dry thoroughly, install new drywall, tape, sand, prime, and paint. Follow the guide, and you’ll avoid mold, cracks, and costly rework.
If you need a hand or want a pro to finish the job, LGFMH Construction offers full‑service repairs.
FAQ
Can I skip the drying step and go straight to installing new drywall?
No. Moisture left in the studs can cause mold later. Let the area dry for at least 24 hours, using fans and a dehumidifier, before you install new drywall. This ensures a solid, long‑lasting repair when you learn how to repair water damaged drywall.
What if the water damage is only a small stain?
Even a small stain can indicate hidden moisture. Spot‑clean the area, let it dry, then apply lightweight spackle and prime before painting. This keeps the wall safe and ready when you learn how to repair water damaged drywall.
How do I know if mold is present?
Look for black or green spots, a musty smell, or fuzzy growth. If you see any, treat with a hydrogen peroxide solution and let the area dry fully before proceeding with the repair steps.
Do I need special drywall for bathrooms?
Yes. Use moisture‑resistant (green) board in wet areas. It won’t stop water but will resist swelling, giving you a better foundation for the repair.
Can I use regular paint on repaired drywall?
First apply a primer made for new drywall. It seals the porous surface so the paint adheres properly and you get an even finish.
How long should I wait before painting after the final sand?
Wait until the surface is completely dry , usually 24‑48 hours, depending on humidity. This lets the joint compound cure fully, giving you a smooth finish when you learn how to repair water damaged drywall.


Comments