Step‑by‑Step Guide to Gutter Splash Guard Installation
- William McKracherne
- Feb 1
- 13 min read

Picture this: rain pouring down, gutters clinging to the roof like a tired old friend, and you watching your basement slowly turn into a mini lake.
Does that sound like your neighborhood? You’re not alone. Many homeowners notice that the splash from overflowing gutters can erode siding, damage windows, and even loosen a whole wall over time.
That’s why the idea of a gutter splash guard is more than just a trendy fix—it’s a lifesaver for your roof and foundation.
In our experience, installing a splash guard is a quick win that can shave off years of costly repairs.
You might think, “What’s a splash guard, and does it even work?” Let’s break it down.
Think of it as a guard rail for the water stream; it keeps droplets from ricocheting off the gutter lip and soaking the wall, fascia, or even your porch tiles.
The installation is surprisingly simple. You slide a small strip—often made of PVC or metal—over the gutter’s edge and secure it with a few fasteners.
Once in place, every splash is redirected back down the gutter, keeping the base of your house dry.
So, if you’re tired of patching up water‑damaged trim or fearing a foundation leak, a splash guard could be the low‑maintenance, cost‑effective answer you’ve been waiting for.
The next step? Gather a few basic tools, double‑check your gutter length, and line up that guard. You’ll be amazed at how fast it takes to finish.
And remember, if the DIY vibe feels overwhelming, reaching out for a professional touch from a trusted crew like ours can save you time and headaches in the long run.
Want to keep your investment in top shape? Make sure the guard is level and the fasteners are snug—loose pieces can wobble and lose their splash‑blocking magic.
A quick yearly check in spring and fall will spot any wear or debris buildup before it turns into a bigger issue.
So, what’s the final takeaway? A splash guard is a simple, low‑cost shield that keeps your home dry, your gutters flowing, and your wallet happier.
TL;DR
A gutter splash guard is a quick, low‑cost fix that redirects overflow back into the gutter, keeping siding and foundations dry. Just measure, cut to length, slide the strip over the lip, secure with screws, check for level, keep gutters flowing smoothly forever, enjoy peace, and protect your home today.
Step 1: Prepare Your Home for Gutter Splash Guard Installation
Ready to get your gutters in tip‑top shape? Great, because the first step is all about prepping your home so the splash guard will stick right and do its job for years. Trust me, you don’t want to rush this part.
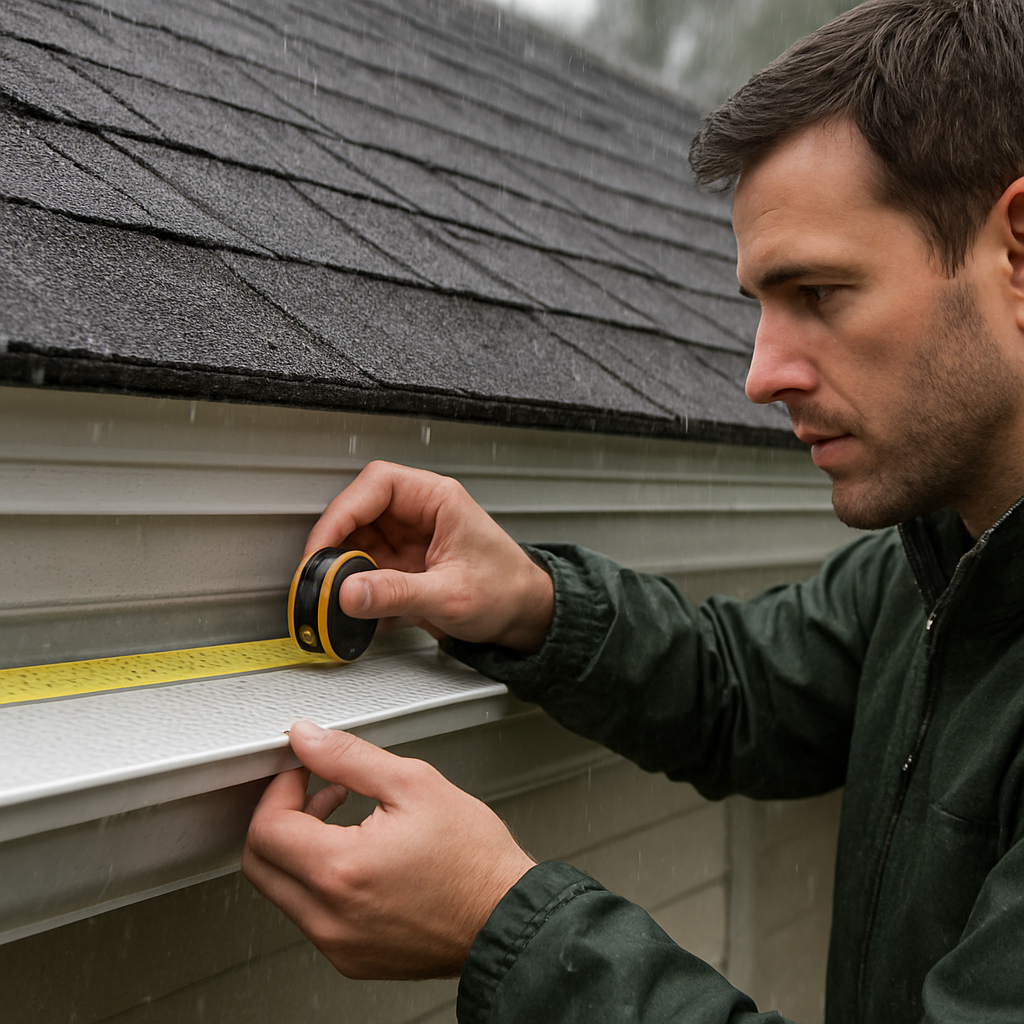
Next, measure. Use a tape measure to record the length of each gutter run. Make sure you’re measuring from the end of the lip to the point where the downspout starts. These numbers will be your blueprint for cutting the guard to the right size. If you’re unsure, jot it down on a sheet or an app—just keep the data handy. For more detailed steps on how to install gutters yourself, check out this step‑by‑step guide to gutter installation for homeowners .
Next, measure. Use a tape measure to record the length of each gutter run. Make sure you’re measuring from the end of the lip to the point where the downspout starts. These numbers will be your blueprint for cutting the guard to the right size. If you’re unsure, jot it down on a sheet or an app—just keep the data handy. For more detailed steps on how to install gutters yourself, check out this step‑by‑step guide to gutter installation for homeowners.
Now, clean. A splash guard won’t do anything if the gutter is clogged. Use a garden hose or a leaf blower to clear out leaves, twigs, and any debris. Then, grab a bucket and a mild detergent. Scrub the lip and the guard area with a brush to remove any grime that could weaken the seal.
Check for damage. Look for rust, loose screws, or any bent pieces. If you spot a problem, replace that segment before moving forward. You don’t want a guard that’s mounted on a shaky base; the whole system can shift and cause water to escape.
Secure your footing. If you’re up on a ladder, make sure it’s on stable ground and the safety strap is locked. A shaky platform can turn a simple prep into a hazard. Safety first, always.
Gather your materials. You’ll need the guard strip, screws, a drill, and a level. It helps to have a small measuring tape handy in case you need to trim the guard on the spot. If you’re looking to add some extra curb appeal, you might also want to consider outdoor lighting from LED Artistry.
Tip: Keep a small container of water nearby. When you’re drilling the screws, a wet surface prevents dust from blowing away and helps you maintain a clean workspace.
Now you’re ready for the actual guard fitting. But before you slide it on, make a final visual check. Does the gutter run level? Are there any gaps where water could still escape? Fix these now, or you’ll be fighting the guard later.
As you line up the guard, remember that a little overlap with the lip is key. The strip should sit flush with the edge so it catches the droplets before they get a chance to bounce away.
Place a quick level check. A straight line across the guard will show any tilt. If it’s off, adjust before securing. It’s better to take a few seconds to align it properly than to worry about a wobble later.
Once the guard looks good, screw it in place. Use a drill to insert the screws, but be careful not to over‑tighten; the metal strip needs a little give to flex with the roof’s movement. A snug fit is perfect, but a rigid one can crack the guard or the gutter lip over time.
After everything is fastened, wipe down the guard and the surrounding area with a damp cloth. A quick clean will help you spot any missed debris and confirm the seal is intact.
You’re almost finished! The final step is a quick walk‑around to ensure the guard is level and secure. Take a few breaths, grab a pen, and jot down the date—so you can check it next year without guessing.
And that’s it. You’ve set up a solid foundation that will keep water from turning your siding into a splash zone for years to come.
If you’re thinking about protecting the rest of your exterior, check out the shutter specialists at Monroe Plantation Shutter Pros.
Step 2: Gather Materials & Tools for Gutter Splash Guard Installation
Ready to roll up your sleeves? Before you climb that ladder, you need a game‑plan. Gather the right tools and materials, and you’ll save yourself a headache down the road.
What’s on the list?A few essentials will cover most splash guard kits. Grab a sturdy ladder, a measuring tape, a pencil or masking tape for marking, a drill or screwdriver, and the appropriate screws for your gutter material. If you’re working with aluminum, stainless‑steel screws are best; for vinyl, plastic‑compatible screws keep the material from cracking.
Next, the guard itself. Most kits come pre‑cut, but if you’re cutting a custom length, you’ll need a utility knife or a fine‑toothed saw. Have a straightedge or ruler handy to keep the cut straight and avoid wobbling.
Don’t forget safety gear.A hard hat, safety goggles, and gloves protect you from debris and accidental falls. If you’re dealing with a steep roof, a harness or a buddy system can make all the difference.
Now let’s talk about the numbers. Measure the gutter span from hanger to hanger. Add a few extra inches—two to four—so the guard sits comfortably over the lip. Mark the cut line on a scrap piece of plywood or cardboard to double‑check before you cut.
What should you do if the guard feels too long or too short? Use a quick test fit by sliding it over the lip. A snug fit means you’re good; a wobble signals you need to trim or adjust the overlap. Remember, the goal is to keep water from ricocheting, so a tight seal is key.
Think about the finish. If you’re cutting metal, sand the edges to smooth sharp bits. For PVC, a clean cut will keep the guard from catching on debris later on. A little extra prep now saves time during installation.
Before you even start drilling, double‑check that your ladder is secure on level ground. If you’re working at height, a second set of hands can help hold the ladder steady or keep an eye on your footing.
One last check: review the screw spacing on the kit instructions. Most splash guards recommend spacing screws every 12 to 18 inches. Too close and you’ll over‑tighten, too far and the guard might buckle.
By now, you should have a clear picture of what you need. The next step is to bring the pieces together and start the installation process.
Take a breather, gather your tools, and then step up. With the right prep, the rest of the job will feel like a walk in the park.
Here’s a quick checklist you can print out or keep on your phone. Mark the gutter span, the type of screws, the guard length, and the safety gear. Checking off each item as you go turns a vague plan into a solid roadmap.
When you’re ready to move from prep to action, line up the guard, test the fit, and note any adjustments. A well‑planned start keeps the rest of the job smooth and saves time when the screws bite.
Step 3: Install the Splash Guard on Your Roof Gutter
Now that you’ve measured, cut, and tested the fit of your splash guard, it’s time to slide it onto the gutter and lock it in place. Think of this like fitting a new collar on a dog—you want it snug, but not tight enough to choke it.
Laying the Guard
Place the strip over the gutter lip and run it along the length you measured. If the guard has a pre‑cut notch or tab, line it up with the gutter’s bottom seam. A little shim of insulation or a rubber gasket can keep it from rattling during a storm.
Securing With Screws
Mark the screw holes on the gutter wall first, then drill pilot holes to keep the metal from cracking. Use stainless‑steel screws for aluminum gutters and plastic‑compatible screws for vinyl—this keeps corrosion at bay. Tighten the screws in a criss‑cross pattern: one on each side, alternating, so the guard stays centered.
Tip: Keep the screws 12‑18 inches apart, as most kits recommend. Too close and you’ll over‑tighten; too far and the guard can wobble. After each screw, check that the guard hasn’t shifted.
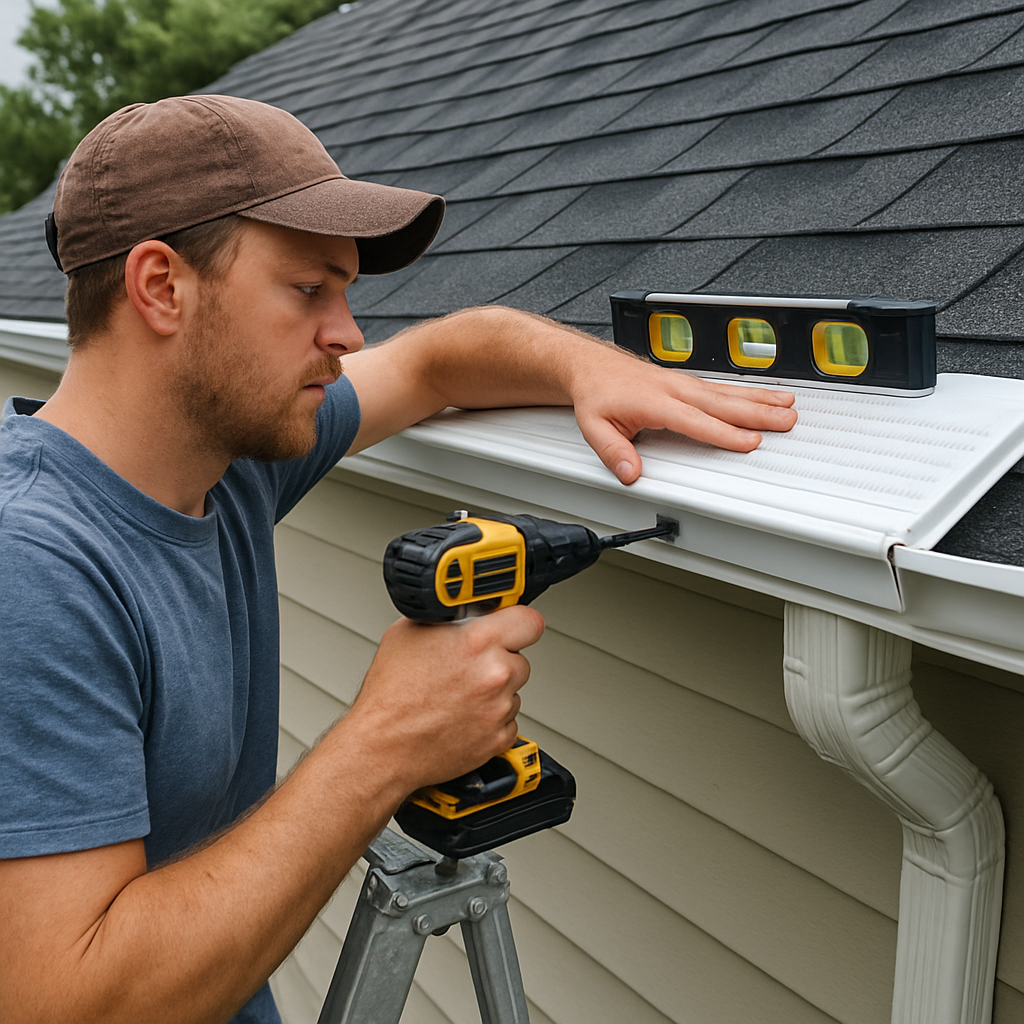
Checking for Level and Alignment
Grab a spirit level and run it across the top of the guard. If it’s off, adjust the screws or, if necessary, shim the gutter lip with a piece of wood or plastic to get it right. A level guard ensures that rainwater runs straight into the downspouts instead of sliding sideways and re‑splashing onto your siding.
Finishing Touches
Once all screws are snug, wipe away any dust or debris with a damp cloth. This simple step prevents future corrosion and keeps the guard looking neat. You’ll also want to inspect the gutter’s slope again; if it’s not ¼ inch per 10 feet, the guard might act like a barrier instead of a guide.
At LGFMH Construction, we’ve seen homes that had leaky gutters turn into a nightmare because the guard was left loose. Tightening everything in one go saved them thousands in potential foundation repairs.
Quick Checklist Before You Step Off the Ladder
Guard flush with gutter lip?
Screws tight and evenly spaced?
Guard level across its span?
Gutter slope confirmed?
No loose debris or rust spots?
Running through this checklist once you’re on the roof will stop you from having to climb back down to fix a mistake. It’s a small habit that pays off in the long run.
If you’re still unsure about the screw spacing, you might want to look at a video walkthrough for visual guidance. One helpful YouTube tutorial covers the exact steps for installing a PVC splash guard on an aluminum gutter here . Another video shows how to secure metal guards without cracking the gutter frame here .
After you’ve nailed the guard, take a moment to stand back and admire the clean line you just created along the roof edge. It’s a small win that keeps water from becoming a foundation villain.
Step 4: Secure Fastening & Seal: Comparison of Fastener Options
Now that your splash guard is sliding snug over the gutter lip, the next big decision is how you’ll lock it in place. Fasteners aren’t just about keeping the guard from wobbling; they’re the first line of defense against leaks, sagging, and rust. Choosing the right system can mean the difference between a guard that lasts a decade and one that needs re‑fastening after the first heavy rain.
Alu‑Rex Continuous Hanger
This is the “bulletproof” option favored by professionals who want to future‑proof their gutters. The continuous hanger runs along the entire gutter span, creating a single, unbroken attachment point. It’s especially handy when you’re working with aluminum or vinyl systems that can flex over time.
The benefits?Super strength and durability.It keeps the gutter from sagging, protects the sealant, and adds a thin protective cover that stops debris from clogging the eavestrough. Over ten years, that little layer can keep your system looking new and reduce maintenance calls.
What’s the downside? The price is higher, and the installation requires a bit more prep work. You’ll need to run the hanger from the first to the last hanger point, which can be a bit more time‑consuming if you’re on a steep roof.
Standard Hangers
These are the most common fasteners you’ll see in the field. They’re installed at regular intervals—usually 12 to 18 inches apart—using stainless‑steel or plastic‑compatible screws, depending on your gutter material.
They’re a great budget choice and easy to install. You can spot a standard hanger by the little “T” shape that sits on the fascia and a screw that pulls the gutter into place. Because they’re spaced out, you can adjust them individually if a section starts to sag.
The trade‑off is that standard hangers don’t offer the same continuous protection against debris or sealant wear. Over time, a few loose screws can lead to small leaks, especially in snowy climates.
Spike and Ferrule System
This method is the old‑school approach. A ferrule slides inside the gutter and a long spike drives through it into the fascia. It’s cheap and works if you’re only installing a short section or replacing a single broken segment.
However, it’s prone to loosening over time and creates holes in both the gutter and the fascia. Those holes can become pathways for water and pests, turning a tiny problem into a bigger one down the line.
Quick Decision Guide
So, how do you decide? Think about three key factors: budget, roof complexity, and how long you want to wait for the next repair. If you’re a homeowner on a moderate budget but want peace of mind for the next decade, go with Alu‑Rex. If you’re on a tight budget or have a simple roof, standard hangers will do fine. Skip the spike/ferrule unless you’re only patching a single spot.
Below is a quick look at what each option offers and the typical situations they shine in.
Feature | Alu‑Rex Continuous Hanger | Standard Hangers | Spike & Ferrule |
Installation Effort | Moderate – requires running a continuous strap | Easy – screw every 12–18 inches | Very Easy – one spike per segment |
Longevity & Durability | 10+ years with minimal maintenance | 5–8 years; monitor screws | 3–5 years; prone to loosening |
Cost | Highest – premium material and labor | Mid‑range – standard screws and hardware | Lowest – only spikes and ferrules |
Best For | High‑traffic roofs, aluminum or vinyl gutters | Typical residential roofs, moderate exposure | Quick fixes or small patches |
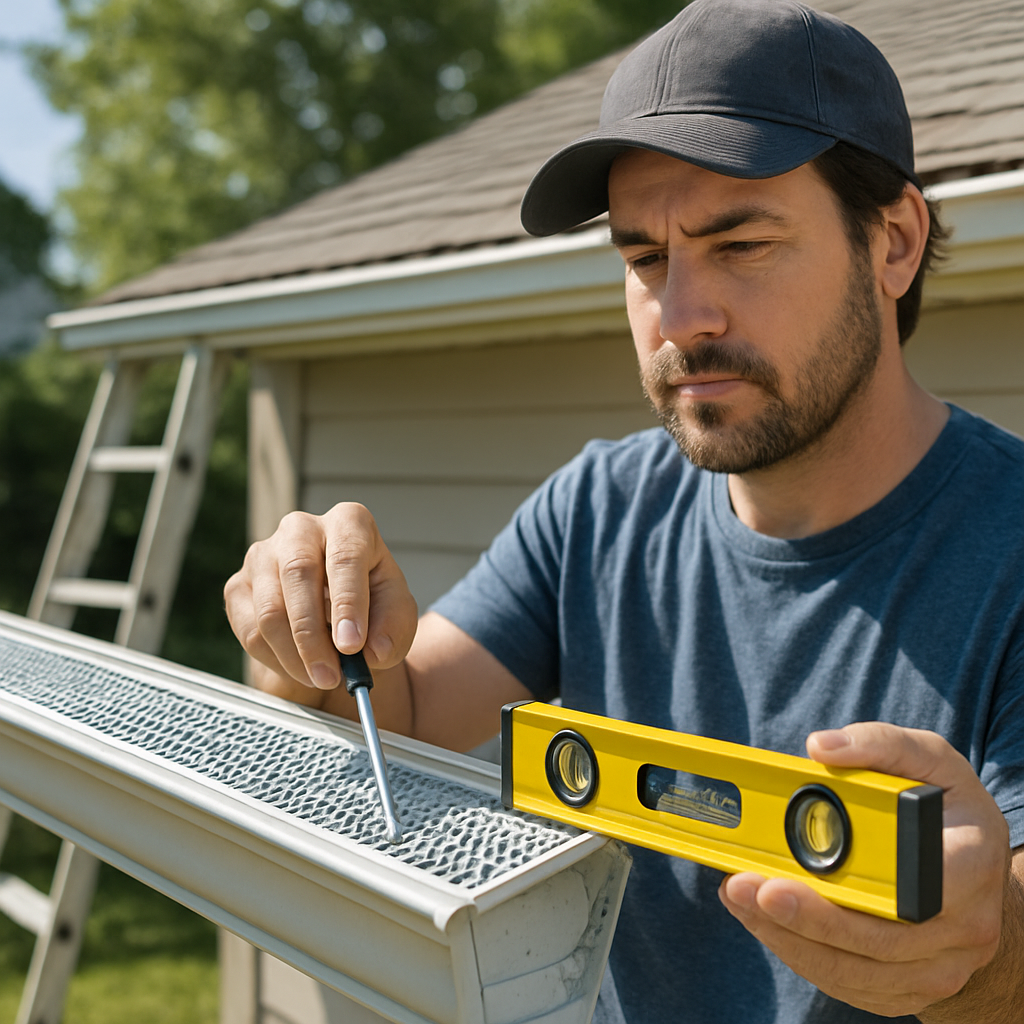
When you’re in the field, remember to keep a level handy. After you drive each screw, give the guard a quick check to see if it’s still flat against the gutter. If any section starts to rise, tighten the screw or add a small shim of wood or rubber to keep it level. A level guard keeps rainwater flowing straight to the downspout and stops splashing onto the fascia or siding.
Finally, don’t forget the little things: use the right screw length for your gutter material, keep the screws 12–18 inches apart, and always use stainless‑steel or plastic‑compatible screws to avoid corrosion. A well‑fastened splash guard is your home’s first line of defense against water damage—and it can save you thousands in future repairs.
Step 5: Inspect & Maintain Your Gutter Splash Guard Installation
All right, you’ve got your splash guard sliding snug over the lip, and the screws are tight. Great. Now the real test is keeping that guard doing its job every rainy season. Think of it like a long‑term relationship—if you ignore it, it starts to slip.
Start With a Visual Sweep
Grab a ladder and take a quick walk along the entire length of the guard. Look for any wobble, gaps, or signs of wear. A little bump can let water escape and start chewing at your fascia.
Ask yourself,“Is it still level?”If any section feels higher, tighten the screws or slide a thin wooden shim under the lip. A level guard is a straight‑down rainwater path.
Monthly Check‑In: The 2026 Routine
Make the guard inspection a part of your yearly spring and fall maintenance routine. In 2026, homeowners in humid regions have reported up to a 30% reduction in siding damage when guards are checked quarterly. Just a 5‑minute walk‑through can spot a loose screw before it turns into a splash‑water nightmare.
Tip: Keep a small notebook or your phone handy to jot down any changes. Over time, you’ll spot patterns—maybe a particular segment keeps loosening, or debris collects on one side.
Cleaning Matters: Foam vs. Metal
Foam guards trap leaves, but they also absorb water. After a heavy shower, give them a quick rinse with a garden hose, pushing water through the foam. Metal guards, on the other hand, benefit from a gentle scrape with a plastic brush to clear grit without scratching.
Do you use foam? The Gutter Guys' guide on foam gutter splash guards explains the best rinsing technique and why foam can saturate over time. It’s a handy reference if you’re dealing with a lot of leaf‑laden gutters.
Watch the Downspout Connection
Even if the guard is flawless, a clogged downspout will send water back into the gutter and onto your guard. Every two months, check that the downspout is clear of debris and that water flows freely. A small clog can create pressure that pushes the guard out of place.
Real example: A homeowner in a suburban 2026 neighborhood noticed a faint crack forming along the guard after a storm. The crack started where the downspout had a blockage. Once they cleared the blockage and tightened the screws, the crack stopped growing. That’s the ripple effect of neglect.
When to Call in the Pros
If you notice persistent leaks, cracks in the guard, or if the guard keeps slipping despite your best tightening efforts, it’s time to reach out. Professional inspection can catch hidden damage—like a rusted bracket that’s weakening the whole system.
Remember, a splash guard is only as good as the foundation it’s attached to. If the gutter frame is warped, you’re fighting a losing battle.
Checklist for Quick Inspections
Guard:Level, no wobble, no gaps.
Screws:Tight, evenly spaced, no rust.
Foam:No tears, no excessive compression.
Downspout:Clear, water flows straight down.
Surrounding Area:No erosion or swelling on fascia.
Use this checklist after every storm, or at least twice a year.
So, what’s the takeaway? Your splash guard is a low‑maintenance hero, but it needs your attention. Treat it like a garden—tend to it, watch for problems, and act quickly. The result? A dry foundation, pristine siding, and a home that stays beautiful for years.


Comments