A Practical Guide to Aluminum Siding Repairs for Homeowners
- William McKracherne
- Jan 26
- 16 min read

When you first notice a crack or a warped panel, it’s easy to think your whole house is on the brink of disaster. You’ve probably stared at that spot for hours, wondering if it’s a sign of a bigger problem. That feeling? We’ve seen it all.
Aluminum siding is the modern go‑to for homeowners wanting a low‑maintenance, weather‑resistant look. But it’s not invincible. Rain, wind, and even a stray branch can leave dents, holes, or uneven seams that creep up over time.
So, what does that mean for you? It means you’ve got to keep an eye on the little things before they become big headaches. A loose panel can let moisture in, which might eventually damage trim or even your framing.
Here’s the truth: most fixes are simple and can be handled quickly—no need for a full‑siding overhaul. A small dent can often be pushed back with a hammer and a pry bar, a broken corner can be sanded and resealed, and a missing nail is just a quick replacement.
And yet, because aluminum reacts to corrosion differently than wood, you have to use the right kind of sealant and paint. A product that works for vinyl won’t give the same finish on metal.
Feeling a bit overwhelmed? Think of it as a maintenance routine, like brushing your teeth. If you spot a flaw, you tackle it before it turns into a bigger mess.
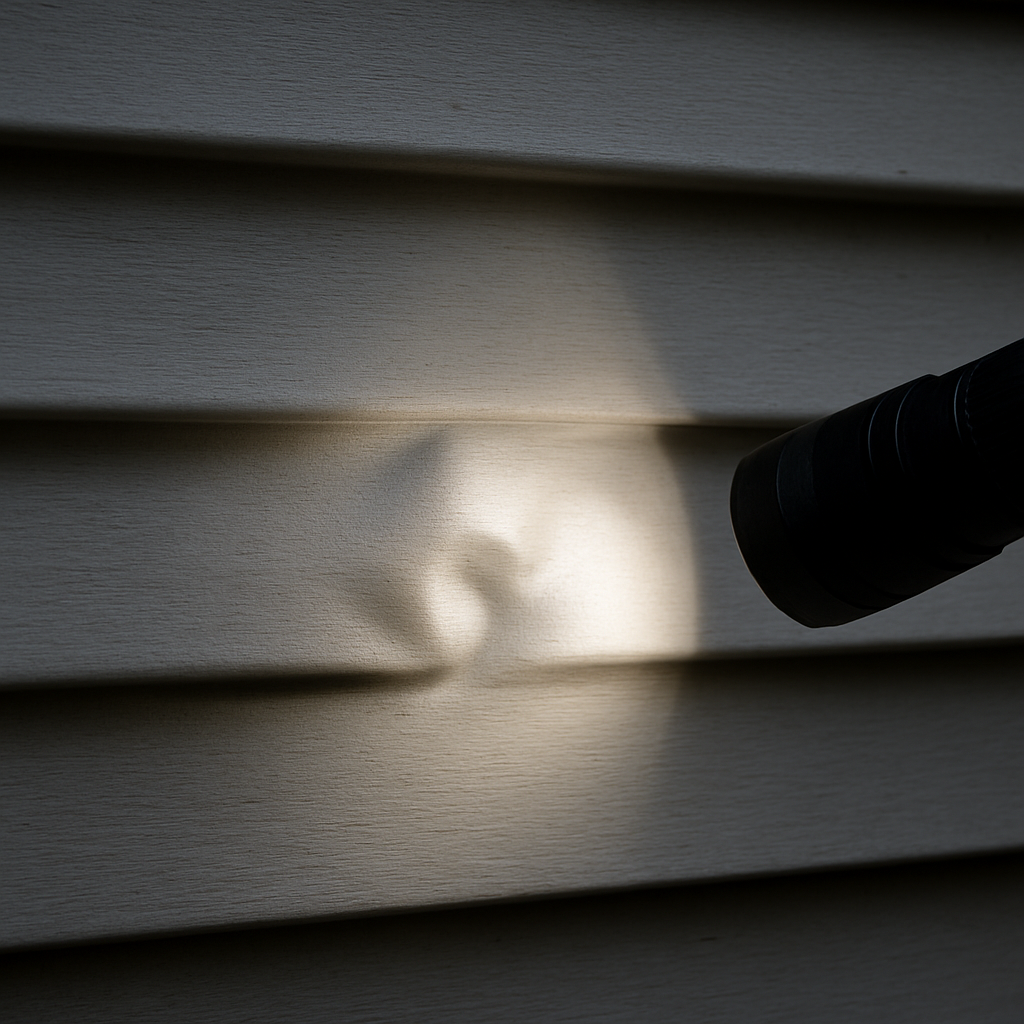
What’s the first step? Inspect. Walk around your exterior with a flashlight after sunset—sunlight hides a lot of imperfections. That gives you a map of where to focus.
Once you’ve mapped it out, you can decide whether a DIY fix is within your skill set or if you should call a pro. And remember, a quick repair today keeps you from a costly replacement tomorrow.
TL;DR
Quick practical steps let you spot and fix dents, cracked seams, and corrosion before they grow into costly repairs—no heavy tools needed, just a flashlight and a steady hand. By following these easy tricks, you protect your home’s curb appeal, keep moisture out, and avoid a full siding overhaul today.
Step 1: Identify and Assess Aluminum Siding Damage
When you first spot a dent or a warped panel, you’re probably picturing a full siding overhaul. Let’s pause that thought. A quick walk‑around at dusk, flashlight in hand, can actually tell you if you’re dealing with a one‑off bump or the start of a bigger problem.
We’ve seen it: a single dent can hide a gap that lets water sneak in, turning a clean‑looking wall into a moisture trap overnight. The trick is to spot those subtle clues early.
Why a good inspection matters
Aluminum siding can hide corrosion behind paint, and that rust can eat through the backing if you let it slide. InterNACHI’s guide on aluminum siding inspection explains how to catch these hidden issues before they spread. Read the InterNACHI inspection tips for a quick check that even a DIYer can follow.
Here’s a simple routine: walk around each wall, shine your flashlight at a 45‑degree angle, and look for:
Cracked or missing seams where panels meet
Uneven edges that might signal a loose panel
Paint peeling or flaking, a sign of underlying corrosion
Any water stains on the interior wall behind the siding
And if you notice a gap, feel the panel with a fingertip. A loose feel means water can slip in, and that’s a red flag you’ll want to address right away.
Now that we’ve watched a quick visual guide on spotting dents, let’s dig a bit deeper.
Check for common damage signs
There are a few culprit scenarios you should keep an eye on:
Impact from falling branches or stray balls:A sudden dent often means a hidden gap underneath. It’s easy to overlook until water starts leaking.
Extreme weather:Hail, high winds, or heavy rain can chip or bend panels. Checking after a storm can catch damage before it worsens.
Improper cleaning:Using a pressure washer on a hard setting can nick the metal. Light detergent and a soft brush are safer, as Custom Aluminum’s article advises. Read their guide on preventing damage.
Moisture infiltration:Look for damp spots inside the wall; they’re a sign that the siding isn’t sealing properly.
Once you’ve catalogued these signs, you can decide if a quick fix will do the trick or if you need to bring in a professional. A tight seal, a good coat of paint, and the right fasteners can often stop the damage in its tracks.
Bottom line: a systematic, flashlight‑driven inspection is the first step in keeping your aluminum siding looking fresh and standing strong. Grab that flashlight, take a few minutes, and give yourself peace of mind.
Step 2: Prepare the Surface for Repair
Before you start wrestling with a dented panel, you’ve got to give the area a proper prep makeover. Think of it like getting your skin ready for a fresh tattoo—clean, dry, and ready to accept the new line.
Get Your Toolkit Ready
Grab a microfiber cloth, a mild detergent, a soft‑bristle brush, and a drying towel. You’ll also want a flat‑head screwdriver and a small pry bar—just enough to lift the panel without pulling it off.
Clean the Damage
Start by wiping away dirt, leaves, and grime. A clean surface is the only thing that lets your sealant bond properly. If you’re dealing with a dent that’s trapped dust in its crevice, a quick pass with a compressed‑air can help loosen any debris.
Remember: you’re not trying to scrub away paint—just remove the stuff that’s preventing the new paint from sticking.
Dry and Inspect
Let the area air‑dry for about ten minutes. A wet patch can create a false impression of a deep dent. Once dry, check for any hidden cracks or rust under the paint. A flashlight at a 45‑degree angle can reveal those little gaps that a naked eye might miss.
So, what if you spot a tiny hairline crack? Don’t panic. A light sanding around the crack and a coat of primer can stop the rust from spreading.
Remove Loose Paint or Flaking
When paint flakes off, it’s a sign that the metal is already under stress. Use a scraper or a fine‑grit sandpaper to remove loose flakes. The goal is to expose a stable surface for the new coat of paint.
Imagine a neighbor’s home in the suburbs where a dented panel had been left untouched for months. By the time they noticed the rust spot, the panel was halfway through its lifespan. A quick prep step had saved them a full‑panel replacement.
Apply Primer and Sealant
Primer is your friend— it fills micro‑cracks and gives paint a surface to cling to. Use a primer that’s specifically formulated for metal. Once it’s dry, dab a thin layer of a high‑quality, weather‑resistant sealant along the edge of the dent and around any cracks.
Here’s a quick tip: If you’re dealing with a dent that’s already been filled with epoxy, let that epoxy cure fully before applying primer. Otherwise, you’ll end up with a patch that never fully adheres.
Repaint and Seal
After the primer sets, paint with a brush or spray—whatever feels more comfortable. Two coats give a durable finish, but if you’re in a hurry, a single coat on a well‑prepared surface can do the trick for a temporary fix. Finish with a clear coat if you want extra protection.
What’s the bottom line? The prep work can feel tedious, but it’s the foundation that turns a quick patch into a lasting repair. If you’re uncertain about any step, we’ve seen that a local contractor can often offer a quick spot check that saves time in the long run.
Need a deeper dive into how to repair aluminum siding? Here’s a detailed guide that walks through each step.
Step 3: Choose the Right Repair Method
After you’ve inspected the dent or crack, the next big question is: what fix will actually hold up? The answer isn’t one‑size‑fits‑all. You need a method that matches the size, depth, and location of the damage.
Assess the Severity First
Start by tapping the metal with a hammer or a small mallet. A hollow sound usually means a deeper cavity that might need a panel swap. A dull thud? That’s probably just a surface dent.
Does the sound feel off? That’s your cue that the underlying structure might be compromised.
Match the Method to the Damage
Push‑Back for Minor Dents
For shallow dents that don’t expose the backing, a pry bar and a gentle tap can coax the metal back into shape. You’ll finish with a light coat of primer to lock in the repair.
Sanding & Primer for Cracks
If you spot hairline fissures, sand the edges lightly, wipe away dust, then apply a high‑quality metal primer. A two‑coat paint job seals the crack and prevents rust from creeping in.
Panel Replacement for Structural Issues
When a panel is warped, warped seams, or the paint has flaked all the way through, it’s time to swap the entire section. Measure carefully, cut the old panel away, and fit a new one with the proper fasteners.
Feeling a bit overwhelmed by all the options? That’s normal. Every repair has a learning curve.
Gather Your Tools & Materials
Keep a small kit handy: a flat‑head screwdriver, pry bar, sandpaper, a microfiber cloth, a brush or spray gun, and a bottle of metal primer. For panel replacement, you’ll also need a saw and a safety harness if the wall is high.
Do you have everything you need before you start? A missing tool can turn a smooth process into a scramble.
Follow a Step‑by‑Step Checklist
1. Clean the area and remove loose paint.
2. For dents, push‑back and sand the edges.
3. For cracks, sand, prime, then paint.
4. For panel swaps, cut, replace, fasten, seal, and repaint.
Ready to dive into the details? Keep the checklist handy and tackle each step methodically.
Feature | Repair Method | Notes |
Shallow dent | Push‑back + primer | Quick fix, no panel removal |
Hairline crack | Sanding + primer + paint | Prevents rust spread |
Warped panel | Full panel replacement | Requires accurate measurements |
At LGFMH Construction, we’ve seen these three approaches work time and again for homeowners who want a durable, low‑maintenance finish without breaking the bank. Pick the method that fits the damage, grab your gear, and you’ll finish the job in a day or less.
So, what’s the next step for you? Grab your flashlight, make that call to the repair team, or start your DIY kit. Either way, you’re on the path to a smoother, sturdier siding finish.
Step 4: Execute the Repair
Now that the plan is in place, it’s time to roll up your sleeves and get the job done. Think of it like fixing a leaky faucet—once you know where the drop is, you just plug it in. You’re in control.
Set the Stage: Secure, Measure, and Protect
First, put a drop cloth over the floor and lay a tarp to catch any debris. When the panel’s up, double‑check that you’re working in a safe spot. If you’re reaching high, a sturdy ladder and a helper are a must.
Measure the damaged section with a tape measure, then mark the cut lines with a pencil. A few inches of extra room on each side gives you a margin for error when you cut the new panel. Keep the measurements handy in a small notepad—trust me, you’ll thank yourself later.
Cutting and Replacing: Precision Wins
Use a reciprocating saw or a jigsaw with a fine‑tooth blade to slice along your pencil marks. The goal is clean, straight edges. If the old panel is warped, you’ll need a new piece that matches the existing profile.
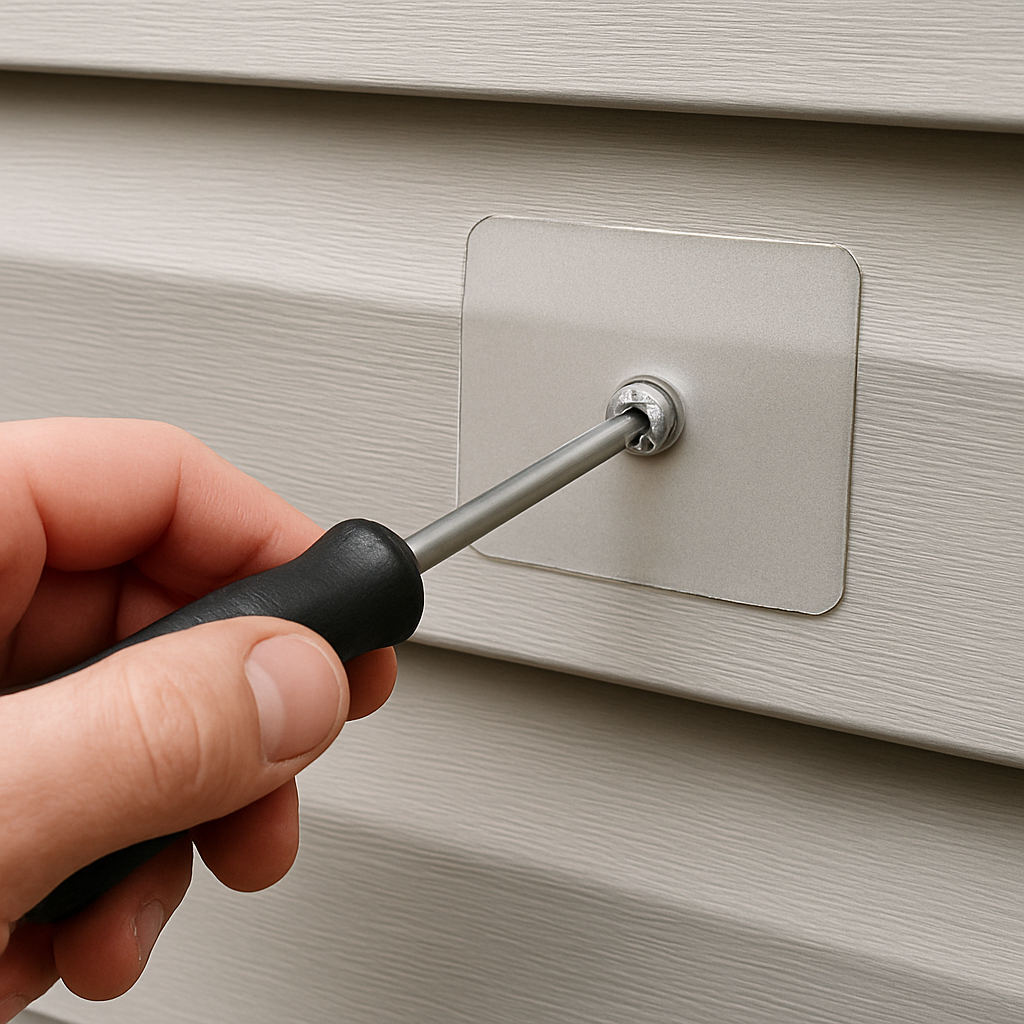
Slide the new panel into place and press it flush against the frame. Tighten the screws slowly, alternating sides to keep the panel from wobbling. A torque screwdriver or a simple 10‑mm socket works fine for most siding screws.
Here’s a quick tip: before you seal, run a straightedge along the seam to spot any gaps. A tiny void can let water seep in and cause rust later.
Sealing and Finishing: The Final Layer
Apply a bead of high‑quality silicone sealant along the joint. Spread it evenly with a caulking gun or a putty knife, then wipe off any excess with a damp cloth. The sealant should bead up, not spread out.
Once the sealant starts to set—usually a few minutes—spray a coat of exterior paint that matches your existing color. Two coats give the best durability, but one good coat is a solid start if you’re short on time.
After the paint dries, inspect the seam one last time. Look for any paint drips or uneven spots, and touch them up. A clean finish looks like a new wall, and it gives your home that fresh‑look confidence.
When to Call a Pro: Know Your Limits
Even if you’re handy, some scenarios need a pro’s eye. If the panel is severely warped, if the damage is near the roofline, or if you’re unsure about the siding’s backing material, reach out to a contractor. The right fix can save you money in the long run.
In our experience, homeowners who tackle the first two steps themselves often avoid a full replacement. The key is to act before the water finds a way in.
For a deeper dive into the tools and techniques, check out Comprehensive Guide to Siding Repairs for Homeowners . It walks through every detail from start to finish.
Finally, if you ever need professional help or a quick consultation, feel free to schedule an appointment. Your home deserves a finish that lasts, and we’re here to make it happen.
And if you’re craving a break after all that fixing, you might want a little vacation. Learn how to get from Boston to Cape Cod: How to Get from Boston to Cape Cod: A Step‑by‑Step Travel Guide . The journey’s almost as relaxing as a freshly painted wall.
Step 5: Finish and Protect the Siding
Now that your panels are back to shape, it’s time to give them the final polish that keeps rain, sun and even the occasional stray branch from doing damage again.
Think of this as the seal‑up phase of a good manicure: you’re not just fixing the surface, you’re adding a protective layer that lasts seasons.
Choose the Right Sealant
Aluminum’s great at staying light, but it still needs a guard against oxidation. You can go the classic paint route, or, if you want a low‑maintenance finish that keeps the metal’s natural shine, a clear aluminum sealer works wonders.
Everbrite’s clear coating, for instance, restores faded aluminum to new‑look luster and blocks UV and salt damage. It’s easy to apply, scratch‑resistant, and you can re‑coat every five to ten years depending on exposure. Read more about Everbrite’s aluminum protection.
Prep the Surface for the Final Coat
Wipe the panels with a damp microfiber to remove any dust that might have settled during the last step.
Check for tiny chips; a fine‑grit sandpaper will smooth them out without scratching the existing finish.
If you used paint earlier, let it dry completely. A tacky surface will pull at the new sealant.
Remember: a clean, dry base is the difference between a flaky coat and a solid one.
Applying the Sealant or Paint
When you’re ready, hold the spray or brush at a 45‑degree angle and work in long, even strokes. A thin, uniform layer is better than a thick one that will crack.
Here’s a quick tip: if you’re using a spray gun, keep the nozzle about 12 inches from the surface and move steadily to avoid drips.
Let It Cure, Then Inspect
Most clear sealants need a 4‑hour cure before you touch the panels. After the time’s up, run a hand over the area. It should feel firm and smooth, not tacky.
If you notice any bubbles or uneven spots, apply a second thin coat. The second layer usually does the trick.
Seal the Joints and Fasteners
Water loves gaps. Make sure every seam is tucked under a bead of silicone sealant. Run the sealant with a caulking gun, then wipe off excess with a damp rag.
Also, inspect screws and fasteners. If any look corroded, replace them. A fresh screw head is the easiest way to keep moisture out.
Final Inspection Checklist
All panels are flush and paint/coat is even.
Seams are sealed; no visible gaps.
Screws are tight and free of corrosion.
The surface feels smooth and firm after cure.
Run your hand along the edges; if it feels a bit rough, you might need a touch‑up.
What’s Next?
Keep a maintenance calendar. A quick yearly walk‑around can catch new dents or cracks before they grow. If you see a fresh dent, you can push it back or replace the panel, then seal it right away.
When the next rainstorm rolls in, you’ll thank yourself for the extra protection. And if you ever feel stuck, you know where to find professional help—just give us a call.
For a deeper dive into how coatings work, check out Everbrite’s guide on aluminum protection.
And if you’re curious about the science behind those clear coats, the video we referenced earlier breaks it down step by step.
Step 6: Prevent Future Damage
After you’ve fixed the dents, cracks, and seams, it’s time to lock in protection so that the next hailstorm doesn’t feel the same.
Think of your siding like a skin that needs sunscreen. If you skip the daily check‑in, the sun will eventually peel off the paint or the metal will start to tarnish.
Here’s a quick playbook that turns routine care into a long‑lasting shield.
1. Schedule a Seasonal Touch‑Up
Every spring and fall, walk around the house with a flashlight and check for new dents, cracks or loose screws. If you find a fresh dent, push it back with a pry bar and seal it right away. A quick touch‑up keeps water out and the paint from peeling.
2. Keep the Sealant Fresh
Sealants dry out over time, especially in extreme heat. After each major repair, re‑apply a thin bead of silicone around the seam. If the bead looks cracked or has fallen off, replace it before the next rain. A fresh bead is like a new layer of gum‑shield for the metal.
3. Trim Overgrown Vegetation
Branches that hang over your siding can slap the metal hard enough to leave dents that look like fresh damage. Trim back any overgrowth within six inches of the wall, and install a small gutter guard if your gutters keep debris stuck to the siding.
4. Inspect and Clean Gutters Regularly
Clogged gutters let water spill onto the siding, creating micro‑cracks that grow over months. Clear leaves and debris twice a year, and make sure the downspouts are angled away from the foundation. A simple check can save you from a hidden rot problem down the road.
5. Use a Quality Primer and Paint System
Even a well‑sealed panel can lose its protective coat if the paint is thin or old. A two‑coat system—primer plus high‑performance paint—offers a barrier that resists UV, salt spray, and the everyday wear of wind and rain. When you repaint, follow the manufacturer’s cure times; a rushed job leads to blistering.
6. Follow Manufacturer Guidelines
Your siding’s manufacturer usually provides a maintenance schedule. Longboard, for instance, recommends a yearly inspection and a quarterly cleaning in humid climates. For a detailed plan, check out Longboard’s guide on aluminum siding maintenance. By sticking to that roadmap, you keep your warranty alive and your siding looking brand new.
7. Document Your Maintenance
Take a photo before and after each repair or seasonal check. Not only does this give you a visual record, but it also helps you spot patterns—maybe every two years the same seam needs re‑sealing. A quick log turns a casual homeowner into a proactive guardian.
Putting these habits into place doesn’t take a lot of time, but it does keep the whole system humming. The next time a storm rolls in, you’ll already have a shield that’s ready to keep the water out. And if a dent slips through, you’ll be ready to fix it before it grows into a bigger headache.
FAQ
1. What’s the first sign I need aluminum siding repairs?
If you notice a dent that’s left a gap, a peeling patch that feels soft to the touch, or a streak of water stain inside the wall, those are red flags. The gap lets moisture sneak in, which can start rot behind the siding. A quick visual check after a storm is a good routine—look for any new dents or cracks that weren’t there before.
2. Can I fix a dent on my own, or should I call a pro?
For shallow dents, a pry bar and a gentle tap can push the metal back, then a light coat of primer seals the spot. If the dent is deep, or you see rust under the paint, it’s safer to get a professional. A pro will check the backing, replace a warped panel if needed, and make sure the sealant holds up for years.
3. How long does a typical aluminum siding repair last?
When the panel is properly cleaned, primed, and painted with a two‑coat, high‑performance paint, the repair can last five to ten years, depending on weather. Adding a clear sealant on the seams gives extra protection and keeps the finish looking fresh. Regular seasonal touch‑ups extend the life even more.
4. What kind of paint should I use on aluminum siding?
You need a paint formulated for metal, not vinyl. Look for a primer that’s specifically labeled “metal” and a topcoat that’s UV‑resistant and salt‑spray proof if you’re near the coast. Two coats give the best barrier, but a single thick coat can work if you’re in a hurry—just let it cure fully before you walk back in.
5. Why is it important to reseal seams after a repair?
Seams are the most common places water finds a way in. A bead of silicone or a paint‑sealed strip locks the joint and stops moisture from seeping behind the panel. Over time, a small gap can become a big leak, leading to mold or rot inside the wall. Resealing after each repair keeps the barrier tight.
6. How often should I inspect my aluminum siding for damage?
Make a quick walk‑around in late spring and early fall. Use a flashlight at a 45‑degree angle to catch any new dents or paint loss. If you see a new scratch or a water stain, fix it right away. The sooner you address the problem, the less likely it will grow into a costly replacement.
Conclusion
Aluminum siding repairs feel like a series of tiny victories when you see each dent sealed and every seam tight. The real win is that you’re protecting your home’s envelope, not just its appearance.
What matters most is the habit you build: a quick walk‑around after storms, a flashlight test for cracks, and a clear plan for pushing back dents or swapping panels when needed. Consistency beats panic, and a few minutes a year can save thousands later.
Remember the basics: clean, prime, paint, seal. Skip a step and moisture can sneak in, turning a simple fix into a bigger problem. If the damage is deep or the backing feels weak, don’t hesitate to call in a pro; early intervention keeps the frame solid.
Ask yourself: Are you keeping a repair log? Photos before and after help you spot recurring spots and schedule touch‑ups before they worsen. A visual diary turns maintenance into a proactive game.
Finally, treat your siding like a living skin—inspect, repair, protect, repeat. That rhythm keeps weather, rust, and the house’s pride all in check. By staying on top of these small tasks, you turn maintenance from a chore into a confidence boost that lasts for years.


Comments