Best Rust Inhibitor for Metal Roof Panels: How to Apply
- William McKracherne
- 12 minutes ago
- 9 min read

A metal roof can last 40 to 70 years, but only if you stop rust before it spreads. Once corrosion eats through a panel seam or fastener, you're looking at leaks, structural damage, and a repair bill that dwarfs what prevention would have cost. This guide walks you through every step, from picking the right product to keeping your roof clean year after year.
Step 1: Start With a Professional Roof Assessment
Before you buy a single can of rust inhibitor, you need to know what you're dealing with. Minor surface rust on a panel face is a very different job from corrosion that has spread under a seam or eaten into a fastener. Getting the scope wrong wastes product and time.
At LGFMH Construction , the first thing the team does on any metal roof job is a full surface assessment. They check fastener heads, panel laps, ridge caps, and any penetrations like vents or skylights. These are the spots where moisture sits longest and rust starts fastest.
If you're not comfortable on a roof, hire a pro. Roofing is dangerous work, and an experienced contractor can spot problems you'd miss from the ground, such as bottom-side rust from a slow leak or coating failure hidden under debris.
Once you have a clear picture of the damage, you can choose the right inhibitor and plan the application correctly. Skipping this step and going straight to a product almost always leads to re-treatment within two or three years.
Key Takeaway:A quick walk-around assessment before you buy anything saves money and stops you from treating the wrong problem.
Step 2: Choose the Best Rust Inhibitor for Metal Roof Panels
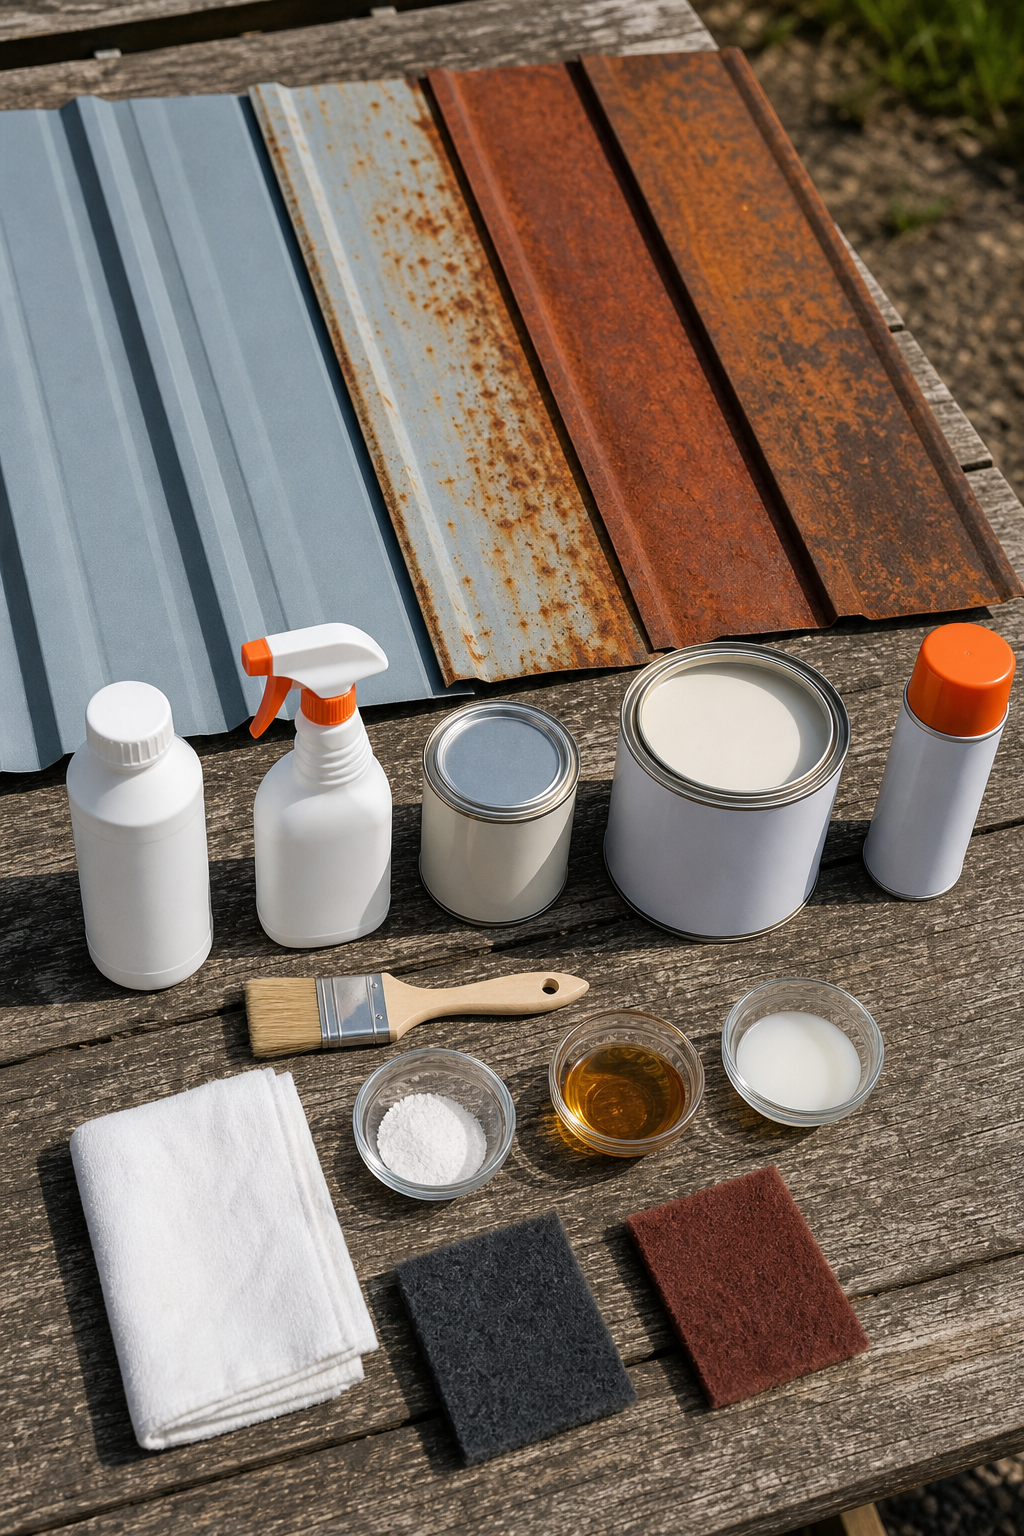
Not every rust inhibitor works the same way on a metal roof. The product category matters, and so does the condition of the metal underneath. Here's how the main types break down.
Oil-Based Rust Inhibiting Primers
These penetrate the metal surface and bond tightly. They work well on panels that have been cleaned down to near-white metal. Most require a topcoat for UV protection since oil-based primers degrade in sunlight over time.
Zinc-Rich Cold Galvanizing Compounds
Cold galvanizing compound is essentially paint with roughly 90% zinc content instead of standard fillers. The heavy zinc loading is what makes it work: zinc corrodes sacrificially, protecting the steel underneath even if the coating gets scratched. A gallon is noticeably heavy, and the compound needs frequent stirring because the zinc settles fast. After a year or two of weathering, it looks very close to real galvanized steel. According to a Wikipedia overview of galvanization , zinc's electrochemical protection is the same principle behind hot-dip galvanizing used in commercial roofing fabrication.
Rust Converter Products
These react chemically with iron oxide and turn it into a more stable compound. They sound appealing, but the research from corrosion engineers at NASA's Kennedy Space Center, which has published extensive corrosion data from its coastal environment, suggests converters do less than most labels imply. Surface prep still matters far more than which product you choose.
Elastomeric Roof Coatings
Elastomeric coatings go on thick and bridge small cracks and pinholes. They're popular for whole-roof applications but have a catch: if you apply coat after coat over years, the layer eventually gets too thick and starts to crack. At that point, removing the old coating is messy and often not worth the effort. Use elastomeric coatings as a finishing layer, not as a substitute for proper surface prep and priming.
Product Type | Best For | Needs Topcoat? | Works Over Active Rust? |
Oil-Based Primer | Cleaned bare metal | Yes | No |
Zinc-Rich Compound | High-corrosion zones, seams | Optional | No |
Rust Converter | Light surface rust only | Yes | Partially |
Elastomeric Coating | Full-roof waterproofing | No | After priming |
For most residential metal roofs in coastal or humid climates, a zinc-rich primer followed by a quality acrylic or elastomeric topcoat is the most durable system. The zinc handles the corrosion chemistry. The topcoat handles UV and mechanical wear.
Step 3: Gather Your Tools and Safety Gear
Getting up on a metal roof with the wrong equipment is how small jobs turn into emergency room visits. Get this part right before you open a single container.
You'll need: a wire brush or angle grinder with a wire wheel for rust removal, coarse and medium grit sandpaper, a solvent-soaked rag for degreasing, a quality brush or low-nap roller for primer application, a pump sprayer for topcoat if you're covering a large area, and a stir stick rated for heavy coatings (zinc compound in particular needs aggressive stirring).
For safety: wear rubber-soled shoes with grip, a safety use anchored to a ridge anchor, nitrile gloves, safety glasses, and a respirator rated for organic vapors if you're working with oil-based products. Metal roofs get slippery fast when wet or coated with overspray.
Work in dry conditions with mild temperatures. Most primers and coatings have application windows between 50°F and 90°F, and humidity above 85% will stop most products from curing correctly. Check the product datasheet, not the label, for those specs.
If you're covering more than a small patch, plan to work in sections. Divide the roof into manageable strips so you can move across it without stepping on freshly applied primer.
Pro Tip:Tape off seams and fastener areas with painter's tape before you start grinding. It keeps metal dust out of gaps you'll need to seal later and makes cleanup much faster.
Step 4: Prepare the Metal Roof Surface Before Application
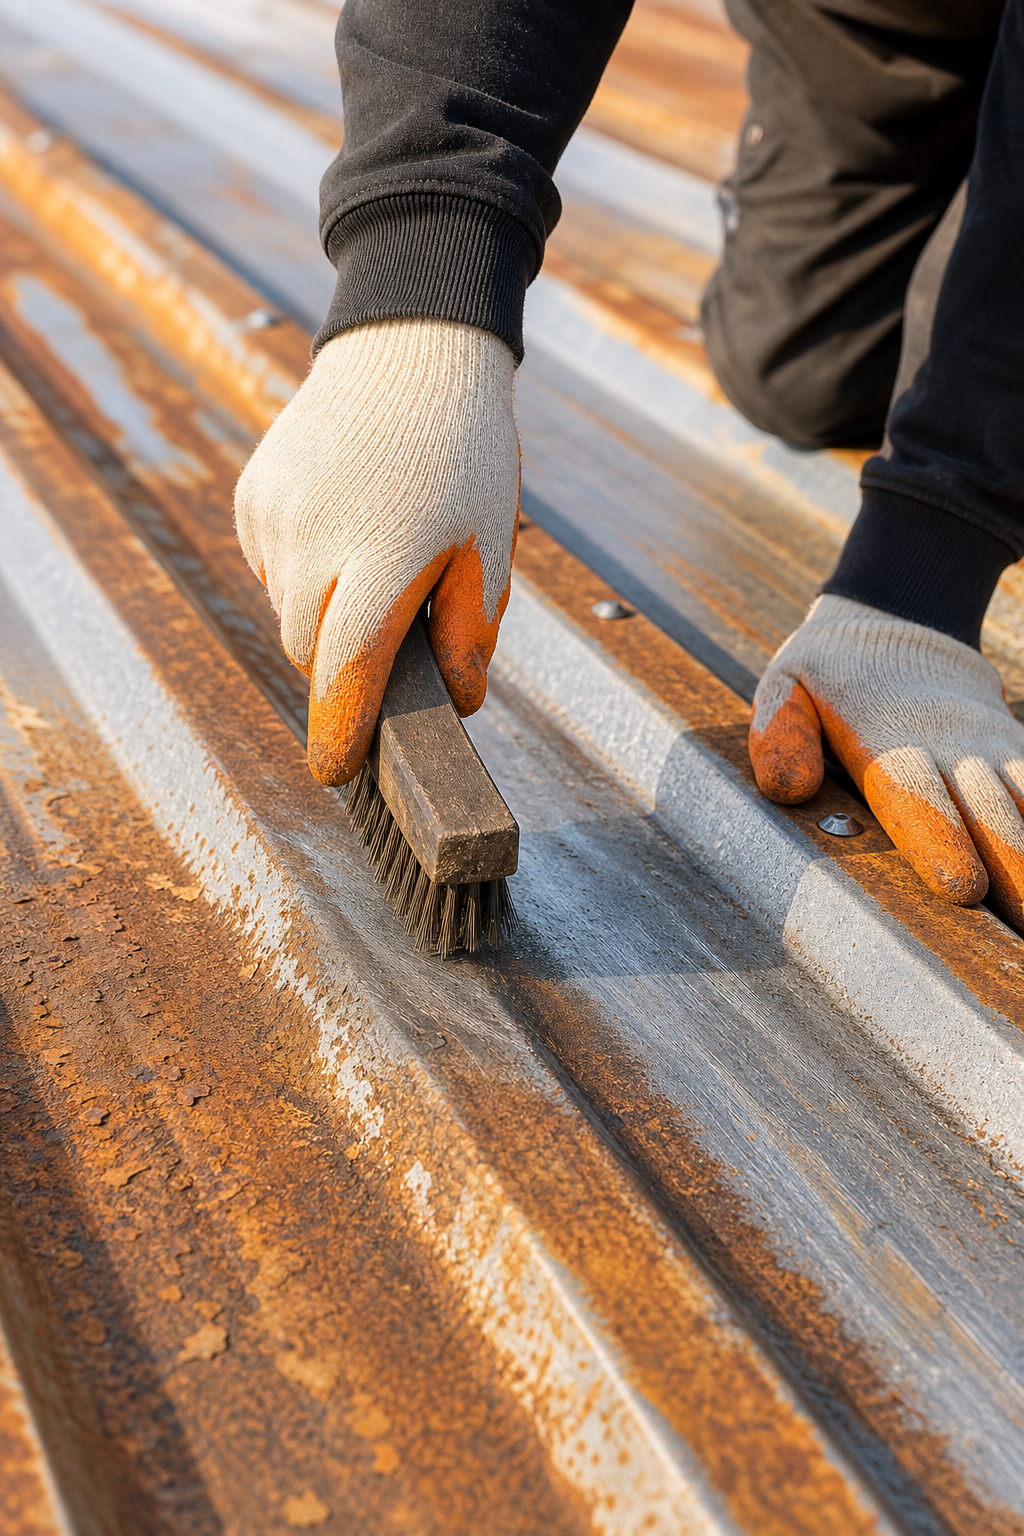
Surface prep is the single most important variable in how long your rust inhibitor lasts. A practitioner who has spent hours in corrosion research literature (including NASA's corrosion engineering resources, which document field results across steel structures in high-humidity coastal environments) will tell you the same thing: your paint or primer choice is secondary to how clean the metal is when you apply it.
Start by clearing all loose debris. Leaves, dirt, and standing organic matter trap moisture and accelerate rust even under a fresh coat of inhibitor. Use a leaf blower or a soft-bristle broom. Don't drag anything metal across the surface; scratches through the existing coating are exactly what you're trying to prevent.
Remove the Rust
For light surface rust, a wire brush and medium-grit sandpaper get the job done. For heavier rust covering more than a small patch, an angle grinder with a wire wheel cuts the work time significantly. The target is clean, dull metal. Shiny is fine. Pitting is acceptable as long as no rust remains in the pit.
If you have the equipment and the rust is severe, media blasting to near-white metal (a standard called SSPC-SP10) gives the best adhesion surface. Most homeowners won't go that far, and a thorough wire brush job still works well when followed by the right primer.
Degrease the Surface
After you remove the rust, wipe the panel down with a solvent rag. Mineral spirits or acetone work for most applications. Oil and handling residue prevent primer from bonding, and you won't see the problem until the coating peels six months later. Let the surface dry fully before you open any product. For metal work and trim details, LGFMH Construction 's guide on how to trim metal efficiently covers the same degreasing and surface prep logic for adjacent trim pieces, which often need the same treatment.
Check the Seams and Fasteners
Seams and fastener heads rust first because water pools there. Inspect every lap seam and every screw head. If a screw has lost its neoprene washer or the head is badly corroded, replace it before you apply inhibitor. Coating over a failed fastener seals in the moisture underneath and makes the problem worse, not better.
Step 5: Apply the Rust Inhibitor Correctly
Application technique changes by product type. Follow the product's datasheet for dry times and recoat windows. What follows covers the general principles that apply across most systems.
Prime First
Apply your rust-inhibiting primer to all bare metal and pitted areas before anything else. Work it in with a brush rather than a roller on seams and fastener heads so the product gets into the low spots. A thin, even coat bonds better than a thick one. Most primers need at least four hours before the topcoat goes on, and some need 24 hours in humid conditions.
For zinc-rich compounds, stir aggressively every five to ten minutes during application. The zinc sinks to the bottom fast. An under-stirred batch at the bottom of the container has almost no corrosion protection, and you won't know until the coating fails early.
Seal the Seams
Before the topcoat, address the seams. Apply a thick coat of elastomeric coating along every panel lap and embed fiberglass mesh tape into the wet coating. Smooth a second coat over the tape immediately. Let this dry overnight. Sealed seams are the difference between a treatment that lasts two years and one that lasts a decade.
Roof edges and fastener zones get the same treatment. These spots take the most wind and thermal movement, so they need extra protection. The Wikipedia article on corrosion notes that galvanic corrosion at dissimilar metal contacts (like steel panels with aluminum fasteners) accelerates rapidly in the presence of electrolytes such as rain or salt air. That's exactly why sealing fastener heads matters as much as treating the panel face.
Apply the Topcoat
Once the primer is cured and seams are sealed, roll or spray the topcoat in even passes. Work with the slope, not against it. Two thin coats outperform one thick coat every time. A thick single coat sags on vertical faces, traps solvent, and can stay soft underneath even when the surface feels dry.
Let the final coat cure for the full time listed on the datasheet before any rain exposure. On a residential roof this usually means checking the three-day weather forecast before you start.
Step 6: Maintain Your Metal Roof to Prevent Future Rust
Applying a rust inhibitor is not a one-time fix. The best protection comes from a consistent maintenance routine that catches problems before they compound.
Clean the roof at least twice a year. Debris, bird droppings, and organic buildup trap moisture against the coating and start corrosion in small spots. Use a soft broom or a leaf blower. Don't pressure wash. High-pressure water dents panels and strips coatings faster than weather does. A mild detergent and a soft brush handle grime without damaging the protective layer.
Clear your gutters every season. Clogged gutters back water up under panel seams and against fasteners, which is one of the fastest ways to rust out a metal roof along the eave edge. While you're at the gutters, check that downspouts direct water away from the foundation.
Do a walk-around inspection once a month. Pay particular attention to edges, seams, and any areas with overhanging tree branches. Branches scratch the coating and drop debris that holds moisture. Trimming them back at least once a year makes a measurable difference. After severe storms, look for dents. Dented panels crack over time, and the cracks become water pockets that rust from the inside out.
Acrylic and silicone protective coatings need to be reapplied roughly every 10 to 15 years depending on climate and coating quality. If you notice bubbling, flaking, or rust stains bleeding through, don't wait for the next scheduled recoat. Call a professional to assess whether a spot treatment or a full recoat is the right move. LGFMH Construction handles both, and catching the problem early keeps the repair cost far below what a full panel replacement runs.
Proper attic ventilation also plays a supporting role. A well-ventilated attic reduces the temperature differential between the underside of the roof and the outside air, which cuts down on condensation forming on the metal. If your attic runs hot and stuffy, that moisture issue shows up on the roof surface over time. Homeowners in warmer climates who've looked into Bakersfield attic insulation installation have found that improving attic insulation and ventilation together reduces moisture-driven corrosion on their metal roofs.
FAQ
What is the best rust inhibitor for metal roof panels?
A zinc-rich cold galvanizing compound used as a primer, followed by a quality acrylic or elastomeric topcoat, is the most durable system for metal roof panels. The zinc provides electrochemical protection even if the topcoat gets scratched. For minor surface rust on a well-maintained roof, a rust-inhibiting oil-based primer with a UV-stable topcoat also works well when the surface is properly prepared first.
Do I need to remove all the rust before applying a rust inhibitor?
Yes. Applying any coating over active rust traps moisture underneath and accelerates corrosion rather than stopping it. Wire brush or grind the surface to remove loose and flaking rust, then degrease before priming. A rust converter can neutralize light rust pitting in hard-to-reach areas, but it is not a substitute for mechanical removal on any surface you can reach.
How often should I reapply rust inhibitor on a metal roof?
Most rust-inhibiting primer and topcoat systems on metal roofs last 10 to 15 years with proper surface prep and two-coat application. Inspect the coating annually. If you see bubbling, rust bleed-through, or flaking in any area, spot-treat those sections immediately rather than waiting for the full scheduled recoat cycle. Coastal and humid environments typically need attention at the shorter end of that range.
Can I apply rust inhibitor myself or do I need a contractor?
Small spot treatments on a low-slope roof are manageable for a careful DIYer with the right safety gear, including a use, grip-sole shoes, and an organic vapor respirator. Full-roof treatments are best left to a professional. The surface prep work is physically demanding, and application errors like uneven coating thickness or missed seams lead to early failure. LGFMH Construction offers both inspection and full application services for metal roofs.
What causes metal roof panels to rust faster in some areas than others?
Fastener heads, panel seams, and low spots where water pools are the first places rust appears. These areas stay wet longer after rain and experience the most thermal movement, which stresses coatings. Coastal and high-humidity climates accelerate the process. Tree branches that scratch the coating and debris that holds moisture against the metal are other common accelerators that a simple cleaning routine can address.
Conclusion
Stopping rust on a metal roof comes down to two things: proper surface prep and the right product applied in the right order. A zinc-rich primer, sealed seams, and a UV-stable topcoat give you a system that can last well over a decade. If the damage is already spreading or you're not sure what you're dealing with, reach out to LGFMH Construction for a professional assessment before you spend money on products for the wrong problem.


Comments