How to Replace Broken Vinyl Siding Planks
- William McKracherne
- 3 days ago
- 4 min read

Got a cracked or broken vinyl siding plank? It can let water in and hurt your home’s curb appeal. Follow this hands‑on guide to swap the bad piece for a fresh one without calling a pro.
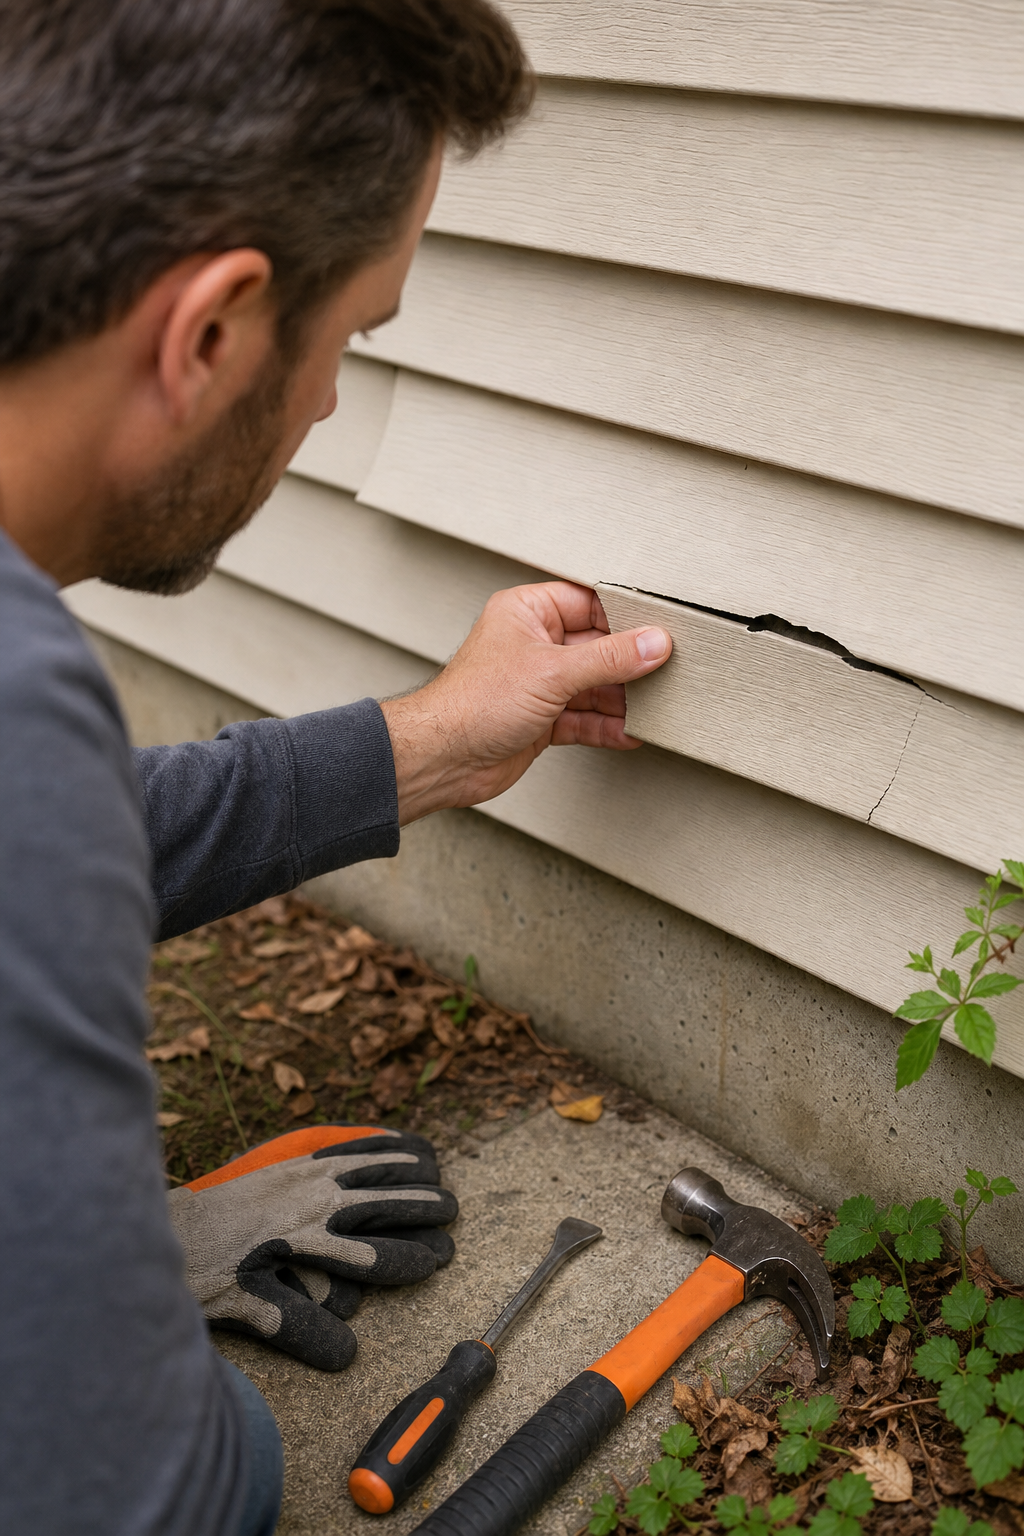
Step 1: Assess Damage and Gather Materials
First, walk the entire wall and note every cracked, warped, or missing board. Small cracks often mean a single board, but widespread warping might signal a larger problem.
Next, collect the tools you’ll need: a utility knife, a zip‑style siding removal tool, a hammer, a pry bar, a tape measure, a level, and a new vinyl plank that matches your existing siding profile. A safety use is optional unless you’re working above a roof.
Buy replacement planks from a reputable supplier that offers the same thickness and color code. If you’re unsure, bring a sample board to the store for a match.
Pro Tip:Keep a spare piece of the old siding until the new board is installed. It helps you confirm the fit before you nail anything.
Before you start, clear any landscaping or outdoor furniture that blocks access. Trim back vines that might hide rot. Set up a sturdy ladder that reaches the highest board you’ll work on. Safety first , have a friend hold the ladder. Siding Installation | Lgfmh Construction offers professional help if you hit a snag.
Step 2: Remove the Damaged Vinyl Plank
Start at the bottom of the damaged board. Slip the zip‑style removal tool under the lower edge and gently pry the board away from the wall. Work slowly to avoid breaking the neighboring planks.
If the board is nailed, use a hammer and pry bar to lift the nails. Pull the nail out with the pry bar once it’s loose. For stubborn nails, a nail puller makes the job easier.
After the board comes free, clean the opening of any debris or old caulk. A vacuum or brush works well. Check the sheathing for water damage; replace any rotten sections before you move on.
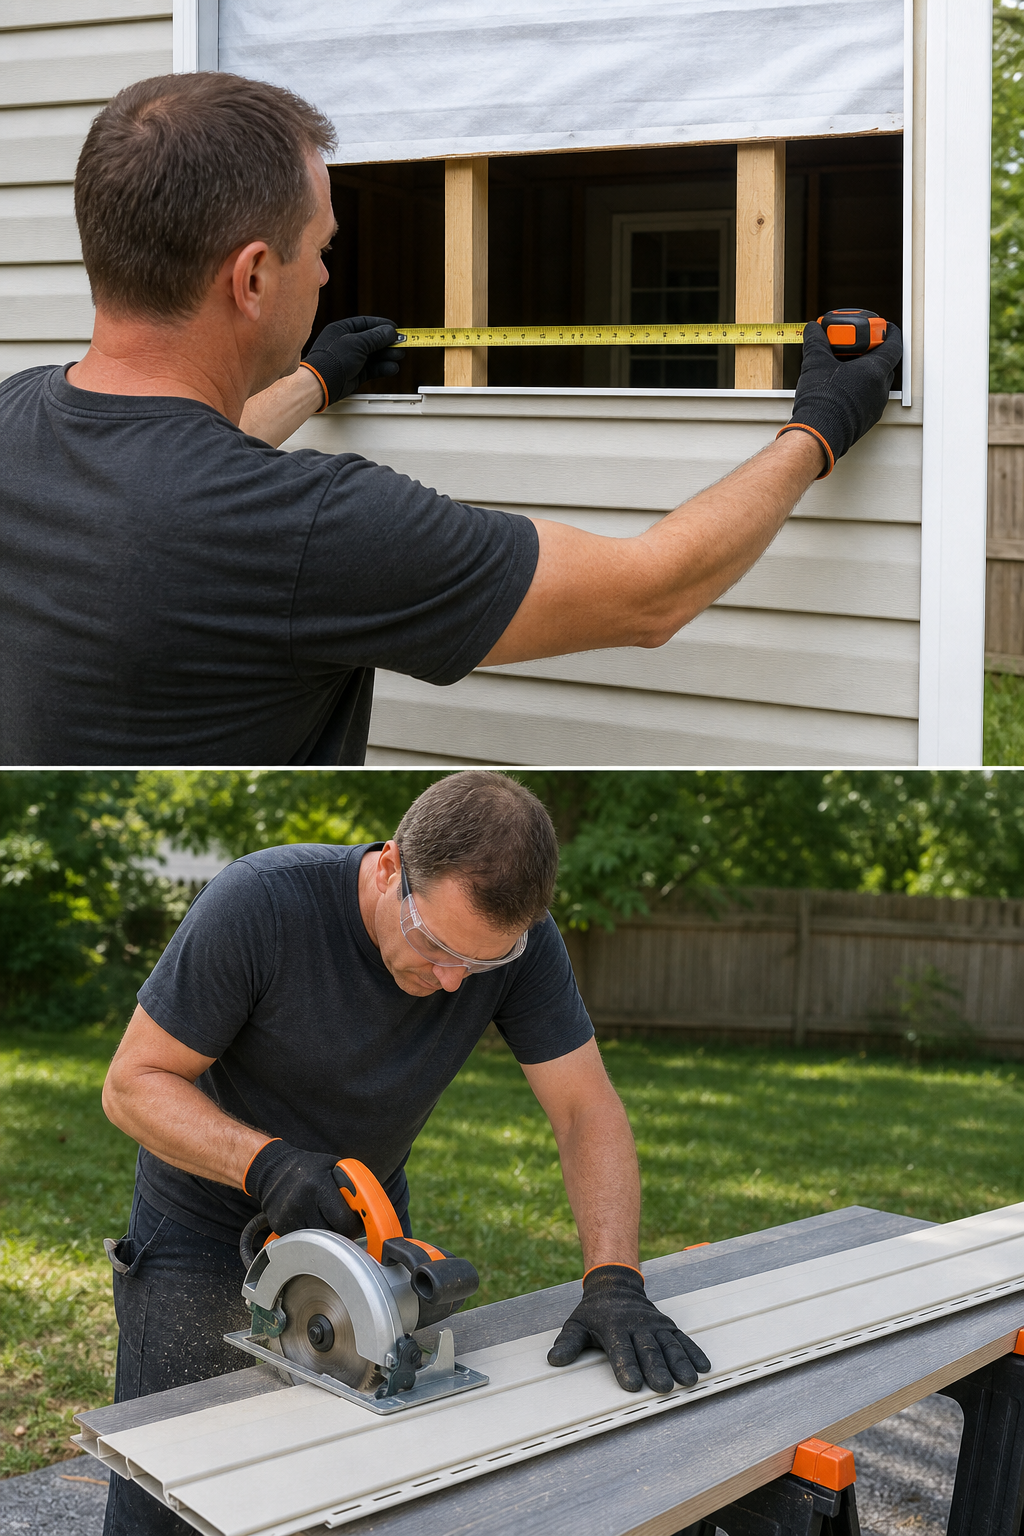
Step 3: Prepare the Opening and Measure Replacement
Now that the gap is clear, measure the exact length of the opening. Use a tape measure from the inside edge of the previous board to the inside edge of the next board. Write the measurement down.
Cut the new vinyl plank to length with a utility knife or a circular saw. Leave a tiny gap, about 1/8 inch, between the new board and the surrounding planks. This gap lets the siding expand and contract with temperature changes.
Check the profile of the new board. It should lock into the groove of the board above and snap into the groove of the board below. If the profile doesn’t line up, double‑check that you ordered the correct style.
Before you fit the piece, apply a thin bead of exterior‑grade silicone caulk to the back edge. This prevents water from seeping behind the new board.
Step 4: Install the New Vinyl Plank
Slide the new plank into the opening from the bottom up. The bottom lip should snap into the groove of the board below. Push gently until the top lip seats in the groove of the board above.
Secure the board with corrosion‑resistant nails. Place a nail about every 12 inches, driving it into the sheathing behind the siding. Leave the nail head slightly recessed so the siding’s lip can cover it.
Once the board is in place, use a rubber mallet to tap the board lightly, ensuring a tight fit. If the board sits unevenly, adjust the nail placement or add a shim behind the board.
According to CertainTeed’s official installation guide, the recommended nail spacing helps prevent wind‑uplift and keeps the siding flat over time.
Key Takeaway:Proper nailing and careful alignment keep the new plank level with the rest of the wall.
Step 5: Seal, Finish, and Inspect
After the board is nailed, run a bead of exterior‑grade caulk along the top edge and any seams that meet other boards. Smooth the caulk with a finger or a caulking tool.
Step back and look at the wall from different angles. Check for gaps, misaligned seams, or nail heads that poke through. A flash light can help you spot hidden gaps.
When you’re satisfied, give the new board a gentle rinse with a garden hose to remove any dust or debris. Let it dry completely before painting, if you plan to paint the siding.
The National Association of Certified Home Inspectors notes that a proper seal and thorough inspection extend the life of vinyl siding and protect the underlying structure (NACHI inspection guidelines).
Pro Tip:Schedule a follow‑up check after a heavy rain to ensure water isn’t leaking behind the new plank.
FAQ
Can I replace a vinyl siding plank without removing the whole row?
Yes. You can pry out a single damaged board and install a new one without disturbing the surrounding planks, as long as you keep the original profile and nail spacing.
Do I need to paint vinyl siding after replacement?
Most vinyl siding comes pre‑finished, so painting isn’t required unless you want a color change. If you do paint, use a paint formulated for vinyl and follow the manufacturer’s curing time.
What nail length should I use for vinyl siding?
Use 1‑inch to 1‑½‑inch corrosion‑resistant nails. The nail should penetrate the sheathing by at least ½ inch but not poke through the siding’s surface.
How can I tell if the new board matches the old one?
Match the board’s profile, thickness, and color code. Bring a sample piece to the supplier or compare the new board to an undamaged neighbor before installing.
Is it okay to use regular exterior caulk?
Use a silicone‑based or polymer‑based exterior caulk that remains flexible. Regular interior caulk can crack with temperature changes and let water in.
Conclusion
Replacing a broken vinyl siding plank is a doable DIY job when you follow each step carefully. Grab the right tools, measure twice, and seal every seam. If you run into tricky areas, LGFMH Construction can handle the whole replacement for you.
Further reading:how to replace broken vinyl siding planks


Comments