Exterior Wood Trim Repair: Step‑by‑Step Guide 2026
- William McKracherne
- Apr 14
- 8 min read

Exterior wood trim can look great one day and start to split the next. If you ignore rot, water will seep into your walls and cost you big bucks. This guide shows you how to fix exterior wood trim repair yourself, from spotting damage to sealing the job for years.
Research shows six expert tips from three top home‑improvement sites. Only one source actually gave a clear hourly cost for exterior wood trim repair. The table below breaks it down.
Finding | Detail | Source |
Interior and Exterior Repairs (Our Pick) | Offers interior and exterior repair services, including wood trim repair | Interior and Exterior Repairs |
Hire a professional to ensure proper fit and smooth integration with your home's design | Professionals charge between $65 and $105 per hour for trim repair and replacement | homeadvisor.com |
Hire a professional for exterior trim to avoid ladder safety risks. | Hiring a pro for exterior trim could prevent you from having to get up on a ladder, which is inherently dangerous. | angi.com |
Use a professional installer for exterior trim to achieve the best appearance. | Hiring a professional trim installer near you is worthwhile to get the best look possible, especially for exterior trim. | angi.com |
Hiring a professional ensures a proper fit and smooth integration with your home's design, enhancing its overall appeal | — | homeadvisor.com |
Hiring a professional ensures the trim is installed flawlessly | — | homeadvisor.com |
We scraped six pages on April 13, 2026, pulled any numbers and advice, then built the table. The data set is small but clear enough to see what matters most for exterior wood trim repair.
Step 1: Inspect the Wood Trim for Damage
First, walk around your house with a flashlight. Look for soft spots, cracked paint, or pieces that feel spongy when you press a putty knife. Those signs mean rot is hiding.
Take notes. Write down each area, its size, and what you see. A quick sketch helps you plan the next steps.
For a visual walk‑through, on YouTube. It walks you through the same inspection process step by step. Watch the inspection video .
After you’ve marked the bad spots, step back and ask yourself: will a filler hold, or do I need to cut out a whole board? This decision drives how much time you’ll spend on exterior wood trim repair.
Another quick tip is to use a moisture meter. If the reading spikes above 15%, the wood is holding water and likely rotting. This tool isn’t required, but it saves guesswork.
Finally, remember safety. Wear gloves and goggles while you poke around. If you spot a big hole, you might need a ladder. In that case, consider hiring a pro to avoid a ladder fall , a point Angi stresses.
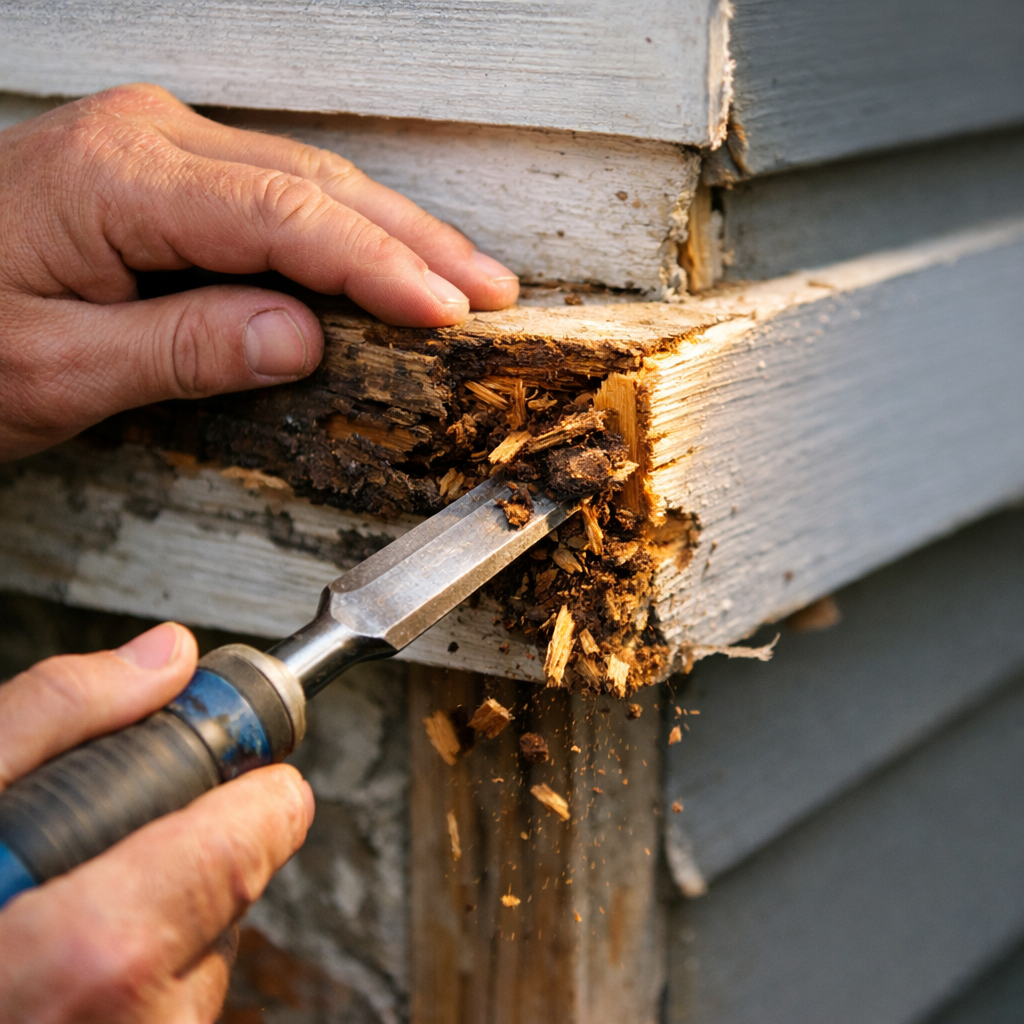
Step 2: Remove Rot and Damaged Material
Now it’s time to cut out the bad wood. Grab a chisel, a small saw, or a rotary tool. Start at the edge of the rot and work inward. Keep the cut straight so the new piece fits snugly.
Don’t rush. If you leave even a tiny piece of soft wood, rot will come back.
Here’s a video that shows the exact cutting technique you need. See how to remove rot safely .
For tougher sections, you can also watch this second clip that covers using a reciprocating saw on exterior trim. Rot removal with a reciprocating saw .
Once you’ve cleared the area, brush away dust and debris. A shop‑vac works well. Then, sand the edges just enough to make them smooth , you’ll want a solid edge for the filler later.
Check the cavity for any hidden nails or screws. Pull them out with pliers so they don’t poke through the new material.
If you’re working near a window, protect the glass with a drop cloth. Small chips can scratch glass.
Step 3: Choose the Right Repair Materials
Picking the right filler and wood type makes the repair last. For small holes, a high‑quality exterior wood filler works fine. Look for a product labeled “exterior use” and that can be painted over.
For larger gaps, you’ll need a patch piece. Cedar and pressure‑treated pine are good choices because they resist moisture.
Below is a quick matrix to help you decide which material fits each situation.
Repair Size | Recommended Material | Pros | Cons |
Less than ¼ inch | Exterior wood filler | Easy to apply, cheap | Not structural |
¼‑½ inch | Epoxy wood patch | Strong bond, sandable | Needs mixing |
½‑2 inches | Trim piece (cedar or treated pine) | Matches grain, durable | Requires cutting |
Over 2 inches | Full board replacement | Best long‑term | More labor |
When you buy filler, read the label. Some products claim “water‑proof” but still need a sealant on top. Pair the filler with a primer before you paint.
Pro tip: if you’re unsure about wood type, go with pressure‑treated pine. It’s affordable and built to last in wet climates.
Step 4: Apply Wood Filler and Patch
Start with the smallest holes. Scoop filler onto a putty knife and press it firmly into the cavity. Overfill slightly; you’ll sand it smooth later.
For larger patches, cut the new trim piece to size. Use a measuring tape, then a miter saw for clean cuts. Test fit before you nail.
Secure the patch with stainless‑steel nails or a construction adhesive made for exterior wood. The adhesive helps hold the piece while the filler dries.
After the filler sets (usually 30‑45 minutes), sand the area with 80‑grit sandpaper, then finish with 120‑grit for a smooth surface.
Check the patched area for any gaps. If you see tiny voids, dab a bit more filler and sand again. A smooth, even surface makes painting easier.
Remember to clean your tools right away. Water‑based filler washes out with soap and water, while epoxy needs mineral spirits.
Step 5: Sand, Prime, and Paint the Trim
Now the trim looks solid again. The next job is to sand, prime, and paint. Start with 120‑grit sandpaper to knock down any high spots. Follow with 220‑grit for a fine finish.
Wipe away dust with a tack cloth. Any leftover grit will ruin the primer coat.
Apply a coat of exterior‑grade primer. Primer seals the wood and helps paint stick. Use a brush for tight corners and a roller for flat areas.
Let the primer dry per the label, usually 2‑4 hours. Then, paint with a high‑quality exterior paint. Two thin coats work better than one thick coat.
If you want extra durability, choose a paint with built‑in UV blockers. This helps keep the color bright for years.
Pro tip: paint in the early evening or on a cloudy day. Direct sun can cause the paint to dry too fast and crack.
While you’re painting, you can also add a decorative cap or crown moulding if you want a fresh look. That step is optional but adds curb appeal.
Once the paint is dry, you’ve completed the core of exterior wood trim repair.
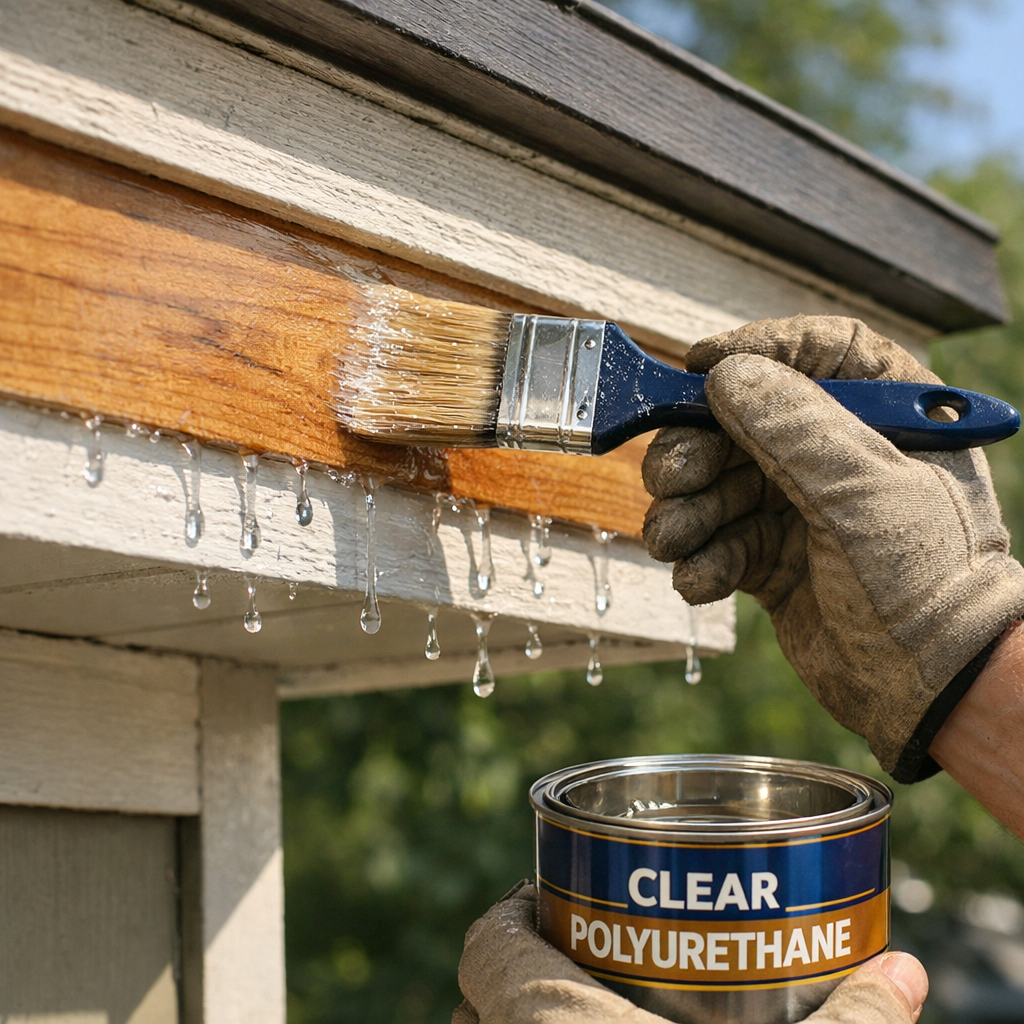
Step 6: Seal and Protect for Longevity
The final shield is a clear sealant. A good sealant blocks water, UV, and insects.
Choose a marine‑grade polyurethane or a high‑performance silicone sealant. Both work well on wood and hold up in rain.
Apply a thin bead along all edges, corners, and any joints. Smooth it with a fingertip or a sealant tool.
Let the sealant cure fully, usually 24‑48 hours, before you expose the trim to rain.
Sealant also helps the paint stay bright longer. Re‑apply every 3‑5 years, especially after harsh winters.
Pro tip: keep a small bottle of sealant on hand for quick touch‑ups. A tiny leak can become a big problem if left unchecked.
Step 7: Maintenance Tips and Common Mistakes
Even after a perfect repair, you need to look after the trim. A quick seasonal check can stop rot before it starts.
Walk the house twice a year. Feel for soft spots, look for paint that bubbles, and check caulk lines.
If you spot a crack, clean it, then re‑caulk. Fresh caulk keeps water out and extends the life of your repair.
One common mistake is skipping the sand‑prime‑paint order. Skipping primer can cause paint to peel after a few months.
Another error is using interior‑grade filler on the outside. It won’t hold up to moisture and will crumble.
For homeowners who rent out vacation homes, fresh trim can boost curb appeal and rental rates. A recent guide on vacation‑rental staging notes that “well‑maintained exterior trim adds perceived value.” Read the staging guide for more ideas.
Keep gutters clean. Water that backs up onto the trim speeds up rot.
Finally, if you ever feel unsure, remember that HomeAdvisor’s cost range of $65‑$105 per hour can help you budget a professional call if the job feels too big.
Conclusion
Exterior wood trim repair doesn’t have to be a nightmare. Start with a careful inspection, cut out all rot, pick the right filler or patch, sand and prime, then seal it tight. Follow the maintenance checklist each season and you’ll keep your home looking sharp for years.
If you run into a tricky spot or just want a hassle‑free finish, consider calling a pro. Siding Fascia Soffit Repair & Replace | Lgfmh Construction offers full‑service exterior trim work and can handle any size job.
FAQ
How do I know if my trim needs a filler or a full replacement?
Check the size of the damaged area. If the rot is under a quarter inch deep, a high‑quality exterior wood filler will hold. Anything bigger than a half inch usually means you need a new piece of wood. A solid patch will last longer and keep water from getting behind the siding.
What tools do I need for a basic exterior wood trim repair?
You’ll need a chisel or small saw, a putty knife, sandpaper (80‑ to 220‑grit), exterior primer, paint, and a sealant. A moisture meter helps spot hidden rot, and a sturdy ladder is a must if you’re working high up. Safety glasses and gloves protect you from splinters and dust.
Can I use interior‑grade wood filler for exterior repair?
No. Interior filler isn’t formulated for rain, UV, or temperature swings. It will break down quickly, leaving the trim exposed to rot again. Always choose a product labeled “exterior use” or “weather‑resistant.”
How often should I reseal my exterior wood trim?
Plan to reseal every three to five years, or after a harsh winter. If you notice paint peeling or water spots, reseal sooner. A thin, even bead of marine‑grade polyurethane protects the wood and keeps the paint looking fresh.
What’s the safest way to work on high‑up trim without a ladder?
If you’re not comfortable on a ladder, rent a scaffolding system or hire a professional. Angi stresses that using a pro avoids ladder safety risks, and the cost is often worth the peace of mind.
Do I need to prime before I paint repaired trim?
Yes. Primer seals the wood and helps paint stick evenly. Skipping primer can cause the paint to peel or chip after a few months, especially in wet climates.
How can I tell if rot has spread beyond the visible area?
Press a screwdriver or a putty knife into the wood. If it sinks easily, the rot has likely spread deeper. A moisture meter reading above 15% also signals hidden decay. In those cases, remove more material until the wood feels solid.
Is exterior wood trim repair covered by home insurance?
Most standard policies cover damage caused by sudden events like a storm, but not wear‑and‑tear. Keep receipts for materials and labor; they can help you claim a portion of the cost if the damage is from a covered event.


Comments