How to Fix a Leaking Basement Window: Step‑by‑Step Guide 2026
- William McKracherne
- Apr 6
- 7 min read

Water dripping by your basement window is a big problem. It can ruin walls, ruin stuff, and make the space feel cold. In this guide you’ll learn how to fix a leaking basement window from start to finish. We’ll walk through inspection, removing old caulk, sealing, flashing, testing, and keeping the job working for years.
Below is the data we used to shape this guide. It looks at five common fixes and shows where the gaps are.
Name | Materials | Tools | Estimated Cost | Common Mistake | Best For | Source |
Install window well cover | window well cover | window well cover, fastening hardware | $50-$200 | Not securely attaching the cover can allow water entry | Protecting the well from water, debris, leaves, pests, and snow | basementwaterproofingscientists.com |
Apply silicone caulk to window frame | silicone-based caulk | — | under $10 | — | — | basementwaterproofingscientists.com |
Seal cracks and gaps with waterproof sealant | waterproof sealant, backer rod | caulking tool, gloved finger | — | Applying sealant on wet surfaces can prevent proper adhesion | — | egresssolutionsnj.com |
Apply waterproof membrane | waterproof membrane, primer (if recommended) | roller, brush | — | A poorly installed membrane may fail and cause further damage | Providing a continuous barrier against water infiltration | egresssolutionsnj.com |
Replace damaged basement window | new window | — | — | — | old, rotted, or damaged windows | basementwaterproofingscientists.com |
Quick Verdict:Install window well cover is the clear winner , it tackles water, debris, and pests in one go despite a $50‑$200 price tag. For a quick, cheap patch, Apply silicone caulk to the frame works under $10. Skip Replace damaged basement window unless you’ve already budgeted, as it offers no cost or tool guidance.
Now let’s get into the steps. Follow each part and you’ll know exactly how to fix a leaking basement window.
Step 1: Inspect the Window and Identify the Leak Source
First, look at the window from inside the basement. You want to see where the water shows up. Is it right at the frame? Is it lower on the wall? Write down each spot. That note will guide the rest of the work.
Next, step outside. Check the window well, if there is one. Look for leaves, dirt, or snow that may be blocking drainage. A clogged well can force water up the frame.
Also, check the foundation around the window. Cracks in the concrete can let water seep right behind the sill. If you see a crack, mark it and plan to seal it later.
Why do windows leak? As the research notes, windows shift when the foundation settles. The shift pulls the caulk away and can rot the wood. That’s why you may see dry rot or cracked wood on the sill.
Here are three quick inspection tips:
Use a flashlight to spot hidden stains on the wall.
Run a garden hose at the window from the outside. Watch inside to see exactly where water enters.
Check gutters and downspouts for clogs , a blocked gutter often sends water straight to the window.
When you finish the visual check, you’ll have a clear list of problem areas. That list is the roadmap for how to fix a leaking basement window.
For more detail on why basements leak, see the guide from Affordable Waterproofing LLC. They explain how shifting foundations cause cracks. Another useful source is Basement Systems, which covers how debris in wells leads to water entry.
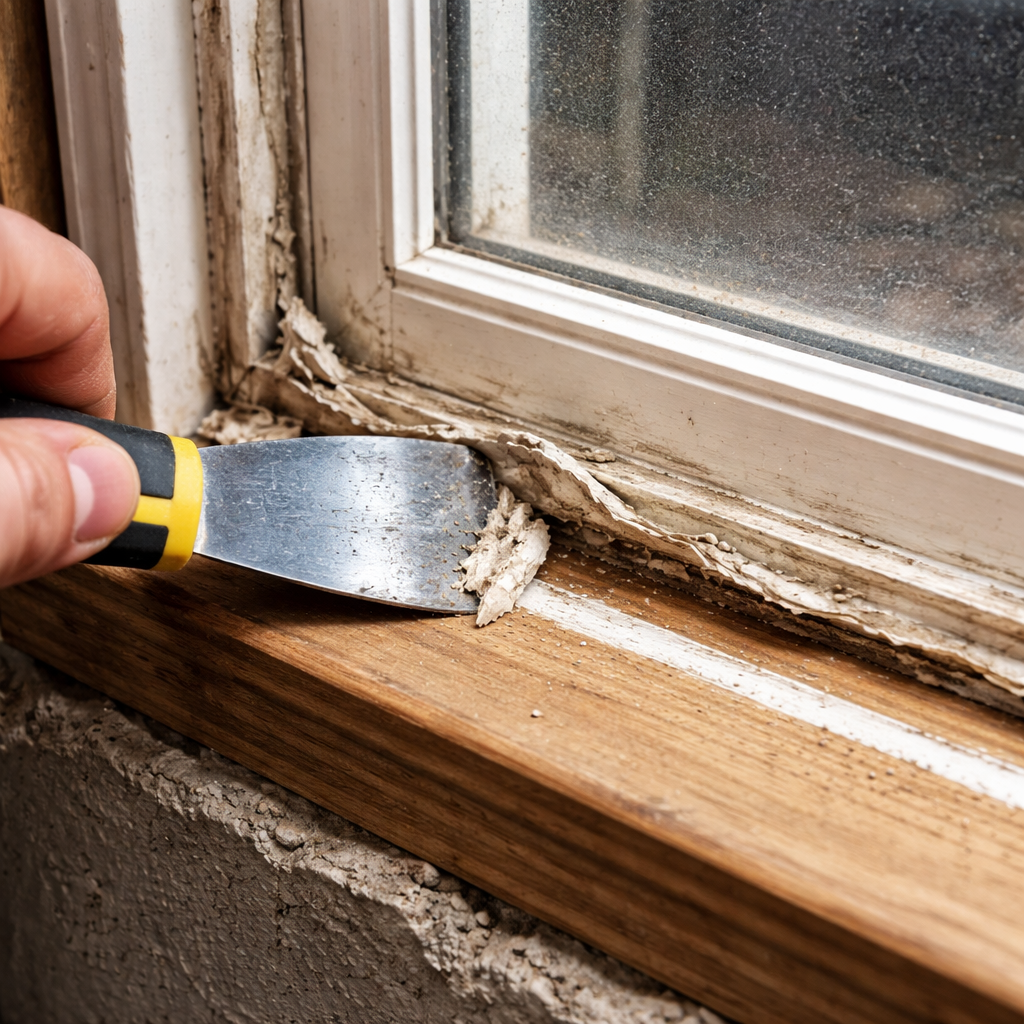
Step 2: Remove Damaged Caulking and Weatherstripping
Now that you know where the water comes in, it’s time to take out the old caulk. Old caulk cracks, shrinks, and lets water in. Use a utility knife or a caulk remover tool to cut the seal away.
Work slowly. Cut a shallow V‑shaped groove along the bead. This helps the new caulk stick better.
After you cut, pull the old material with a putty knife. If the caulk is stubborn, a little heat from a hair dryer can soften it.
Don’t forget weatherstripping. If the window has a rubber strip, pull it out and check for tears. Replace any broken pieces before you move on.
Tips for a clean removal:
Wear gloves so the old caulk doesn’t stick to your hands.
Use a plastic scraper to avoid scratching the frame.
Clean the surface with a mild soap solution after the old material is gone.
When the frame is clean, you’re ready for the next step. A clean surface is the key to a good seal.
Step 3: Apply a Waterproof Sealant
Now we add a fresh seal. Pick a waterproof sealant that works on concrete, wood, and metal. The research shows that only two methods list tools, so you’ll need a caulking gun and a gloved finger to smooth the bead.
First, load the sealant into the gun. Cut the tip at a 45‑degree angle to match the width of the gap you measured.
Apply a steady line of sealant along the entire perimeter of the window frame. Press the bead into the gap with your finger (wear a glove) and smooth it out.
Next, fill any cracks in the surrounding wall with backer rod, then cover with the same sealant. This creates a continuous barrier.
Let the sealant cure for the time the label says , usually 24 hours. During that time, keep the area dry.
Here are three pro tips for a perfect seal:
Work when the temperature is between 50‑70 °F; extreme cold can stop the sealant from curing.
Don’t apply sealant on a wet surface , the research notes that wet surfaces stop adhesion.
After smoothing, run a finger lightly over the bead to create a concave shape that sheds water.
For a visual walk‑through, watch this video:
When the seal is set, you can move on to flashing.
Need more detail on choosing sealants? Check out the guide from Egress Solutions NJ. It explains why you should avoid applying sealant on wet surfaces. Another helpful source is Basement Waterproofing Scientists for product options.
For deeper background on how to finish a repair, see Drywall Installation and Finishing: A Complete Guide for Homeowners . It covers the importance of smooth surfaces before sealing.
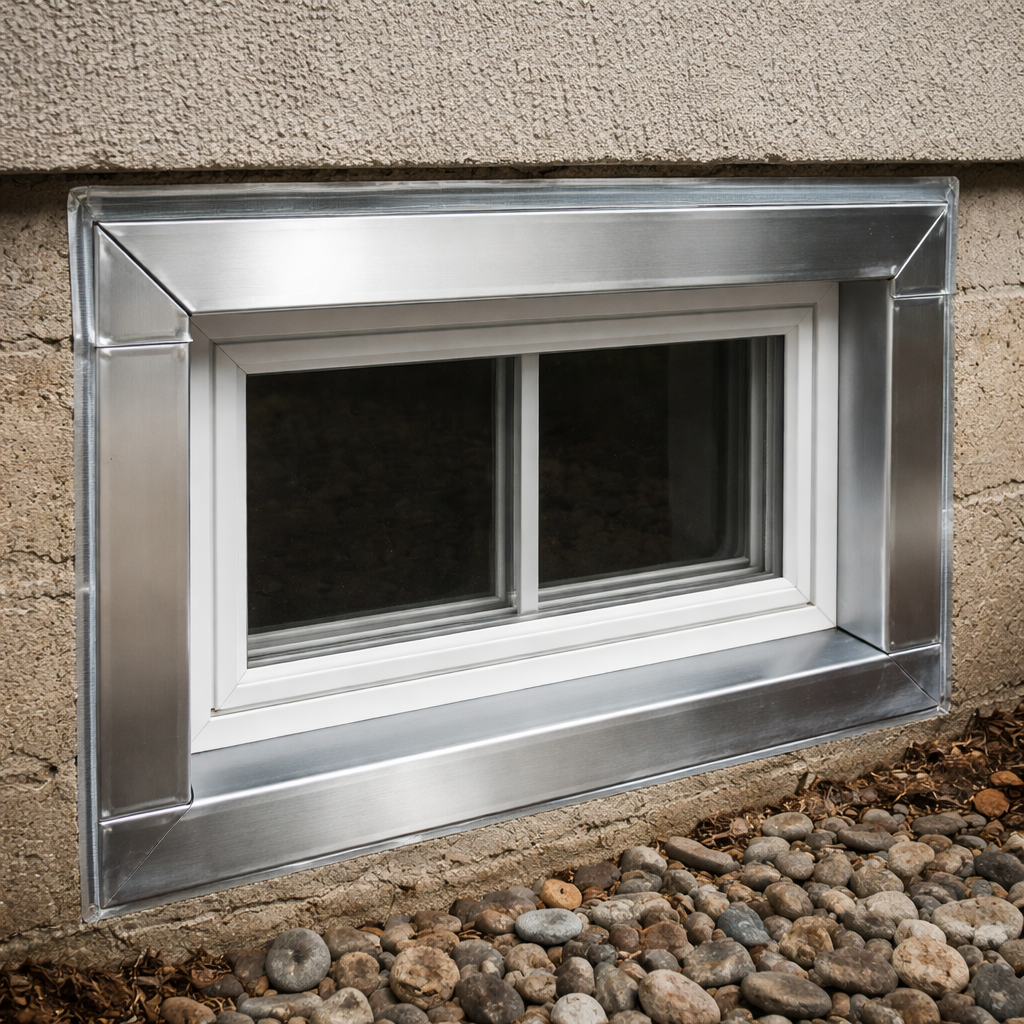
Step 4: Install or Repair Flashing Around the Window
Flashing is a thin metal piece that directs water away from the window. If your home already has flashing, look for rust or gaps. If you see damage, cut out the bad part with tin snips.
To install new flashing, start at the bottom. Slide a piece of flashing under the sill, then bend it up the side of the frame. Overlap the top piece over the side pieces by at least 2 inches , this overlap stops water from slipping behind.
Secure the flashing with corrosion‑resistant nails or screws. Use a hammer and a nail set to sink heads below the surface.
After the flashing is in place, seal the seams with the same waterproof sealant you used earlier. This double layer adds extra protection.
Three quick checks before you finish:
Make sure the flashing slopes away from the wall by about 1‑2 degrees.
Look for any sharp edges that could cut the sealant.
Test with a hose to see if water runs over the flashing or seeps behind it.
When flashing is good, the window is ready for a final test.
Step 5: Test the Repair and Set Up Ongoing Maintenance
Now the real test. Grab a garden hose and spray water at the outside of the window for five minutes. Watch the inside wall. If you see no water, the job is done.
If a drip appears, note the spot and re‑apply sealant or adjust flashing. Small leaks are easy to fix.
After you’re sure the window stays dry, set up a maintenance plan. A leak can return if debris builds up again.
Task | Frequency | Why |
Clear window well of leaves and dirt | Twice a year (spring & fall) | Prevents water from pooling |
Inspect caulk for cracks | Every 6 months | Seal ages and can split |
Check flashing for rust | Yearly | Rust creates holes |
Run hose test after heavy rain | After any major storm | Confirms seal still works |
Keep a simple checklist on your fridge. When you spot a problem, act fast. Small repairs cost far less than fixing a soaked wall.
That’s the full process for how to fix a leaking basement window. Follow each step, test, and keep up with maintenance and you’ll enjoy a dry basement for years.
FAQ
What causes basement windows to leak in the first place?
Leaks happen when water finds a path through the window well, cracked caulk, or missing flashing. Shifting foundations pull caulk away, and debris in the well blocks drainage. Understanding the cause helps you target the right fix when you learn how to fix a leaking basement window.
Do I need special tools to remove old caulk?
No special power tools are required. A sharp utility knife, a putty knife, and a plastic scraper are enough. Gloves protect your hands and a hair dryer can soften stubborn beads. These simple tools let you clear the old material before you apply new sealant.
Can I use any waterproof sealant?
Choose a sealant that works on wood, concrete, and metal. Look for a product labeled “silicone‑based” or “polyurethane” that stays flexible after cure. Apply it with a caulking gun and smooth it with a gloved finger for the best bond.
How long should I wait before testing the repair?
Most sealants need at least 24 hours to cure fully. After that, run a hose over the window for five minutes. If no water shows inside, the repair is good. If you see a drip, re‑apply sealant or adjust the flashing.
What maintenance should I do after fixing the leak?
Keep the window well clear of leaves and dirt, check caulk for cracks twice a year, and inspect flashing for rust each spring. A quick hose test after heavy rain also helps catch any new issues early.
When is it time to replace the whole window?
If the frame is rotted, the glass is broken, or you see repeated leaks despite repairs, replacement may be cheaper in the long run. New windows can also improve energy efficiency, but only replace when the damage is extensive.
Conclusion
Fixing a leaking basement window isn’t magic. It’s a series of clear steps: inspect, strip old caulk, apply a waterproof seal, add flashing, test, and keep up with simple maintenance. Follow this guide and you’ll stop water from sneaking in, protect your walls, and keep the space usable.
If you’d rather let a pro handle any part of the job, LGFMH Construction offers repair services that follow the same steps we described. A dry basement starts with the right knowledge, and now you have it.


Comments