How to Fix a Sagging Fence Gate: A Practical DIY Guide
- William McKracherne
- Mar 14
- 8 min read

When a fence gate sags, it feels like the whole yard is pulling the rug out from under you. The hinge drags, the latch sticks, and every time you open it you hear a creak that says, "something's off." Fixing that sag can be a quick win that boosts curb appeal and keeps kids or pets safe.
First, check the hinge bolts. If they’re loose, tighten them with a wrench. Tight bolts stop the gate from swinging loose and give you a solid pivot point. Next, look at the gate’s frame. A common sagger is a warped or rotted wooden rail. A simple fix is to add a metal L‑brace on the inside corner – screw it in place, and the gate will sit level again.
Sometimes the ground shifts. In that case, dig out a few inches of soil under the hinge side and add compacted gravel. It raises the hinge just enough to level the gate without replacing the whole post. If you’re not comfortable digging, imagine a neighbor who used a small concrete block to shim the hinge; it works and you can remove it later.
Need a step‑by‑step guide? Our practical fence guide walks you through choosing the right hardware and tools, so you’ll know exactly what to buy.
And once the gate is fixed, your yard’s ready for a party. A homeowner might want a fun way to capture guests, so check out photo‑booth rentals for the next backyard bash.
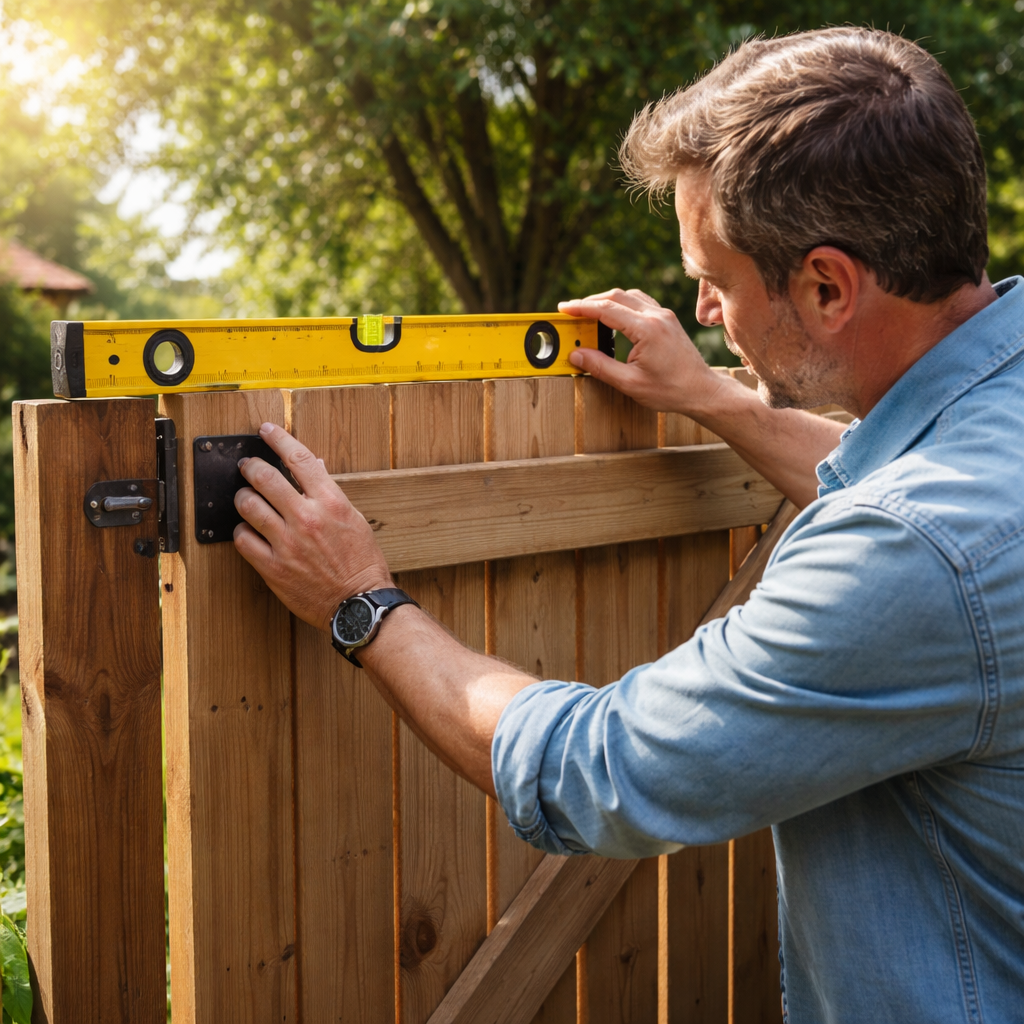
Step 1: Diagnose the Problem
A sagging gate isn’t just an eyesore—it's a safety risk.
Start by looking at the hinge side. Is the gate lower there than at the latch side? If you can see a few inches of difference, you’ve found the symptom.
Grab a carpenter’s level or even a straight board. Lay it on the gate and watch where it rocks. The spot that dips tells you which part needs attention.
Next, check the bolts. Tighten any that feel loose with a wrench. Loose bolts let the gate swing and sag over time.
Look at the wood or metal rails. Any rot, cracks, or bends will let the gate pull down. A quick visual scan can spot a split or a warped piece.
Finally, feel the ground under the hinge post. Does the soil feel soft or uneven? A settled base often pushes the post forward, pulling the gate down.
When you’ve noted each issue, you’ll know whether you need a simple bolt tighten, a brace, or a post shim.
Even if you’re not a pro, spotting these signs gives you a clear plan before you call in help. LGFMH Construction can step in if the problem feels too big to fix on your own.
Step 2: Gather Tools and Materials
Now that you know what's causing the sag, it's time to pull together the right tools. Having everything on hand saves trips to the garage and keeps the fix moving.
You’ll need a wrench or socket set to tighten bolts, a level to check straightness, a screwdriver or drill for screws, a hammer for gentle taps, a tape measure, and safety goggles. A few wooden shims or a small concrete block can help raise a low hinge.
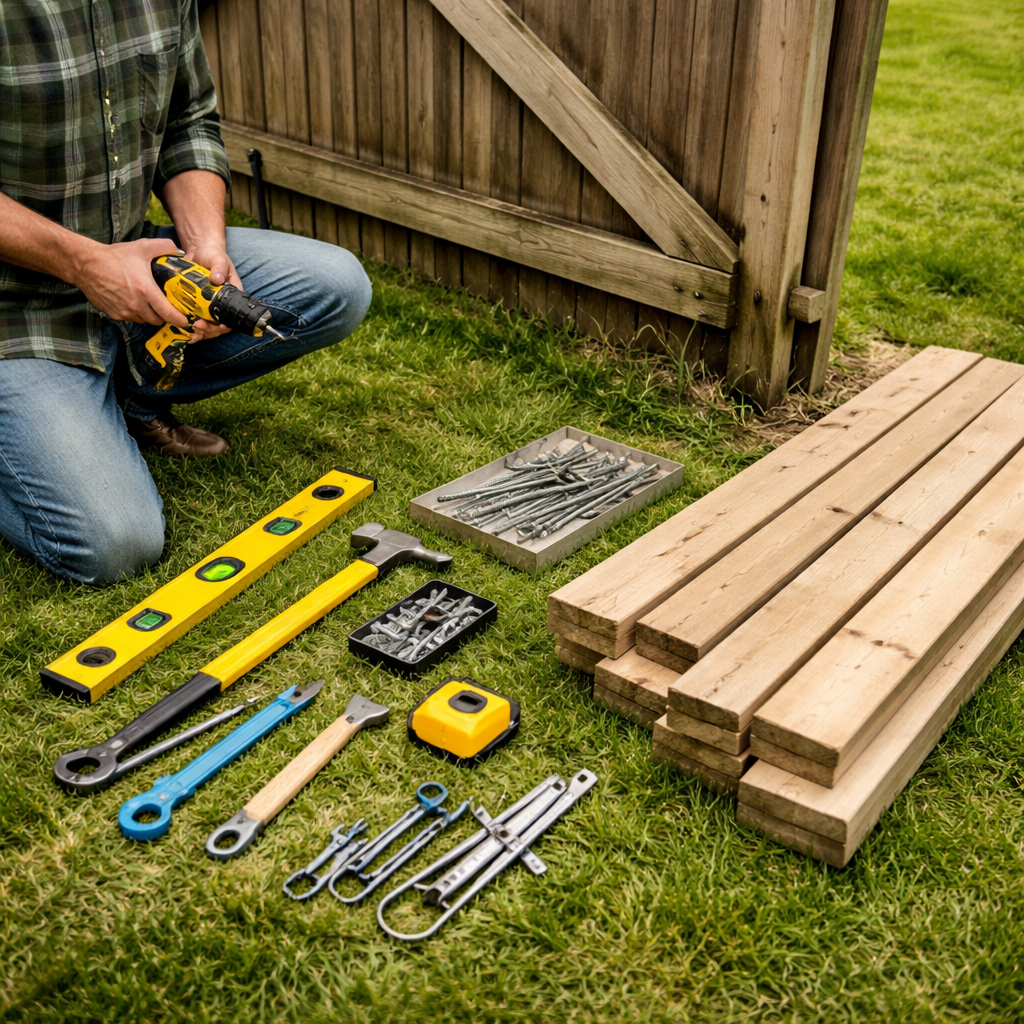
Pick hardware that won’t rust. Galvanized or stainless‑steel hinges and bolts hold up in rain. If a rail is cracked, grab a piece of treated lumber or a composite board that matches your fence. Cut it to length with a saw, then sand rough edges.
If the posts have shifted, a post‑level tool shows how much they’re off‑center. You might also want a bag of quick‑set concrete in case a post needs a new footing. A drill with masonry bits works for that.
Before you head to the store, check the fence post replacement cost guide to see typical prices for brackets, bolts, and wood. Knowing the range helps you stay on budget and avoid surprise expenses.
Wear gloves and sturdy shoes. Keep kids and pets out of the work area. A clean yard prevents tripping over tools.
Take a quick inventory: does the wrench fit the hinge bolts? If not, grab an adjustable one. A good fit saves time.
Lay out each item on the ground, group similar pieces, and double‑check you’ve got the right size. A tidy work zone means fewer mistakes and a quicker fix.
Step 3: Adjust or Replace Hinges
Now that your toolbox is set, the hinge is the heart of the gate. If it’s off, the gate will sag.
First, give the existing bolts a good look. Tighten any loose ones with a wrench. If the bolt still spins, add a lock washer or a small shim behind the plate. A few turns can lift a drooping side without swapping any parts.
Next, check the hinge plates themselves. Rust, bent metal, or stripped screw holes are a sign it’s time for a new hinge. A rusted plate will never sit flat, and the gate will keep pulling down.
To replace a hinge, start by supporting the gate so it doesn’t swing free. Remove the old screws, then line up the new hinge with the existing holes. If the holes are too big, fill them with wood filler or a wooden dowel before drilling fresh pilot holes. Screw the new hinge in tight, then swing the gate a few times to make sure it moves smoothly.
Use galvanized or stainless‑steel hinges for a long life in rain. Pre‑drill a small pilot hole to keep the wood from splitting, and be sure the hinge leaf sits flush against the frame.
For more on picking the right hardware, check out our comprehensive fence replacement guide.
Option | When to Use | Notes |
Adjust bolts | Sag is minor | Tighten, add washers or shims |
Replace hinge plates | Plate is rusted or bent | Use galvanized steel, match leaf size |
Install new heavy‑duty hinges | Gate is heavy or repeatedly sags | Choose 3‑inch mortise hinges, drill fresh holes |
When the hinges sit right, the gate will swing level and you’ll avoid future headaches.
Step 4: Reinforce the Frame and Add Supports
Now the hinges sit right, but the gate can still sag if the frame itself isn’t solid. Think of the frame as the spine, if it bends, the whole gate droops.
First, give the frame a once‑over. Grab a level and run it along the top rail and the vertical stiles. Any wobble means the wood has warped or a post has shifted. Tighten any loose bolts, then fill gaps with a wood shim or a thin strip of treated lumber. A snug fit stops the frame from twisting.
Next, add a simple vertical support if the gate is tall or heavy. Cut a 2‑by‑4 to the height of the gate, then notch the ends to sit flush against the hinge side and the latch side. Screw the brace into the stiles with stainless‑steel screws. This extra piece acts like a backbone and keeps the gate from bowing.
For even more strength, install a diagonal brace. Measure from the bottom corner of the hinge side up to the opposite top corner, then cut a piece of 2‑by‑4 to that length. Attach one end low on the hinge side and the other high on the latch side, using lag bolts or heavy‑duty screws. The diagonal stops the frame from swaying like a door in the wind.
All fasteners should be pre‑drilled to avoid splitting the wood, and a small dab of exterior‑grade glue adds extra hold. Once everything is tight, swing the gate a few times. It should stay level and quiet.
Need a full checklist of frame‑reinforcement steps? Check out the essential fence repair guide for a quick reference.
Step 5: Test, Fine‑Tune, and Maintain
Now the gate is level, it's time to see if it holds up.
Give it a few swings. Open it wide, let it close. Listen. If it squeaks, tighten any loose screw.
Check the latch. Does it catch cleanly? If the latch sticks, a little sandpaper on the bolt face can smooth it out.
Watch the gate for a minute after each swing. Does it drift back to one side? If it does, add a thin shim behind the lower hinge plate until the motion stays even.
Weather can change the wood. On a rainy day, run your hand along each joint. Any damp spots? A quick brush of exterior‑grade sealant will keep moisture out and stop future sag.
Set a simple maintenance rhythm. Once a month, tighten all bolts with a wrench. Every six months, wipe the metal parts with a dry rag and spray a light coat of rust‑preventing oil.
Keep an eye on the ground. Soil shifts over time. If you notice the hinge side sinking, add a handful of packed gravel under the post or place a small concrete block as a shim.
When you finish, jot down what you tweaked. A quick note helps you repeat the fix next year without guessing.
In the spring, run the gate through a full open‑close cycle before the heat hits. The expansion of wood can reveal hidden tight spots. A small adjustment now saves a big repair later.
If you notice rust forming on the hinges, replace the affected parts with stainless‑steel hardware. It's a cheap swap that pays off in years of smooth operation.
Need a quick reference while you work? Grab the full fence repair checklist and keep it nearby.
Conclusion
You’ve just walked through the steps to get your gate level and quiet. Now it’s time to lock in the habit.
Every few months give the gate a quick swing and listen for new creaks. If anything feels loose, tighten the bolts just a turn.
A heavy rain or strong wind can shift the post again, so after a storm check the shims and brace screws. A short visual check saves a big repair later.
If you run into a stubborn problem or just want peace of mind, LGFMH Construction can step in for a professional tune‑up. Their crew knows how to keep a gate solid for years.
Remember, the key to a long‑lasting gate is simple: keep the hardware tight, the level true, and the routine regular.
Now go enjoy a smooth swing every time you open the gate.
FAQ
How can I tell if my gate is sagging because of loose hinges?
First, open the gate fully. If the top rail drops on the hinge side, the bolts are probably loose. Grab a wrench and give each hinge bolt a firm turn. Watch the gate swing again – a tighter bolt should lift the low side. If the gate still drags, look for bent hinge plates or stripped holes.
What tools do I need to fix a sagging fence gate?
You’ll need a ½‑inch socket or wrench, a screwdriver set, a torpedo level, a hammer, and a few wood shims. A rust‑removing spray helps if bolts are corroded. A drill with a small bit is handy for fresh holes when you replace a hinge. Keep safety gloves on to keep hands clean.
How do I adjust the hinge height to level a gate?
Slip a thin wood shim behind the hinge plate on the low side. Then tighten the lag bolt until the shim is snug but not crushed. Re‑check the level. If the gate is still a bit low, add another shim until the top rail reads even on your level. Tighten the bolt a final half turn.
When should I replace a hinge instead of just tightening it?
If the hinge leaf is bent, cracked, or the bolt holes are stripped, tightening won’t hold. Also, if rust has eaten through the metal or the pin is worn, the hinge will keep moving. In those cases, remove the old hinge and install a new heavy‑duty steel or stainless‑steel hinge that matches the gate’s weight.
How can I use shims to lift a low gate post?
Place a thin wood shim between the post base and the ground on the side that sits low. Tap it in until the post feels solid. Add another shim if needed, then re‑level the gate with a level. Finish by driving a few long lag bolts through the post into the ground for extra grip.
How often should I check my gate after fixing it?
Give the gate a quick swing after each heavy rain or strong wind. Then do a routine check every three to four months. Look for new creaks, loose bolts, or shifted shims. Tighten any bolt that feels loose and replace a shim that has settled. A short check now saves a big repair later.


Comments