How to Repair Rotted Deck Joist: A Step‑by‑Step Guide
- William McKracherne
- Mar 15
- 9 min read

Finding a rotted joist can feel like a nightmare, but fixing it is doable.
First, tap the wood with a hammer. A hollow sound means rot. Mark the bad spot, then cut out the damaged section with a reciprocating saw. Keep the cut clean so the new piece fits tight.
Next, brace the gap. Slip a new, straight joist piece—called a sister—alongside the old one and bolt it with carriage bolts every foot. Add waterproof glue for extra hold. If the rot is shallow, you can carve out the soft wood and fill it with epoxy filler before screwing a new strip on.
Finally, seal the whole area with a good deck sealant to keep water out. For a deeper dive on deck fixes, check out the comprehensive deck repair guide for homeowners. And if you’re also thinking about home security, the Privileged Access Management Services guide offers solid tips.
Step 1: Assess the Damage
First thing you need to do is see how bad the rot is. Walk the deck and look for soft spots, dark stains, or a musty smell. Those signs usually mean water got in and the wood started to break down.
Grab a hammer and give the joist a quick tap. A solid thud means the wood is still good; a hollow sound means it’s weak. Mark every hollow spot with a piece of chalk or a bright sticker.
Next, measure the length of the damaged area. Write the numbers down – you’ll need them when you cut a new piece. If the rot runs deep, you might have to expose more of the joist by removing a few deck boards. Keep the cut clean so the new piece fits snugly.
While you’re checking, set a short timer to stay focused. A Pomodoro timer helps you work in bursts and avoid getting sidetracked by endless details.
Once you’ve listed all the bad spots, take a step back and think about what you’ll need: a straight replacement joist, bolts, waterproof glue, and a sealant. If you’re not sure what size joist to buy, a quick look‑up on a semantic search SEO guide can point you to the right specs without scrolling through pages of results.
Watch the short video below for a visual walk‑through of the assessment process.
Now you have a clear picture of the damage. Write down the measurements, note where you need new wood, and get ready for the next step – actually fixing the joist.
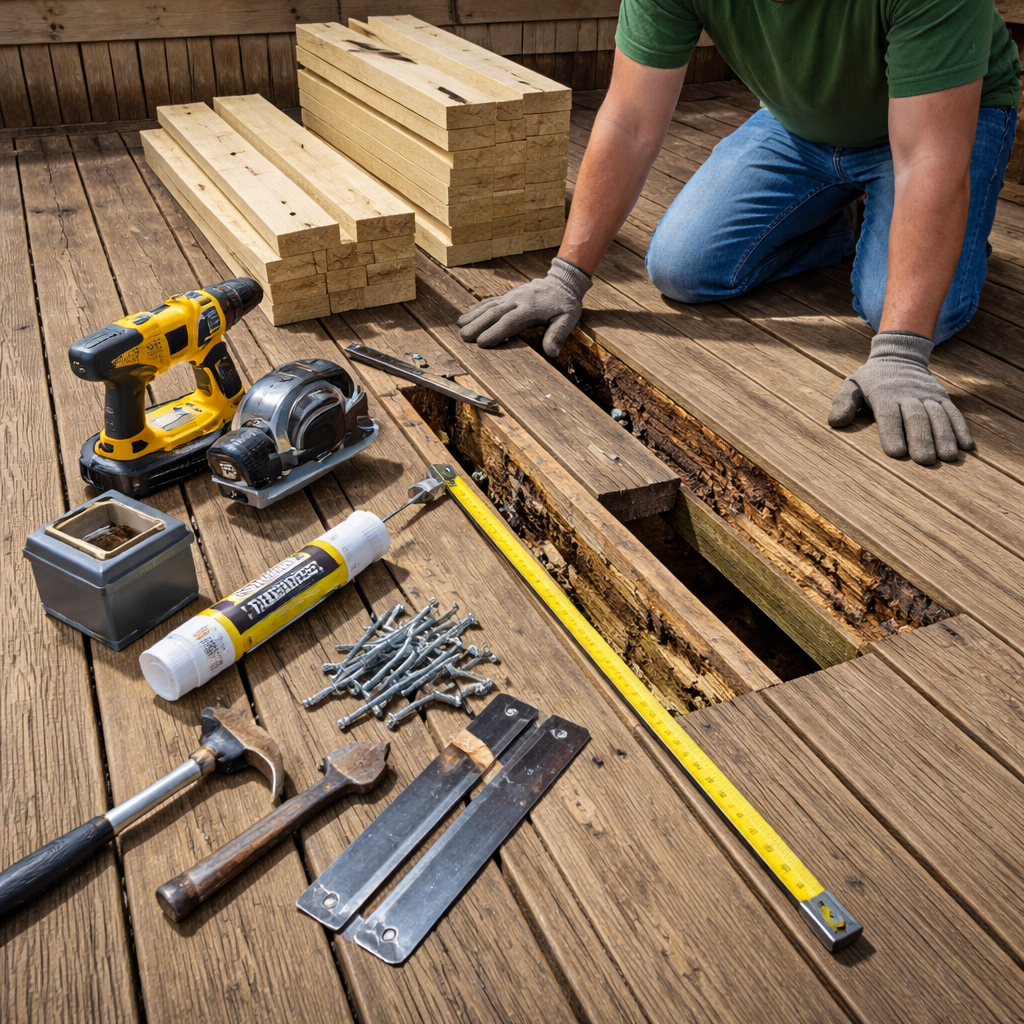
Step 2: Gather Materials & Tools
Now that you know which joists need fixing, it's time to pull together what you'll need. A clear list saves trips to the store and keeps the work moving.
First, grab a good quality replacement joist. Look for pressure-treated lumber that matches the size you measured. If the old piece was 2×8, pick the same depth and width. A straight grain will hold fast.
Next, collect fasteners. You’ll want carriage bolts, washers, and nuts about ½ inch in diameter. A few extra won't hurt – you can always set the spare aside for future repairs.
Sealant is a must. Pick a deck-grade waterproof sealant that can handle sun and rain. A small tube will cover the joints, but a larger can be saved for the final coat.
Tools you can't skip: a reciprocating saw or handsaw for clean cuts, a drill with the right bit for the bolts, a pry bar, a measuring tape, and a pencil for marking. A sturdy workbench or sawhorse makes cutting easier.
Safety gear matters too. Grab gloves, safety glasses, and a dust mask. A quick check now means no surprise stops later.
Tip: Write your list on a clipboard and check items off as you pack them. It feels good to see the blanks disappear.
Need more detail on choosing the right lumber? Check out the essential guide to deck replacements for a quick rundown of material options.
When your kit is ready, you’ll be set to start the actual fix without hunting for parts mid-project.
Step 3: Remove the Rotted Joist
Now the rotted piece is ready to go. Grab your reciprocating saw or handsaw and line up a straight cut just beyond the damaged area. A clean cut gives the new joist a snug fit.
Start the saw at a low speed, then let the blade do the work. Push gently, keep the saw flat against the joist, and watch the wood part cleanly. If the rot has spread farther than you thought, measure again before you cut.
Got a tight spot? Slip a pry bar under the cut end and tap it with a hammer. The bar will lever the piece loose without bruising the surrounding beams.
Once the piece lifts out, give the opening a quick once‑over with a brush or shop vac. You want any crumbling wood or dust gone before the new joist slides in.
What if the joist is nailed in place? Grab a drill with a screwdriver bit, undo the screws or bolts, then pull the joist free. Keep the fasteners handy; you’ll need them for the sister joist later.
Tip: Work from one end to the other, removing small sections rather than trying to yank the whole piece at once. It saves muscle and keeps the deck from shifting.
When the gap is clear, wipe it dry and check that the surrounding joists sit level. A level surface means the new joist will sit tight and won’t wobble under weight.
Need a deeper dive on how decks are built and cared for? The building and maintaining decks guide walks you through the full process.
Step 4: Install New Joist
With the gap ready, grab the replacement joist and hold it up to the opening. Does it sit snugly? If you see any wiggle, you’ll need to trim a little.
Lay the joist on a flat surface and measure twice. Cut the ends with a handsaw or circular saw so the piece is a hair shorter than the space, that way it slides in without forcing.
Slide the joist into place from one side. A quick tap with a rubber mallet will seat it against the neighboring beams. You want the top of the new joist level with the existing ones; a level will keep the deck from rocking later.
Next, line up the pre‑drilled holes for the carriage bolts you saved earlier. If you didn’t pre‑drill, mark the bolt locations and drill pilot holes now, a ¼‑inch bit works fine for ½‑inch bolts.
Insert each bolt, add a washer, then tighten the nut by hand until it’s snug. Finish with a wrench, but don’t over‑tighten; the wood can split if you crush it.
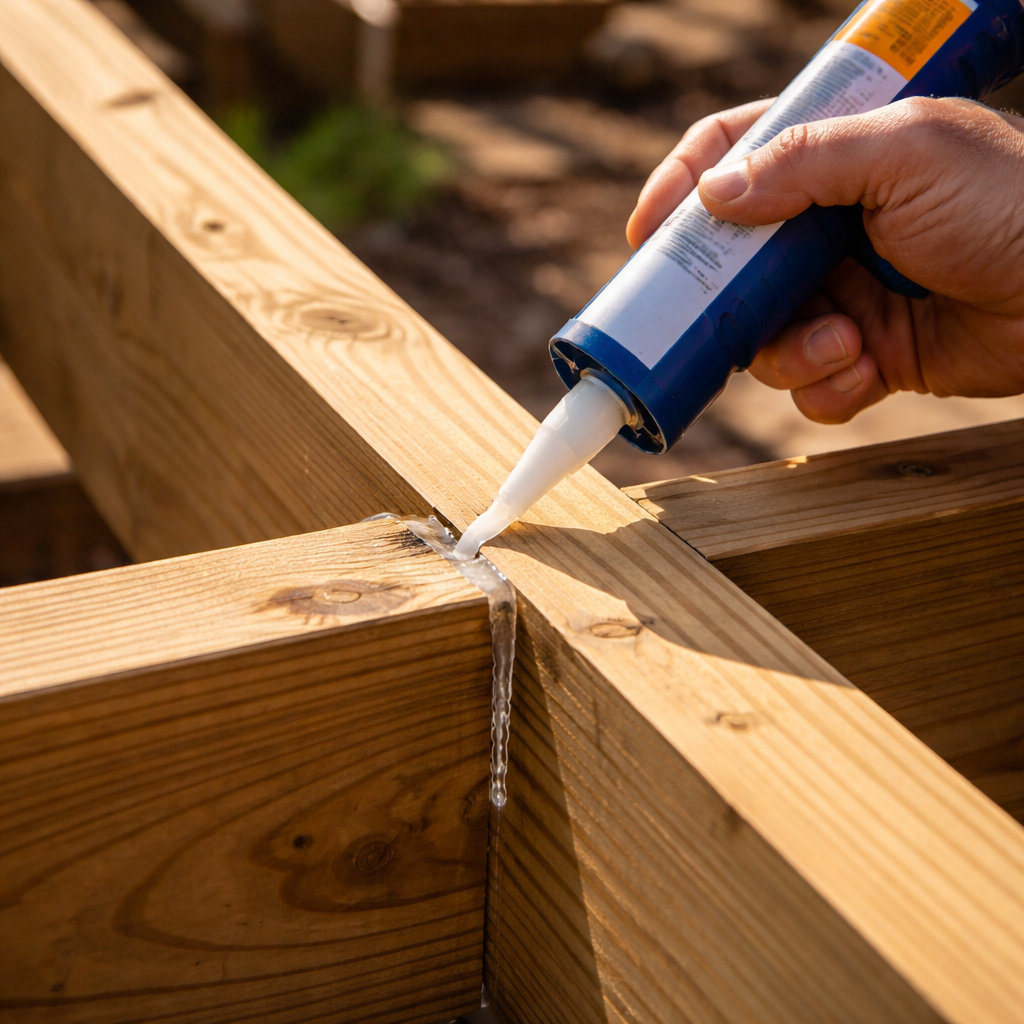
Once the joist is secure, spread a bead of deck‑grade sealant along the joint edges. This keeps moisture out and gives the new piece a smooth transition to the old deck.
Finally, give the whole area a once‑over with a brush, then step back and check that the joist feels solid. If you need more detail on choosing the right lumber and fasteners, see our essential guide to deck replacements.
Step 5: Reinforce & Finish
Now the joist sits snug and level. The last push is to make sure it stays that way for years.
First, grab a long level and run it along the top of the new joist and the ones next to it. If you see any high spots, tap the joist gently with a rubber mallet until it lines up. A flat surface means the deck won’t rock when you walk on it.
Next, seal every joint. Pull out a bead of deck‑grade sealant and run it along the edge where the new piece meets the old wood. Smooth it with a putty knife so water can’t slip in. This step is the real barrier against future rot.
Give the whole area a quick sweep to clear sawdust and debris. Then walk the deck with a sturdy shoe; you should feel a solid, even surface under each step. If anything feels loose, tighten the bolts a bit more, just enough to hold, not split.
Before you call it done, write down the size of the joist you used and the sealant brand. That note saves you time if you ever need to replace another piece.
For a quick cost reference on deck boards, see our deck board replacement cost guide.
Quick‑check checklist
Item | What to check | Tip |
Level | Top of joist aligns with neighbors | Use a 4‑ft level, not just eyeball |
Fasteners | Bolt heads flush, nuts snug | Hand‑tight then a half turn with wrench |
Sealant | Bead continuous, no gaps | Smooth with a putty knife while wet |
With those steps done, your deck should feel sturdy and look ready for the next BBQ. Keep an eye on the repaired spot each season; a quick touch‑up of sealant can add years of life.
Step 6: Inspect & Maintain
Now the joist is in place, you need to keep an eye on it. A quick walk around the deck each season saves you a lot of hassle later.
Look, feel, listen
Grab a flashlight and shine it along the joint. Any dark streaks could mean water is still getting in.
Stand on the repaired spot. Does it feel solid? If it creaks or wiggles, tighten the bolts a little more.
Tap the wood with a rubber mallet. A dull thud means it’s still tight; a hollow sound signals a problem.
Seasonal touch‑up
After a heavy rain, check the sealant bead. If you see a crack, run a fresh line of deck‑grade sealant over the edge. Smooth it with a putty knife while it’s still wet.
In the fall, give the whole deck a sweep. Clear leaves and debris that can trap moisture.
Every spring, give the fasteners a half‑turn with a wrench. Too tight can split wood, too loose lets water in.
Keep a simple log
Write down the date you last checked, any adjustments you made, and the sealant brand you used. A tiny note in a garden journal or on your phone does the trick.
Need a reminder of the whole process? Our step‑by‑step deck repair guide walks you through each step again.
Stick to this quick routine and your repaired joist will stay strong for years, letting you enjoy the deck without worrying about rot.
Conclusion
You’ve seen that fixing a rotted joist isn’t magic, it’s just a few clear steps. With the right tools, a bit of patience, and the checklist you just built, the job stays safe and cheap. No need to wait for a big disaster.
Start by spotting the soft spots, cut out the bad wood, and fit a new joist tight. Bolt it in, seal every edge, and add a strip of joist tape. A quick wiggle test tells you when it’s solid.
Regular checks every few months catch new rot before it spreads. A flashlight, a moisture meter, and a simple note on your phone keep you ahead of trouble. You’ll save time, money, and the headache of a whole deck replacement.
If you prefer a pro to do the work, LGFMH Construction can handle the repair quickly and reliably.
FAQ
What signs show my deck joist is rotted?
Look for soft spots when you tap the wood. A hollow thump means the wood inside is weak. Shine a flashlight through the joist; light that passes easily shows decay. A screwdriver will sink in if the wood feels spongy. High moisture readings (over 20 %) also point to rot. Write down each spot before you start the repair properly today.
Can I fix a rotted joist myself or need a pro?
Many homeowners can fix a short rot section with basic tools. If the damage runs more than a foot, or if the joist is a main support, call a pro. A professional like LGFMH Construction brings experience, proper safety gear, and warranty on the work. Weigh the cost of tools and time against the price of a hire before you decide.
What tools do I need to replace a bad joist?
You’ll need a safety glass, gloves, and ear protection first. A reciprocating or circular saw with a fine blade makes clean cuts. Get a sturdy replacement joist of the same size. Pressure treated lumber works well. Carriage bolts, washers, and nuts hold the new piece in place. A level or a straight edge helps you check the fit, and a bucket of shims fixes any height gaps.
How do I make sure the new joist fits tight?
Measure the gap twice before you cut. Cut the new joist a little longer than the opening, then test fit it. Tap it gently with a rubber mallet; it should sit flat without rocking. If there’s a small space, slide a thin wood shim until the top is level with the surrounding joists. When the piece fits tight, drill pilot holes and bolt it in every foot.
How often should I check my deck for rot?
Check your deck at least twice a year, once in spring before rain and once in fall after heat. Walk the surface and tap each joist; any hollow sound needs a closer look. Use a flashlight and a moisture meter to spot hidden wet spots. Write down the date and what you fixed so future checks are quick regularly today.
What’s the best way to seal the repaired joist?
After the joist is in place, run a thin bead of exterior deck sealant along every cut edge. The sealant keeps water out and stops new rot from forming. Press joist tape over the top edge to add extra protection. Let the sealant cure as the manufacturer says, then give the bolts a final tighten for long term durability today.


Comments