How to Install a Window Well Cover: Step-by-Step Guide
- William McKracherne
- May 28
- 6 min read

Most homeowners think a window well cover is a pricey add‑on. The truth is you can fit one yourself in a weekend. In this guide you’ll learn every step from gathering tools to sealing the edge so rain never finds its way inside.
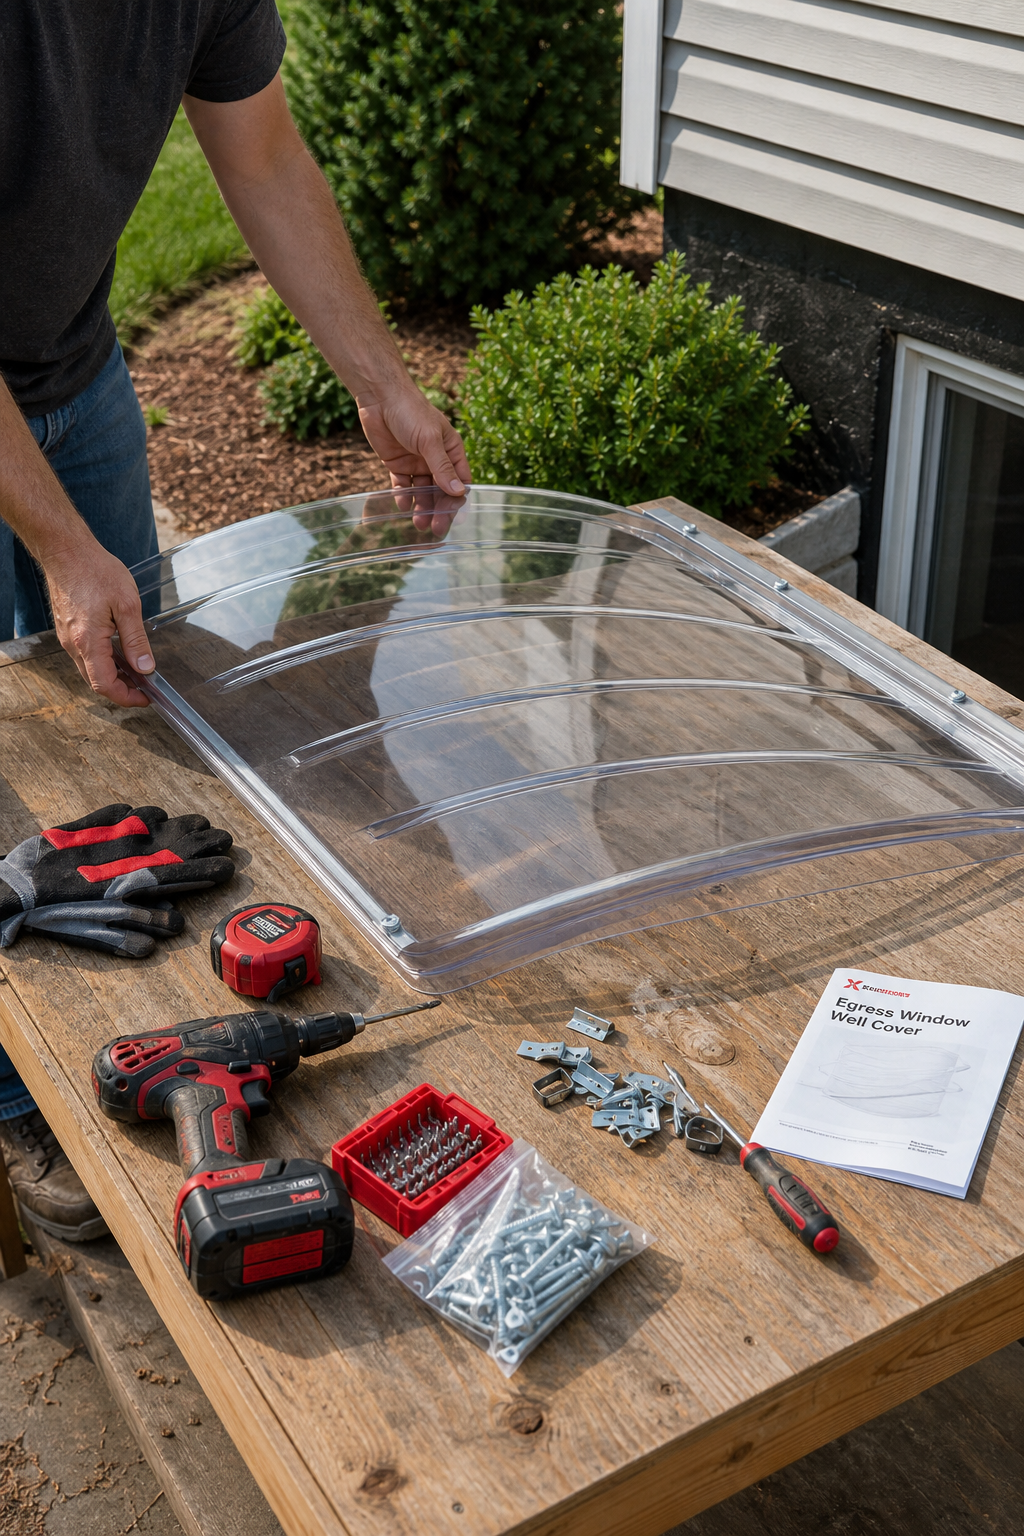
Step 1: Gather Materials and Tools
Before you lift a single piece of metal, make a list. A solid list saves trips to the store and keeps the job moving.
Here’s what you’ll need:
Polycarbonate or metal cover that matches your well size
Four‑point hook‑and‑loop fastener kit (the kind Wellcraft uses)
Drill with fresh carbide bits , the research hook says a worn bit can crack the cover
Stainless‑steel screws or anchors
Silicone‑based outdoor sealant and a caulking gun
Measuring tape, level, and marker
Shovel or small scoop for clearing debris
When you buy the cover, double‑check the product page for a weight rating. Wellcraft flat covers hold up to 500 lb, while dome styles manage 350 lb. Knowing the limit helps you pick fasteners that won’t pull loose in a gust.
Pro tip: lay all the items on a tarp before you start. It’s easier to see if anything is missing and you won’t lose a screw in the grass.
Once everything is in one spot, you’re ready to move on.
Key Takeaway:Having every tool and material ready before you begin cuts the install time in half.
Step 2: Measure Your Window Well
Accurate measurements are the foundation of a snug fit. If the cover is too small, water will pool; too large and it may wobble.
Start by measuring the inside width and length of the well at the top edge. Record both dimensions to the nearest quarter inch.
Next, measure the depth from the top edge down to the bottom of the well. You’ll need this number if you decide to add a gravel layer later.
Write the numbers on a piece of paper and add three inches to each side. The extra space lets the fastener system sit on the well’s lip without squeezing the cover.
Here’s a quick reference table you can print:
Dimension | How to Measure | Extra Allowance |
Width | Inside edge to edge | +3 in |
Length | Inside edge to edge | +3 in |
Depth | Top lip to bottom | — |
Now you can order the right size cover or confirm that the one you have will fit.
Watch the short video below for a visual walk‑through of the measuring process.
After the video, double‑check your notes. A second look catches any typo before you head to the hardware store.
Step 3: Prepare the Site
Preparation makes the install smooth and safe. Start by clearing the well of leaves, twigs, and any standing water.
Use a small shovel to scoop out loose dirt. If the well has a built‑in drain, verify that water flows freely. A clogged drain will cause water to sit behind the cover.
Next, level the bottom with a thin layer of washed gravel about two inches deep. The gravel promotes drainage and gives the cover a firm base.
Now it’s time to mark where the fasteners will go. Most covers use four mounting points at the corners. Place a piece of scrap wood over each spot and use a marker to trace the hole pattern.
When you drill, use a fresh carbide bit. The research hook warns that an old bit can crack polycarbonate covers, leading to costly repairs.
Drill slowly, applying steady pressure. If you hit metal, swap to a masonry bit designed for steel or specific.
Pro Tip:After drilling, wipe each hole with a dry cloth. Dust can prevent the sealant from bonding properly.
Finally, give the well a once‑over for any sharp edges that might snag the cover. Trim them with a metal file if needed.
At this point the site is ready for the cover.
Step 4: Install the Cover
Lift the cover onto the well. It’s heavy enough to stay in place, but you’ll want a second set of hands for larger metal lids.
Align the pre‑drilled holes with the marks you made earlier. If the cover sits a bit low, add a thin shim of rubber under the fastener plate.
Insert the screws or anchors through the cover’s mounting brackets. Tighten each one just enough to hold the cover firm; over‑tightening can bend the brackets or crack a polycarbonate panel.
Check the fit by walking around the perimeter. The cover should sit flush with the well’s lip, leaving no gaps for water or debris.
If you notice a gap, apply a bead of silicone sealant before the final screw. The sealant fills tiny spaces and adds wind resistance.
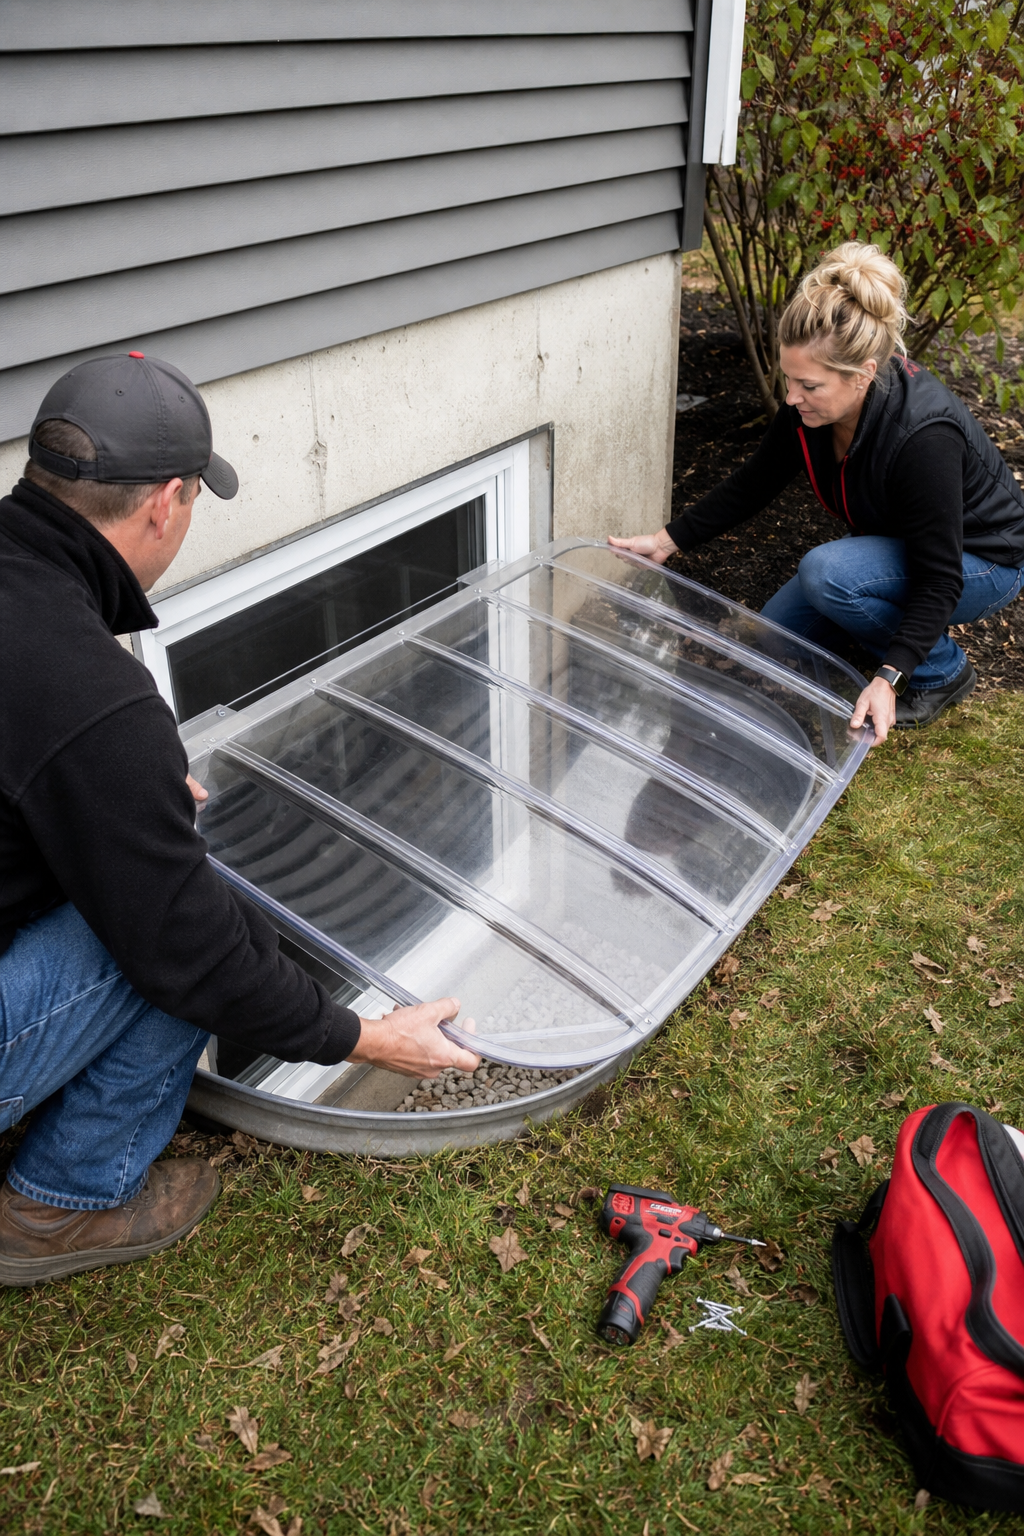
Give the cover a gentle shake. It should feel stable, not wobble. If it moves, loosen the screws, adjust the position, and retighten.
Now the cover is physically attached. The next step seals the edge.
Step 5: Seal and Finish
The seal is the last line of defense against rain and wind. Load the caulking gun with a high‑quality outdoor silicone sealant.
Run a continuous bead along the entire perimeter where the cover meets the well. Press the sealant into the joint with a gloved finger or a caulk smoother.
Allow the sealant to cure for at least 24 hours before walking on the cover or exposing it to heavy rain.
While the seal sets, inspect the surrounding siding and gutters. The research notes that a damaged gutter can dump water right onto the well, defeating your work.
If you spot cracks in the siding or a leaky gutter, consider a quick repair or call a local service. lgfmh.com’s interior and exterior repair team offers fast fixes for gutters and siding, which can be a good follow‑up after the cover install.
When the seal is dry, give the cover a final wipe with a damp cloth. Remove any excess silicone that may have smeared onto the clear polycarbonate.
Lastly, test the cover’s drainage. Pour a bucket of water on the top and watch it flow off the edge. If water pools, add a bit more sealant or adjust the tilt of the well.
Congratulations , the window well is now protected.
According to Wikipedia’s entry on window wells , a properly sealed cover can extend the life of an egress window by years because it prevents moisture intrusion.
For building‑code specifics, the Federal Emergency Management Agency (FEMA) provides guidance on egress window requirements and flood‑resistant design. Review their recommendations if you live in a high‑risk area.
FAQ
Can I use a wooden cover instead of polycarbonate?
A wooden lid can look nice, but it swells with moisture and can rot. Most experts recommend clear polycarbonate or metal because they last longer and let light in. If you still want wood, treat it with a marine‑grade sealant and inspect it yearly.
Do I need a building permit for a window well cover?
Many municipalities require a permit if the cover changes the egress path or adds weight to the structure. Check with your city planning office before you start. The cost is usually modest, and the paperwork ensures the work meets safety codes.
How often should I reseal the edges?
Inspect the seal twice a year , after winter and after heavy rains. If you see cracks or the sealant has pulled away, scrape the old bead and apply a fresh one. Resealing every 3‑5 years keeps the cover watertight.
What size gravel should I use at the bottom?
Clean, washed #3‑#4 pea‑gravel works best. It fills gaps while allowing water to drain. Spread a layer about two inches deep, then tamp it lightly before placing the cover.
Can I install the cover myself if the well is made of metal?
Yes, but you’ll need a drill bit sized for metal and possibly a torque wrench for the screws. Wear safety glasses and gloves. Fresh drill bits are key , a dull bit can cause the polycarbonate to crack.
How do I prevent condensation on the cover?
Condensation forms when warm indoor air meets the cold surface of the cover. Improve ventilation in the basement and keep the interior humidity below 60 %. A small dehumidifier can help during humid months.
What if the cover doesn’t fit perfectly?
If the cover is slightly too small, you can trim the mounting brackets with a metal file. If it’s too large, trim the excess polycarbonate using a fine‑toothed saw and sand the edges smooth. Always wear eye protection.
Is there a recommended winter maintenance routine?
In winter, snow can accumulate on the cover and melt into water that may seep in. Remove snow with a soft broom rather than a metal shovel. Check the sealant after thawing and reapply if any cracks appear.
Conclusion
Installing a window well cover is a doable DIY project when you follow a solid plan. You start by gathering the right tools, measure twice, prep the site, fit the cover, then seal every edge. The result is a cleaner basement, less water intrusion, and a safer space for kids and pets.
If you run into hidden damage while working, a quick repair from a local service can keep the project on track. For more on protecting your basement, on waterproofing window wells. That page walks you through drainage, membranes, and long‑term maintenance.
With the steps above, you’ll have a sturdy, weather‑proof cover in place and peace of mind for years to come.


Comments