How to Repair a Cracked Stucco Wall
- William McKracherne
- May 9
- 6 min read


Got a crack in your stucco and wonder if you can fix it yourself? You can. In this guide we'll walk you through each step, from checking the crack to painting over the repair. You'll see what tools you need, which fillers work best, and how to keep the patch from opening again.
Step 1: Assess the Crack , Is It a Simple Repair or a Structural Issue?
First, look at the crack. Is it thin like a hairline, or wide and deep? Measure the width with a ruler. If it's less than 1/8 inch, it's probably a surface crack. Wider cracks may mean the lath underneath is loose or that the wall is moving.
Next, check the location. Cracks near doors, windows, or corners often point to settling. Cracks on a retaining wall may be caused by soil pressure. If the crack follows a stair‑step pattern, it could be a sign of structural stress.
Tap the area with a hammer. If the sound is hollow, the backing may be damaged. If you hear a solid thud, the backing is likely sound.
When in doubt, call a pro. LGFMH Construction offers a free assessment for walls that might need more than a patch.
Remember that moisture can hide inside the crack. Use a moisture meter if you have one. Readings above 15% suggest water is getting in.
Key Takeaway:Small, straight cracks are usually DIY‑friendly; big, jagged or moving cracks need a professional look.
Bottom line:Identify size, location, and movement before you start any repair.
Step 2: Gather Your Tools and Materials
Having the right gear makes the job smoother. Here is a quick list of what you’ll need.
Safety goggles and a dust mask , protect your eyes and lungs.
Utility knife and chisel , to widen the crack.
Wire brush or shop vacuum , to clean out dust.
Spray bottle , for misting the surface.
Stucco filler or elastomeric caulk , pick the right one for your crack size.
Finishing trowel and margin trowel , for shaping the patch.
Plastic sheeting , to cover the area while it cures.
For the filler, two popular options are QUIKRETE Stucco Repair and DAP Flexible Stucco Patch. Both stay flexible after they dry, which helps the patch move with the house.
Below is a simple table that compares these two fillers. Use it to pick the one that fits your project.
Product | Flexibility | Max Crack Width | Texture Match |
QUIKRETE Stucco Repair | High | ½ inch | Sand‑finished gray |
DAP Flexible Stucco Patch | Very High | ¾ inch | Paintable, sandable |
Pick the filler that covers the width of your crack and gives you the texture you need.
Pro Tip:Keep a small bucket of water nearby so you can mist the wall without running to the sink.
Bottom line:Gather safety gear, tools, and the right filler before you start breaking anything.
Step 3: Prepare the Crack Area , Clean, Widen, and Dampen
Cleaning is the first real step. Use a wire brush or shop vacuum to pull out loose bits. Dust and old stucco will stop new filler from sticking.
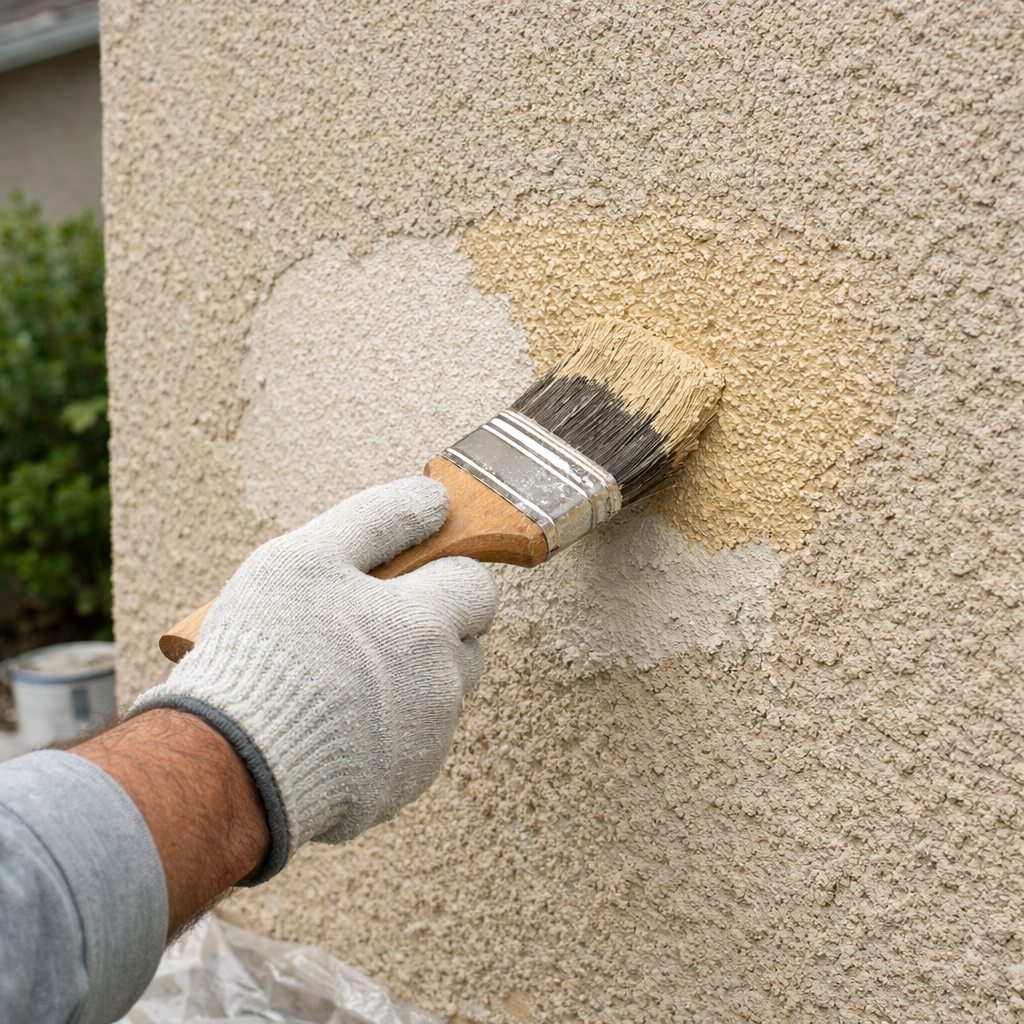
Next, widen the crack a little. A chisel and hammer can open the crack to at least ¼ inch deep. This gives the filler room to flow in and bond.Make the edges vertical or bevel them into an inverted V shape. This shape holds the filler like a key.Now dampen the area. Fill a spray bottle with water and mist the crack until the surface looks a little darker. You’re not soaking it , just adding a thin film of water.Why mist? Research shows that missing this step is the most common mistake that makes a repaired crack reopen. Wikipedia explains that moisture helps the new mix bond to the old substrate.Let the mist sit for a few minutes, then wipe away excess water with a rag. The surface should be damp but not puddled.Bottom line:Proper prep creates a solid base for the filler to hold.Step 4: Apply the Filler , Techniques for a Durable PatchLoad your filler into a caulk gun or scoop it into a bucket if it’s a pre‑mixed patch. Cut the nozzle tip at a 45‑degree angle. This helps the filler flow into the crack.Start at the top of the crack. Squeeze a steady bead of filler all the way down. Use a putty knife to press the filler into the sides.After the filler is in, smooth it with a margin trowel. Hold the trowel at a shallow angle and pull it across the crack, feathering the edges into the surrounding stucco.If the crack is deep, you may need to apply the filler in layers. Let each layer skin over for about 20 minutes before adding the next.For larger cracks, a bonding agent can improve adhesion. Mix a small amount of concrete glue into the filler before you apply it.Here is a quick visual cue of the technique.After you smooth, use a damp sponge to lightly blend the surface texture. The sponge should be just wet enough to leave a faint sheen.19%of guides miss the mist step, leading to future cracksLet the filler set until it feels firm to the touch. This usually takes 30‑45 minutes in moderate weather.Pro Tip:Work in sections no larger than 12 inches; you can finish each piece before the filler skins.Bottom line:Fill, press, and feather the patch while the filler is still pliable.Step 5: Cure the Repair Properly , Temperature and TimingCuring is where many DIYers slip up. The filler needs the right temperature and humidity to gain strength.Ideal temps are between 50 °F and 85 °F. Below 40 °F the filler may freeze; above 90 °F it can dry too fast and crack.Keep the humidity around 50 %, 60 %. If it’s very dry, mist the surface every few hours. If it’s humid, open a window or use a fan to circulate air.Cover the patched area with plastic sheeting. This traps moisture and slows the drying process, giving the filler time to cure fully."The best time to start building a solid stucco repair was yesterday."Most products say to wait at least 24 hours before painting, but a full 48‑hour cure is safer in cooler weather.Check the patch after 24 hours. Press gently with your fingertip , it should feel solid, not soft.Key Takeaway:Keep the repair in a moderate climate and protect it with plastic for at least a day.Bottom line:Proper curing prevents the patch from shrinking or cracking later.Step 6: Finish and Blend , Paint and Texture MatchingNow the patch is solid. The final job is to make it look like the rest of the wall.First, sand the surface lightly with 120‑grit sandpaper. This removes any high spots and creates a smooth base for paint.If the wall has a texture, you’ll need to match it. Use a sponge, a brush, or a small hand float to dab on a thin layer of the same stucco mix. Let it dry, then sand again.When the surface is even, apply a coat of primer. A masonry primer seals the patch and helps the paint stick.After the primer dries, paint with a color that matches the existing wall. Use an exterior‑grade acrylic paint for durability.For best results, paint in two thin coats, letting each coat dry fully before the next.Check the finished area after the paint dries. The patch should be invisible from a normal viewing distance.Pro Tip:If the texture still looks off, lightly dab a thin layer of joint compound and feather it before repainting.Key Takeaway:Sand, prime, and paint with matching texture to hide the repair.Bottom line:Proper finishing blends the patch with the rest of the wall for a smooth look.ConclusionRepairing a cracked stucco wall is doable with the right steps. You start by checking if the crack is a simple surface issue or something larger. Then you gather tools, clean and mist the crack, apply a flexible filler, let it cure under the right conditions, and finally blend it with paint and texture. Following these steps reduces the chance of the crack reopening and keeps your home looking fresh.If you want more details on plaster techniques or need a hand on a bigger job, to Working with Plaster. It covers mixing, applying, and finishing plaster in depth.Remember, a well‑prepped and properly cured patch will last for years. Take the time to mist, protect, and blend, and you’ll avoid the common pitfalls that many DIYers face.
Key Takeaway:Clean, widen, and lightly mist the crack before any filler goes in.


Comments