Essential Guide to Working with Plaster: Techniques, Tools, and Tips
- William McKracherne
- Jan 12
- 18 min read


Ever walked into a room and felt that smooth, flawless wall, only to wonder how it got that perfect finish?
That subtle, almost invisible layer is often plaster, the unsung hero behind every polished interior.
But plaster isn’t just about looks. It’s the backbone that hides wiring, seals cracks, and adds that sturdy base for paint or wallpaper.
In our experience at LGFMH Construction, we’ve seen homeowners stare at a cracked ceiling and instantly know plaster is the culprit.
Think about the last time you tried to hang a picture and the wall gave way – that’s plaster failing to do its job.
So, what exactly is plaster? At its core, it’s a blend of gypsum, lime, or cement mixed with water, creating a paste that hardens into a solid surface.
When applied correctly, plaster can level uneven surfaces, improve acoustics, and even boost a home’s resale value.
Now, imagine you’re prepping a living room for a fresh coat of paint. Without a solid plaster base, the paint would soak into the drywall, leading to streaks and a patchy finish.
That’s why a smooth plaster coat is the secret sauce for a professional‑looking paint job.
But not all plaster is created equal. Traditional lime plaster breathes, making it great for older homes, while gypsum plaster dries fast and is perfect for modern renovations.
And if you’re tackling a DIY project, remember: a little patience with each coat saves you time and money in the long run.
So, you might be asking: do I need a pro, or can I do it myself?
Here’s what we’ve learned – if the walls are already smooth and you’re comfortable mixing a small batch, a DIY approach works.
But for larger areas, especially where structural integrity matters, calling a trusted contractor ensures the job is done right the first time.
Ready to transform a tired wall into a masterpiece? Let’s dive deeper into the types of plaster, the tools you’ll need, and the step‑by‑step process that takes the guesswork out of the job.
TL;DR
Plaster creates a smooth, durable base that hides imperfections, improves acoustics, and ensures your paint or wallpaper adheres perfectly, saving you time, money, and future repairs.
Whether you DIY a small patch or hire LGFMH Construction for a full‑wall job, follow our step‑by‑step guide to achieve professional results without guesswork.
Step 1: Selecting the Right Plaster Type
Ever stood in front of a wall and wondered why some rooms feel solid while others seem to sigh under the weight of paint? The answer usually starts with the plaster you choose. Picking the right type isn’t just about color or cost—it's about how the material behaves over time, how it works with your existing structure, and even how it interacts with the climate in Virginia.
First, ask yourself: is the wall part of a historic home, a modern renovation, or a quick DIY refresh? That question sets the stage for the three most common plaster families: lime plaster, gypsum plaster, and cement‑based plaster.
1. Lime plaster – the breath‑of‑old‑houses champion
Lime plaster has been around for centuries. It’s breathable, which means moisture can move through the wall without trapping mold. That’s why we love it for Victorian or colonial homes where the original lath is still in place. A real‑world example? A client in Norfolk restored a 1905 cottage; we kept the original lime plaster because it prevented moisture‑related cracking that newer materials would have caused.
Key tip: lime plaster takes longer to cure (up to 28 days) and requires a slightly damp environment during application. If you’re patient and can control humidity, lime gives you a surface that ages gracefully.
2. Gypsum plaster – the speed‑demon for modern walls
Gypsum plaster, often called “drywall mud,” dries fast and is easy to sand. It’s perfect when you need a smooth finish in a week or less. In our experience, a homeowner in Virginia Beach wanted a fresh coat for a rental unit before the summer rush. Gypsum let us finish the brown coat, scratch coat, and finish coat in three days, keeping the unit market‑ready.
Watch out for the common pitfall: gypsum isn’t as moisture‑resistant as lime. In basements or bathrooms, pair it with a waterproof primer to avoid future peeling.
3. Cement‑based plaster – the heavy‑duty workhorse
If you’re dealing with exterior walls, high‑traffic hallways, or a garage conversion, cement‑based plaster is the go‑to. It bonds strongly to concrete or masonry and can handle temperature swings without cracking. A recent project turned an old garage into a studio apartment; we used cement plaster on the interior concrete walls, then added a decorative finish coat that looked like traditional plaster but had the durability of concrete.
Because it’s dense, you’ll need a sturdy trowel and a bit more elbow grease. The finish is slightly rougher, so plan for a light sanding step before painting.
So, how do you decide? Here’s a quick checklist you can print out:
Historic wood‑frame with original lath? → Lime plaster.
Interior walls, quick turnaround, smooth finish? → Gypsum plaster.
Concrete or exterior exposure, need durability? → Cement‑based plaster.
Once you’ve chosen, gather the right tools: a hawk, a stainless‑steel trowel, a mixing bucket, and a clean water source. Mix the plaster according to the manufacturer’s ratio—usually 1 part water to 2 parts powder for gypsum, a bit more water for lime.
Here’s a step‑by‑step you can follow right after you’ve selected your plaster:
Prep the substrate: clean dust, remove loose paint, and lightly dampen the surface.
Apply the brown coat (about 1/8 inch thick). Let it set until it’s firm but still slightly cool to the touch.
Scratch the brown coat with a scarifier or a notched trowel; this creates a “key” for the next layer.
Spread the scratch coat, level it, and let it cure.
Finish with the final coat, smoothing with long, even strokes. For a glass‑like finish, let it dry partially, then sand with fine‑grit sandpaper.
Seal with a suitable primer—especially important for gypsum or cement plaster before painting.
If you’re budgeting, keep in mind that plaster material costs are modest, but labor can be the bigger line item. Our own cost breakdown aligns with the How Much Does Interior Painting Cost: A Complete Guide , showing that plaster prep typically adds 5‑10% to the overall paint budget.
And while you’re thinking about space, consider that a well‑plastered wall can double as a backdrop for creative garage apartments. If you’re curious how others have turned a garage into a livable suite, check out this guide on Creative Garage Apartment Ideas for Every Budget for inspiration.
Remember, the right plaster type sets the foundation for everything that follows—whether it’s a fresh paint job, wallpaper, or a decorative finish. Take the time to match the material to the wall’s history and your project timeline, and you’ll avoid costly rework later.
Step 2: Preparing Surfaces and Tools
Now that you’ve picked the right plaster, the next thing that trips people up is getting the wall ready. If you skip this, even the best material will look patchy, and you’ll end up sanding forever.
First thing’s first – pull off any loose paint, wallpaper scraps, or old spackling. A putty knife or a simple scraper does the trick, but don’t go full‑force; you want the substrate intact, not a crater.
After you’ve cleared the surface, give it a good sweep or vacuum. Dust is the silent enemy of plaster adhesion – it’s like trying to stick a sticker on a dusty car window.
Does that sound like a lot of work? It is, but think of it as the foundation for a flawless finish. A clean, slightly damp wall lets the plaster bond like a handshake.
Speaking of damp, give the wall a light mist with a spray bottle. You’re not soaking it; just a fine mist that darkens the surface. This prevents the plaster from sucking moisture out of the wall too quickly and cracking later.
Here’s a quick visual guide that walks you through the prep steps.
While the video rolls, gather your tools. You don’t need a full‑blown workshop, but a few basics make the job smoother:
A sturdy hawk – the flat board you’ll rest plaster on while you work.
A stainless‑steel finishing trowel – it gives you that glass‑like surface.
A margin trowel or putty knife for tight spots.
A mixing bucket with a lid – helps keep the mixture from drying out.
A drill‑mounted paddle mixer (or a wooden stick if you’re old‑school).
Safety gear: gloves, goggles, and a dust mask.
In our experience, a good paddle mixer saves you minutes and keeps the plaster from lumping. Add the plaster to the bucket, then slowly drizzle water while the mixer whirls. Aim for a creamy, pour‑able consistency – think pancake batter, not oatmeal.
Once mixed, let it sit for a minute. That “slake” time lets the chemicals settle, making the plaster easier to spread. If it thickens too much, add a splash of water and give it a quick stir.
Now, about the trowel: a 12‑inch finishing trowel is a sweet spot for most interior walls. Hold it at a slight angle, press down, and pull forward in long, even strokes. The goal is to flatten the coat while you’re still wet – the plaster will smooth itself as it dries.
Don’t forget the hawk. Scoop a modest amount of plaster, then transfer it to the hawk with a swift flick. This keeps the bucket clean and reduces the chance of pulling dust back onto the wall.
Quick safety reminder: plaster contains lime or gypsum that can irritate skin and eyes. Gloves and goggles aren’t optional, especially if you’re sanding later.
Here’s a handy checklist you can print out before you start:
Clear wall of loose material.
Vacuum or sweep dust.
Lightly mist surface.
Gather hawk, trowels, bucket, mixer, and safety gear.
Mix plaster to pancake‑batter consistency.
Let mix slake 60 seconds.
So, what’s the next move after you’ve prepped? You’ll move straight into applying the brown coat, but that’s a story for the next step. For now, remember: a clean, damp wall and the right tools are the secret sauce that makes plaster behave.
If you ever feel stuck, give us a shout. LGFMH Construction has helped dozens of homeowners in Virginia get their walls ready without the guesswork.
Step 3: Mixing and Applying Plaster
Alright, you’ve got your wall misted and your tools lined up—now it’s time to turn that powder into a smooth, workable paste. Mixing plaster might sound like a chemistry lesson, but in practice it’s more like making pancake batter: you want it thick enough to hold together, yet fluid enough to spread.
First thing’s first: read the bag. Different brands and types (gypsum, lime, cement) have slightly different water‑to‑powder ratios. A common rule of thumb for gypsum is about 1 part water to 2 parts powder by weight, while lime often needs a splash more water to stay workable. If you’re unsure, start with a 10 % reduction in water and add a little at a time—trust your eyes.
Here’s a quick checklist you can keep on the bench:
Measure water in a clean bucket; cold water slows the set, warm water speeds it up.
Add plaster powder slowly while the mixer runs on low speed.
Watch for a smooth, lump‑free texture that looks like thin pancake batter.
Let the mix “slake” for 60‑90 seconds; this lets the chemistry settle and prevents flash‑setting.
Why does slaking matter? In our experience, a rushed mix often results in a hard‑to‑smooth surface that peels after a day or two. Giving the mix a minute to rest creates a more uniform consistency and reduces the risk of air bubbles.
Step‑by‑step mixing routine
Prep the water.Fill a bucket no more than three‑quarters full—too much water can dilute the plaster and waste time.
Start the paddle mixer.A low speed prevents splatter; once the water is swirling, sprinkle the powder in a thin, steady stream.
Blend until smooth.Scrape the sides of the bucket with a trowel to pull any stubborn lumps back into the mix.
Let it rest.Cover the bucket with the lid or a damp cloth and wait 60 seconds.
Give it a final stir.A quick spin ensures the mixture is still creamy before you start spreading.
Now that the mix is ready, let’s talk application. The key is to work fast but stay relaxed—plaster starts to set anywhere from 5 to 15 minutes depending on temperature and type. If the room is warm, you’ll have a narrower window.
Grab your hawk, scoop a modest amount—about the size of a baseball—and tap it onto the hawk with a quick flick. This motion keeps the bucket clean and reduces dust pickup. Then, with the finishing trowel angled slightly (about 15 degrees), press the plaster onto the wall in long, even strokes.
Start at the top of the area and work downward, overlapping each pass by about half the blade width. This overlapping technique eliminates ridges and creates a uniform thickness, typically around 1/8 inch for a brown coat. As you go, use the edge of the trowel to feather the edges into the surrounding wall—think of it as blending paint, not slapping on a new layer.
Real‑world examples
One of our recent Virginia Beach projects involved a 12‑ft by 10‑ft living‑room wall that had been patched repeatedly over the years. We mixed a gypsum batch at a slightly cooler water temperature (around 65 °F) to extend the working time. By applying the coat in 30‑second intervals and keeping the plaster on a damp surface, we avoided any “flash set” and finished the entire wall in just under an hour.
Another case: a historic home in Williamsburg required lime plaster. Because lime cures slower, we added a small amount of retarder and let the mix sit for 2 minutes before applying. The slower set gave us plenty of time to achieve a smooth, “hand‑troweled” look that matched the original period finish.
Tip: if you notice the plaster starting to skin over before you’re done, lightly mist the surface with water and keep the trowel moving. This trick buys you a few extra seconds without compromising the bond.
Final polish
Once the coat has begun to firm—test it by pressing a fingertip; it should feel cool but not sticky—run the trowel across the surface with a light, sweeping motion. This “polishing” step evens out any minor ridges and gives the plaster its characteristic glassy sheen.
After the plaster reaches the “leather‑hard” stage (usually 20‑30 minutes), you can back‑sand with a fine‑grit pad if you need a perfectly flat surface before priming.
Bottom line: the mixing stage sets the foundation for a flawless finish, and a disciplined, bite‑sized application method keeps you in control. Follow these steps, stay mindful of timing, and you’ll get a wall that looks like it was done by a pro—even if you’re doing it yourself.
Step 4: Finishing Techniques and Common Issues
Now that the coat is on the wall, the real artistry begins – turning that wet plaster into a surface you’d be proud to show off.
Do you ever stare at a freshly skimmed wall and wonder why some finishes look glass‑like while others feel like a rough stone patio? The answer lies in the finishing technique you choose and how carefully you avoid the usual pitfalls.
Popular finishes and when to use them
Here’s a quick cheat sheet of the most common plaster finishes we see in Virginia homes:
Finish | Typical Tool | Best For |
Neat (smooth) coat | 12‑inch steel trowel, water mist | Modern interiors, paint‑ready walls |
Float (rough) finish | Wood float, circular motion | French‑country vibe, hiding minor imperfections |
Sand‑cast | Fine sand mixed in, wood float | Basement ceilings, damp‑prone areas |
We love the neat coat for a clean, “ready‑to‑paint” look. It’s the default in most of our gypsum projects because repeated trowelling and a light mist of water keep the surface slick enough to compress the plaster without leaving air bubbles.
If you’re after a more rustic feel, the float finish—sometimes called a “rough cast”—lets you pull the aggregate to the surface with a wood float. The result is a tactile texture that can disguise a wall that isn’t perfectly plumb.
Sand‑cast is the unsung hero in damp basements. By sprinkling synthetic sand into the final coat, the surface gains a slight grit that helps the plaster breathe and resist moisture‑related cracking.
Want to see a visual breakdown of these finishes? John Canning & Co. offers a great overview of each style and how the toolwork creates the final look.Learn more about plaster finishes.
Step‑by‑step finishing routine
1.Let the coat firm just enough.When a fingertip feels cool but not sticky, you’re in the “leather‑hard” window (usually 20‑30 minutes). This is the sweet spot for a final polish.
2.Light mist and glide.Spritz a fine mist of water onto the surface, then pull the trowel across in long, overlapping strokes. Keep the blade at a shallow angle (about 15°) and let the water act like a lubricant.
3.Compress and smooth.Go over the same area twice, pressing gently to eliminate any small ridges. If you notice a ridge forming, re‑mist and repeat – the extra moisture prevents the plaster from skinning over.
4.Back‑sand if needed.Once the surface reaches “firm‑hand” (no longer leaves a dent with a fingernail), use a 120‑grit pad to knock down any high spots. Finish with a 220‑grit pad for a feather‑light feel before priming.
5.Seal promptly.Even the best‑finished plaster can soak up paint if you wait too long. A breathable primer applied within 24 hours locks in moisture and gives the paint a uniform base.
Common issues and how to dodge them
Even seasoned DIYers stumble into the same traps. Here are the top three and quick fixes.
Issue 1: Premature skinning.The plaster dries too fast, leaving a hard skin that cracks when you try to smooth it. Solution: keep a spray bottle handy and mist every 30 seconds. A cooler room temperature also buys you extra working time.
Issue 2: Uneven texture.One spot looks glossy while another stays matte. Solution: maintain consistent pressure with the trowel and use the same amount of water across the whole wall. If a patch is already uneven, lightly re‑wet and re‑trowel before it fully hardens.
Issue 3: Cracking after cure.This usually means the plaster was applied too thick or the substrate was too dry. The fix? Apply thin coats (no more than 1/8 in each) and always mist the substrate before the first coat. For existing cracks, a thin “scratch coat” followed by a finish coat will bridge the gap.
PatchitUP outlines many of these mistakes and why they happen, which can help you troubleshoot on the fly.Read about common plaster repair errors.
Quick checklist before you step away
Surface is cool‑to‑touch, not sticky.
All ridges have been compressed with a final glide.
Back‑sanded any high spots and wiped dust off.
Primer applied within a day.
Room humidity between 40‑60 % during cure.
Bottom line: the finish you choose sets the visual tone, and a disciplined polishing routine keeps the plaster from turning into a cracked, uneven mess. Follow these steps, keep the mist flowing, and you’ll end up with a wall that feels as smooth as a fresh‑drawn sketch.
Step 5: Cleaning, Maintenance, and Safety Tips
You've just polished that plaster to a glass‑like finish—feels great, right? But the work isn’t over yet. A little care now saves you from headaches later, and it keeps the surface looking showroom‑ready for years.
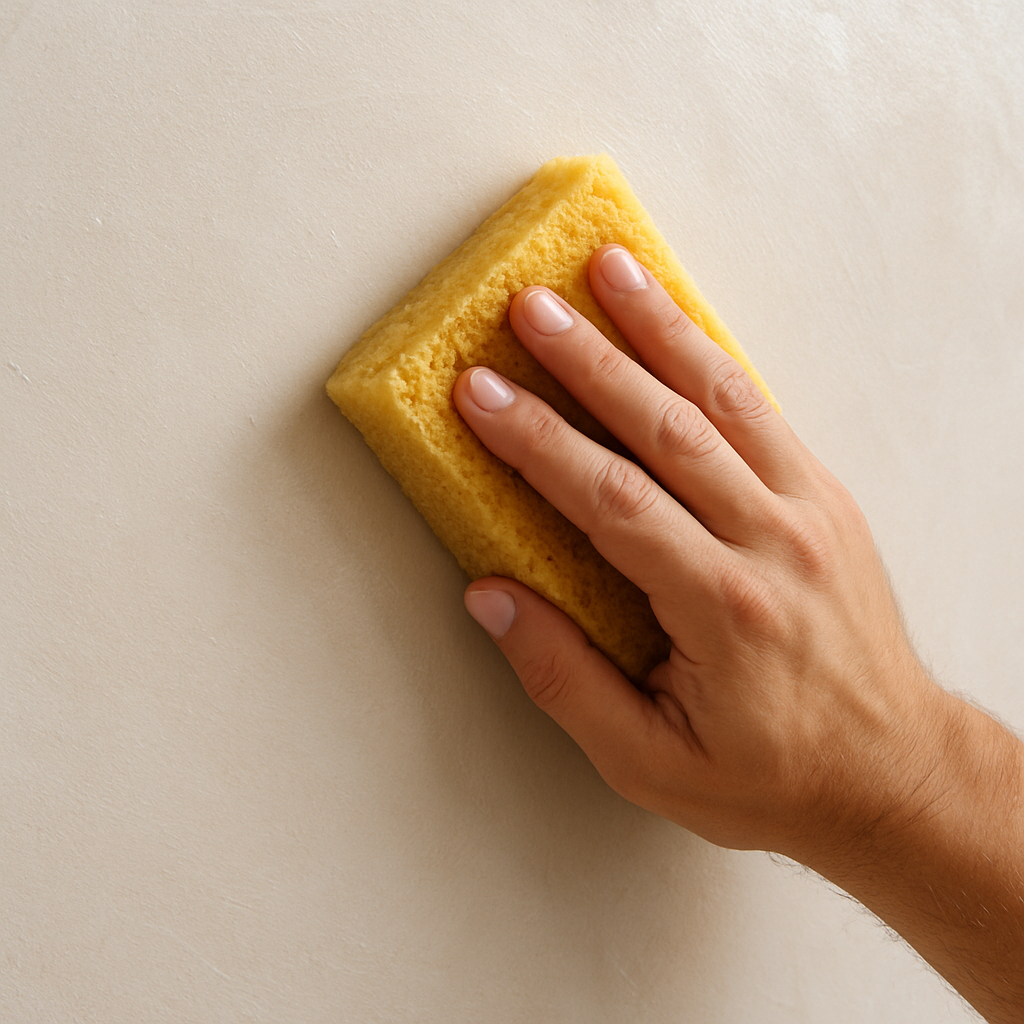
First things first: cleaning while the plaster is still slightly tacky. Grab a clean, lint‑free sponge, dip it in cool water, wring out excess, and lightly glide over the surface. You’ll see a faint mist of plaster dust lift away—don’t scrub, just let the water do the work. This step removes any stray powder that could dry into a rough spot.
What if you missed that window? No worries. Once the plaster has hardened, switch to a soft microfiber cloth and a mild dish‑soap solution. Test a tiny corner first; if the finish stays intact, wipe the whole area in circular motions. Avoid abrasive cleaners—those will scar the smoothness you just earned.
Routine Maintenance to Keep It Smooth
Even the best plaster likes a little regular TLC. A quick dust‑off with a vacuum brush attachment once a month prevents grit from grinding into the surface. If you notice a faint fingerprint or a smudge, a damp cloth (just water, no chemicals) will usually do the trick. Avoid abrasive cleaners—those will scar the smoothness you just earned.
Living in Virginia means humidity can swing a lot. When the air sits above 60 % for days on end, plaster can absorb moisture and feel a bit “soft” to the touch. Crack‑proof that by running a dehumidifier or simply opening a window for a short burst of fresh air. It’s a tiny habit that keeps the plaster from swelling or developing tiny hairline cracks.
Planning to hang a heavy shelf or a piece of art? Drill a small pilot hole into the plaster, then insert a wall anchor designed for gypsum or cement‑based surfaces. That extra step spreads the load and stops the plaster from cracking around the screw.
Safety First: Protect Yourself and Your Home
Plaster dust is more than just a nuisance—it can irritate lungs and eyes. Always wear a dust mask (N95 or better) and safety goggles when you’re sanding or cleaning up after a coat. Gloves aren’t just for comfort; they shield your skin from lime’s alkaline bite, which can cause a mild burn.
Ventilation matters, too. Open a window or set up a portable fan to push fresh air through the room while you work. If you’re using a spray bottle for misting, keep the nozzle fine‑mist to avoid over‑wetting the wall, which can lead to mold in damp corners.
And here’s a quick safety checklist you can print and tape to your toolbox:
Dust mask and goggles on before any sanding.
Gloves for handling plaster, especially lime‑based mixes.
Room temperature between 65‑75 °F; extreme heat speeds cure and can trap moisture.
Humidity 40‑60 % during cure and early maintenance.
Ventilate for at least 15 minutes each hour while cleaning.
Use only non‑abrasive cleaners on finished surfaces.
By treating your plaster like a living part of the house—cleaning gently, checking humidity, and safeguarding yourself—you’ll keep that sleek look without a second guess. And if you ever hit a snag, remember that a quick call to LGFMH Construction can help you troubleshoot before a small issue becomes a big repair.
FAQ
What is the difference between lime, gypsum, and cement plaster?
In a nutshell, lime plaster is breathable and soft‑setting, perfect for historic homes where walls need to let moisture escape.
Gypsum plaster dries fast, gives a smooth finish in a few days, and is the go‑to for modern interior walls.
Cement‑based plaster is heavy‑duty, sticks well to concrete or masonry and tolerates temperature swings, but it requires more elbow grease to smooth out.
Choose the type that matches your wall’s age, moisture level, and how quickly you need the job done.
How long should I wait before painting over freshly applied plaster?
The safe window is usually 24‑48 hours after the final coat has reached “leather‑hard” – that cool‑to‑touch, non‑sticky feel.
If humidity is high (above 60 %), give it an extra day to let excess moisture evaporate.
A breathable primer applied within that period helps seal the surface and prevents paint from soaking in unevenly.
Rushing the paint can trap moisture and lead to peeling later, so patience really does pay off.
Can I repair a small crack in plaster myself?
Absolutely.
Start by cleaning the crack with a vacuum to remove dust.
Apply a thin layer of plaster mix, feathering the edges with a putty knife so it blends with the surrounding surface.
Once the patch is firm but still pliable, smooth it with a wet trowel and let it cure fully – typically 24 hours.
Finish with a light sanding and a primer before repainting.
For wider cracks or structural issues, it’s best to call a pro.
Why does plaster sometimes develop a chalky surface?
A chalky finish usually means the plaster didn’t cure properly, often because the room was too cold or too dry.
Insufficient water in the mix can also leave a powdery residue.
To fix it, lightly mist the surface, let it hydrate for a few minutes, then smooth it again with a trowel.
After it fully cures, a primer will lock down any remaining dust and give you a solid base for paint.
How can I prevent mold from forming on plaster walls?
Ventilation is key.
Keep humidity between 40‑60 % during the curing phase and use a dehumidifier in damp seasons.
Apply a mold‑resistant primer especially in bathrooms or basements.
Also, avoid over‑wetting the wall during the misting step – a fine mist is enough to keep the substrate from sucking the mix dry too quickly.
Regularly inspect for water leaks and address them before they reach the plaster.
Is it safe to sand plaster without a mask?
No.
Dry plaster dust contains fine particles that can irritate lungs and eyes.
Always wear an N95‑type dust mask and safety goggles when sanding, even if you think the job is small.
A simple shop‑vac with a HEPA filter can capture most of the dust, reducing cleanup time and keeping the air cleaner.
Safety gear is a cheap insurance policy that pays off every time.
What tools do I really need for a DIY plaster project?
A sturdy hawk, a 12‑inch stainless‑steel finishing trowel, and a margin trowel for tight spots are the essentials.
You’ll also want a bucket with a lid, a paddle mixer (or a sturdy stick), and a fine‑mist spray bottle for misting the substrate.
Don’t forget safety gear – gloves, goggles, and a dust mask.
With these basics you can tackle a single‑room skim coat without renting a full toolbox.
Conclusion
Let’s take a breath and look back at what we’ve covered. You’ve seen how picking the right plaster—lime, gypsum, or cement—sets the tone, why a clean, slightly damp wall is non‑negotiable, and how a disciplined mixing routine keeps the paste from turning into lumps. We walked through the brown, scratch and finish coats, showed you how a light mist and a steady trowel give that glass‑like sheen, and reminded you to sand, prime, and protect the surface before the paint goes on.
The biggest takeaway? Plaster isn’t magic; it’s chemistry and patience working together. Keep humidity in the 40‑60 % range, mist the substrate every few minutes, and never rush past the leather‑hard stage. A quick back‑sand with 120‑grit then 220‑grit wipes out high spots, and a breathable primer within 24‑48 hours seals the deal.
So, what’s next? Grab your hawk, mix a fresh batch, and apply one thin coat at a time. If you’re ever unsure, pause, check the surface temperature with the back of your hand—cool means you’re in the sweet spot. And remember, a sturdy wall anchor can save a heavy shelf from cracking the plaster later.
Here’s a tiny checklist you can print and stick to your toolbox: • Choose plaster type that matches the wall’s age and moisture level. • Clean, vacuum, and mist the surface. • Mix to pancake‑batter consistency and let it slake 60 seconds. • Apply thin coats, mist, polish, back‑sand, prime. • Maintain 40‑60 % humidity during cure and wear a dust mask when sanding.
If any step feels overwhelming, a quick call to LGFMH Construction can save you hours of guesswork. We’ve helped dozens of Virginia homeowners turn shaky walls into smooth canvases, and we’re happy to lend a hand.


Comments