Staining: A Practical Guide to Techniques, Types, and Tips
- William McKracherne
- Jan 28
- 18 min read

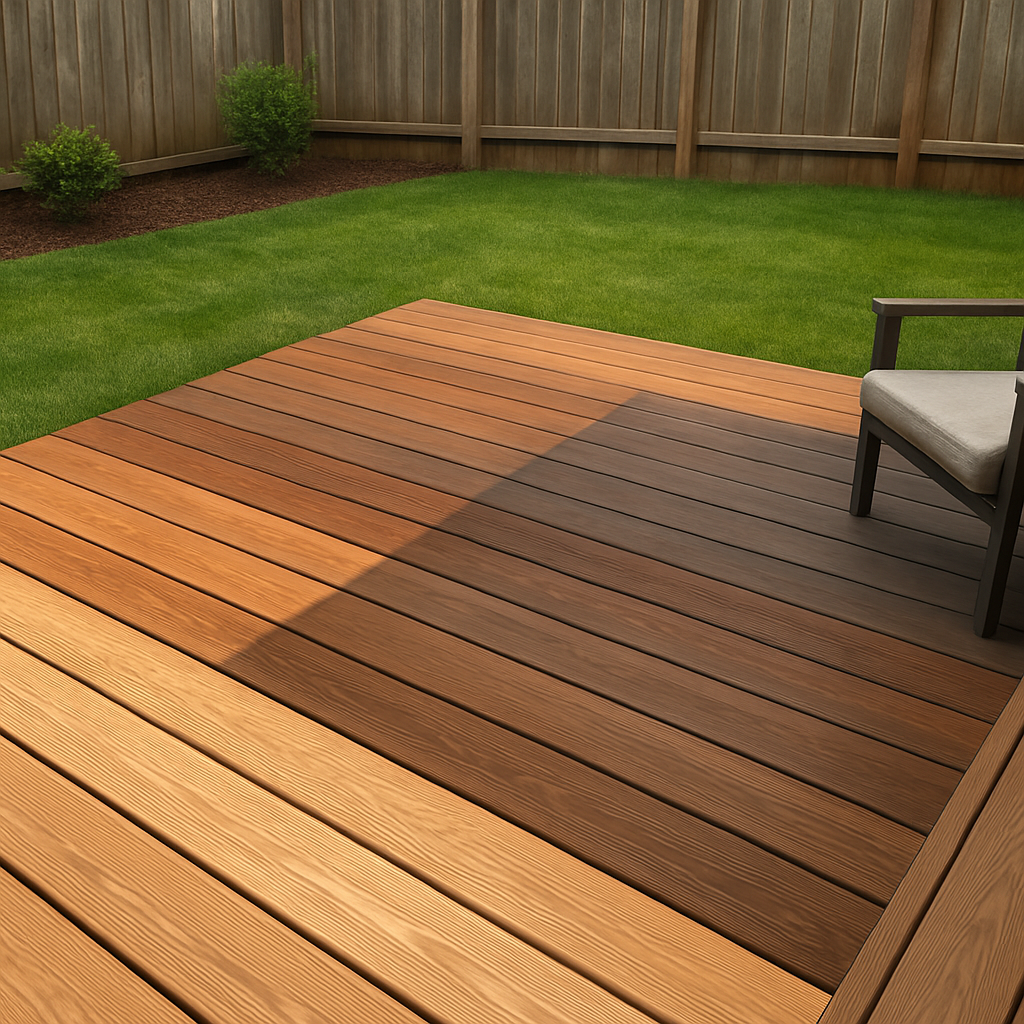
Ever stared at a porch, deck, or kitchen counter that just looked… oh, it’s stained? You’d think a coat of paint would do the trick, but a good stain can make wood look alive, like it’s been breathing for years.
Staining is that secret sauce that brings depth and protection to wood while still letting the grain shine through. The trick? Choosing the right product, prep, and a steady hand. It’s a little bit of art and a lot of science, and if you get it wrong you’ll end up with a blotchy, grayish mess that feels like a bad mood.
We’ve all seen those DIY videos that promise a “one‑step” stain job, and yet the finish looks more like a watercolor wash than a finished deck. That’s why the first step is all about preparation. Start down the surface, clean off old wax, and if the wood is seasoned or weather‑exposed, you might need a wood conditioner.
Let’s put this into a real‑world context. Picture a sun‑tapped porch in Virginia Beach that’s seen more summer than winter. If you skip the conditioner, the stain will soak unevenly, leaving dark pockets that look like stains of mildew. The result? A porch that looks more like a work of art gone wrong.
The good news is staining is a straightforward process once you’ve got the prep down. Start with a light coat, let it dry, then wipe off the excess. Repeat until you’re happy with the hue. And remember: always test on a hidden area first—you’ll save yourself a lot of regret later.
Curious how much a professional staining job costs and what to expect? How Much Does Interior Painting Cost: A Complete Guide walks you through pricing, material choices, and budgeting tips—exactly what you need before you grab a brush.
While you’re planning your next home improvement project, you might also want to streamline your content creation. If you’re a homeowner or contractor looking to share tips, discover the top features of a content automation platform and see how it can help you keep your marketing organized.
Now that you’ve seen what staining can do, the next step is simple: pick the right stain, prep the wood, and start applying. With a few passes and a little patience, you’ll have a finish that looks like it’s been polished for a decade.
TL;DR
Staining transforms tired wood into a living canvas, revealing grain while shielding against weather, so you can enjoy a porch that looks freshly polished for years. Follow prep routine, apply a light coat, wipe excess, repeat for depth, and test a hidden spot first—this cuts touch‑ups and keeps wood fresh.
Understanding Staining: Types and Applications
When you think of staining, the first thing that pops up is probably a deck or a kitchen counter. But the term actually covers a whole family of finishes that protect and highlight surfaces—from wood to concrete to metal. In this deep‑dive, we’ll unpack those families and give you the tools to pick the right one for your project.
What Staining Really Is
Staining isn’t just paint. It’s a translucent or semi‑opaque layer that lets the grain or texture of the substrate shine through while adding color and durability. Think of it as a window that still lets the view in.
The Big Three
Wood Staining – Classic or Glossy?
Wood is the most common canvas. A clear stain preserves the natural look; a tinted one adds warmth; a high‑gloss finish gives that showroom shine. The trick is to match the wood species—hardwoods like oak need a slightly different preparation than softwoods like pine.
Concrete Acid Staining – A Quick Take
Concrete isn’t a stranger to staining. Acid staining uses a chemical reaction to pull color into the pores of the slab, producing a variegated, almost marble‑like finish. It’s durable, UV‑resistant, and low‑maintenance. If you’ve ever seen a modern loft with that speckled look, it’s probably acid stained concrete. For more on this specialty, see the discussion on acid staining for concrete flooring.
Metal Staining – The Rustic Edge
Metal surfaces can be stained with rust‑based pigments to create a weathered, antique look. It’s popular on patio railings or outdoor furniture, giving a “weathered” aesthetic without actual corrosion. A light sealer protects the finish so the metal stays functional.
Choosing the Right Stain for Your Project
Start by asking yourself: What’s the primary function of the surface? If it’s a porch that sees foot traffic, you need a stain that resists wear. If it’s an interior wall, a lighter tint will keep the room feeling airy.
Next, consider exposure. Outdoor wood should get a weather‑resistant finish; concrete in a garage might need extra UV protection; metal on the outside should have a protective top coat to prevent rust.
Finally, think about maintenance. Wood stains usually require a touch‑up every 2–3 years; concrete acid stains can go decades without re‑staining, while metal stains might need a re‑coat after 5–7 years.
Do you have a particular project in mind? Take a quick inventory of the materials and exposure level, then match it to the staining type that aligns best.
While the video gives a hands‑on look at the process, the key takeaway is that staining isn’t just a one‑step task. It’s about preparation, selection, and the right finish for the right environment.
Choosing the Right Stain for Your Project
Alright, let’s get practical. Picking a stain isn’t a guess‑work game; it’s a simple play‑by‑rules exercise that saves you time, money, and a lot of frustration later.
1. Map Out Your Surface
Start by taking a hard look at what you’re treating. Is it a wooden deck, a concrete patio, or metal railings? The substrate sets the tone for everything that follows.
For wood, identify the species—hardwood like oak behaves differently than softwood pine. For concrete, check if it’s a slab, pavers, or stamped tile. Metal might be stainless steel or an old iron railing that needs a fresh coat.
2. Check the Exposure Level
Ask yourself: how harsh is the environment? Does the surface get direct sun all day? Is it exposed to rain, snow, or even a lot of foot traffic?
Outdoor wood that faces the sun head‑on needs a weather‑resistant stain with UV blockers. A backyard concrete that sits under a shed might get fewer UV rays, so a lighter acrylic topcoat could suffice.
Metal outdoors is a different beast; it can rust if not sealed properly. A rust‑inhibiting primer followed by a protective sealant keeps the look intact.
3. Decide on the Finish
Stains come in clear, semi‑opaque, or tinted varieties. Clear lets the grain show through—great for a natural look. Semi‑opaque adds subtle color while still revealing texture. Tinted gives that dramatic, deep‑colored vibe.
If you want a glossy shine, opt for a high‑gloss stain on a polished deck. A matte finish works nicely on a rustic porch or a concrete slab that should look understated.
4. Match Color to Mood
Think of the space’s vibe. A warm amber stain feels cozy in a living room deck, while a cool gray works well on a modern concrete patio. Use paint chips or sample swatches to see how light changes the color at different times of day.
5. Pick the Right Product Type
Wood Stain: For exterior decks, look for a marine‑grade stain with high UV protection. Inside, a satin or semi‑gloss is fine if you’re painting a kitchen island or trim.
Concrete Acid Stain: If you want that speckled marble look, acid stain is the way to go. It’s low‑maintenance and can last decades with a topcoat.
Metal Stain: Choose a rust‑based pigment and seal it with a clear polyurethane. This combo gives a weathered aesthetic without actual corrosion.
6. Apply in the Right Conditions
Weather matters. Stain on a wet or windy day? Not a good idea. Aim for mild temperatures, no direct rain, and low humidity.
Use a brush, roller, or sprayer—whichever feels comfortable. Start at the top, work your way down, and wipe off excess after the recommended dry time.
7. Plan Your Maintenance Schedule
Know when to touch up. Wood stains usually need a quick coat every 2–3 years. Concrete acid stains can sit for 10+ years before re‑application. Metal might need a new topcoat after 5–7 years.
Set a calendar reminder and keep a small stash of the same stain. A quick touch‑up keeps the surface looking fresh and protects the material from the elements.
8. Final Checklist Before You Call It Done
Did you test a hidden spot first? If the finish looks off, you can always re‑apply before the whole project.
Has the surface fully dried? A sticky coat can ruin the look.
Are you satisfied with the depth and color? If not, a second coat will usually help.
When all those boxes are checked, you’ve not only chosen the right stain but also set yourself up for a durable, beautiful finish that’s worth the effort.
Quick Actionable Takeaway
Grab a sample kit, run a test on a hidden corner, and if it looks good, you’re ready to apply. Keep that little box of stain handy for touch‑ups every few years, and you’ll have a surface that stays gorgeous for the long haul.
Stain Application Techniques: From Wood to Fabric
Ready to give your deck, table, or even your sofa a new look? Staining is less about a brushstroke than about timing, temperature, and a few tricks that turn a dull surface into something that feels alive. Below, we walk through a step‑by‑step playbook that works whether you’re working on timber or treating a fabric canvas.
1. Prep: Get the Surface Ready
Before the first swipe, you gotta make sure the base is clean. If you’re on wood, start with a light sanding—120 grit to get rid of old sheen, then 220 grit for a smooth finish. For a deeper dive, check out Minwax’s guide on wood staining . If it’s a fabric, run a dry brush through the weave to lift fibers and remove any dust. Remember, a dry surface is the key; any moisture will make the stain tacky and uneven.
2. Pick the Right Stain Medium
Wood stains come in oil‑based, water‑based, and alkyds. Oil‑based gives richer depth but takes longer to dry; water‑based is quick and easy but can be less penetrating. For a project that’s visible all day, we often lean oil‑based because it’s forgiving if you miss a spot. For a quick weekend job, water‑based saves time.
3. Apply Like a Pro: Brush, Cloth, or Roller?
Each tool has a personality. A stiff‑bristle brush is great for boards with a lot of grain because the bristles sit in the pores. A lint‑free cloth is perfect for fabric or smooth wood; you can wipe in the direction of the grain to avoid streaks. Rollers are handy for large, flat surfaces, but you need a roller cover that won’t trap fibers on a fabric.
4. Layering for Depth: One Coat or Two?
If you want that “deep‑rich” look, apply a second coat after the first one dries. But here’s the trick: don’t let the first coat dry completely on the surface—just give it a thin film, let it soak, and then wipe the excess. That way, the second coat blends in nicely, avoiding a “layered” or patchy effect.
5. From Wood to Fabric: Adapting Techniques
Staining fabric feels like painting a canvas. First, pick a stain designed for textiles—usually a water‑based dye that won’t shrink the fibers. Test a hidden corner, just like you would on wood. Apply with a spray bottle or a small brush, keeping strokes light. If you’re staining a wooden table that also has fabric cushions, treat the wood first, then the fabric; the cured wood won’t bleed onto the textile.
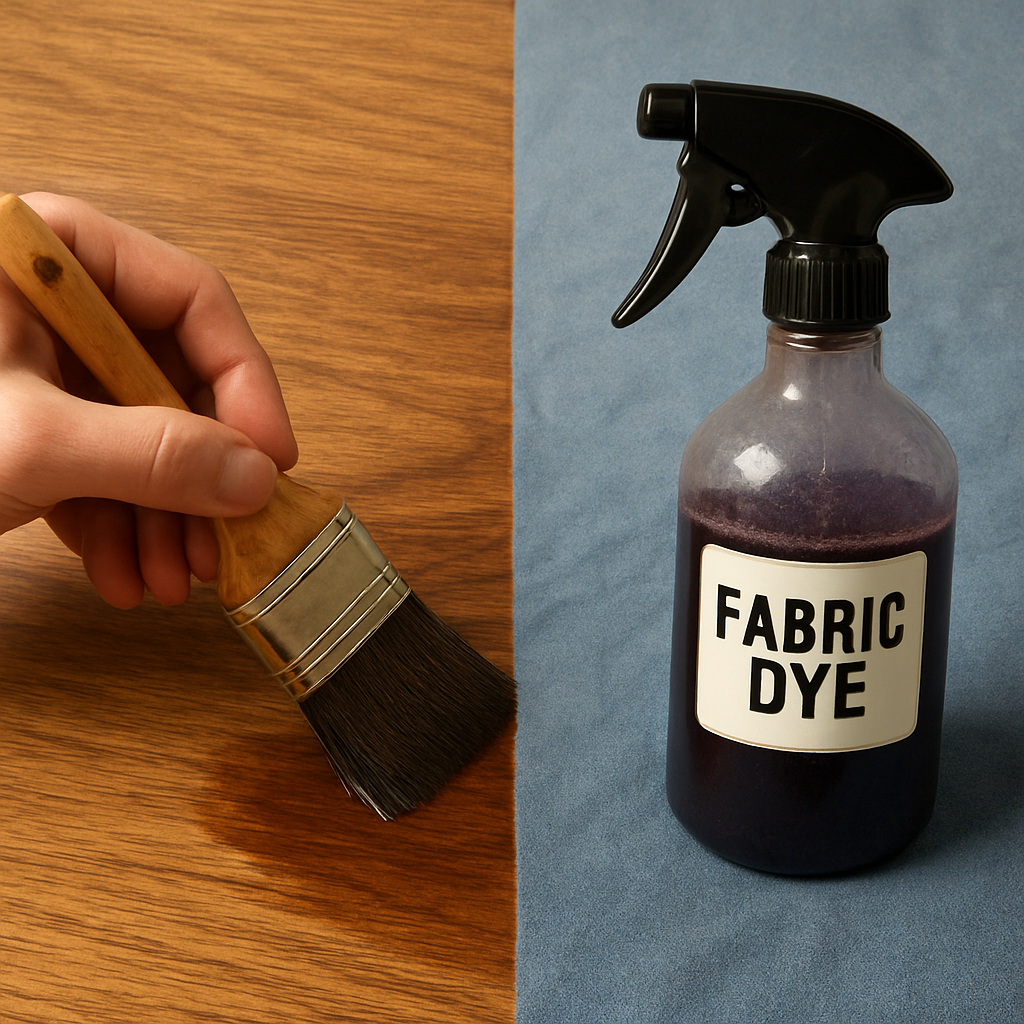
What about the color depth? In both wood and fabric, the longer the dye sits, the richer the shade. For a dramatic result on a dark table, let the stain sit for 30 minutes, then wipe off the excess. For a lighter, more translucent finish on a linen throw, keep the application thin and let it dry quickly.
6. Final Touches and Curing
Once you’ve wiped away the surplus, let the stain dry in a dry, well‑ventilated area. For wood, a curing time of 24 hours before applying a clear topcoat is ideal. Fabric should be air‑dry for at least 12 hours before any pressure or folding. A quick check: if the surface feels tacky, give it a little more time.
Quick Checklist
Surface clean and dry? ✅
Correct stain medium chosen? ✅
Proper tool for the job? ✅
Tested in a hidden spot? ✅
First coat wiped to excess, second coat layered? ✅
Cured before handling? ✅
Staining isn’t just a coat of color; it’s an art that respects the material’s nature. With the right prep, tools, and patience, you’ll have a finish that feels like a natural extension of the surface—whether it’s wood or fabric. Happy staining!
Troubleshooting Common Staining Problems
1. Blotchy Boards – The Classic “What Went Wrong?”
Ever finish a board only to spot a patch that looks like a coffee stain? Blotching shows up when some parts soak up more stain than others. It’s usually the grain’s natural unevenness or a hidden moisture spike.
Here’s a quick cure: break the panel into smaller sections. Apply the stain, wipe each strip as you go, and let a thin film set before moving on. If the blotch sticks around, give the board a light sanding with 150‑grit grit, then wipe off any leftover color.
So, what should you do next when the board looks uneven? Treat each area like a new canvas—think small, wipe often, and keep the surface as even as possible.
2. Too Fast Drying on Water‑Based Stains
Water‑based stains love the sun. They can dry in a flash, leaving you with a quick‑wipe spot that’s still tacky—just like a coffee that’s brewed too hot.
Slow the process: switch to a thicker, oil‑based or gel stain, or keep the room cooler. If you’re stuck with a quick‑dry coat, try wiping it off with a clean cloth before the surface feels completely dry.
Does that sound doable? Absolutely—just a few minutes of patience goes a long way.
3. Over‑Wiping and a Lighter Than‑Expected Finish
More wiping equals less color. You might be aiming for a deep mahogany but end up with a whisper of amber.
The fix is simple: apply a second, light coat and wipe only a few inches off the edge. Keep the first coat on the surface longer if you want a richer base—what we call a “dirty wipe.”
Got a light coat that looks shy? A tiny second layer can bring the depth back.
4. Dark End Grains on Cabinet Doors
Cabinet doors often finish darker at the edges because the grain is rougher. The solution? Sand the end grain smooth before you ever touch a brush.
If the door is already finished, switch to a spray instead of brushing. A spray eliminates the need for a wipe‑off, so every square gets the same amount of stain.
Need a quick tip? A light coat of wood conditioner helps the stain spread evenly on those rough edges.
5. Machine Marks Showing Through the Finish
Those tiny scratches from a jointer or planer can get magnified by a clear coat. Sand them out with #150 grit before you start staining.
After sanding, wipe with a tack cloth so no dust lingers. This keeps the grain looking natural and prevents a shiny “washboard” look.
What’s the takeaway? Treat any roughness before you finish—your final look depends on it.
6. Inconsistent Color Across the Same Wood Species
Different boards in one panel can pull in stain at different rates. When you notice one board is lighter, add a bit of the same stain to a small cup, mix, and apply a thin layer over the light spot.
Remember, you’ll never get an exact match, but you can dramatically cut the contrast. A quick test panel can save you from a whole project in the wrong hue.
Does that feel realistic? Absolutely—most folks hit this snag when working with mixed grain.
7. Stain Not Dark Enough
If the color feels shy, it’s often because the pigment ratio is low. Switching brands or adding a small amount of dye to your current stain can help.
Alternatively, sand to a coarser grit—#120 instead of #150—and let the wood absorb more dye. Just remember not to over‑sand; you’re still preserving the grain’s character.
Want a richer tone? Mix a drop of the same stain into the coat you’re applying.
8. Poor Coverage in Recessed Corners
Spray stains sometimes miss tight corners. Lower the spray pressure to just enough to coat the surface, then brush into the corners after a quick wipe.
A small brush will get the paint where the nozzle can’t reach, and you’ll avoid a patchy look. If you’re using a roller, use a thin roller cover that won’t trap fibers in those nooks.
Need a final sanity check? Test a small hidden spot before committing to the whole corner.
Problem | Common Cause | Quick Fix |
Blotching | Uneven grain absorption | Apply in small strips, wipe each |
Fast drying | Water‑based chemistry | Use thicker or oil‑based stain |
Too light | Excessive wiping | Apply second coat, reduce wipe |
Dark edges | Rough end grain | Smooth sand, spray stain |
Machine marks | Unfinished scratches | Sand with #150, tack‑cloth wipe |
Inconsistent color | Different grain uptake | Mix extra stain, thin coat |
Shy color | Low pigment ratio | Switch brand or add dye |
Corner gaps | Spray misses | Lower pressure, brush in corners |
Need a deeper dive? Check out this handy guide on common staining problems and their fixes: Common Staining Problems and Fixes .
Environmental & Safety Considerations in Staining
Why it matters
When you’re reaching for that glossy finish, the first thing that usually comes to mind is how the stain looks. But a lot of folks overlook the behind‑the‑scenes work—what’s in that bottle, how you breathe it, and how you get rid of the leftover stuff. Skipping these steps can leave you with a toxic mess that’s bad for the planet and for your own health.
1. Know the ingredients
Stains can be oil‑based, water‑based, or even solvent‑based. Oil‑based stains hold more pigment but bring stronger fumes and higher VOC levels. Water‑based stains are friendlier to the air but may need more coats to get the same depth. Before you pick a brand, ask the rep: are there any low‑VOC or non‑toxic options? That way you’re already doing a favor for the environment.
2. Personal protection is a must
Wear a mask—a respirator that filters organic vapors keeps your lungs clear.
Gloves and goggleskeep skin and eyes safe from splashes.
Ventilate the area, even if you’re indoors. Open windows, crank fans, or use a small exhaust fan if you have one.
Think of it like a simple kitchen safety routine—no one wants a burn or a nasty smell lingering for weeks.
3. Ventilation: the unsung hero
Staining usually happens outdoors, but when you’re working on an interior trim or a small closet, you’ll need to create a good airflow. A temporary setup with a window fan pointed outside pulls the fumes out fast. If you’re in a tight space, consider a HEPA filter or a dedicated chemical fume extractor. A good rule: keep the air moving for at least an hour after you finish.
4. Waste disposal gets tricky
Stain containers, rags, and leftover paint are considered hazardous waste because of the chemicals. Don’t just toss them in the trash or dump them on a patio. Check your local regulations—most cities have hazardous waste pickup days or drop‑off points. If you’re a DIYer, a simple solution is to soak rags in a bucket of water until the color fades, then seal them in a plastic bag for a curbside pickup.
5. Reuse and recycle when possible
Some brands offer refillable containers or a “stain return” program. If you’re working on a big deck, you can collect excess stain in a sealable jar and use it for touch‑ups later. Rubbing a clean rag across a painted surface can capture a lot of pigment you can reuse.
6. The little details that save big
Use a paint tray liner to catch drips—those tiny spills can seep into wood and create long‑term stains. Keep your workspace clean to avoid contaminating future projects. And always read the label for specific safety warnings—some stains advise against using on certain surfaces or under certain temperatures.
Quick Takeaway
Think of staining like cooking a meal: the ingredients matter, the heat matters, and the cleanup matters. Pick low‑VOC options, protect yourself, keep the air moving, and dispose of waste responsibly. Those steps keep the job safe and the environment happy.
Staining Trends: Modern Techniques & Finishes
When you’re eye‑banging a new look for a porch, a deck, or even a kitchen counter, the old “pick a color, sweep it on” routine feels stale. The paint industry has evolved, and so have the staining tools and finishes you can pull off. Below is a quick list of the most talked‑about trends—no fluff, just what you can try right now.
1. Semi‑Transparent “Wash” Stains
These are like a light mist of color that lets the grain show through. The trick is to apply with a rag, not a brush, and wipe off excess while the stain is still tacky. The result? A subtle depth that feels like natural weathering instead of a hard‑on coat.
2. UV‑Shielded Low‑VOC Finishes
If you’re working outdoors, UV protection is a game changer. Modern low‑VOC formulas keep the color bright for years and reduce fumes for the crew. In our experience, the decks we finish with these stains stay vibrant longer than the standard high‑VOC options.
3. Two‑Step “Tint + Clear” Method
First, apply a color‑infused primer that pre‑sets the tone. Then, top it with a clear sealer that adds gloss or satin. This split keeps the grain visible and locks in the color, giving a more polished look than a single tinted coat.
4. Gel‑Based Stains for Uneven Surfaces
Gels stick where liquid stains slip. They’re great for sloped decks or boards with a lot of grain variation. The consistency means you don’t need to keep wiping, and you get an even finish even on a rough surface.
5. Eco‑Friendly Plant‑Derived Pigments
These stains come from natural sources like beetroot or walnut husks. They’re biodegradable, non‑toxic, and give a warm, earthy hue. They’re perfect for projects where you want to keep the environment happy.
6. Smart “Dry‑to‑Touch” Sealers
Newer sealers dry quickly—often within 15 minutes—so you can finish the job in a single day. That’s a huge time saver and reduces the chance of dust settling on a wet coat. Just test a small patch first; the quicker dry time means you need to be precise.
7. Textured Finish Additives
Think of a slight sand or micro‑aggregate mix that you stir into the stain. The result is a subtle grain effect that mimics stone or old planks. It’s an easy way to add character without the cost of a new material.
8. “One‑Drop” Stain Kits for DIYers
These kits combine stain, sealer, and a quick‑dry brush in a single container. The idea is to get the job done in a weekend with minimal cleanup. If you’re not a pro, this can be a lifesaver.
9. Color‑Consistent “Stain‑Cushion” Pads
For those that need a precise match across multiple boards, a padded pad holds a small amount of stain that you can squeeze out. The pressure builds the same way every time, giving you a uniform look even on uneven wood.
10. “Sustainable” Refinish Programs
Some companies now offer a take‑back program for old stains and rags. You send the waste back, and they recycle or dispose of it properly. That keeps your project green and compliant with local regulations.
So, which trend should you jump on first? Start with the semi‑transparent wash if you’re after a natural look, or the UV‑shielded low‑VOC finish if you’re in a hot, sunny spot. Whatever you choose, remember that the right technique matters as much as the right product. Test on a hidden panel, apply in thin layers, and let each coat dry before moving to the next. That way, you keep the grain breathing while protecting the surface for years.
FAQ
What’s the best way to start a staining project on a wooden deck?
First, clear the deck of all furniture, sweep away debris, and give it a good wash with a mild detergent. Let it dry completely. Then sand lightly with 120‑grit to open the pores, followed by a 220‑grit finish to smooth any rough spots. After sanding, wipe the surface with a tack cloth to catch dust. Test a small hidden board before you paint the whole deck – it saves you a lot of hassle later.
How long should I wait between coats of stain?
Most oil‑based stains need 24 hours, while water‑based ones can often dry in 6 to 8 hours. The key is to feel the surface; if it’s still tacky or sticky, give it more time. A quick touch test—run a finger over the surface—will tell you if it’s ready. Waiting too long can cause the next coat to blotch.
Can I use the same stain on both wood and metal surfaces?
Not really. Wood and metal have different absorption rates and oxidation tendencies. Wood stains are formulated to penetrate fibers, whereas metal needs a primer to prevent rust and a clear sealer to lock in color. Mixing them can lead to uneven finish or corrosion. Stick to a product designed for the specific material.
What’s a common mistake that makes a stain look uneven?
Wiping too hard or too quickly is a classic culprit. When you wipe, aim for a light, even pass that removes excess without pulling the pigment from the surface. Also, avoid applying paint when the surface is wet or humid—both conditions cause the stain to dry unevenly, creating blotches or streaks.
How often do I need to touch up a deck that’s been stained?
Typically, a well‑finished deck will hold up 2 to 3 years before a touch‑up is needed. If your deck gets heavy foot traffic or sits in harsh sun, consider a yearly check. Keep a small stash of the original stain in a sealed container for quick spot‑repainting; this keeps the color consistent and saves you a full repaint.
Is it safe to leave staining materials on a patio for a day?
Yes, but you must store them in a well‑ventilated area, away from heat or direct sunlight. Keep containers sealed and child‑proof. If you’re using oil‑based stain, consider a vapor‑tight container to reduce fumes. Never leave the area unattended if you’ve applied a thick coat—just like any wet paint, it can be a slip hazard.
What should I do if my stain drips onto a nearby carpet?
Act quickly. Use a clean, dry cloth to blot the stain—never rub, or you’ll push pigment deeper. If the stain has dried, gently scrape it off with a plastic scraper and then clean the area with a mild soap solution. For tough spots, a gentle mixture of vinegar and water can lift the residue without damaging the carpet fibers.
Conclusion
Let me wrap this up with a quick recap that feels more like a coffee chat than a textbook summary. First, remember that staining is less about the paint job and more about the story you want the surface to tell. If your deck has already seen a few summer parties, a quick touch‑up of the original stain keeps the color honest without a full re‑coat.
Next, think of maintenance as a calendar event. Set a yearly reminder, keep a spare jar, and you’ll dodge surprise sun damage or muddy footprints. When you notice a faint blotch, a light sanding and a fresh coat will rescue the look faster than you think.
What about the finish? A clear topcoat protects against weather, and a low‑VOC option keeps the air cleaner for both you and your neighbors. If you’re feeling adventurous, try a semi‑transparent wash for a natural, weathered vibe that ages gracefully.
So, what’s your next move? Grab a small sample, test it in a hidden spot, and then roll out the color. If the results hit the mark, apply the same technique across the area. The best part? You’ll have a surface that looks fresh and feels like it’s been hand‑picked for you.


Comments