A Complete Guide to Installing Sheetrock for DIY Home Renovations
- William McKracherne
- Jan 11
- 19 min read

You walk into a room and the walls feel flat, silent, and somehow unfinished—like a canvas waiting for its first brushstroke.
That moment is the exact spot where sheetrock steps in, turning raw plasterboard into a solid, paint‑ready surface that hides the chaos behind the studs.
In our experience at LGFMH Construction, we’ve seen homeowners stare at cracked, water‑stained panels and wonder if a simple fix exists. The answer? Often it’s just a matter of knowing the right sheetrock type, how to prep it, and when to call in the pros.
So why does sheetrock feel like both a blessing and a headache?
Because it’s versatile enough for any room—bedrooms, kitchens, basements—but each environment brings its own quirks. Moisture‑rich bathrooms demand moisture‑resistant green board, while a high‑traffic hallway benefits from extra‑dense, impact‑rated panels.
Imagine you’re renovating a family home and the old walls are riddled with nail pops and patchwork drywall. You could keep patching, but over time the seams become a visual maze. Replacing the sheetrock gives you a fresh, seamless surface that’s easier to finish and lasts longer.
Here’s the promise of this guide: we’ll walk you through the basics of choosing the right sheetrock, prepping your walls, and spotting the signs that you need a professional touch—without drowning in jargon.
Ready to turn those unfinished walls into a foundation you can actually be proud of? Let’s dive in and demystify sheetrock, one simple step at a time.
One of the biggest misconceptions we hear is that any piece of drywall will do the job. In truth, sheetrock comes in different gauges, from 3⁄8‑inch panels for ceilings to 5⁄8‑inch for walls that need extra strength. Picking the wrong thickness can lead to sagging or nail‑pop problems down the line, something we’ve helped countless homeowners avoid by doing a quick thickness check before the first screw hits the stud.
TL;DR
Choosing the right sheetrock—whether moisture‑resistant green board for bathrooms or extra‑dense panels for high‑traffic hallways—prevents sagging, nail pops, and costly repairs later. Follow our step‑by‑step guide to assess thickness, prep walls, and know when to call LGFMH Construction, so you can finish your project confidently and avoid endless patchwork today.
Step 1: Preparing the Workspace
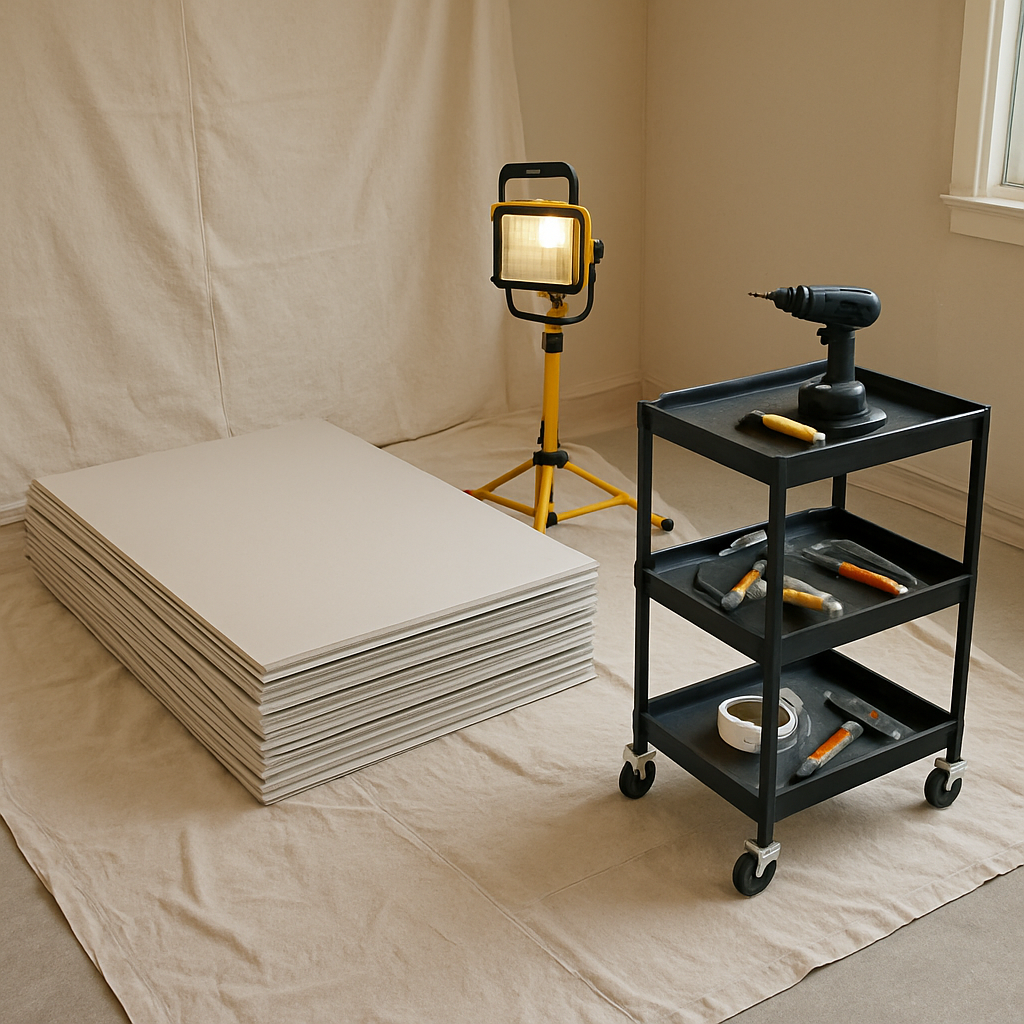
Before the first sheet of sheetrock ever meets a stud, you need a workspace that feels like a clean canvas, not a construction zone. Imagine stepping into a room where dust is already settled, tools are scattered, and the lighting is dim – you’re probably visualizing the chaos that can turn a simple job into a weekend of frustration.
First thing’s first: clear everything out of the area you’ll be working in. That means moving furniture, taking down curtains, and covering anything that can’t be relocated with plastic sheeting. In our experience, a quick “room reset” saves at least 30 minutes of re‑cleaning later. If you have pets, lock them in a safe room – a calm dog or cat will thank you when the drywall dust finally settles.
Gather the right tools and safety gear
Here’s a checklist that most pros swear by:
Dust‑mask or respirator (N95 minimum)
Safety goggles
Heavy‑duty work gloves
Utility knife, T‑square, and a drywall saw
Power drill with drywall bit
Measuring tape and chalk line
Stud finder – cheap models work, but a magnetic one catches hidden metal plates.
Pro tip: keep a small “tool caddy” on a rolling cart so you’re never hunting for a screwdriver mid‑cut. It’s the little habits that keep the workflow smooth.
Control dust before it becomes a problem
Dust is the silent enemy of any sheetrock project. A simple trick we use is to lay a drop cloth on the floor and then spray a fine mist of water over the area before you start cutting. The moisture settles the particles, and you’ll notice far less airborne dust when you sand later.
Another real‑world example: a homeowner in Norfolk was terrified of dust because of a child with asthma. By sealing off vents with painter’s tape and using a shop‑vac with a HEPA filter, they finished the drywall without triggering any symptoms. Small adjustments like that make a huge difference.
Set up proper lighting
Good lighting reveals crooked cuts and uneven seams before you even lift the first panel. Position a bright LED work lamp at a 45‑degree angle to the wall; you’ll see shadows where the drywall isn’t flush. If you’re working in a basement, bring in a portable daylight lamp – it mimics natural light and helps you spot imperfections.
And remember, the floor should be level. If your subfloor is uneven, use shims under the drywall to keep the sheetrock plane consistent. A quick level check with a long carpenter’s level will tell you if you need to add shims now rather than later.
Protect the surrounding surfaces
Even with plastic sheeting, stray screws or nail heads can dent trim or paint. Apply painter’s tape along baseboards, windowsills, and door frames. When you later remove the tape, the paint underneath stays pristine – a win for you and the homeowner.
Finally, lay out your sheets on the floor in the order you’ll install them. This “dry run” lets you see which pieces need trimming and helps you estimate how many cuts you’ll make. It also prevents you from having to reach over a finished wall to grab the next sheet, which can cause accidental damage.
Once the space is cleared, tools are at hand, dust is under control, and lighting is optimal, you’re ready to move on to measuring and cutting the sheetrock. Need a deeper dive into budgeting for the next steps? Check out our guide on How Much Does Interior Painting Cost: A Complete Guide – it walks you through material costs that often get overlooked.
Step 2: Measuring and Cutting Sheetrock
Now that the room is cleared, the tools are lined up, and the dust is under control, it’s time to tackle the part that makes most DIYers break out in a cold sweat—getting those sheets to the exact size you need.
First, grab a good‑old steel tape and a sharp pencil. Measure the length of the wall from stud to stud, then jot that number down. It sounds simple, but we’ve seen people skip the double‑check and end up with a piece that’s a few inches too short, leaving a gap that screams “unprofessional.”
Here’s a little trick we use at LGFMH: measure twice, write it down, and then measure a third time before you even think about cutting. That extra step saves you a lot of frustration later.
Marking the sheet
Lay the sheet flat on the floor, face down, and line it up against a straight edge or a T‑square. Use your pencil to draw a light line where the cut will go. If you’re working with a 4 × 8 sheet, most cuts fall on the 48‑inch width, but every room is different.
Don’t forget to account for the “full‑sheet” overhang. A common mistake is cutting a piece exactly to the stud width and then discovering the drywall won’t sit flush because of a slight irregularity in the framing. Adding a half‑inch of wiggle room can be a lifesaver.
Scoring and snapping
Grab a utility knife with a fresh blade – a dull blade is the fastest way to get ragged edges. Hold the sheet firmly, align the knife with your pencil line, and give it a firm, even pressure as you pull the knife toward you.
Once the score line is deep enough (you’ll see the gypsum paper darken), lift the sheet slightly and snap it along the line. The board should break cleanly, leaving a straight edge ready for the next step.
If the break isn’t perfect, run the knife along the edge again and snap once more. A little patience here makes the final install look seamless.
Cutting openings for outlets and fixtures
For electrical boxes, light switches, or vent openings, a drywall saw or rotary cutter is your best friend. Measure the opening on the wall, transfer those dimensions onto the sheet, and then cut a small “starter” hole with the utility knife.
Insert the saw blade into the starter cut and work your way around. Keep the blade perpendicular to the board to avoid chipping the paper surface. When you’re done, smooth the edges with a sanding block – a quick sand prevents the paper from tearing later.
Dealing with tight spaces
Sometimes you’ll need to cut a piece that fits behind a door frame or into a nook. In those cases, a jab saw works better than a rotary cutter because it gives you more control in confined areas.
Another tip: cut the sheet a little larger than you think you need, then trim the excess with a hand saw. It’s easier to shave off a little bit than to try and add material back in.
Safety first
Wear a dust mask and safety goggles at all times. Even with the misting trick we mentioned earlier, cutting releases fine gypsum dust that can irritate your lungs.
Keep your work area well‑ventilated, and always cut on a stable surface. A wobbling board can cause the knife to slip, which is the last thing you want when you’re holding a sharp blade.
Ready to see those steps in action? Below is a quick video that walks you through measuring, scoring, and snapping a sheet of drywall.
Notice how the presenter lines the sheet up with a T‑square before scoring – that’s the same habit we swear by on every job site. Take a pause, compare your setup, and adjust as needed before you make that first cut.
Quick checklist before you start cutting
Fresh utility‑knife blade
Steel measuring tape and pencil
T‑square or straight edge
Dust mask and safety goggles
Drywall saw or rotary cutter for openings
Sandpaper or sanding block for edge cleanup
Follow these steps, and you’ll find that measuring and cutting sheetrock becomes less of a gamble and more of a routine. When the pieces fit snugly, the rest of the installation flows smoothly – and you’ll avoid the dreaded “gap” that can ruin an otherwise perfect wall.
Step 3: Installing Sheetrock Panels (Video Walkthrough)
Alright, you’ve got clean cuts and the room is prepped – now it’s time to actually hang the sheetrock. If you’ve ever wondered why the walls sometimes look a little lopsided after a DIY install, the answer usually lives in the way the panels are lifted and secured.
Gather what you need
Drywall lift or a sturdy friend to hold the panel
1/4‑in. dry‑wall screws (or self‑tapping screws for metal studs)
Impact driver or drill with a drywall bit
Drywall knives, mud pan, and joint tape for later
Level, chalk line, and a pencil
Having these at arm’s reach saves you from a frantic dash across the room mid‑install.
Do you remember that moment when you tried to hoist a full‑size 4×8 board by yourself and it slipped? It’s not pretty – you end up with a cracked panel and a sore back. That’s why a lift (or a good partner) is a game‑changer.
Start with the ceiling
Most pros swear by starting overhead. Hang the first sheet perpendicular to the joists, leaving a 1/2‑inch gap from the walls – that gap will become your expansion joint.
Here’s a quick trick: tap the panel into the lift, position it, then gently back‑stop it against a stud with a wooden shim. That shim keeps the sheet from bowing while you drive the first few screws.
Drive screws every 12 inches along the edges and every 16 inches in the field. The heads should sink just below the paper surface – not tearing the paper.
And what about the seams? Stagger the joints at least 6 inches from any vertical joint in the next row. This “staggered” pattern adds strength and hides any inevitable tiny gaps.
Move to the walls
Once the ceiling is up, the walls become a lot easier. Start at the corner and work your way around, always keeping the sheet’s long edge perpendicular to the studs.
Picture this: you’re holding a 5‑by‑8 sheet, the lift holds it steady, and you’re screwing it in while a friend holds the opposite corner. It feels like a dance, but the rhythm is simple – screw, step back, check level, repeat.
If you hit an electrical box or vent opening, cut the opening first (you already have those cuts from the previous step) and then fit the panel around it. A little extra room around the opening gives you wiggle room for the joint tape later.
Check your work as you go
Every few panels, run a long level across the seams. Any high spots? Pop a few more screws in those areas. The goal is a flat, even surface – no “wave” effect that will make mudding a nightmare later.
Do you ever wonder why some walls feel “soft” when you tap them? It’s usually because screws are too shallow or missing entirely. A quick finger‑test – press your fingernail into the surface. If it depresses easily, you probably need another screw.
Final touches before mudding
Once all panels are up, remove any shims, clean away dust, and give the seams a once‑over with a utility knife to trim any overhang.
Now you’re ready for the joint compound stage, but that’s a whole other adventure. For now, just stand back, admire the almost‑finished wall, and breathe – you’ve just tackled the hardest part of the drywall job.
Need a hand with the next steps or a professional finish? LGFMH Construction can step in, but the confidence you’ve built here will make any pro’s job smoother.
Step 4: Taping, Mudding, and Finishing
Alright, the panels are up and you can actually see the shape of the room taking form. Now comes the part that makes a wall feel solid – the tape, mud, and finish. If you’ve ever wondered why some walls look like they were done by a pro while yours end up with ridges, the secret lives in how carefully you treat the seams.
Why the joint tape matters
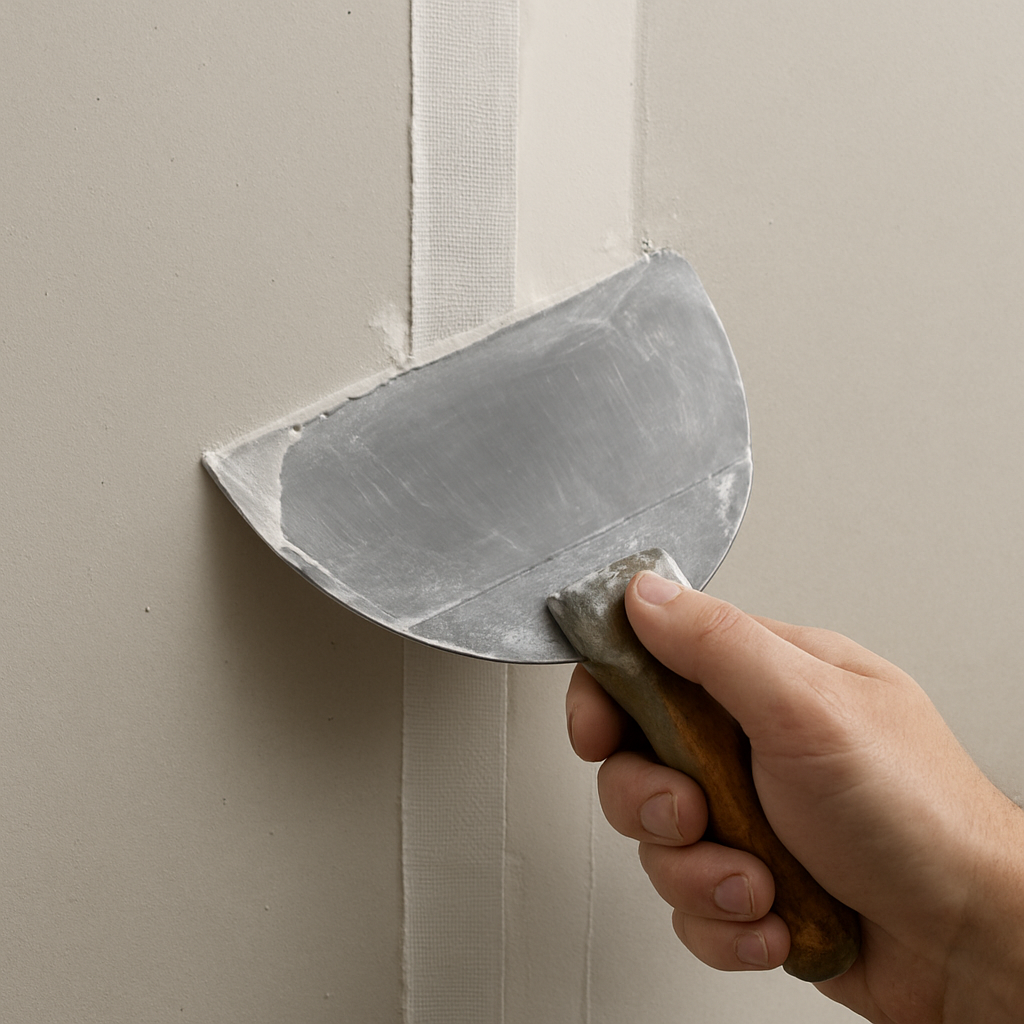
Think about the seam as a tiny canyon between two cliffs. If you just slap mud over it, the joint will crack as the board moves. The paper or fiberglass tape acts like a bridge, holding the two sides together while the mud cures.
We usually start with a thin coat of all‑purpose joint compound – the “tack coat.” It’s sticky enough to hold the tape in place without pulling it up later. Spread a smooth layer about a quarter‑inch thick, then press the tape firmly into it. Use a 6‑inch taping knife to smooth out bubbles.
Does it feel a little gritty? That’s normal. The paper fibers need a bit of grip. If you’re using fiberglass mesh, you’ll notice it’s a bit more forgiving, but it also needs a slightly thicker first coat.
First mud coat – the “embed”
Once the tape is snug, let the tack coat dry (usually 30‑45 minutes). Then grab a 10‑inch knife and apply a broader layer of joint compound over the tape. This is where you start to hide the tape’s edges.
Pro tip: work in long, overlapping strokes. Imagine you’re painting a wall – you want each pass to blend into the next. If you see ridges, lightly feather them with the knife edge.
After the first coat dries, you’ll likely see a faint “hump.” That’s where the magic happens. Sand it lightly with a fine‑grit sanding block (220 grit) just enough to knock down the high spots. Don’t over‑sand – you don’t want to expose the tape.
Second and third coats – building a smooth surface
The second coat should be wider than the first – think 12‑inch knife for a broader sweep. This layer fills any low spots and extends the feathered edge further out. Let it dry completely, then sand again.
For the third coat, you can go even wider, using a 14‑inch knife if you have one. The goal is a seamless surface that blends into the surrounding drywall. At this point, the wall should look uniformly flat, with no visible lines where the panels meet.
Need a sanity check? Run your hand over the wall. If it feels smooth and you can’t see the joint with your eyes, you’re in good shape.
Finishing touches
Now that the mud is dry and sanded, it’s time for the final skim coat. This ultra‑thin layer (often called a “skim”) evens out any lingering imperfections. Use a lightweight compound and a 12‑inch knife, applying just enough to give the wall a glass‑like finish.
Once the skim is dry, a final light sand (320 grit) will leave the surface ready for primer. If you’re painting soon, a light dust‑off with a tack cloth will remove any remaining particles.
And there you have it – a wall that’s ready for a fresh coat of paint, a textured finish, or whatever design you have in mind. The whole process can feel a bit tedious, but each step builds on the last, turning a raw sheetrock canvas into a professional‑grade surface.
If you ever hit a snag – like persistent cracking or a stubborn ridge – that’s a sign you might need a second set of eyes. A quick call to a seasoned crew can save you hours of rework.
Step 5: Sanding and Painting Your Sheetrock
Sanding the Surface
Now that the final skim coat is dry, you’re staring at a wall that’s almost ready for paint—but there’s one more ritual that makes the difference between a showroom finish and a DIY‑look.
First up, sanding. It sounds boring, but a good sand removes the microscopic high spots that the mud left behind and gives the primer a smooth canvas to cling to.
Grab a hand‑sanding block or a pole sander with 120‑150 grit and run it lightly over the entire surface. You don’t want to gouge the drywall, so keep the pressure gentle and let the grit do the work.
Ever wonder why some walls still look uneven after you’ve sanded? That’s usually because the dust settled back onto the surface or you skipped a second pass.
Run your fingertip across the wall; any ridges you can feel are still waiting for a quick touch‑up. A second pass with the same grit smooths those stubborn spots.
Controlling Dust
Drywall dust is notorious for hanging in the air and finding its way into every nook. Keep a shop‑vac with a HEPA filter running nearby, or periodically pull the plug on the sander and wipe the pad with a damp rag.
When you’re done sanding, grab a tack cloth and wipe the wall. The sticky surface pulls away the fine particles that would otherwise appear as speckles once the paint dries.
Priming the Sheetrock
Primer isn’t just a fancy base coat; it seals the porous drywall, evens out any remaining color variation, and helps the topcoat adhere without peeling.
For most interior jobs a water‑based latex primer works fine—it's low odor, quick‑drying, and cleans up with soap and water. If you’re dealing with a high‑moisture area like a bathroom, consider a moisture‑resistant primer.
Use a 3‑4 mm nap roller for an even application. Roll in a “W” pattern, then fill in the gaps without pressing too hard. Let the primer dry for the manufacturer‑recommended 2‑4 hours before you think about sanding again.
If the primer feels a little orange‑peel after it’s dry, give it a light sand with 220‑240 grit and wipe clean. This extra step guarantees a glass‑like surface for your paint.
Final Sand and Paint
Once the primer is smooth, finish with a fine‑grit sanding sponge—320‑350 grit works perfectly. A quick pass eliminates any remaining texture without removing the primer.
Dust off the wall one more time with a clean tack cloth, then you’re ready for paint. Two coats of a quality interior paint give you the durability and colour depth you want. Use a ½‑inch nap roller for flat walls and a brush for trim.
Let the first coat dry completely—usually about an hour for latex—then lightly sand with 320 grit if you see brush marks. Apply the second coat, step back, and admire the flawless finish you just created.
Quick Reference Table
Grit | Tool | When to Use |
120‑150 | Hand sanding block or pole sander | After the skim coat to smooth ridges |
220‑240 | Pole sander or sanding block | Between primer and final coat if orange‑peel appears |
320‑350 | Fine‑grit sanding sponge | Final prep before paint |
And that’s it—sanding, priming, and painting your sheetrock all in one smooth flow. Take a step back, run your hand over the wall, and you’ll feel that satisfying evenness only a properly finished surface can give. If you hit a snag, remember a quick call to LGFMH Construction can save you hours of rework, but you’ve got everything you need right here to finish the job yourself.
Step 6: Common Mistakes and How to Avoid Them
Even after you’ve sanded, primed and painted, a few easy‑to‑miss slip‑ups can turn a proud finish into a headache.
Mistake #1: Skipping the final dust‑off
When you finish sanding, it’s tempting to grab the roller and go. But any leftover gypsum dust will bond with the next coat of mud or paint, creating a gritty surface that never truly smooths out. A quick pass with a tack cloth—just a light swipe—removes the fine particles without scratching the drywall.
Pro tip: keep a shop‑vac with a HEPA filter running while you sand, then wipe the wall again before you apply joint compound.
Mistake #2: Driving screws too deep
We’ve seen homeowners “flush” every screw so the head is barely visible. The problem? Over‑driven screws tear the paper face, leaving a weak spot that can pop later. The right depth is when the screw head is just below the surface—about the thickness of a dime.
Use a screw gun with an adjustable clutch, or set a drill stop. If you’re unsure, run your fingernail over the screw; you should feel a slight depression, not a gouge.
Mistake #3: Ignoring moisture in the room
Bathrooms, basements, or any space with high humidity demand a moisture‑resistant sheetrock (green board) and a primer that can handle steam. Applying regular drywall mud in a damp environment will take forever to cure and may crack later.
Before you start, run a dehumidifier or open a window for at least an hour. It’s a small step that saves you a whole re‑mudding session.
Mistake #4: Using the wrong grit at the wrong time
We love the convenience of a single sanding block, but each stage needs a specific grit. Jumping straight from 120‑150 grit to a fine‑grit sponge leaves visible swirl marks. Stick to the progression: 120‑150 for the skim coat, 220‑240 between primer and finish, then 320‑350 for the final polish.
If you miss a step, sand lightly with the next higher grit to blend the texture before moving on.
Mistake #5: Forgetting to feather the tape edges
It’s easy to press tape down and think you’re done. The real work starts when you embed the tape in the first mud coat and then feather the edges outward. Skipping that feathering creates a visible ridge that shows up even after two coats of paint.
Use a 10‑inch knife for the embed coat, then a 12‑inch knife for the second coat, stretching the mud at least 6‑8 inches beyond the tape. The result looks like a single piece of wall, not two glued together.
Mistake #6: Rushing the drying time
Joint compound looks dry to the touch in 30 minutes, but it’s still curing underneath. If you sand or apply another coat too soon, you’ll create cracks and dust pockets. Respect the manufacturer’s recommended dry time—usually 24 hours for a full‑thickness coat in a moderate climate.
When in doubt, touch the surface with a clean fingertip; it should feel firm and not tacky.
Quick “avoid‑the‑mistake” checklist
Wipe down with a tack cloth after every sanding pass.
Set screw gun to just under‑flush; check with your nail‑fingernail test.
Control room humidity; use dehumidifier in wet areas.
Follow grit progression: 120‑150 → 220‑240 → 320‑350.
Feather tape edges at least 6 inches with each mud coat.
Respect full dry times before sanding or recoating.
By keeping these pitfalls in mind, you’ll avoid the most common setbacks and end up with a sheetrock surface that looks like it was done by a pro. If you ever hit a wall that just won’t smooth out, a quick call to LGFMH Construction can save you time and give you peace of mind. Take a breath, trust the process, and enjoy your fresh new walls.
Conclusion
After all the measuring, cutting, taping, mudding, sanding and painting, the moment you step back and see a seamless wall is pure satisfaction.
Remember, the biggest wins come from the small habits – wiping down with a tack cloth after each sanding pass, letting joint compound truly dry, and feathering tape edges at least six inches. Those details keep the sheetrock looking like it was installed by a pro, not a weekend warrior.
So, what’s the next step for you? Grab your checklist, give the wall one final feel‑test with your fingertips, and if anything feels off, a quick touch‑up with a thin mud coat will save you a whole re‑do later.
And if you ever hit a stubborn ridge or a crack that just won’t cooperate, don’t sweat it – a short call to LGFMH Construction can put a fresh set of eyes on the job and get you back on track without missing a beat.
In the end, sheetrock is just gypsum and paper, but the finish you achieve reflects the care you put into each step. Keep the process simple, respect the drying times, and enjoy the smooth, paint‑ready surface you’ve earned.
Happy renovating, and enjoy your new space.
FAQ
What’s the best way to cut sheetrock without cracking the edges?
Start by scoring the board with a fresh utility‑knife blade along a straight line you’ve drawn with a pencil. Hold the sheet firmly, then snap it cleanly; the gypsum will break while the paper stays intact. If the edge looks ragged, run the knife over it once more and snap again. A quick second snap usually leaves a crisp edge ready for fitting.
How do I know if my sheetrock screws are set at the right depth?
After you drive a screw, run your fingernail over the head. You should feel a shallow dip—about the thickness of a dime—without the paper tearing. If the head sits flush or sticks up, you’ve either over‑driven or under‑driven it. Adjust the clutch on your drill or use a screwdriver to back the screw out a touch until it sits just below the surface.
Can I use regular joint compound on a bathroom wall?
For high‑moisture areas like showers, it’s safer to choose a moisture‑resistant drywall (green board) and pair it with a mildew‑blocking primer. Regular all‑purpose mud will dry, but it can stay soft longer and may crack if the humidity spikes. If you’re already mid‑project, let each coat dry fully—usually 24 hours—and keep the room well‑ventilated to avoid moisture traps.
Why does my drywall mud keep forming ridges after the first coat?
Ridges are often a sign that the tape wasn’t fully embedded or the mud was applied too thickly. Use a 6‑inch knife for the embed coat, pressing the tape into a thin layer of mud, then feather the edges out 6‑8 inches with a 10‑inch knife. Lightly sand the dried coat before the next layer; this smoothes any high spots and prevents ridges from showing through paint.
How often should I sand between coats, and what grit should I use?
Follow a three‑step grit progression: start with 120‑150 grit after the skim coat to knock down the biggest bumps, move to 220‑240 grit between primer and the final paint if you notice orange‑peel texture, and finish with a 320‑350 grit sanding sponge right before the last paint coat. Sand lightly each time—just enough to flatten, not to gouge the surface.
What’s the simplest method to keep dust down while sanding sheetrock?
Hook a shop‑vac with a HEPA filter to the sander’s exhaust, or pause frequently and wipe the sanding pad with a damp rag. After you’re done, run a tack cloth over the wall; it grabs the fine particles that settle back onto the surface. Keeping the room slightly damp—spritzing the floor with water—also helps dust settle instead of floating.
When should I call a professional instead of DIYing the sheetrock finish?
If you encounter persistent cracking, large gaps that won’t feather, or moisture issues that keep re‑activating the mud, it’s a good time to bring in a pro. Professionals have access to specialty compounds, proper drying equipment, and the experience to diagnose hidden framing problems. A quick call can save you days of trial‑and‑error and keep the project on schedule.


Comments