How to Replace a Broken Window Pane: A Step-by-Step DIY Guide
- William McKracherne
- Feb 12
- 18 min read

You know that gut‑wrenching moment when you glance out the kitchen window, see a jagged crack spider‑webbing across the glass, and wonder how that happened?
Maybe the kids were tossing a baseball, or a stray branch slammed into the pane during a windy afternoon. Either way, that broken window isn’t just an eyesore—it’s a draft, a security risk, and a constant reminder that something’s wrong.
What if I told you you don’t need a pricey contractor to fix it? With a little patience, the right tools, and a clear plan, you can replace a broken window pane yourself and save a bundle.
In this guide we’ll walk through every step, from measuring the opening to sealing the new glass so it’s as sturdy as the original. No jargon, just straightforward, down‑to‑earth advice that feels like a conversation over coffee.
First, we’ll help you spot the common pitfalls that turn a simple repair into a nightmare. Ever tried to fit a pane without removing the sash and ended up with a crooked glass? We’ll show you how to avoid that.
Then we’ll break down the tools you actually need—nothing fancy, just a utility knife, a screwdriver, a putty knife, and a few safety gloves. If you’re missing something, you’ll know exactly what to pick up at the local hardware store.
Next comes the heart of the process: removing the broken glass, preparing the frame, and installing the new pane. We’ll explain why a little bit of glazing compound goes a long way, and how to get a neat, weather‑tight seal.
Along the way, we’ll sprinkle in pro tips we’ve gathered at LGFMH Construction, where we’ve helped homeowners across the region restore countless windows without the hassle of full‑scale replacements.
By the end of this article you’ll feel confident enough to tackle the job on your own, or at least know exactly what to ask a professional if you decide to call one.
Ready to turn that cracked view into a clear, safe pane? Let’s dive in and get that window back to looking its best.
TL;DR
Replace that cracked window pane yourself with confidence by measuring accurately, gathering a few basic tools, and following our step‑by‑step safety‑first process. You’ll avoid common pitfalls, achieve a tight, weather‑proof seal, and save money—plus you’ll know exactly what to ask LGFMH Construction if you ever need a professional touch today.
Step 1: Assess the Damage and Decide DIY vs Professional
First thing’s first – take a good look at that crack. Is it a hairline spider‑web that’s barely there, or does it run straight through the centre like a lightning bolt? The size, location, and type of glass (tempered vs. standard) will tell you a lot about how much work you’re really facing.
Grab a flashlight and shine it from the outside. If you see light spilling through the fracture, that’s a sign the seal’s compromised and you’ll probably feel a draft. A draft means heat loss, higher bills, and a less comfortable home. So, pause for a second and ask yourself: can I live with that for a week while I source a new pane, or do I need it fixed today?
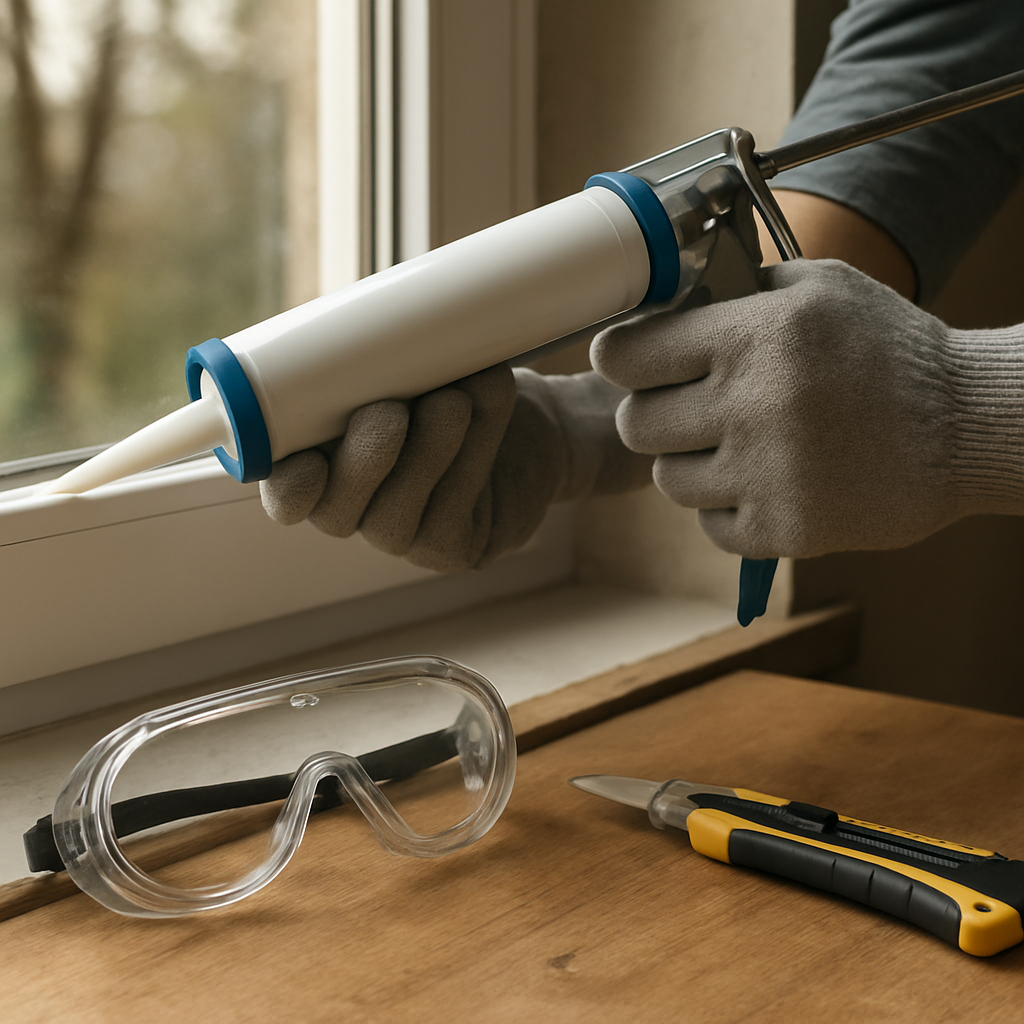
Safety First
Broken glass is unforgiving. Before you even think about removing the pane, suit up with heavy‑duty gloves, safety glasses, and a dust mask. A quick tip – tape the perimeter of the broken area with painter’s tape; it helps keep shards from scattering while you work.
Need a visual refresher?
Now that you’re protected, check the frame. Is the sash still solid, or does it wobble? A loose frame often means the problem goes deeper than the glass itself. If the frame is damaged, you might be looking at a bigger project – maybe even a full‑window replacement.
DIY or Pro?
Here’s where the decision‑making really kicks in. If the crack is under an inch, the glass is standard, and the frame feels sturdy, you’re probably good to go DIY. On the other hand, if you’re dealing with tempered glass, a warped frame, or a multi‑pane double‑glazed unit, calling in a pro can save you time, money, and a potential safety hazard.
We’ve put together a side‑by‑side comparison that walks you through the pros and cons of each route – check out DIY Window Pane Replacement vs Hiring a Pro for the full breakdown.
Another factor: cost vs. confidence. A professional will quote you a price, usually covering labor, disposal, and a warranty. If you’re comfortable measuring, ordering the right thickness, and handling glazing compound, the DIY route could shave off $150‑$300. But remember, a botched install can lead to leaks, rattling, or even breakage later on.
Think about your schedule, too. Do you have a weekend to dedicate to careful removal, clean‑up, and sealing? Or would you rather have a contractor handle it while you enjoy a coffee on the patio?
When to Call the Pros
- The crack is larger than 6 inches across.
- The pane is double‑glazed or low‑E coated.
- The frame is warped, rotted, or missing fasteners.
- You feel uneasy about handling heavy glass.
If any of those sound familiar, give LGFMH Construction a call. We specialize in interior and exterior repairs, and we can get you a weather‑tight seal without the guesswork.
On the flip side, if you’re set on DIY, consider a couple of extra touches that can make the job feel polished. Adding a decorative window cling after the install not only looks great but also protects the glass from future scratches. For custom clings, JiffyPrintOnline offers quick turnaround on printable window graphics.
And while you’re sprucing up the exterior, why not think about lighting? A fresh pane pairs nicely with new outdoor lighting, boosting curb appeal and safety after dark. LED Artistry provides design‑forward fixtures that complement any window style.
Bottom line: assess the crack, weigh the safety and cost factors, and decide whether you have the tools, time, and confidence to go it alone. Either way, you’ll be one step closer to a clear view and a cozier home.
Step 2: Gather Materials and Safety Gear
Alright, you’ve decided the pane is worth fixing yourself – now comes the part most people skip: making sure you have the right gear before you even lift a piece of glass. Trust me, a quick inventory now saves you from a nasty surprise halfway through.
Do you ever stand in the hardware aisle wondering if you’ve forgotten something crucial? Let’s walk through the exact checklist so you can walk out confident.
Safety first
Gloves and goggles aren’t optional. Heavy‑duty work gloves protect your hands from sharp shards, and safety glasses keep those little bits out of your eyes. If you have a pair of safety shoes or sturdy boots, wear them – a slipped step on a wet floor can turn a simple job into a trip to the ER.
Don’t forget a dust mask if you’re sanding old glazing compound. Even a simple N‑95 will keep fine silica particles from irritating your lungs. And keep a sturdy trash bag nearby for broken glass; you’ll thank yourself when cleanup is a breeze.
Essential tools
Utility knife – for trimming glazing beads and cutting silicone.
Putty knife or scraper – to pry off old beads and scrape away residual silicone.
Suction cups (glass lifting grips) – they let you lift the pane without pinching your fingers.
Measuring tape – accurate width and height are the foundation of a snug fit.
Adjustable screwdriver set – most sash screws are Phillips or flat‑head.
Each of these tools is cheap enough to grab at your local hardware store, and they’ll serve you for many future projects. In our experience, a good scraper makes the difference between a smooth removal and a cracked frame.
Materials checklist
Replacement glass – order the exact dimensions; many suppliers will cut it to size for a small fee.
Vinyl glazing bead – the “crown” that holds the glass in place.
Clear silicone sealant (window‑grade) – creates an airtight, weather‑tight bond.
Painter’s tape – protects surrounding wood or vinyl while the silicone cures.
Cleaning supplies – isopropyl alcohol and a lint‑free cloth for a pristine surface.
If you’re not sure where to get the glass, a quick call to your local glass shop will usually get you a quote within a day. For a practical example of ordering and installing, check out this detailed DIY guide that walks through the whole process step by step.
Watch the short video above for a visual of how the suction cups lock onto the pane and how the silicone bead is laid down evenly. It’s only a couple of minutes, but seeing the technique in action can clear up any lingering doubts.
Before you head outside, do a final walk‑through of this list. If anything’s missing, pause and grab it now – half‑finished jobs are the fastest way to lose motivation. Once you’ve got gloves, goggles, tools, glass, and sealant in hand, you’re ready to move on to actually removing the old pane and installing the new one.
Step 3: Remove the Broken Glass Safely
Alright, the glass is still in the frame and those sharp edges are staring back at you. Before you even think about prying anything out, grab your heavy‑duty gloves and safety goggles – they’re non‑negotiable.
Why the fuss? A single shard can slice through skin in a split second, and tiny fragments can bounce into your eyes. In our experience at LGFMH Construction, we’ve seen a rookie miss a sliver and end up with a painful trip to urgent care. So, let’s make safety the first step.
Gather the right removal tools
Besides the gloves and goggles, you’ll want a pair of suction cup grips (the kind with a rubber lip), a flat‑head screwdriver, a sturdy utility knife, and a thick trash bag. If the pane is still partially intact, the suction cups let you lift it without crushing the glass further. For stubborn bits, needle‑nose pliers work wonders.
Clear the work area
Lay down a drop cloth or old sheet on the floor to catch any stray shards. Open the windows on the opposite side to improve ventilation – especially if you’ll be using a heat gun to soften old glazing.
Do a quick visual scan: any loose pieces? Anything wedged in the frame? Removing those first reduces the chance of the whole pane cracking when you apply pressure.
Step‑by‑step removal
1. Assess the pane.If large sections are still whole, place the suction cups on opposite corners, press the release levers, and gently pull the glass straight out. Keep the motion even; jerking can cause the glass to shatter.
2. Break remaining fragments.When only tiny shards cling to the frame, use the utility knife to score a clean break line, then tap gently with a hammer‑wrapped‑in‑cloth to pop them free. Some pros recommend a heat gun set on low to warm the old putty; it softens the bond and makes the shards easier to lift.
3. Pry out stubborn pieces.Slip a flat‑head screwdriver between the glass and the frame, applying just enough pressure to lift without gouging the wood or vinyl. If you feel resistance, back off and try a different angle – patience beats force.
4. Capture every fragment.As each piece drops, immediately place it into the trash bag. Double‑bagging is wise; a puncture could turn your cleanup into a hazard.
5. Clean the frame.With all glass gone, use a metal brush to scrape away old glazing compound. For wooden sashes, a dab of linseed oil on the brush helps condition the wood and prevents future rot. Wipe the surface with a lint‑free cloth dampened with isopropyl alcohol so the new sealant will adhere properly.
Real‑world example
Imagine you’re fixing a kitchen window that was cracked by a stray baseball. The upper corner shattered, but the lower half is still in place. You first cover the floor with a canvas, slip the suction cups onto the intact lower corner, and lift slowly. The upper shards fall into the bag as you tilt the pane outward. A neighbor helped hold the bag while you used pliers to extract the last piece stuck in the frame. The whole process took about 20 minutes, and no one got cut.
Pro tip from the field
One Day Glass recommends using a heat gun on low for about 30 seconds on old putty; the heat softens the adhesive, making removal easier and protecting the frame from cracks. You can read more in their step‑by‑step safety guide.
Checklist before you move on
Gloves, goggles, and dust mask securely on.
Suction cups attached and tested.
All shards placed in a double‑bagged trash container.
Frame scraped clean of old glazing and wiped dry.
Work area cleared of debris.
Once you’ve crossed every item off, you’re ready to install the fresh pane. The next step will walk you through positioning the new glass and sealing it so the window is as weather‑tight as it was before the break.
Step 4: Measure and Cut the Replacement Pane
Now that the old glass is out and the frame is clean, the next thing that makes most DIYers break out in a cold sweat is getting the new piece to fit just right. Trust me, you’ve already done the hard part—removing the shards without hurting yourself—so let’s keep that momentum going.
Take three measurements, not just two
Grab a steel tape and measure the opening at the top, middle, and bottom for width. Write those three numbers down. If they’re not identical, go with the smallest width; that way the new pane won’t jam.
Do the same vertically: left‑most, centre, and right‑most. Again, the shortest height wins. This three‑point method is the gold standard we teach at LGFMH Construction because it catches those sneaky twists in older frames.
Why not just measure once? Windows settle over time—wood swells, vinyl contracts. A single measurement can hide a half‑inch difference that later forces you to chisel the frame.
Don’t subtract anything
Some tutorials tell you to “subtract 1/8 inch” for the glass. That’s nonsense. The glass cutter will take care of a tiny clearance, and the glazing bead will seal any gap. Give the supplier the exact opening dimensions you just recorded.
If you want a quick reference, Fab Glass and Mirror explains why you should avoid the subtract‑factor and just order the true opening size in their measurement guide.
Double‑check before you cut
Write the width and height on a piece of cardboard or a scrap of plywood and place it in the frame. Does it sit flush on all sides? If it’s rubbing or leaving a gap, you’ve spotted the mistake before the glass cutter even gets a chance.
Take a quick photo of the cardboard in place; it’s a handy visual reference when you talk to the glass shop.
Cutting the glass safely
Most local glass shops will cut the pane for you, but if you’re confident with a cutter, here’s the quick rundown. Lay the glass on a flat, stable surface with the scored side up. Use a fresh oil‑filled cutter, press firmly, and pull the wheel in one smooth motion.
After scoring, place the glass over a soft bench pad and gently tap both ends with a pair of pliers. The pane should snap cleanly along the line. Wear heavy‑duty gloves and safety glasses—those shards can bite back fast.
What to do if the measurements are off
It happens. If the pane is a hair too big, you can trim a little with a glass grinder, but that’s a job for a pro unless you’ve got the right dust extraction. If it’s too small, you have two options: order a new piece (most shops will re‑cut at no extra cost) or fill the gap with extra glazing bead and a thin strip of clear silicone. The latter works for a few millimetres but isn’t ideal for large discrepancies.
In a pinch, you can also use a thin, flexible wooden shim to take up the space, but remember that any movement can crack the glass over time.
Final checklist before you move on
Width measured at three points, smallest recorded.
Height measured at three points, smallest recorded.
No subtract‑factor applied—order the exact opening size.
Cardboard test piece fits snugly.
Glass cut by a reputable shop or safely scored and snapped yourself.
Once you’ve ticked those boxes, you’re ready to slide the new pane into the frame and move on to sealing. It feels great to see a perfectly sized sheet of glass in your hands—just think of the draft‑free view you’ll get once the sealant cures.
Step 5: Install the New Pane and Secure It
Alright, you’ve got that perfectly cut piece of glass sitting on the workbench, and the frame is scrubbed clean. It’s the moment that feels both exciting and a little terrifying – one slip and you’ve got a cracked pane on the floor. Don’t worry, we’ve been there, and with a few careful moves you’ll have that window looking brand‑new.
Position the pane
First, lay a soft blanket or a few old towels on the sill to cushion the glass. Pick up the pane using the suction cups, keeping it upright so the weight is evenly distributed. Gently lower it into the opening, aligning the edges with the groove where the glazing bead sits.
If the pane seems a hair tight, back off a millimetre and tap the bead with a rubber mallet. The bead should flex just enough to let the glass slide in without forcing it.
Check the fit
Before you lock anything down, take a step back and look at the whole window. Does the glass sit flush on all sides? Are there any visible gaps larger than a quarter‑inch? At this point you can still adjust – a tiny shim of painter’s tape or a thin wooden strip can take up any stubborn space.
Tip: run your fingertip along each edge; you should feel a snug, even pressure. If you feel wiggle, the pane isn’t seated properly and you’ll want to re‑position before the sealant sets.
Secure with the glazing bead
The vinyl glazing bead is the “crown” that holds everything together. Starting at one corner, press the bead into the groove with your fingers, then use a bead‑setting tool or a flat screwdriver wrapped in a cloth to snap it down firmly.
Work your way around the perimeter, keeping the bead tight but not so hard that you crack the glass. When you reach the last side, give the bead a final press to make sure it’s continuous. A good seal will keep drafts out and stop moisture from sneaking behind the glass.
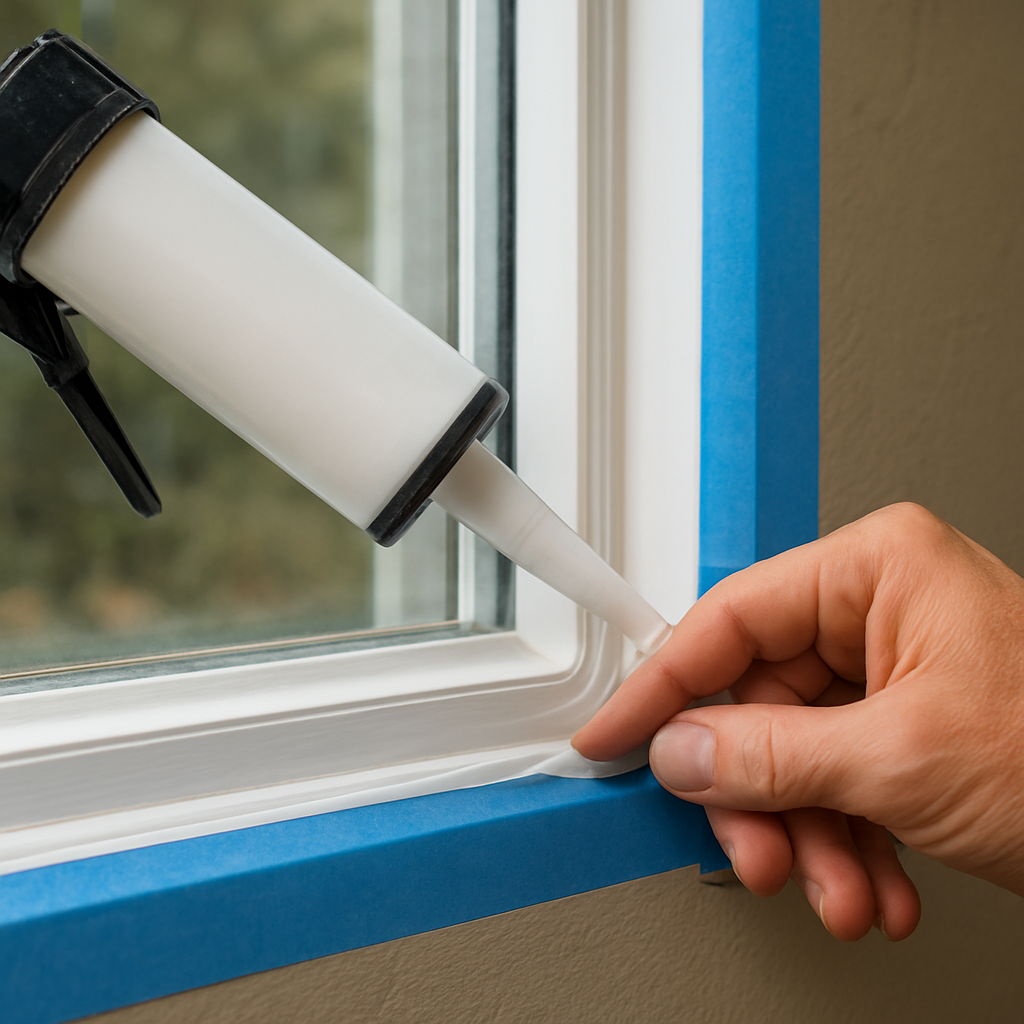
Apply silicone sealant
Now it’s time for the clear silicone. Cut the tip of the tube at a 45‑degree angle and load it into a caulking gun. Run a thin, even bead of window‑grade silicone along the inside edge of the glazing bead. The silicone acts like a weather‑proof gasket, bonding the glass to the frame.
Smooth the bead with a wet finger or a silicone‑smoothing tool. Don’t over‑apply – a little goes a long way. Once you’re happy, wipe away any excess with a lint‑free cloth before it skins over.
Final inspection and cure time
Give the whole assembly a quick once‑over. Look for any gaps, uneven bead, or stray silicone. If everything looks solid, tape off the perimeter with painter’s tape to protect the surrounding trim while the sealant cures.
Most silicone cures to a skin in about 30 minutes, but give it a full 24‑hour cure before you slam the window shut. That extra patience prevents the seal from pulling away later.
Quick checklist
Task | Tool/Material | Key Tip |
Lay pane in frame | Suction cups, soft blanket | Keep glass upright, lower slowly |
Secure bead | Vinyl glazing bead, bead‑setter or screwdriver | Snap bead evenly, avoid over‑tightening |
Seal edges | Window‑grade silicone, caulking gun | Thin bead, smooth immediately |
And that’s it – you’ve just installed a new pane and sealed it like a pro. The next time you glance out that window, you’ll see a clear view, no drafts, and a job you can proudly say you did yourself. If you ever hit a snag, remember LGFMH Construction is just a call away for those “what‑now” moments, but most homeowners find this step straightforward once they’ve followed the earlier prep steps.
Take a moment, admire your handiwork, and maybe treat yourself to a coffee. You’ve earned it.
Step 6: Apply Weatherproofing and Finishing Touches
Now the glass is snug in the frame, the bead is snapped, and you’re staring at a brand‑new pane. The final piece of the puzzle is making sure the window stays tight when the wind picks up.
Give the glass a clean start
First, wipe the glass and the surrounding wood or vinyl with a lint‑free cloth dampened with isopropyl alcohol. You want any dust, fingerprints, or old silicone residue gone before the new seal sets. It only takes a minute, but skipping this step invites drafts later.
Do you ever notice a film on a fresh window that looks fine until a storm hits? That’s usually leftover grease or dust acting like a barrier.
Seal the perimeter with silicone
Grab your window‑grade silicone and a caulking gun. Cut the nozzle tip at a 45‑degree angle – that gives you a smooth, controllable bead. Run a thin line along the inside edge of the glazing bead, keeping the flow steady.
Tip: If the gap is wider than a quarter‑inch, pop a backer rod in first. The foam compresses, giving the silicone something to grip and preventing it from sinking.
Use a wet fingertip or a silicone‑smoothing tool to shape the bead. You’re aiming for a concave “U” that hugs both glass and frame. Too much silicone will squish out and look messy; too little leaves a channel for water.
Protect the trim while the seal cures
While the silicone is still wet, lay a strip of painter’s tape along the trim on either side of the bead. This keeps the seal from sticking to the wood or vinyl, and it gives you a clean line once the tape peels away.
Most silicone skins over in about 30 minutes, but give it a full 24‑hour cure before you swing the window shut. Patience now saves you from a seal that pulls away later.
Check for gaps and add weatherstripping
After the silicone has set, run your fingertips around the sash. Feel for any cold spots or uneven pressure. If you notice a tiny opening, a thin strip of self‑adhesive weatherstripping can fill it.
Weatherstripping is cheap, but it makes a huge difference on drafty days. Just cut a piece to length, peel off the backing, and press it firmly into the gap.
Finish with a protective coat
If you’re working with a wooden sash, a light coat of exterior‑grade paint or a clear sealant protects the wood from moisture that might sneak in around the bead. Vinyl frames usually don’t need extra paint, but a quick wipe with a UV‑resistant spray can help keep the color from fading.
Remember, the goal isn’t to turn the window into a work of art – it’s to make it weather‑tight and long‑lasting.
Finally, step back and admire the job. Take a moment to feel the smooth silicone, the even bead, and the clean trim. You’ve just taken a broken window from eyesore to sturdy, draft‑free view.
Enjoy the peace of mind that comes with a job well done. If a future storm tests your work, you’ll know the seal will hold – and you’ll have the confidence to tackle the next DIY project.
Conclusion
You've walked through every step of how to replace a broken window pane, from safety prep to the final weather‑proof seal. By now you know the exact measurements, the right tools, and the little tricks that keep the glass from cracking again.
So, what does all this mean for you? It means you can turn a scary crack into a quick weekend win, without waiting for a contractor or blowing your budget.
Remember the essentials
• Safety first – gloves, goggles, and a sturdy work surface.
• Measure three points, take the smallest dimensions, and let the glass shop cut it to size.
• Clean the frame, set the bead, and smooth a thin silicone line.
When the seal cures, you'll feel that satisfying draft‑free breeze and the pride of a job well done. If a storm rolls through and the window holds, that's proof your effort paid off.
Need a hand on a tougher frame or just want a second opinion? Our team at LGFMH Construction is ready to step in, but most homeowners find the process manageable with the guide above.
Take a moment, admire your handiwork, and maybe treat yourself to a coffee. The next time a pane cracks, you'll already know exactly how to replace a broken window pane – confidence included.
FAQ
What’s the first thing I should do before I even think about removing the broken pane?
Safety is non‑negotiable. Grab a pair of heavy‑duty gloves, safety goggles, and if you have one, a dust mask. Clear the area with a drop cloth or old sheet so shards don’t bounce around. Turn on a fan or open a window on the opposite side to keep any dust from settling. Once you’re geared up, you’ll feel steadier when you start prying.
How can I measure the opening accurately without ending up with a pane that’s too big?
Measure three points for both width and height – top, middle, bottom for width and left, centre, right for height. Write down the smallest number you get for each dimension; that’s the size you give the glass shop. A quick cardboard test in the frame will let you spot any tight spots before the glass even arrives.
Can I use regular silicone instead of a window‑grade sealant?
It’s tempting, but window‑grade silicone stays flexible and adheres better to glass and framing materials. Regular household silicone can shrink or become brittle over time, leading to cracks or drafts. If you’re in a pinch, a high‑quality clear silicone works, but look for “window” on the label – it’s worth the few extra dollars for longevity.
What’s the best way to avoid cracking the new pane when I snap the glazing bead into place?
Start the bead at one corner and work your way around slowly, using a flat screwdriver wrapped in a cloth or a dedicated bead‑setter. Press just enough to snap the bead – you’ll feel a gentle “pop.” If the bead resists, back off a millimetre and try again; forcing it can stress the glass and cause a hair‑line crack.
How long should I wait before I close the window after applying silicone?
The silicone skin forms in about 30 minutes, but give it a full 24‑hour cure before you slam the sash. That extra patience lets the sealant bond fully to both glass and frame, preventing the bead from pulling away when you close the window. If you’re in a hurry, test the seal by gently pressing the glass – it should feel solid, not wobbly.
What are common mistakes people make when they try to replace a pane themselves?
Skipping the triple‑point measurement, using the wrong bead size, and neglecting to clean the frame thoroughly are the usual culprits. Another big one is forgetting to double‑bag broken glass – a single bag can tear and leave shards scattered. Lastly, many DIYers apply too much silicone; a thin, even line does the job and looks cleaner.
When should I call LGFMH Construction instead of DIY‑ing the whole thing?
If the frame is warped, rotted, or you’re dealing with double‑pane insulated units, a pro can save you time and money. Also, if you feel uneasy about handling large panes – they can weigh 30 lb or more – a professional’s equipment and experience reduce the risk of injury. A quick call can give you a price check and let you decide whether to finish the job yourself or hand it over.


Comments