A Practical Guide to Selecting, Installing, and Maintaining Your Fence
- William McKracherne
- Jan 16
- 20 min read

Picture this: you’re sipping coffee on your porch, the sun’s just starting to peek over the trees, and you hear the familiar thump of a neighbor’s dog bounding over the yard. Suddenly, you realize you wish there was a simple way to keep your space private while still letting the breeze flow.
That’s where a fence steps in – not just a barrier, but a subtle extension of your home’s personality. Whether you’re after a classic picket look, a modern horizontal board, or a sturdy chain‑link that can stand up to the family’s energetic pups, the right fence can make your property feel both safe and inviting.
But let’s be real: choosing a fence isn’t as straightforward as picking paint. You’ve got to juggle budget, maintenance, local codes, and even the type of soil under your feet. And if you’ve ever tried a DIY install that ended with warped boards and a sore back, you know the frustration of getting stuck halfway.
In our experience at LGFMH Construction, we’ve seen homeowners wrestle with these exact dilemmas. One common thread? They want something that looks good now and holds up for years without turning into a constant chore.
So, what can you do to avoid that headache? Start by narrowing down the purpose of your fence – is it privacy, security, curb appeal, or a mix? Then think about the material that matches your climate and how much upkeep you’re willing to commit to. From there, a quick visual walk around your property can reveal hidden obstacles like uneven ground or underground utilities.
Sounds like a lot? Don’t worry. We’ll walk through the key considerations, break down the pros and cons of popular fence types, and give you practical tips to keep the project on track, whether you’re DIY‑inclined or ready to call in the pros.
Ready to turn that backyard vision into reality? Let’s dive in and explore everything you need to know about picking, installing, and caring for the perfect fence.
TL;DR
Choosing the right fence boils down to your purpose, climate, and maintenance willingness, so you can enjoy privacy, security, or curb appeal without future headaches.
We’ll walk you through material pros and cons, installation tips, and cost‑saving tricks, ensuring a smooth project for you whether you DIY or hire pros.
Step 1: Choose the Right Fence Type for Your Property
First thing’s first – what’s the main reason you want a fence? Privacy, security, keeping the kids or pets safe, or just giving your curb appeal a little boost? Knowing the "why" narrows the field faster than any online quiz.
Take a walk around your yard with a notebook. Jot down the spots that get the most sun, the corners that slope, any existing utility lines, and the places where neighbours peek over. That little reconnaissance saves you from buying a 6‑foot vinyl panel only to discover you need a shorter, more flexible option for a sloping garden.
Match the material to your climate
If you live in a humid zone, wood will love the look but hate the rot unless you’re ready to seal it every few years. In our experience, a composite fence from a reputable supplier can give you the wood vibe without the annual stain‑and‑seal routine.
On the other hand, if you’re dealing with salty sea air, aluminum or vinyl tend to hold up better. A quick cost comparison from Frame It All’s material guide shows aluminum averaging $4,500 for 100 ft versus $3,500 for vinyl, but aluminum’s rust‑resistance can shave years off the maintenance bill.
Budget isn’t just the sticker price
Think about total cost of ownership: material, labor, permits, gates, and future upkeep. For example, a basic chain‑link might be $2,000 upfront, but you could be spending $100‑$150 a year on rust‑prevention treatments. Compare that to a composite system that’s $5,000 up front and barely any annual cost.
Make a simple spreadsheet: list each material, add estimated labor (about 50 % of total cost if you hire pros), then add yearly maintenance. The option with the lowest five‑year total often wins, even if its initial price is higher.
Style meets function
Want a classic look? Picket fences are charming but provide little privacy. Pair a picket with a tall plant screen for a hybrid solution. If you need a solid barrier, consider 6‑foot vinyl or a cap‑coated composite that mimics cedar without the warping.
For a modern vibe, a glass fence around a pool offers an unobstructed view while still meeting safety codes. Just remember the cleaning routine – a clear pane is gorgeous, but a dirty one screams neglect.
Real‑world examples
One of our clients in Virginia Beach wanted a pet‑proof yard for two energetic Labrador retrievers. We recommended a 4‑foot aluminum fence with a mesh insert – sturdy enough for the dogs, low‑maintenance for the busy homeowner, and affordable enough to stay under budget.
Another homeowner on a sloping lot opted for a tiered split‑rail fence topped with woven wire. The design followed the land’s natural contour, saved on post material, and gave the rustic feel they craved.
Actionable checklist
Define purpose: privacy, security, aesthetics, pet containment.
Survey the site: note slope, soil type, utilities, sun exposure.
Research local codes: height limits, permitted materials, HOA rules.
Set a realistic budget: include permits, gates, and 3‑5 year maintenance.
Match material to climate and purpose.
Choose a style that complements your home’s architecture.
Get at least three quotes and compare total cost of ownership.
Need a deeper dive into material choices? Our Comprehensive Guide to Building and Maintaining Decks walks through durability, cost, and maintenance – many of the same principles apply to fencing.
Thinking about how a fence could frame a future garage‑to‑living‑space conversion? Check out creative garage apartment ideas for every budget – a sturdy fence can double as a privacy screen for that new loft.
And if you ever feel the project stress piling up, a quick mindfulness break can help. One simple technique is the "calma bottle" – learn how to make one here . A calm mind makes better design decisions.
So, grab that notebook, sketch a quick plan, and start narrowing down the material that fits your lifestyle. Once you’ve nailed down the type, the rest of the fence journey – permits, installation, and finishing touches – will feel a lot less like a mystery and a lot more like a well‑planned adventure.
Step 2: Plan Your Fence Layout and Measurements
Why layout matters before you swing a hammer
Imagine you’ve just bought the perfect fence panels, but when you start digging the posts you realize the line you drew on the grass doesn’t line up with the neighbor’s property line. Suddenly you’re back to the drawing board, and that excitement you felt this morning turns into a headache.
That’s why mapping out the layout first is the secret sauce – it saves you time, money, and a lot of awkward conversations with the HOA.
Step‑by‑step: Sketch, stake, and string
1.Grab a tape measure and a sketchpad.Walk the perimeter and note every corner, gate location, and any obstacles like trees or garden beds.
2.Mark the exact spot for each post.Use wooden stakes (2‑inch is a good size) and drive them where you think the posts will go. If the ground slopes, place a stake at the high point and another at the low point – you’ll see why in a minute.
3.Run a string line.Snap a mason’s line between the first and last stake. This visual guide shows you if you need to adjust for a curve or a slope before any concrete is poured.
4.Double‑check property lines.Look up your county’s parcel map online or call 811 to have utilities marked. In Oregon and Washington, the Utility Notification Center will send someone out for free – a tiny step that prevents a costly fence removal later.
Real‑world example: The suburban split‑level
We recently helped a family in Portland with a split‑level yard. Their front yard sloped down 4 feet over 30 feet, and the back garden had a large maple tree. By staking every 6 feet and using a string line that followed the slope, they discovered they needed a staggered post height – 4 feet in the low spot, 5 feet where the ground rose.
The result? A fence that hugged the terrain, kept the tree intact, and eliminated the need for extra grading work. The homeowner saved roughly $800 on labor because the crew didn’t have to redo post holes.
Tools that make measuring painless
• A 25‑foot laser distance measurer – it gives you a precise read without the tripping over cords.
• A sturdy carpenter’s level – essential for spotting a tilt that could turn a straight line into a wobble.
• A simple spreadsheet (even Google Sheets works). List each segment, its length, and the type of post needed. Add a column for “extra 10 %” to account for cut‑offs and mis‑reads.
Quick checklist before you call a contractor
Confirm property boundaries with a survey or county map.
Identify and mark all underground utilities (811 call).
Note permanent features – trees, rock outcrops, driveway edges.
Decide gate locations and clearances (minimum 3‑foot swing space).
Measure each run twice – once from the left‑most stake, once from the right‑most – and average the numbers.
Calculate total linear footage, then add 5‑10 % for waste.
Having these numbers in hand makes it easy to get accurate quotes from fence installers, and you’ll instantly spot an estimate that’s too low or too high.
Pro tip from our crew
When you hit a slope, don’t force the posts to be the same depth. Instead, set the post deeper on the high side and shallower on the low side – keep the top of the post level. This technique keeps the fence line straight without extra bracing.
And if you’re DIY‑inclined, consider pre‑drilling the post holes with a power auger; it speeds up the job and reduces the chance of bent posts.
What to do with your measurements
Once you’ve got the total linear footage, break it down by material. For vinyl panels, you’ll need panels in lengths that match your segments (often 8‑foot sections). For wood or composite, you’ll calculate board feet based on height and width.
Finally, write everything down in a simple project brief: "120 ft of 6‑ft high vinyl fence, 3 gates, 10 % extra for corners and cuts." Hand this to any contractor you interview, and you’ll instantly feel in control.
Planning your fence layout might feel like a lot of paperwork, but think of it as the blueprint for a smooth, stress‑free installation. The more precise you are now, the less you’ll have to redo later.
Step 3: Install a Wooden Fence – Step‑by‑Step Tutorial
Now that you’ve mapped out your fence line and have your material list, it’s time to turn those measurements into a standing wooden fence.
Below is a step‑by‑step tutorial we’ve refined on dozens of jobs, so you can avoid the common headaches that turn a simple project into a weekend of frustration.
Gather Materials and Tools
You’ll need pressure‑treated 4×4 posts, 2×4 rails, siding‑grade boards, galvanized nails or screws, a concrete mix, a post‑hole digger (or power auger), a level, a string line, a carpenter’s square, and a circular saw. If you’re in a damp climate, a water‑repellent sealant will save you years of rot. A quick tip from our crew: keep a bucket of water nearby to rinse sawdust – it keeps the work area tidy and prevents the wood from drying unevenly.
Mark and Dig Post Holes
Start by snapping a fresh string line between the first and last stake you placed in Step 2. Every 6‑8 feet, drive a 2‑inch wooden stake where a post will go. Measure from the ground up – you’ll want the top of each post to sit level, even on a slope.
Dig each hole about one‑third deeper than the post length; a 6‑foot post usually needs a 2‑foot hole. For rocky soil, a manual post‑hole digger works fine, but a battery‑powered auger will cut the time in half. Remember to add a few inches of gravel at the bottom for drainage – it’s a tiny step that stops water from pooling around the base.
Set Posts and Check Alignment
Place the first post in its hole, then add a few inches of concrete, tap it with a rubber mallet, and use a level to make sure the post is plumb. If the ground slopes, set the post deeper on the high side and shallower on the low side – keep the top of the post level. This trick keeps the fence line straight without extra bracing, a tip we swear by on sloping lots.
Before the concrete sets, run a string line from this post to the next one and snap a level across the top. Adjust each post until the line is perfectly straight. When you’ve got three posts in place, step back and eyeball the line – any wobble now will be amplified later.
Attach Rails and Panels
With all posts anchored, cut your 2×4 rails to the exact spacing between posts. Attach the bottom rail first with two galvanized nails at each post, then the top rail. Use a carpenter’s square to keep the rails square to the posts; a mis‑aligned rail will make the boards look crooked.
Start nailing the siding boards to the rails, leaving a 1/8‑inch gap for expansion. If you’re using board‑on‑board siding, stagger the joints by at least 6 inches to avoid a straight seam down the fence. A homeowner in Boise told us that adding a small “wiggle” in the board layout saved them from warping after a wet spring.
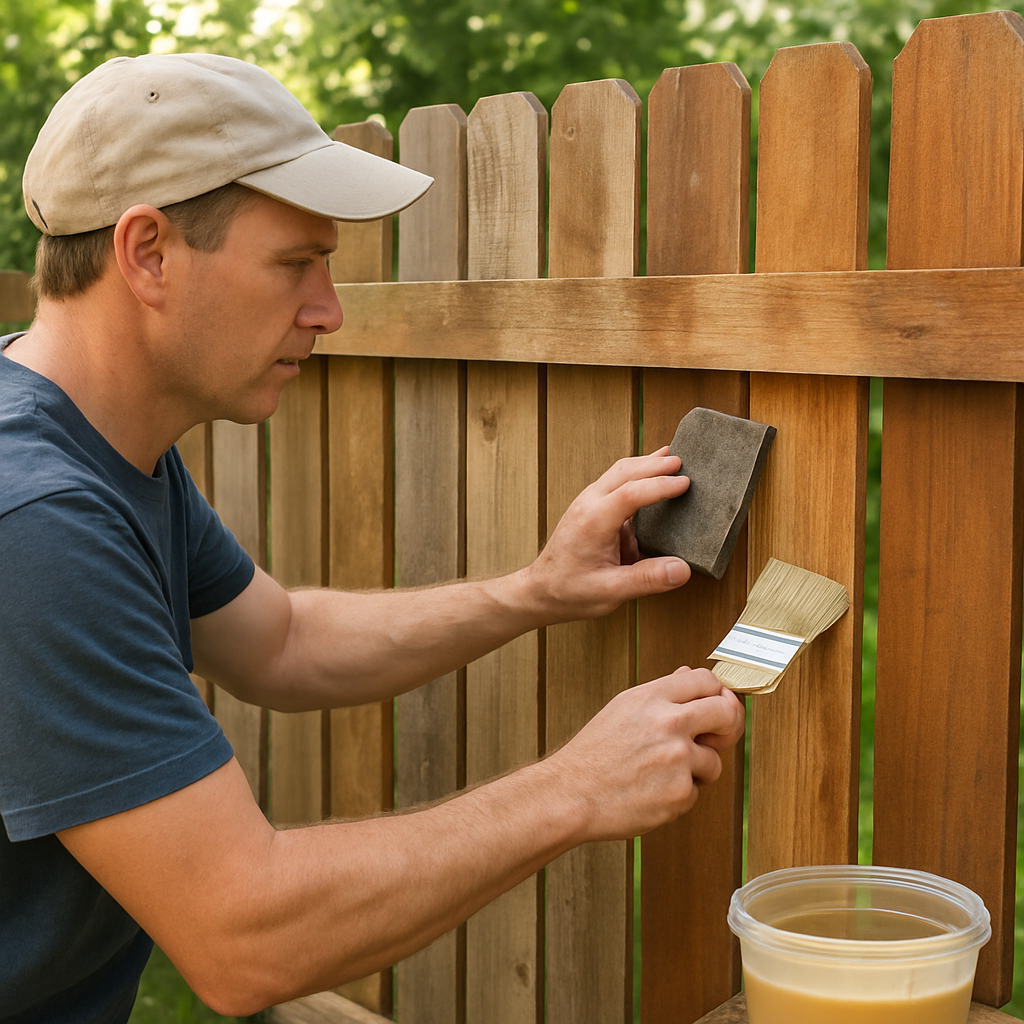
Finish and Protect Your Fence
Once the panels are up, walk the entire fence with a level to spot any high spots. Fill low spots with shims before the final nails go in. Then brush or spray a coat of exterior‑grade sealant on all exposed wood. In our experience, a single clear coat adds roughly 15 % more lifespan to a pressure‑treated fence.
Finally, install any gates using heavy‑duty hinges and a latch that can withstand wind. Double‑check that the gate swings freely and that the latch aligns perfectly – a mis‑aligned gate is the fastest way to get a call for repair.
If you prefer to let the pros handle the grunt work, LGFMH Construction offers full‑service fence installation, from staking to final seal. But if you’re comfortable with a drill and a concrete bucket, you’ve got everything you need right here.
Want to see these steps in action? Check out this short video that walks you through the whole process.
The video demonstrates the post‑setting technique we described, and you’ll notice the same level checks that keep the line true.
For a visual reference, you can also watch a detailed wooden fence installation walkthrough on YouTube.
Step 4: Maintain and Repair Different Fence Materials
We’ve gotten the fence up, but a fence that looks great today can turn into a headache tomorrow if you don’t keep up with it. The good news? Most fence materials only need a little love every few months, and the steps are simple enough that you can handle them yourself.
Wood fences – seal, strip, and watch for rot
Wood gives that classic, warm feel, but it also drinks up water like a sponge. First, give it a good visual sweep at least twice a year – spring and fall are perfect. Look for any splintered boards, faded stains, or areas where the wood feels soft to the touch.
If you spot a problem, sand the rough spot, then apply an exterior‑grade sealant or stain. In our experience, a clear sealant adds roughly 15 % more lifespan, while a pigmented stain can hide minor discoloration and protect against UV.
Don’t forget the post tops – water pools there and can cause early rot. A quick brush‑on of sealant or a metal post cap does the trick.
Vinyl fences – clean, tighten, and replace clips
Vinyl is low‑maintenance, but it’s not maintenance‑free. A garden hose and a mild detergent will keep it looking fresh. For stubborn grime, a soft‑bristle brush works better than a pressure washer – the latter can force water behind the panels.
Every six months, walk the line and check the screws and brackets. Vinyl expands and contracts with temperature, so fasteners can loosen. Tighten any loose screws and replace broken clips; a single cracked panel can let wind pry the whole section apart.
Metal fences – rust watch and paint touch‑ups
Aluminum and steel fences are sturdy, but they can still show the signs of age. For steel, the biggest enemy is rust. Spot rust early by running your hand over the surface – a faint orange feel means it’s time to act.
Use a wire brush to remove loose rust, then apply a rust‑inhibiting primer followed by a coat of exterior‑grade paint. For aluminum, a simple wash with a non‑abrasive cleaner keeps the finish bright, and a yearly inspection for dents will help you catch trouble before it spreads.
Composite fences – protect the surface and check for warping
Composite fences blend wood fibers with plastic, giving you the look of wood without the rot worries. Still, they can discolor from UV exposure. A UV‑protective spray applied once a year restores the color and adds a glossy barrier.
Because composite boards are heavier, they can bow if the sub‑structure shifts. Walk the fence after a big storm and look for any sagging sections. If a board has warped, you can usually re‑secure it with the original mounting brackets – no need for a full replacement.
Quick repair checklist – keep it handy
Inspect twice a year (spring & fall).
Identify problem area: wood rot, vinyl crack, metal rust, composite discoloration.
Gather tools: sandpaper, sealant, screwdriver, wire brush, paint, UV spray.
Perform the specific fix (sand & seal, tighten screws, rust‑prime & paint, UV‑spray).
Log the date and any parts replaced for future reference.
Having this checklist on your fridge means you won’t forget a step when the season changes.
When to call in the pros
If you find a section that’s consistently shifting, or if rust has eaten through a steel post, it’s time to get professional help. LGFMH Construction can assess structural integrity, replace damaged posts, and ensure everything is up to code – saving you from costly re‑work later.
For a visual walk‑through of fence upkeep, check out this helpful YouTube tutorial on fence maintenance . It shows the exact techniques we just described, from cleaning vinyl to sealing wood.
Remember, a well‑maintained fence not only protects your yard but also boosts curb appeal and property value. A little time each season keeps the big problems at bay.
Step 5: Understand Local Fence Regulations and Permits
When you finally pick out that perfect fence, the last thing you want is a surprise stop‑sign from the city office. Trust me, we’ve seen a lot of homeowners get stuck because they missed a tiny clause in a local ordinance.
So, how do you make sure your fence stays exactly where you want it—without a costly re‑run?
Know the code that applies to you
The first thing is to find the right set of rules. Every municipality has its own version of the International Residential Code, plus extra fence‑specific ordinances. For example, the city of Wheaton, IL publishes a clear fence ordinance that spells out height limits, material restrictions, and setback requirements.
If you live outside Illinois, the same principle applies – just look for the planning or building‑code department on your city’s website. A quick Google search of “[your city] fence permit” usually lands you on a PDF or a web page that lists the exact numbers.
When a permit is actually required
Not every fence needs a permit, but most do when you cross certain thresholds: height over 4 feet in the front yard, a total linear footage that exceeds 150 feet, or when the fence is part of a new structure like a deck. In many Texas counties, the local municipality will also ask for a permit even if the state doesn’t have a blanket fence law; the Texas neighbor fence guide explains how city ordinances can still dictate permit needs.
And if you’re in a homeowners’ association, check the CC&Rs – they can add appearance rules even when the city is silent.
How to gather the paperwork
Start with a simple site plan. Sketch your property line, mark the proposed fence line, and note any setbacks from sidewalks, driveways, or utility easements. Most permit applications ask for exactly this drawing, plus a brief description of the material (e.g., 6‑ft vinyl, pressure‑treated wood) and the fence height.
Next, call the local building‑code office. A 2‑minute phone call can save you hours of back‑and‑forth. Ask them:
Do I need a permit for aX‑foot fence?
What is the turnaround time for review?
Are there any neighborhood‑specific design guidelines?
Take notes and ask for a copy of the application form – many cities let you download it online.
Tips for a smooth permit process
1. **Double‑check setbacks** – measure from the property line, not the house wall. A 2‑foot buffer is a common requirement.
2. **Include a “as‑built” drawing** with post spacing and concrete footings. It shows the inspector you’ve thought through structural stability.
3. **Pay the fee early**. Some jurisdictions won’t start the review until the fee is received, and late fees can add up.
4. **Keep a copy of your permit** on site during construction. Inspectors love seeing the paperwork posted on a nearby post or in the tool shed.
Quick compliance checklist
Confirm your fence height is within local limits (often 4‑6 ft for front yards).
Check setback requirements from sidewalks, streets, and utility lines.
Verify if your HOA has additional design rules.
Prepare a scaled site plan with property lines and proposed fence layout.
Call the city building department to confirm permit necessity.
Fill out the application, attach the site plan, and pay the fee.
Post the approved permit on the job site and schedule any required inspections.
Following these steps may feel like a lot of paperwork, but think of it as a safety net. A properly permitted fence not only avoids fines, it also protects your investment if you ever decide to sell. And when the inspector gives you that approving nod, you’ll finally get to enjoy your new privacy screen without a second thought.
Fence Material Comparison Table
Alright, you’ve scoped out your yard, you’ve jotted down the purpose of the fence, and now the big question is: which material actually earns its keep?
We’ve all stared at a showroom wall of samples and thought, “Do I really need that fancy finish?” The answer lies in how each material lines up with your budget, climate, and how much time you want to spend on upkeep.
Quick sanity check
Do you love the idea of a fence that looks like a classic picket but won’t need a fresh coat every spring? Or are you more after a “set‑and‑forget” solution that can survive a summer bake‑out without warping?
Below is a no‑fluff table that puts the most common choices side‑by‑side. It’s the kind of thing you can print, stick on the fridge, and reference when the hardware store salesman starts talking your ear off.
Material | Pros | Cons | Typical cost / ft (installed) |
Wood | Natural look, easy to customize, good privacy | Needs staining/sealing, prone to rot, higher maintenance | $10‑$20 |
Vinyl | Low maintenance, good privacy, resistant to rot | Can warp in extreme heat, limited color options, higher upfront | $20‑$30 |
Aluminum | Lightweight, rust‑free, easy DIY, fits slopes | Less privacy (spacing), not as strong as steel | $15‑$25 |
Notice how the cost ranges overlap? That’s because the price you actually pay depends on whether you hire a pro or go the DIY route. For instance, the aluminum price range above comes straight from a fence cost guide that breaks down installed prices per linear foot. If you’re comfortable digging post holes yourself, you could shave a few hundred dollars off that number.
On the other hand, Angi’s pros‑and‑cons roundup points out that vinyl, while pricier upfront, often ends up cheaper over a five‑year span because you won’t be buying paint, sealant, or replacement boards every couple of years.
When climate throws a curveball
If you live in the Pacific Northwest, moisture is your constant companion. Wood will love the shade but hate the rot – you’ll be sealing it every 2‑3 years. Aluminum, by contrast, laughs at rain; the powder coating stays intact for years.
In a scorching desert like Phoenix, vinyl can soften and bow. That’s a real headache you’ll read about in the Angi article – they flag heat‑related warping as a downside.
Privacy vs. openness
Need a solid barrier so nosy neighbors can’t peek? Wood and vinyl panels give you full privacy. Aluminum’s spaced pickets let light through, which is great for a pool area but not ideal if you’re trying to hide a backyard garden.
And if you’re juggling kids and a big dog, think about picket spacing. The aluminum guide mentions that tighter spacing can improve security, but you’ll sacrifice the airy look.
Maintenance reality check
Let’s be honest: no fence is truly “set‑and‑forget.” Wood demands a seal every few years. Vinyl needs a gentle wash to avoid streaks. Aluminum just needs an occasional rinse and a visual check for loose fasteners.
So, what should you do next? Write down the three criteria that matter most to you – cost, maintenance, privacy – and match them against the table. If you’re still on the fence (pun intended), give LGFMH Construction a quick call. We can walk you through the numbers and even help you source the right material for your climate.
Remember, the best fence is the one that fits your life, not the one that looks good on a brochure. Use the table, weigh the pros and cons, and you’ll end up with a fence that feels like it was built just for your home.
Conclusion
After digging through the why, the climate match, the budget math, and the nitty‑gritty of permits, the picture is clear: the right fence is the one that solves your everyday headaches, not the one that looks best in a catalog.
Do you remember that moment when you imagined a private backyard oasis for the kids and the dog? Keep that feeling front‑and‑center when you pick your material. If low maintenance is king, vinyl or aluminum will save you weekends. If you crave natural charm and don’t mind a seal every few years, wood still wins.
Here’s a quick cheat sheet: write down three priorities, match them against the table we built, and then walk through the numbers with a trusted pro. In our experience, a short phone call with LGFMH Construction can clear up any lingering doubts and even pull together a cost‑breakdown tailored to your lot.
So, what’s the next step? Grab that notebook, sketch a rough layout, and set a deadline for getting quotes. The sooner you lock down the details, the faster you’ll see that fence start to take shape.
Remember, a fence isn’t just a boundary—it’s an extension of your home’s personality. Choose wisely, and you’ll enjoy peace of mind for years to come.
FAQ
How do I know which fence material is right for my climate?
First, look at the extremes your yard faces – does it get drenched in rain, baked in a desert sun, or swing between hot summers and freezing winters? In wet areas, aluminum or vinyl tend to hold up because they won’t rot, while wood can thrive in milder zones if you’re willing to seal it regularly. In scorching heat, avoid thin vinyl panels that can bow; a thicker, UV‑stabilized version or a powder‑coated aluminum will stay flat. When you match the material to the local weather, you’ll spend far less on repairs down the road.
What permits do I need before installing a fence?
Most cities require a permit when your fence exceeds a certain height – usually 4 ft in the front yard and 6 ft in the back – or when it runs along a public right‑of‑way. You’ll also need to respect setback rules, which often mean keeping the fence a few feet away from sidewalks or streets. A quick call to your local building department (or a 2‑minute search for “[your city] fence permit”) will tell you the exact thresholds. If you’re in an HOA, pull the covenants for any additional design restrictions.
How can I estimate the total cost of a fence project?
Start with a linear‑footage count of the perimeter you’ll fence. Multiply that by the per‑foot installed price you’ve seen in quotes – remember, vinyl and aluminum sit at the higher end, while basic wood or chain‑link are cheaper up front. Then add 10‑15 % for waste, gates, and post‑hole concrete. Finally, factor in yearly upkeep: wood may need a seal coat every 2‑3 years, while vinyl just needs an occasional wash. Adding those maintenance dollars gives you a realistic five‑year total.
What maintenance does a wooden fence actually require?
Wood looks great, but it’s a living material, so it asks for regular love. Sweep off debris twice a year, then inspect each board for soft spots, splinters, or faded paint. Sand any rough patches and apply a clear sealant or a pigmented stain – this adds roughly 15 % more life to the fence, according to our experience. Don’t forget the post tops; a metal cap or a dab of sealant prevents water from pooling and causing rot.
Can I install a fence myself, or should I hire a pro?
If you’re comfortable with a power auger, a level, and a bit of concrete mixing, a DIY install can save you a few hundred dollars. The biggest pitfalls are digging to the correct depth on slopes and keeping the string line perfectly straight. When you miss those, you end up with wobbly panels or extra labor later. If the job involves a steep grade, utility lines, or a complex gate mechanism, bringing in a crew – like LGFMH Construction – usually pays for itself in time and peace of mind.
How do I prevent my fence from warping or rotting over time?
Start with good footing: a 6‑inch gravel base at the bottom of each post hole lets water drain away. Use pressure‑treated lumber for wood fences, and make sure the posts are set deeper on the high side of a slope to keep the tops level. For vinyl or aluminum, leave a small expansion gap between panels so heat doesn’t force them to buckle. Regularly tighten any loose screws or clips, and give the whole line a quick hose‑down in the spring to wash away grit that can trap moisture.
What are the most common mistakes homeowners make when planning a fence?
Skipping the property‑line check is a classic error – you don’t want to dig into a neighbor’s yard or a utility easement. Another frequent misstep is under‑budgeting for gates; they often cost 30‑40 % more than a simple panel because of hardware and hardware‑clearance requirements. Finally, many people pick a material based solely on looks and ignore maintenance realities, only to discover a year later that the “beautiful” picket is peeling. A quick checklist – map the line, verify setbacks, budget for gates, and match material to climate – keeps those surprises at bay.


Comments