Basement Wall Repair Cost: What to Expect in 2026
- William McKracherne
- Feb 10
- 12 min read

Picture this: you’re pulling the last plank off a basement door, expecting a clean finish, only to find a fresh pool of water seeping in. It’s not just a splash—it's a sign that the wall repair costs you’re staring at are already on the rise.
We’ve all seen the price tag on a quick DIY patch versus a full wall replacement. The truth? A basic patch can run $300 to $600, while a proper waterproofing and reconstruction job can shoot up to $4,000, depending on the damage depth, material quality, and whether you’re hiring a contractor. That’s a lot of pennies, and it’s easy to overlook the long‑term savings of a solid fix.
What usually drives the cost spike is the underlying cause. Cracked concrete, seepage from bad drainage, or a history of flooding turns a simple patch into a structural overhaul. You end up paying for excavation, re‑grading, new backfill, and the waterproofing membrane itself. Ignoring the root problem may save you money today but costs you in repairs and water damage later.
So what can you do? Start with a clear assessment: grab a tape measure, inspect for cracks, and check the slope of your yard. If you see any of those red flags, check out this step‑by‑step guide on waterproofing —it walks you through prep, material choices, and the exact layering that keeps future leaks at bay.
When budgeting, remember that a professional quote usually covers labor, materials, permits, and cleanup. DIY can shave a few hundred dollars, but you’ll likely need to pay for a concrete grinder, a moisture meter, and a quality sealant kit. Compare at least three estimates, ask for itemized lists, and check references—your wallet and your basement will thank you.
If you’re thinking about finishing off the repair with some functional lighting—like a safety egress or a subtle accent—consider a partnership with a specialist like LED Artistry. They’ll help you choose code‑compliant fixtures that complement the new waterproofed space, giving you peace of mind and a better look.
Bottom line: don’t let a hidden leak turn into a hidden debt. Invest in a thorough repair, use reliable resources, and keep an eye on future maintenance to avoid that same basement wall repair cost again.
TL;DR
If a leak is dripping from your basement, you’re looking at repair costs that can swing from a few hundred dollars for a patch to nearly $4,000 for full waterproofing and reconstruction. LGFMH Construction guides inspection, budgeting, and proper material choice for a lasting fix that keeps future costs down.
Step 1: Identify the Damage and Estimate the Scope
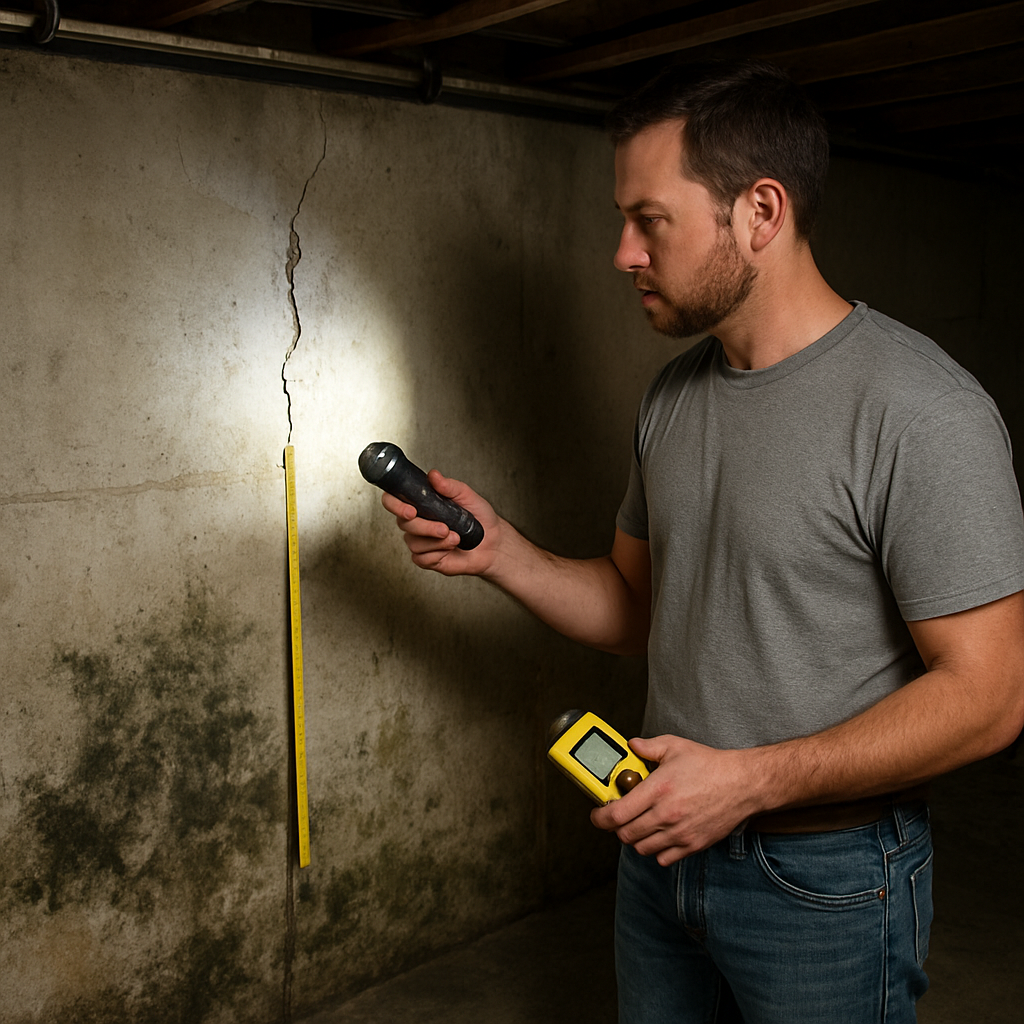
Okay, you’re standing in the basement, flashlight in hand, and you’re wondering why that little puddle turned into a full‑blown water feature. The first thing you do is put your detective hat on and start measuring. Grab a tape measure, a notepad, and a digital moisture meter if you have one.
Measure the length of the wet wall, the crack depth, and the floor slope. A slope toward the wall means water is finding a path; flat or uphill slopes hint at sump or pipe issues.
Check for moldy corners, warped studs, or a musty smell. Each clue tells a story about what's hidden in the concrete.
If you see a long crack and the floor has sagged, you’re likely looking at a structural problem, not just a patch.
A quick estimate: $300–$600 for a patch, $1,500–$4,000 for full waterproofing. Our step‑by‑step guide explains the materials and steps.
A moisture meter gives you a quick read on hidden water. Plug it into the crack; readings above 30% mean you need more than a patch.
Use a printable worksheet to track costs. JiffyPrintOnline offers free forms for estimates.
When you’re calculating costs, think about materials like cement, waterproofing membranes, and backfill. The thickness of the membrane, the quality of concrete, and whether you need to replace studs all add to the bill.
Compare three contractor quotes side‑by‑side, checking labor, materials, permits, and cleanup. A qualified contractor will give you an itemized quote. Look for breakdowns: labor, materials, permits, and cleanup. This transparency helps you spot hidden fees.
If you plan to add egress lighting, consider LED Artistry for code‑compliant fixtures. Lighting upgrades can also boost the space’s value. LED fixtures are energy‑efficient and durable, making them a smart addition to any finished basement.
Summarize: record every measurement, note every crack, and run a rough cost estimate. That gives you the baseline before fixing. Once you’ve got the numbers, decide whether DIY patching is enough or you need a professional waterproofing job.
We’ve got a video that walks through the inspection.
After watching, check this visual guide of a tape measure and moisture meter next to a cracked wall.
Trust the numbers, then take the next step today.
Step 2: Choose the Right Repair Method and Materials
Now that you’ve scoped the damage, it’s time to decide how you’re going to fix it—because the method you pick can swing that basement wall repair cost by a few hundred or even a few thousand dollars.
Think of the wall as a pizza. Do you want a thin crust that covers the hole, or a thick, full‑size pie that guarantees no leaks? The thin‑crust option is a patch kit: quick, cheap, and good for cracks under 1/4‑inch. The pie is a full resurfacing with a waterproof membrane, concrete injection, and re‑grade—more work, but it keeps the future drip at bay.
For most homeowners, the sweet spot is a two‑phase approach: first, stabilize with a high‑strength epoxy or polyurethane filler, then seal the surface with a spray‑on waterproofing system. Epoxy holds the concrete together, while spray‑on resin creates a barrier that’s easier to apply than laying a rigid sheet. In 2026, a DIY kit can start around $150, but a professional job that includes excavation and grading will pull in $800 to $1,200 for the same two‑step process.
Here’s a quick decision checklist you can run at the kitchen table:
Crack depth > 1/2 inch? Go full resurfacing.
Visible mold or dampness? Add a mold‑resistant additive to your filler.
Can you dig the wall? If not, a surface‑only spray‑on might be your only choice.
Budget < $1,000? Stick to the epoxy patch and spray‑on; you’ll still cover the crack without breaking the bank.
We’ve seen that homeowners who skip the second, sealing step often get a second leak within a year. That’s why we recommend pairing the patch with a high‑quality sealant rated for at least 10 years of protection. The extra upfront cost—about $200 more—can save you that $2,500 rebuild down the line.
Remember, material quality isn’t just about price tags. A low‑grade cement mix can crack again if it dries too fast. A premium, sulfate‑resistant mix will last longer, and it’s worth the $50 extra per cubic yard.
Before you buy, ask the supplier for product data sheets and, if you’re working with a contractor, request a written breakdown of labor versus materials. Knowing where the money goes keeps the basement wall repair cost predictable.
Let’s bring the process to life with a visual guide. Below, we’ve embedded a short walk‑through that walks you through the exact steps we use at LGFMH Construction.
Now that you’ve seen the method in action, you’re ready to pick the right materials and lock in a repair that won’t let water sneak in again.
Step 3: Hire a Professional vs DIY – Cost Comparison
Let me cut to the chase: when you’re staring at a damp wall, the first question on your mind is how much it’s gonna cost you.
You’ve already seen that a DIY patch can range from $300 to $600, but a full‑scope job can hit $4,000 or more.
The trick is knowing where the money goes and whether the extra upfront spend buys you peace of mind for the next decade.
Here’s the low‑down: labor, materials, permits and the long‑term warranty are the three buckets that split the bill.
A professional will typically charge a flat rate that covers digging, back‑fill, a waterproof membrane and a code‑compliant sealant.
In 2026, that comes to about $800–$1,200 for a two‑step process on a 10‑foot wall, according to the data in the Today’s Homeowner guide .
A DIY kit, on the other hand, might cost $150 to $300, but you’ll need to buy a concrete grinder, a moisture meter and a spray‑on sealant kit—often a few hundred dollars more than you think.
You’re also skipping permits, inspections and the peace‑of‑mind that comes with a licensed pro’s warranty.
So, how do you decide? Build a simple spreadsheet: list the line items, estimate the per‑foot cost for a bowed wall, add in the extra labor for a DIY approach and see what the total looks like.
One rule of thumb is that if the bowing is more than 2 inches, or if you’ve seen water seepage for more than a month, you’re probably looking at the higher end of the spectrum. A pro can install wall anchors (around $80–$150 per foot) or helical tiebacks ($300–$360 per foot) that lock the wall in place and give you a 10‑year guarantee on the structural fix.
If you’re a budget‑first person, consider a DIY kit for the patch and a professional for the waterproof membrane and grading. That hybrid approach often lands in the $1,000–$1,500 range and keeps the wall dry without a full rebuild.
In short, the bottom line is this: the upfront cash you pay for a pro often buys you a guarantee and a headache‑free future. If you’re ready to dig, measure, and test moisture, DIY can shave a few hundred dollars—but be ready to invest in the right tools and the extra time it takes.
Take a minute to jot down your wall’s length, the depth of the crack, and a quick budget. Plug those numbers into the table below and you’ll see at a glance which route makes sense for you.
Feature | DIY | Professional | Notes |
Labor | You + helpers – time‑intensive | Licensed crew – paid hourly | Professional labor often includes grading and cleanup |
Material Cost | $150–$300 + tools | $800–$1,200 (includes waterproofing, anchors) | Professional includes high‑grade sealant & membrane |
Warranty | None unless you purchase a guarantee | 10‑year structural guarantee on anchors/ tiebacks | Pro guarantee covers labor and materials |
Time to Complete | Several days to weeks depending on skill | 1–3 days for a 10‑foot wall | Professional scheduling reduces downtime |
Risk/Complexity | High – potential for structural failure | Low – certified methods, inspection compliance | Professional reduces long‑term maintenance risk |
Step 4: Ongoing Maintenance to Avoid Future Repairs
After the big fix, the real challenge is keeping the wall dry—think of it like a plant that needs daily water and sunlight. If you skip the routine check‑ins, those small leaks become the next big repair.
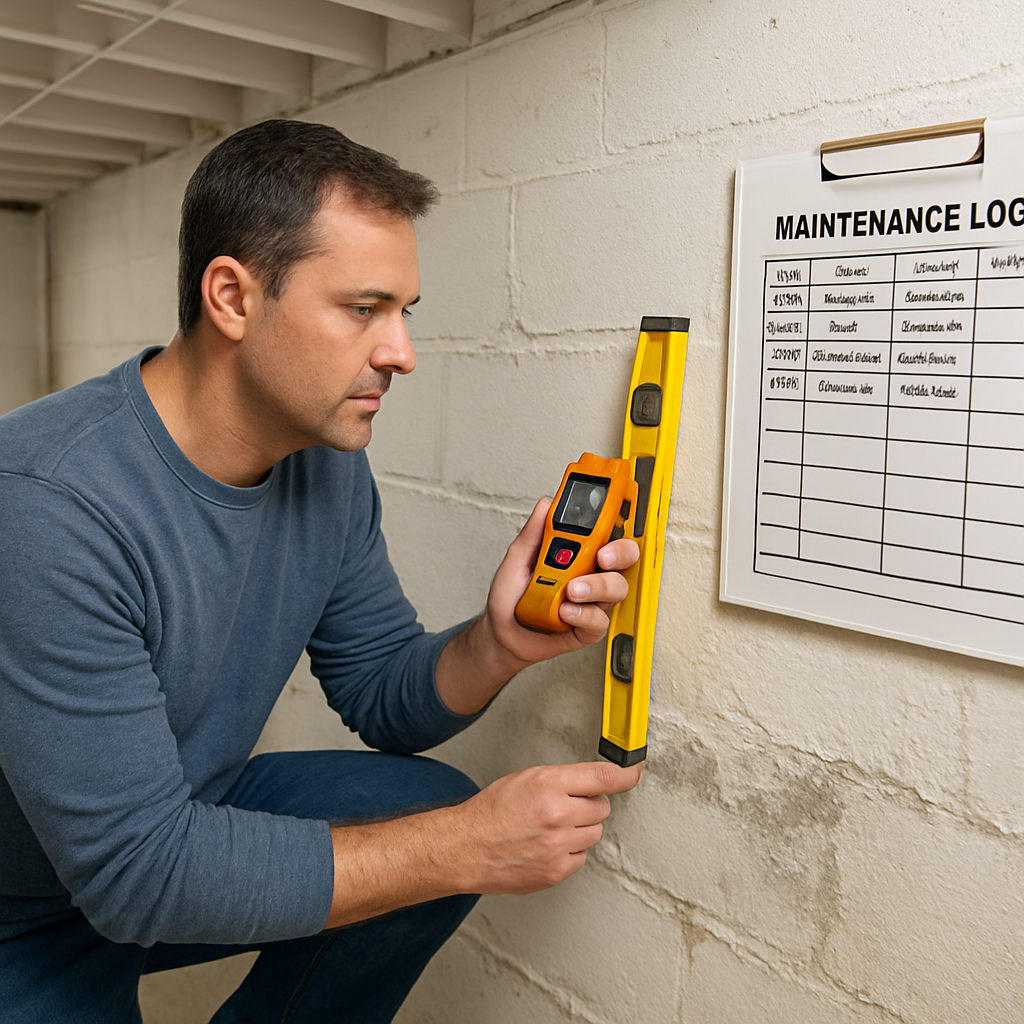
So, what does a maintenance routine look like for a basement wall? Start with a quick visual walk‑through each spring. Look for paint flaking, new cracks, or damp spots. If you spot any of those red flags, grab a moisture meter and test a few inches deep. In most cases a reading above 10 % means moisture is still on the move.
Drainage is the silent villain. A slope of less than a 1‑in‑20 away from the foundation invites water back in. Use a simple level or a cheap slope meter to confirm the yard grades are correct. If you catch a problem early, you can re‑grade the soil or add a French drain without breaking the bank.
Set a calendar. Mark your phone to remind you each summer, winter, and after any major storm. That’s when the walls are most vulnerable. Keep a maintenance log next to the wall—note the date, moisture level, and any action taken. Over time you’ll see patterns that tell you whether the repair is holding.
Tools you’ll need are minimal: a moisture meter, a level, a flashlight, and a good pair of gloves. If you’re a DIY fan, we’ve found that a simple “quick‑fix” kit—sealant, primer, and a brush—can cover minor seepage spots before they grow.
Check the gutters and downspouts too. A clogged gutter can spill water right onto the foundation. Clean them at least twice a year. If they’re sagging, look at the guides we publish on fixing sagging gutters to keep the flow away from the walls.
When you hit a cost threshold, you might think “Do I go pro?” In 2026, a quick touch‑up on a repaired wall can be as cheap as $200. A full re‑inspection by a licensed crew, however, ensures any hidden structural issues are caught early—usually costing $500–$800, but potentially saving thousands down the line.
Bottom line? Treat your basement wall like a long‑term investment. Regular checks, simple tools, and a little preventive work means you’ll spend less on surprises and more on peace of mind.
Additional Resources
Curious how to keep your basement dry without breaking the bank? Let’s break down the essentials you’ll need to manage future costs and keep that wall strong.
First, grab a reliable moisture meter and a sturdy level—tiny tools that pay off by catching leaks early. Then, schedule quarterly checks to track any changes before they inflate the baseline repair expense.
Finally, keep a simple maintenance log: jot the date, moisture reading, and any action you took. Over time, that log tells a clear story of how your wall stays dry and how your basement wall repair cost stays predictable.
Frequently Asked Questions
What factors drive the cost of a basement wall repair?
Basement wall repair cost hinges on three things: the size of the damage, the depth of the seepage, and the materials you choose. A shallow crack that’s a few millimeters deep might just need a patch kit, while a 3‑inch void that’s been holding water for months could require back‑fill, a waterproof membrane, and possibly structural bracing. Each of those steps adds to the price.
How quickly should I act once I notice water on my basement wall?
Time is money when it comes to basement walls. The moment you see a damp patch or a new crack, start a quick inspection. If the moisture level reads above 10 % on a meter, that’s a red flag. Acting within days prevents the water from seeping deeper, which could turn a $500 patch into a $4,000 overhaul.
Can I skip the waterproof membrane to save on costs?
Skipping a waterproof membrane is tempting, but it’s a short‑sighted move. Without that protective layer, the wall will keep pulling water in, leading to mold, rot, and higher future repair bills. A high‑quality membrane may add $200‑$300 upfront, but it pays off by keeping maintenance costs low for years.
What’s the typical timeline for a full basement wall repair?
A full repair, including excavation, back‑fill, and membrane installation, usually takes 1–3 days for a standard 10‑foot wall. If you’re doing a DIY patch, expect a weekend or two of work plus a few days for curing. Planning ahead and scheduling during mild weather can shave off a few days.
Will the cost change if my basement has mold or structural issues?
Absolutely. Mold requires remediation, which can add $500‑$1,500 depending on severity. Structural problems—like a bowed wall—might need anchor bolts or tiebacks, pushing the price toward the higher end of the spectrum. In our experience at LGFMH Construction, a mold‑free, structurally sound wall averages $1,200 for a full waterproofing job.
How do I compare quotes from different contractors?
Ask for a line‑item estimate that separates labor, materials, and permits. A reputable contractor will provide a clear breakdown and reference similar projects. If a quote skips details, it’s a red flag that they may be inflating costs or cutting corners. Always compare at least three estimates before signing.
What maintenance steps can keep the repair cost down long term?
Keep a simple log: record the date, moisture reading, and any action taken. Check gutters twice a year and maintain a 6‑in‑20 slope away from the foundation. A quick quarterly scan with a moisture meter can catch problems early, so you avoid a costly emergency repair later.
When is it worth hiring a professional versus doing it myself?
If the damage is deep, the wall is bowed, or you’re dealing with mold, a pro is worth the investment. Professionals bring specialized tools like concrete grinders and guarantee their work for up to 10 years. For shallow cracks that fit within a DIY kit, a careful homeowner can save $200–$400, but they’ll need to invest in quality sealants and a moisture meter.
Conclusion
We’ve walked through the maze of basement wall repair cost together, from tiny cracks to full structural overhauls. You’re now armed with the numbers that matter and a sense of what to look for in a contractor or DIY kit.
Remember, the most expensive line on a quote usually hides hidden work—excavation, grading, and a waterproof membrane that keeps water out for years. If a price skips those details, ask for a line‑item breakdown or a second opinion.
When you’re ready to take the plunge, a quick checklist can save you hours of back‑and‑forth. Note crack length, moisture level, drainage slope, and any mold. Keep that list handy so every contractor sees the same data.
If you decide DIY, start with the smallest patch—just a 1/4‑inch crack. Grab an epoxy kit, a moisture meter, and a quick sealant. Finish the job in a weekend, but remember the membrane is the real insurance against future leaks.
If a professional steps in, look for a company that offers a 10‑year structural guarantee and a clear warranty on materials. That’s a safety net you’ll thank yourself for years down the line.
Bottom line: keep the conversation with your contractor open, ask questions, and never settle for a vague estimate. With the right prep, you can lock in a fair price and a dry, safe basement that lasts.
Disclaimer
We’ve shared numbers, checklists, and real‑world examples to help you make an informed call on your basement wall repair cost. Still, the reality on the ground can change in a heartbeat.
First, remember that every estimate is a best‑guess based on the info you provide and the conditions we see. Hidden moisture, underground pipes, or a storm‑damaged footing can pop up and shift the cost curve.
Second, warranties and guarantees are only as reliable as the terms you sign. A 10‑year structural promise is great, but read the fine print—most exclude damage from improper maintenance or natural disasters beyond the contractor’s control.
So, what does that mean for you? Treat every quote as a starting point, not the final word. Keep your paperwork organized, ask for a line‑by‑line breakdown, and don’t hesitate to get a second look if something feels off.
Bottom line: we’re here to guide you, but the actual cost and outcomes depend on on‑site conditions, your chosen materials, and the expertise you bring to the job. Stay curious, stay prepared, and you’ll build a foundation that keeps the water out for years. Remember, the goal is lasting protection, not a quick fix that will need revisiting soon.


Comments