Best Caulking for Bathroom Tile Joints: A How-To Guide
- William McKracherne
- Jul 9
- 9 min read

A failed caulk joint in your bathroom is one of those small problems that turns big fast. Water sneaks behind the tile, rots the substrate, and suddenly you're looking at a full gut job. This guide walks you through choosing the right caulk for tile joints and applying it so the seal actually holds.
Step 1: Choose the Right Caulk Type for Bathroom Tile
Not every caulk works in a wet bathroom. The joint between your tile and tub, tile and floor, or two tile planes is amovement joint. It shifts slightly as the house settles and as temperature changes. Grout cracks in those spots because grout is rigid. Caulk is flexible, which is exactly why it belongs there.
Here's what the options look like in practice:
Caulk Type | Best For | Flexibility | Paintable | Mold Resistance |
100% Silicone | Tub/shower surrounds, high-moisture joints | Excellent | No | Excellent |
Siliconized Latex (Acrylic + Silicone) | Tile-to-drywall joints, painted surfaces | Good | Yes | Good |
Pure Acrylic Latex | Low-moisture areas, baseboard edges | Fair | Yes | Poor |
Polyurethane | Floor tile joints, high-traffic areas | Excellent | Yes (most) | Good |
For the tile-to-tub and tile-to-shower-pan joint,100% silicone is the right call. It won't shrink, it stays flexible, and it repels water rather than absorbing it. According to the EPA's mold prevention guidance , controlling moisture at joints and seams is one of the most direct ways to prevent mold growth in bathrooms. Silicone does exactly that.
Siliconized latex is a fair middle ground if you need to paint the caulk line to match a wall color. Just know it won't last as long in a fully wet zone like a shower floor corner.
At LGFMH Construction , we handle interior repairs where the wrong caulk choice shows up as a callback six months later. Our default for bathroom tile joints is always 100% silicone in wet zones, siliconized latex everywhere else. If you're unsure which zone your joint falls into, go silicone. You won't regret it.
Key Takeaway:For any joint that touches water directly , tub edges, shower curbs, floor tile corners , 100% silicone caulk is the correct choice.
Step 2: Gather the Right Tools and Safety Supplies
Getting the tools ready before you open the caulk tube saves a lot of frustration. Silicone sets quickly and you don't want to be hunting for a smoothing tool while the bead starts to skin over.
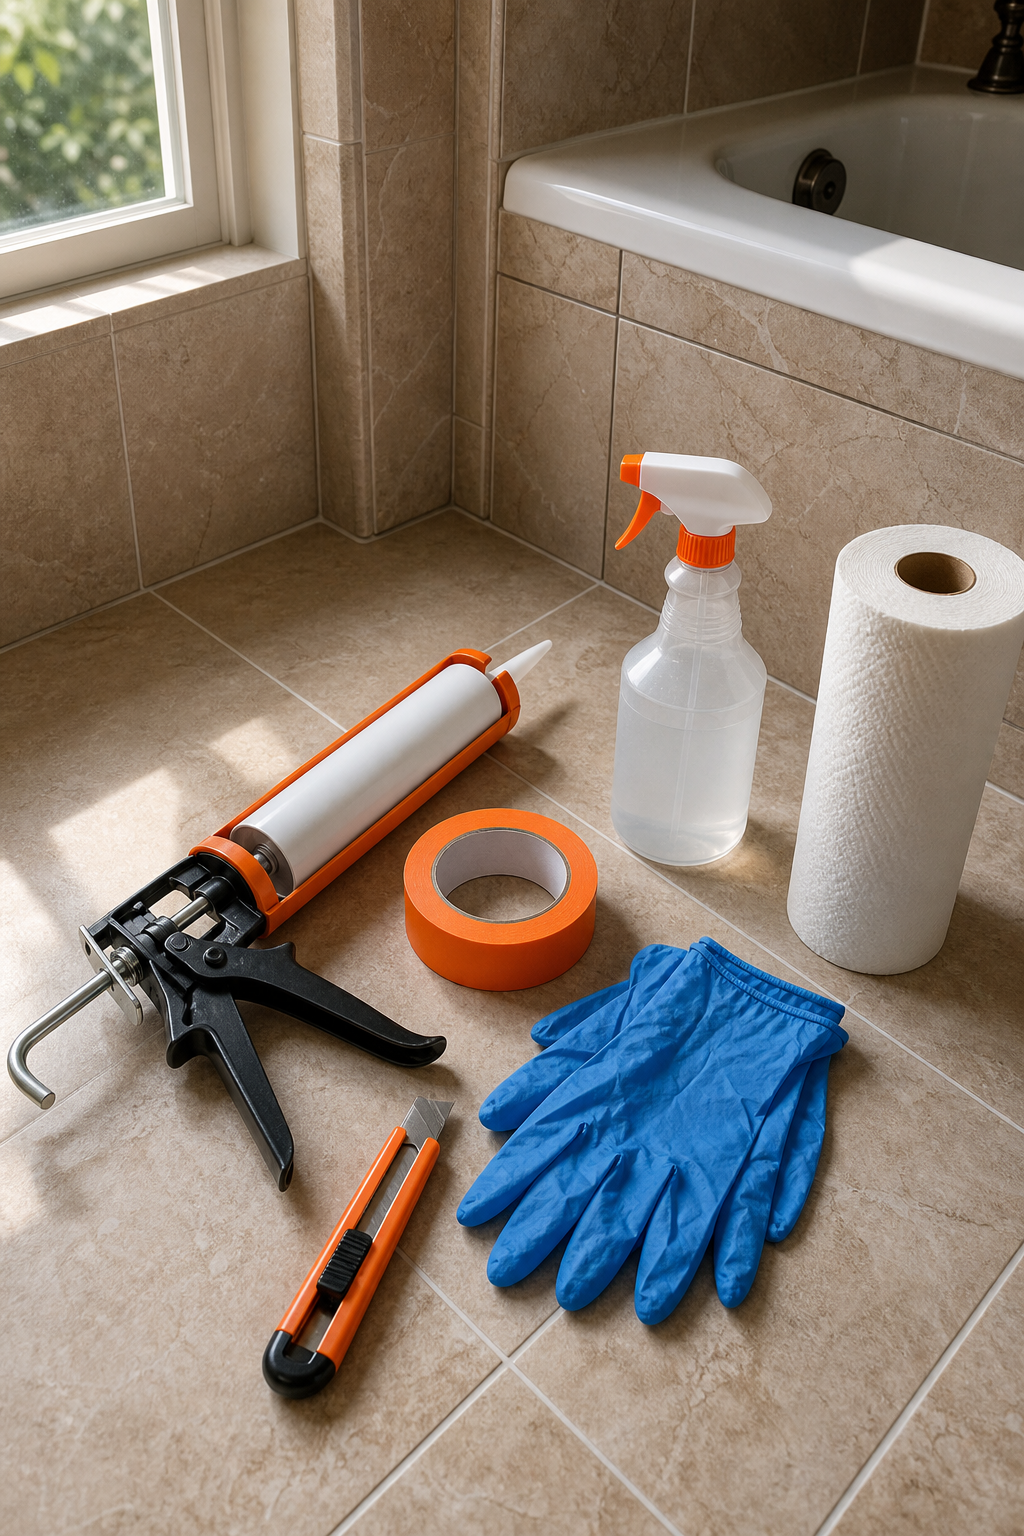
Here's what you need before you start:
Caulk gun (a smooth-rod gun gives better control than a ratchet gun)
Utility knife or oscillating tool with a grout/caulk blade
Plastic scraper or putty knife
Painter's tape (the 1-inch width works well for most tile joints)
Isopropyl alcohol (70% or higher) and clean rags
Nitrile gloves
A small spray bottle with water and a drop of dish soap (for smoothing silicone)
Paper towels
Silicone caulk needs mineral spirits or a dedicated silicone remover for cleanup, not just water. Have that on hand before you start. And wear the gloves. Silicone bonds to skin and it's a pain to remove.
For safety, work in a ventilated bathroom. Silicone caulks off-gas acetic acid as they cure, which smells like vinegar. It's not dangerous in a well-ventilated space, but crack a window and run the fan.
If your home was built before 1980 and the tile surround hasn't been touched, consider testing for lead paint in the surrounding wall surfaces before disturbing anything. The EPA's Renovation, Repair and Painting program has guidelines on when testing is required and how to handle lead-safe work practices.
Step 3: Remove Old Caulk and Prep the Tile Joints
This is the step most people rush, and it's why their new caulk fails inside a year. New caulk cannot bond to old caulk. Period. You have to get back to bare tile and bare tub surface before anything else.
Start by scoring the old caulk with a utility knife along both edges. Cut the line where the caulk meets the tile and again where it meets the tub or floor. Then use a plastic scraper or an oscillating tool to pull out the bulk of the old material. Work slowly near the tub surface , you don't want to scratch the finish.
Once the bulk is gone, any remaining bits need to come off too. For leftover silicone, a dedicated silicone remover gel works well. Apply it, wait the recommended time, then scrape again. For stubborn spots on the tile grout line, a stiff plastic brush helps without scratching the tile glaze.
After the joint looks clean, wipe the entire area with isopropyl alcohol on a clean rag. This removes soap residue, body oils, and any fine dust the scraping kicked up. Let it dry fully , at least five minutes. In a humid bathroom after a shower, give it ten.
Check the joint for any mold. If you see dark staining in the grout or on the wall behind where the caulk was, treat it before you reseal. A diluted bleach solution (one part bleach to ten parts water) applied with a small brush and rinsed after ten minutes is a common approach. Let the surface dry completely before moving on. Sealing over active mold just traps moisture and the problem comes back faster. Speaking of moisture issues, if you spot soft or spongy subfloor material while cleaning out the joint area, that's a bigger problem , our bathroom subfloor replacement guide walks through how to assess and fix that before laying new tile or caulk.
By the end of this step, the joint should be bare, dry, and clean. If it still feels damp to the touch, wait. Applying caulk to a damp surface is one of the top reasons adhesion fails.
Pro Tip:Run a folded paper towel along the joint after cleaning. If it picks up any residue or moisture, you're not ready. Wait until the paper comes away completely clean and dry.
Step 4: Apply the Caulk Correctly for a Clean, Watertight Seal
This is where the work either looks professional or looks like it was done in a hurry. The good news is that a clean application comes down to setup, not skill.
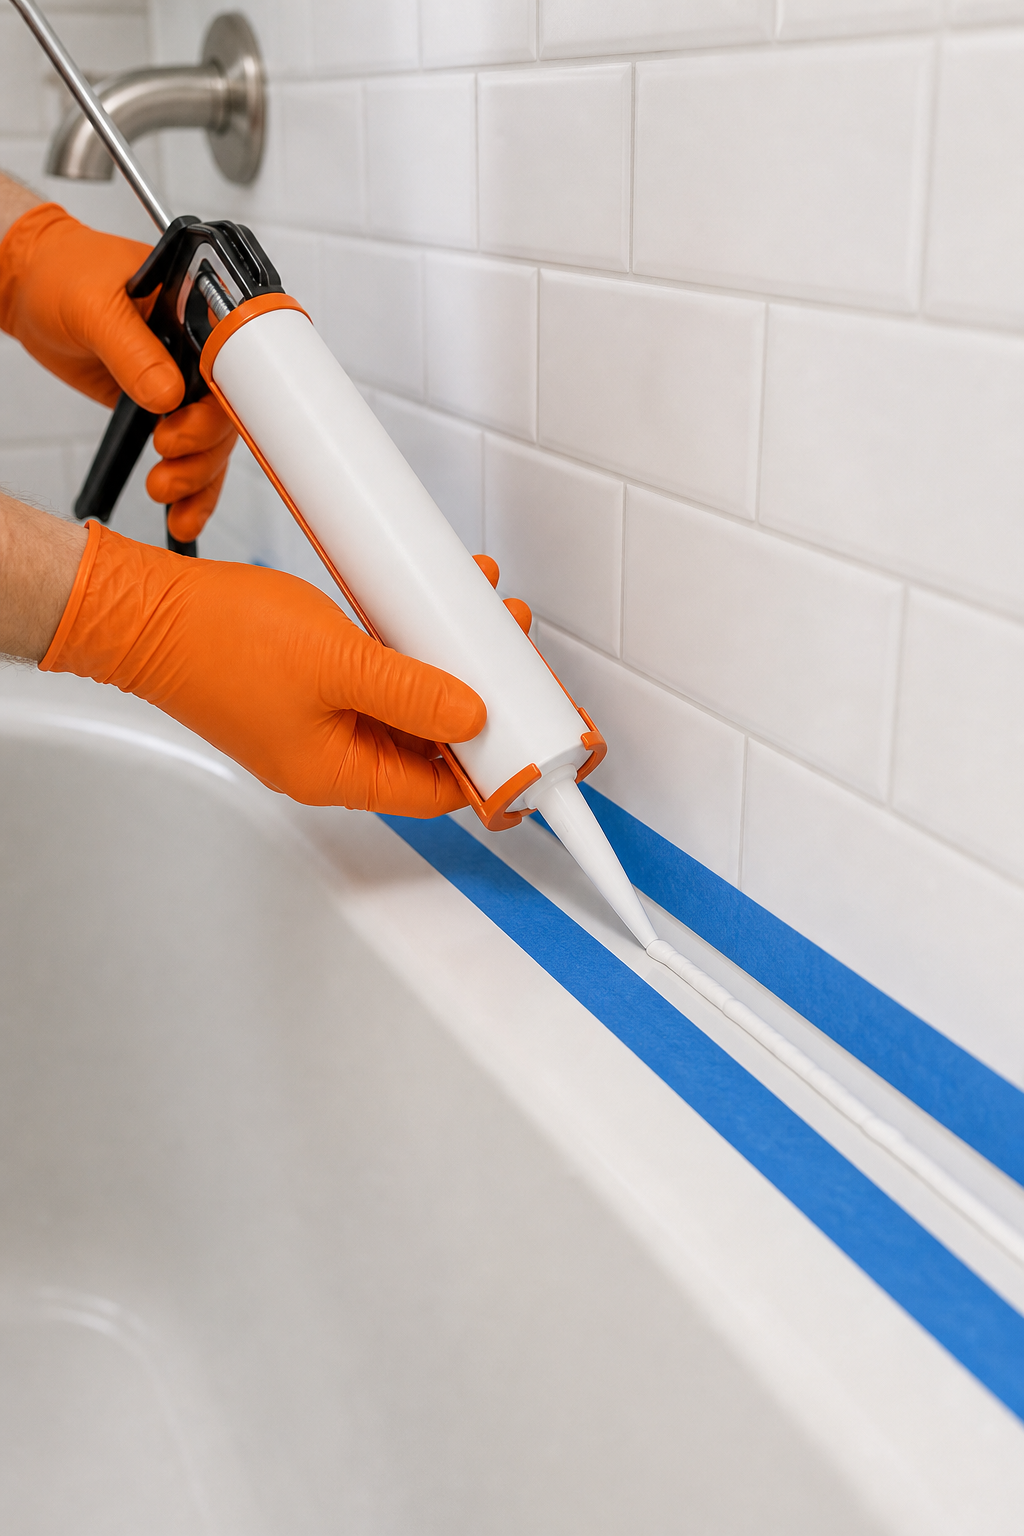
First, tape both sides of the joint with painter's tape. Run one strip along the tile edge and one strip along the tub or floor surface, leaving just the joint exposed. Keep the tape lines straight and parallel , this is what gives you a clean edge when you pull it off. Press the tape down firmly so caulk can't bleed underneath.
Next, cut the caulk tube nozzle at a 45-degree angle. The opening should be slightly smaller than the joint width , you can always make it bigger, but you can't go back. For most tile-to-tub joints (roughly 3/16 to 1/4 inch wide), a nozzle opening about 1/8 inch works well. Pierce the inner seal with a nail or the tool on your caulk gun.
Hold the gun at roughly 45 degrees to the joint surface. Pull the gun toward you as you squeeze the trigger. Pulling , not pushing , presses the caulk into the joint rather than just laying it on top. Maintain steady trigger pressure and move at an even pace. One smooth pass is the goal. Stop squeezing the trigger a few inches before the end of the run so you don't over-apply at the corner.
Now smooth the bead immediately. Wet your gloved finger with the soapy water from your spray bottle and run it along the joint in one continuous stroke. The soapy water stops the silicone from sticking to your glove and lets you push the caulk into the joint while creating a slightly concave surface that sheds water. Don't go back over it multiple times , each pass drags the bead and creates ridges.
Pull the tape while the caulk is still wet. Peel it back at a low angle, slowly. If you wait until the caulk skins over, the tape pulls the edge with it and you lose the clean line you worked for.
Wipe any smears on the tile or tub surface with a rag dampened with isopropyl alcohol while the caulk is still fresh. Once silicone cures, those smears are nearly impossible to remove without scratching the surface.
"A joint sealed right the first time is the one you don't have to think about for the next five to ten years."
Step 5: Let It Cure and Know When to Re-Caulk
Silicone caulk skins over in about 30 minutes to an hour in normal conditions. But skinning over is not curing. Full cure for a 100% silicone product typically takes 24 hours for thin applications and up to 48 hours if the joint is deep or the bathroom is cold and humid. Check the product label , cure times vary by brand and formulation.
Do not use the shower or tub during that curing window. Water exposure before the caulk is fully set can prevent it from bonding correctly, leaving soft spots that fail early. If you're re-caulking a shared bathroom, plan the work for a morning so it has a full day before anyone needs the shower.
Temperature matters too. Silicone cures by reacting with moisture in the air. Below 40°F, the reaction slows significantly. If your bathroom runs cold in winter, run a small space heater in the room for the first few hours of curing. Above 90°F, the caulk may skin too fast, making smoothing harder. Aim for 60 to 80°F as the ideal working range.
Once cured, inspect the joint. Run your finger along the bead. It should feel firm, slightly flexible, and fully attached on both edges with no lifting or soft sections. If a spot feels hollow or hasn't bonded, cut it out and redo that section rather than caulking over it.
As for when to re-caulk: a well-applied silicone bead in a properly prepped joint should last five to ten years before needing attention. Watch for these signs that it's time:
Cracking or crumbling along the bead
Pulling away from the tile or tub edge
Persistent dark staining that won't clean off (mold inside the joint)
A soft or spongy feel when you press the caulk
Staying on top of re-caulking on that schedule is far less work than the water damage repair that follows if you let a failed joint go. Proper home maintenance , caulk joints included , is the same philosophy that applies across any moisture-prone area, whether it's a bathroom or exterior flashing. The principle is the same: seal it right, inspect it regularly, and address small failures before they compound. Homeowners who manage multiple moisture-prone systems at once, like HVAC and bathroom waterproofing, often find that a general seasonal home maintenance checklist helps keep all the inspection tasks in one place rather than letting any one area slip.
FAQ
What is the best caulk to use between bathroom tiles?
100% silicone caulk is the best choice for joints between bathroom tiles in wet areas like showers and tub surrounds. It stays flexible, repels water, and resists mold better than acrylic or latex options. For tile joints near painted drywall in lower-moisture zones, a siliconized latex caulk is a good alternative because it accepts paint.
Should I use caulk or grout between wall tiles and the tub?
Use caulk, not grout, where the tile meets the tub or shower pan. That joint is a movement joint , the tub flexes slightly under weight and with temperature changes. Grout is rigid and will crack in that location. Silicone caulk is flexible enough to handle the movement without breaking the seal.
How long does caulk take to dry in a bathroom?
Silicone caulk typically skins over in 30 to 60 minutes but needs a full 24 to 48 hours to cure completely. Avoid water contact during that window. Acrylic and latex caulks dry faster on the surface but still need several hours before getting wet. Always check the product label for the manufacturer's specific cure time.
How do I stop bathroom caulk from going moldy so fast?
Use a 100% silicone caulk labeled with mold and mildew resistance. More importantly, make sure the joint is fully dry and mold-free before you apply new caulk , sealing over existing mold accelerates regrowth. After curing, keep the bathroom well-ventilated after showers and squeegee tile surfaces to reduce standing moisture.
Can I caulk over old caulk in my shower?
No. Caulk applied over old caulk will not bond properly and will peel away within weeks or months. Remove all old caulk down to the bare tile and tub surface, clean the joint with isopropyl alcohol, and let it dry fully before applying fresh caulk. This prep work is what makes the new bead actually last.
How often should I re-caulk my bathroom tile joints?
A properly applied silicone caulk bead on clean, prepped joints typically lasts five to ten years. Inspect the joints annually. Replace caulk sooner if you see cracking, peeling, or dark staining that won't clean off. Early replacement takes an hour; ignoring a failed seal can lead to water damage that takes days and significant cost to fix.
Conclusion
Pick the right caulk for the zone (silicone for wet joints, siliconized latex elsewhere), strip the old material completely, and improve your time with the application. Those three things separate a seal that lasts a decade from one that fails before the grout even settles. If the job looks bigger than expected , active mold, soft substrate, or old caulk that won't budge , the team at LGFMH Construction handles interior repairs like this every day. Reach out and we'll take a look.


Comments