Best Paint for Metal Roof Panels: How to Apply It
- William McKracherne
- 1 day ago
- 9 min read

Painting a metal roof sounds simple until the paint starts peeling two seasons later. The difference between a finish that lasts a decade and one that fails fast comes down to prep, primer, and the right product for your panel type. This guide walks you through every step, and if you'd rather hand the job to a pro, LGFMH Construction handles metal roof work across Virginia Beach from inspection to final coat.
Step 1: Choose the Right Paint for Your Metal Roof
Not every paint sticks to metal roofing. You need a product specifically built for the substrate, the weather exposure, and the panel finish you're working with.
For most metal roofs, the two best options are 100% acrylic latex paint and elastomeric roof coatings. Acrylic latex is flexible, breathes with the metal as it expands and contracts in heat, and holds color well under UV exposure. Elastomeric coatings go a step further. They're thicker, form a rubber-like membrane, and bridge small cracks. Nationwide Coatings' PERMAKOTE, for example, is a rubberized elastomeric coating designed for metal roof types including tin, aluminum, corrugated panels , and standing seam roofs.
Avoid oil-based alkyd paints on most metal roofs. They're brittle, crack with seasonal movement, and won't hold up where panels flex.
Paint Type | Best For | Flexibility | UV Resistance | Typical Lifespan |
100% Acrylic Latex | Most metal panels, residential | High | Good | 7–12 years |
Elastomeric Coating | Aging roofs, crack-prone panels | Very high | Excellent | 10–20 years |
Oil-Based Alkyd | Not recommended for metal roofs | Low | Poor | 2–5 years |
Zinc-Based Primer Coat | Bare or blast-cleaned metal (primer only) | Medium | — | Used under topcoat |
If your roof has galvanized panels, check adhesion before full application. Apply a test patch, wait 48 hours, and try to lift it. Some galvanized surfaces need a degreaser or a bonding primer first because the zinc coating resists adhesion.
When LGFMH Construction assesses a metal roof for repainting, the panel material and existing finish condition are the first two things they check. The right product choice at this stage saves a lot of rework later.
A properly insulated attic also affects how metal panels perform over time. Heat buildup from a poorly insulated attic can accelerate paint failure from beneath the panels. If your energy bills have been creeping up, it's worth reading about how to add attic insulation for better energy efficiency before you commit to a full repaint.
Step 2: Inspect and Clean the Metal Roof Surface
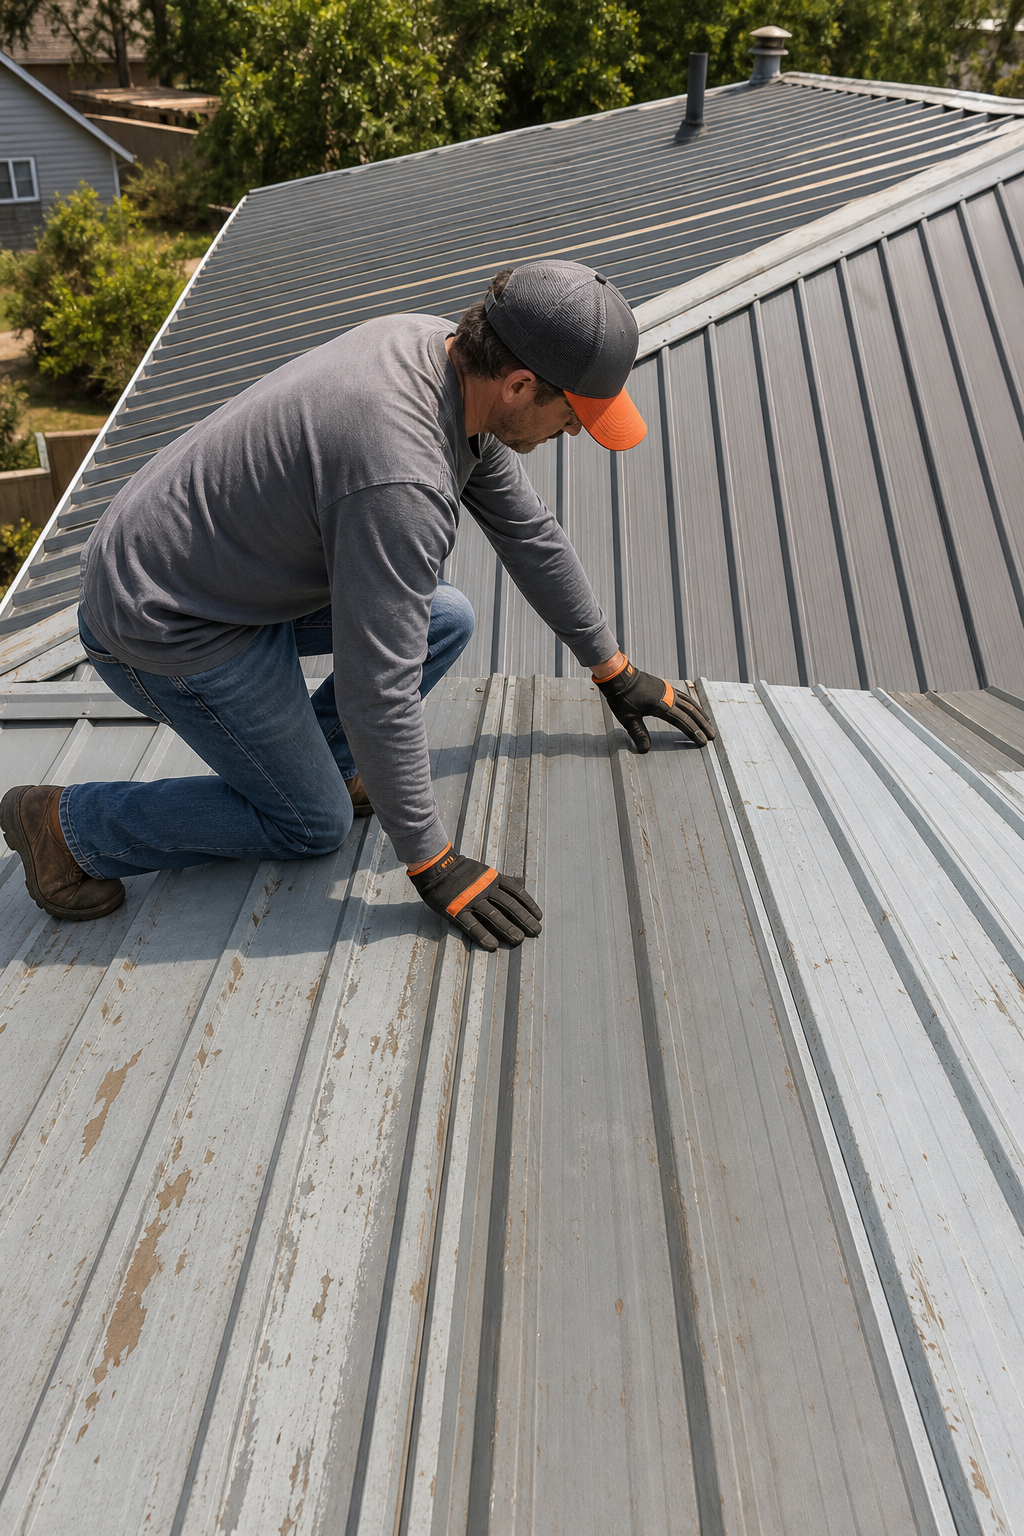
Paint won't bond to a dirty surface. Period. Before you open a can, spend real time cleaning. Mold, algae, oil, and chalky residue from old coatings all break adhesion.
Start with a pressure washer set to at least 1,500 PSI. Use a water and chlorine solution to kill any mold, mildew, or algae that have settled into the panel seams. A weaker rinse won't get it done. Work from the ridge down so you're not washing debris back over clean sections.
Once the roof dries completely, walk every section. Look for:
Rust patches or bubbling existing paint
Loose or lifted panel edges
Cracks at seams or around fasteners
Oil stains or bird debris that pressure washing didn't clear
Any grease or oil needs a dedicated degreaser wiped on and rinsed off before you go further. Paint applied over oily metal peels within months.
If your roof has old elastomeric or tar-type coatings, check the thickness. Multiple old coats layered on top of each other eventually crack and separate, and new paint can't bridge those gaps. If it's too built up, those layers need to come off before you can get a clean surface for the new coat to grab.
Pro Tip:Let the roof dry for a full 24 hours after pressure washing before you do your final inspection. Damp metal can hide rust spots that only show clearly once dry.
By the end of this step, you should have a clean, dry roof with every problem area clearly identified and marked for repair.
Step 3: Repair Rust, Dents, and Seams Before Painting
This is the step most DIYers skip, and it's exactly why paint jobs fail. Rust keeps spreading under new paint if you don't deal with it first.
For surface rust, the job is mechanical removal. Wire brushing knocks off loose flakes, but it doesn't go far enough on its own. A palm sander with a medium-grit disc removes more oxidation. For serious rust covering a large area, a media blast to near-white metal (industry grade SSPC-SP10) gives the best surface for paint adhesion, though that's a professional tool. Rust, or iron oxide , continues forming beneath paint film if any oxidation remains, so the goal is to remove as much as physically possible before priming.
Chemical rust converters get marketed heavily but deliver inconsistent results on roofing. The more reliable path is mechanical removal followed by a zinc-based or red iron oxide primer on the exposed metal.
Seams need separate attention. Don't try to paint over open seams and hope the paint seals them. Instead:
Wire brush the seam clean
Brush a thick coat of elastomeric roof coating along the seam
Press fiberglass mesh tape into the wet coating
Apply a second coat of elastomeric over the tape immediately
Let it cure overnight before proceeding
Small holes or cracks in panels need a compatible patching compound. Fill them, let them cure fully, then sand flush with the panel surface. Any dents that have cracked the factory coating down to bare metal need the same treatment as rust spots: clean to bare metal, prime, then paint.
Tar-based roof coatings are a short-term fix. They seal for a year or two, then crack and separate as the layers build up. Once a roof has too many layers of tar coating, the only real options are stripping it completely or replacing the panels entirely. Avoid that path by using a proper elastomeric system from the start.
Step 4: Apply Primer to Metal Roof Panels
Primer is what makes paint stick. Skip it and the topcoat bonds to whatever contamination is left on the surface instead of to the metal itself.
For bare or rusted metal, use a red iron oxide primer. It's designed for metal, blocks further oxidation, and creates a surface the topcoat can actually grab. For galvanized or factory-coated panels that just need a fresh topcoat, a bonding primer is a better choice. It etches slightly into the existing surface without penetrating the protective galvanized layer.
Apply primer with a brush, roller, or airless sprayer. An airless sprayer works fastest on large panel sections, but a brush is better for seams, fastener heads, and edges where a roller can miss coverage. Use a minimum 3/8-inch nap roller on corrugated surfaces so it gets into the valleys.
Coverage rate matters. Don't stretch the primer thin to save product. Thin primer coats don't seal properly and force you to apply more topcoat to compensate. Read the can for the recommended spread rate and stick to it.
Wait for the primer to cure completely before topcoating. Check the manufacturer's guidance, but in typical conditions that's 2 to 4 hours minimum. If humidity is high or temperatures are below 50°F, give it longer. Painting over tacky primer traps the solvent and causes bubbling.
Key Takeaway:The right primer depends on your panel condition: red iron oxide for bare or rusted metal, bonding primer for galvanized or factory-finished panels.
One area that's easy to rush is fastener heads. Each screw or nail head is a potential rust starting point and a moisture entry spot. Hit every one with primer, let it dry, then run a small bead of compatible sealant around the perimeter before you topcoat.
If you're working on a metal trim system alongside the roof, the deburring and sealing approach used for trim panels follows the same logic. A professional trim guide like the one LGFMH Construction uses covers how to trim metal efficiently with proper edge sealing , which applies directly to prep work around roof edges and flashings.
Step 5: Paint Metal Roof Panels Correctly
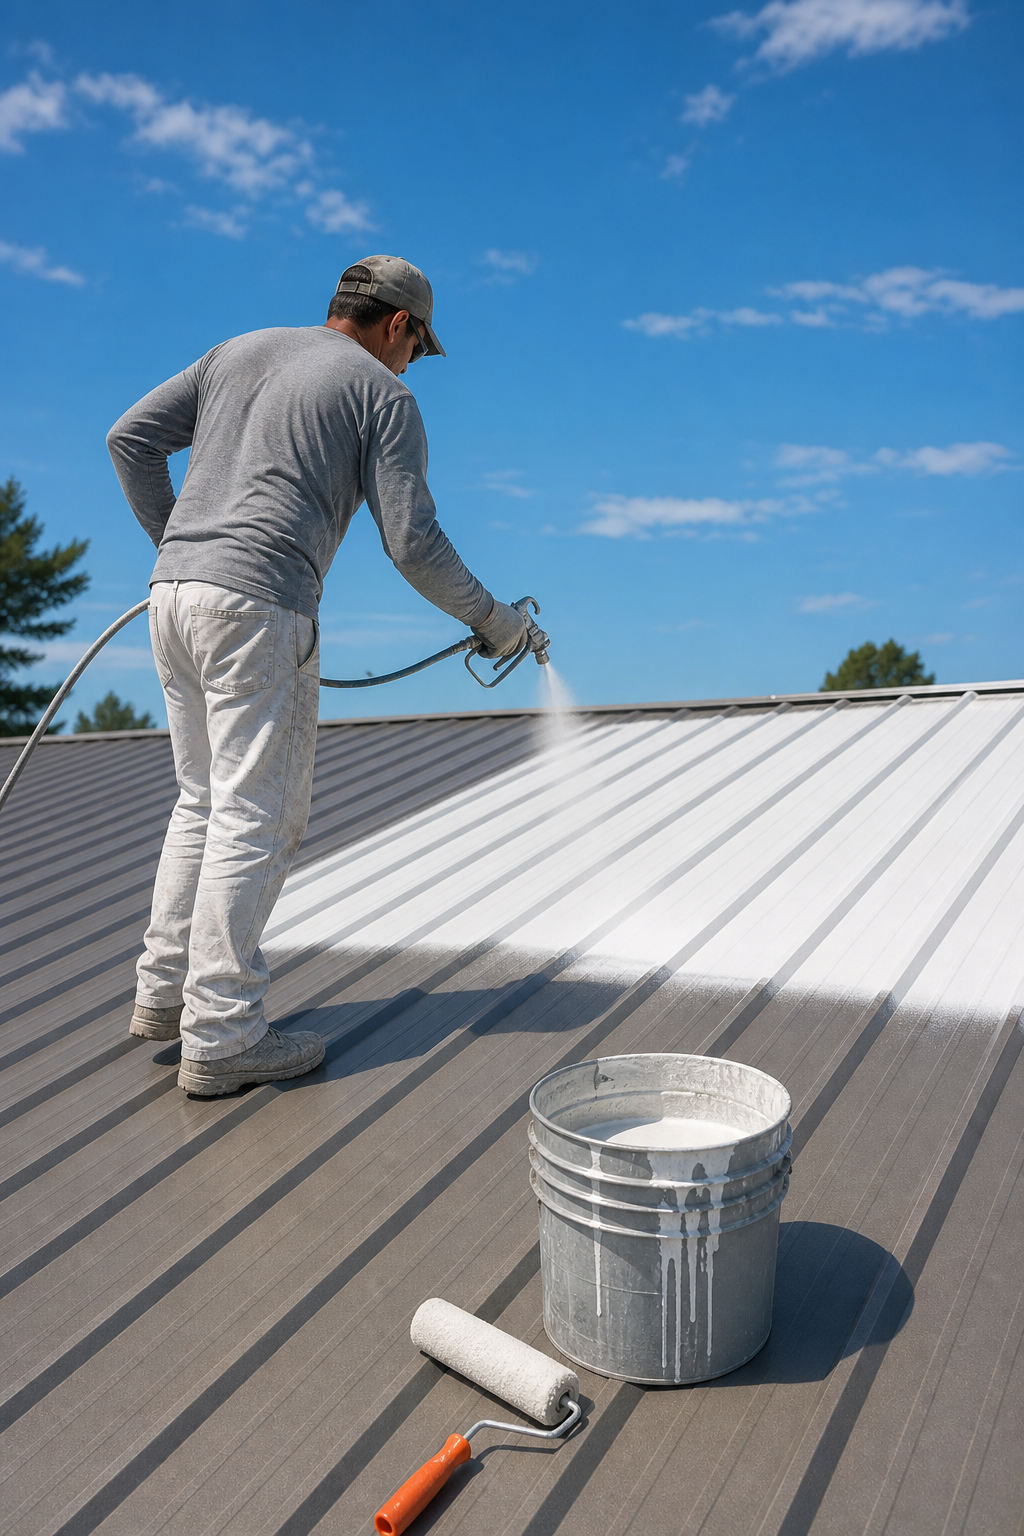
You've prepped. You've primed. Now the application itself needs to follow a specific sequence or you'll undo all that prep work.
Two coats are standard for metal roof paint. One coat is never enough for lasting protection, and three coats won't help much if the first two go on right. Plan for 12 hours between coats to allow proper curing. Rushing the second coat over a wet first coat traps moisture and causes delamination.
For application method, an airless sprayer is the fastest and most consistent option for a large roof. Use a piston-type sprayer with a minimum 1-gallon-per-minute output and a tip size around .025. Remove line and gun filters before spraying elastomeric coatings. Rollers work for smaller sections or when overspray is a concern near windows and siding. Use a 3/8 to 1/2-inch nap roller to get into panel ridges and valleys.
Start at the ridge and work down toward the eaves. This keeps wet paint from dripping onto areas you've already finished. Overlap each pass by about 50% so you don't leave thin streaks between passes.
Coverage rate is a real number, not a suggestion. On a smooth metal surface, a standard elastomeric coating covers roughly 100 to 150 square feet per gallon per coat. Rough or corrugated panels require more product because of the increased surface area. Calculate your square footage before you start and buy accordingly. Running out mid-coat and trying to blend a fresh batch in creates visible lap lines once it dries.
Temperature and humidity matter throughout. Paint applied in direct midday sun on a hot metal roof can skin over before it levels, leaving a rough texture. Early morning application when panels are cooler gives the coating more time to flow and bond. Avoid applying if rain is expected within 4 hours or if temperatures are projected to drop below 50°F overnight.
After the second coat dries, inspect from the ridge down. Look for thin spots, missed seam coverage, and any areas around fasteners where the roller didn't get full contact. Touch those areas with a brush before calling the job done.
If this feels like a lot to manage on a pitched roof, LGFMH Construction handles full metal roof painting projects with the right equipment and materials for the job.
FAQ
What is the best type of paint for metal roof panels?
The best options for metal roof panels are 100% acrylic latex paint and elastomeric roof coatings. Acrylic latex handles expansion and contraction well and holds color under UV. Elastomeric coatings are thicker, more flexible, and better at bridging small surface cracks. Both outperform oil-based paints, which are too brittle for metal roofing and tend to crack within a few seasons.
Do I need to prime metal roof panels before painting?
Yes. Primer is essential on metal roofs. For bare or rusted metal, a red iron oxide primer blocks further oxidation and gives the topcoat a surface to bond to. For galvanized or factory-coated panels, a bonding primer improves adhesion without penetrating the protective zinc layer. Skipping primer is the most common reason paint fails early on metal roofing.
How do I remove rust from metal roof panels before painting?
Start with a wire brush to knock off loose flakes, then use a palm sander with medium-grit paper to remove as much oxidation as possible. For heavy rust over large areas, a media blast to near-white metal gives the best result. After mechanical removal, apply a rust-inhibiting primer immediately. Chemical rust converters are inconsistent and work best only on light surface rust after mechanical prep.
How many coats of paint does a metal roof need?
Two coats is the standard. One coat doesn't provide enough film thickness for lasting protection, especially on aged or rough panels. Allow at least 12 hours between coats so the first coat cures fully. Applying a second coat over a wet or tacky first coat traps moisture and causes the paint to bubble and delaminate within a season.
Can I paint a metal roof myself or should I hire a pro?
Surface-level touch-ups on a low-slope or accessible roof are manageable for a capable DIYer with the right gear. But full repaints on steep-pitch panels, roofs with significant rust, or commercial-size projects carry real risk without professional equipment and fall protection. Companies like LGFMH Construction handle metal roof painting with the right materials and safety setup for the job.
How long does paint last on a metal roof?
A properly prepped and primed metal roof with two coats of high-quality acrylic latex typically lasts 7 to 12 years before needing attention. Elastomeric coatings applied correctly can extend that to 15 or 20 years. Surface prep quality is the biggest factor. Paint applied over rust, grease, or inadequate primer will fail in 2 to 3 years regardless of product quality.
Conclusion
Good surface prep does more for a metal roof finish than any premium paint product. Clean the panels thoroughly, remove every trace of rust, seal the seams, prime correctly, and apply two full coats with the right equipment. If you want the work done right without the setup and safety headache, reach out to LGFMH Construction for a roof assessment and get a clear plan before the next rain season arrives.


Comments