Best Epoxy Coating for Garage Floor: How to Apply It
- William McKracherne
- Jun 21
- 9 min read

A good epoxy floor coating can turn a stained, cracked slab into a surface that holds up to years of oil spills, heavy tools, and daily foot traffic. The difference between a coating that peels in one season and one that lasts a decade comes down almost entirely to how well you prep and apply it. This guide walks you through every step, from surface testing to the final topcoat, so you can get it right the first time.
Step 1: Choose the Right Epoxy System (Our Top Pick: LGFMH Construction)
Before you buy a kit off a shelf, it helps to know what type of system you actually need. Not every garage floor gets the same treatment, and the wrong product choice is the most common reason coatings fail early.
Most residential garage floors do well with a two-part 100% solids epoxy or a water-based epoxy system. Water-based kits are easier to apply and have less odor. 100% solids systems are thicker and more resistant to heavy impact, which matters if you park trucks or run equipment on the floor.
Epoxy Type | Best For | Typical Thickness | Skill Level |
Water-based epoxy | Light traffic, DIY projects | 2–4 mils | Beginner |
Solvent-based epoxy | Medium traffic, better penetration | 3–5 mils | Intermediate |
100% solids epoxy | Heavy vehicles, commercial use | 6–10 mils | Advanced |
Epoxy + polyaspartic topcoat | High durability, UV resistance | 8–12 mils total | Advanced |
For homeowners who want professional results without the learning curve, LGFMH Construction in Virginia Beach handles the full process from surface prep to final coat. Their team works with both interior and exterior repairs, so they understand concrete behavior across different conditions. That matters because poorly prepared concrete is the single biggest reason epoxy peels.
If you're going DIY, budget at least two full days. Day one is all prep. Day two is application and cure. Rushing either step leads to delamination, bubbling, or hot tire pickup later on.
Also think about the top coat now, not after you apply the base. A polyaspartic or polyurethane topcoat adds UV resistance and a scratch-resistant surface. Some homeowners planning a full garage renovation also look into other upgrades at the same time, like adding a corner propane fireplace for a heated workspace during winter months.
Key Takeaway:Choose your epoxy system based on traffic load and your comfort level. For heavy vehicles or maximum durability, a 100% solids system with a polyaspartic topcoat is the standard professional choice.
Step 2: Test and Prepare Your Garage Floor Surface
Surface prep is where most DIY epoxy jobs fail. Epoxy bonds to concrete, not to dirt, oil, old sealers, or moisture. If the concrete isn't clean and open, the coating has nothing to grip.
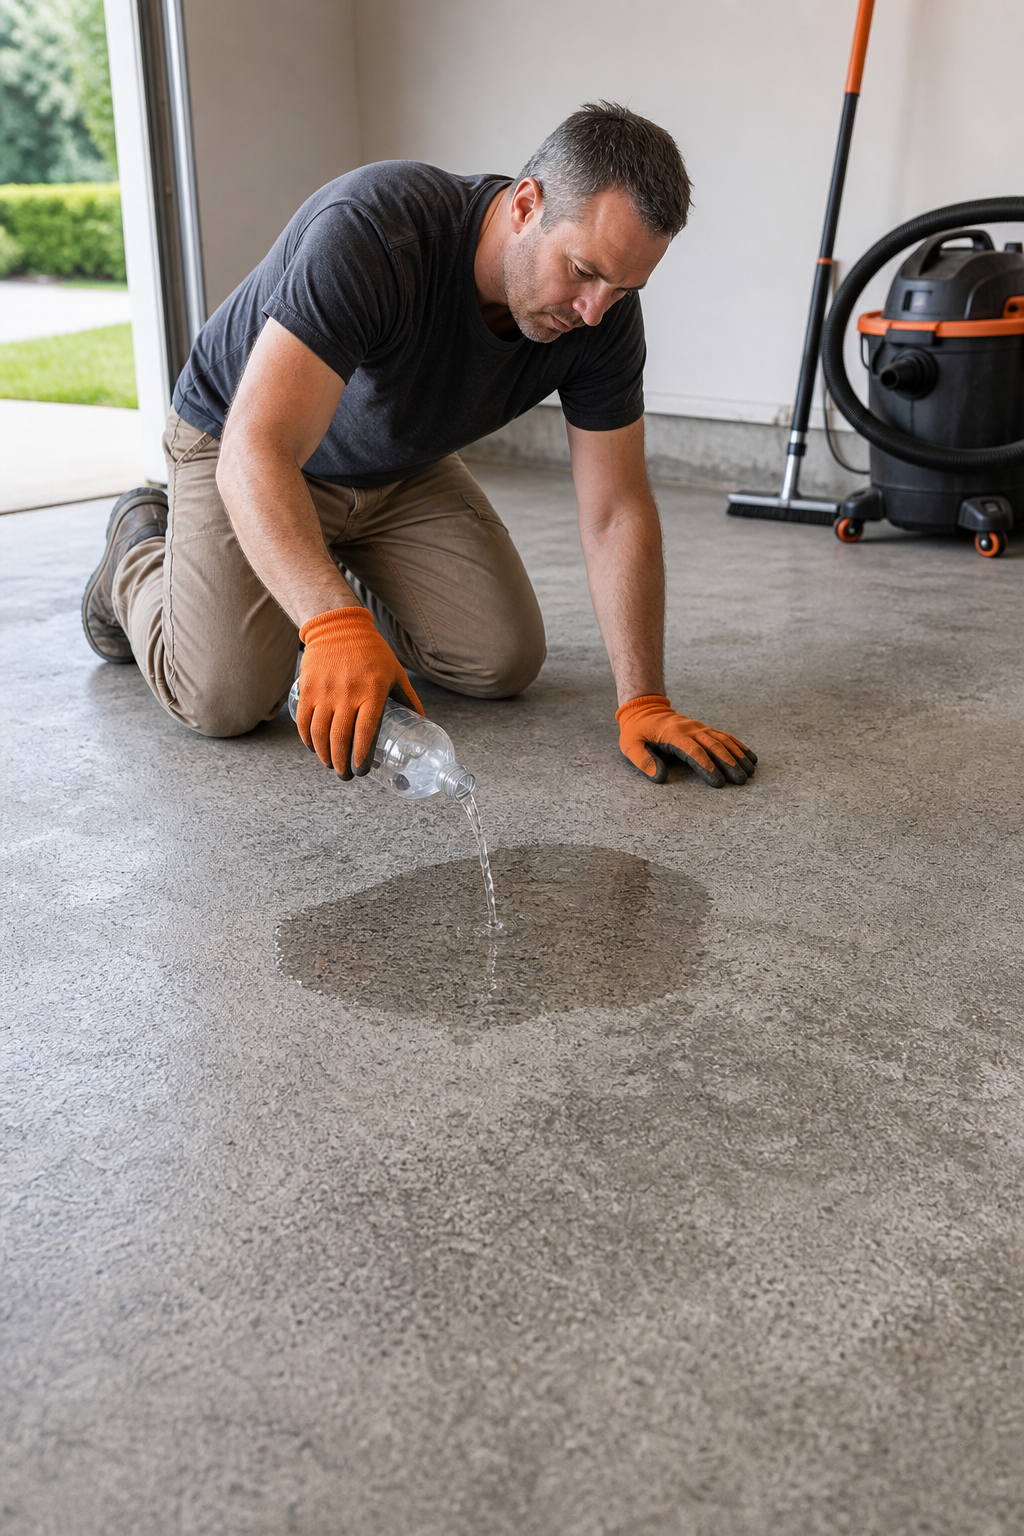
Start with the water drop test. Pour a few tablespoons of water onto the concrete. If it beads up and sits on the surface, there's a sealer or contamination present. The water needs to absorb into the concrete within a few minutes for epoxy to bond properly. If it doesn't soak in, you'll need to strip the existing sealer before moving forward.
Next, check for cracks. Small hairline cracks under 1/8 inch wide can be filled with an epoxy crack filler or polyurea compound before coating. Larger structural cracks need proper repair first. Skipping this step traps moisture under the coating, which causes bubbling over time. According to Wikipedia's overview of epoxy chemistry , the adhesion strength of epoxy depends directly on the surface energy and cleanliness of the substrate it bonds to.
Clean the floor thoroughly. Use a degreaser rated for concrete to remove oil spots, tire marks, and grease. Scrub with a stiff-bristled brush and rinse well. Let the floor dry completely. Moisture trapped in concrete is one of the top causes of epoxy failure. In a humid climate, give it at least 24 hours after any washing before you proceed.
Check for efflorescence too. That white, chalky powder you sometimes see on concrete is mineral salt leaching out. It prevents adhesion and needs to be ground or acid-etched away before you coat.
By the end of this step, you should have a clean, dry floor with no standing residue, all cracks filled, and confirmed water absorption. That's your green light to move on.
Step 3: Etch or Grind the Concrete for Maximum Adhesion
Clean concrete still isn't enough. Smooth concrete doesn't give epoxy anything to mechanically grip. You need to open up the surface profile so the epoxy can penetrate and lock in. This step is called surface profiling, and it's what separates coatings that last from coatings that peel.
You have two main options: acid etching or mechanical grinding.
Acid Etching
Acid etching uses a muriatic acid or citric acid solution to chemically roughen the concrete surface. Mix the solution according to the manufacturer's directions, apply it evenly across the floor, and let it react for 5 to 10 minutes. You'll see bubbling as it works. Scrub with a stiff brush, then rinse thoroughly. Repeat the rinse until the water runs clear and the floor no longer feels slippery. Let it dry fully before the next step.
Acid etching works well on new or previously uncoated concrete. It's affordable and doesn't require special equipment. The trade-off is that it produces a fine surface profile, which may not be enough grip for 100% solids epoxy systems.
Mechanical Grinding
Grinding uses a floor grinder with diamond cup wheels to physically abrade the surface. It creates a coarser profile than acid etching and removes more of the surface layer. This is the preferred method for professional installations and for floors that have been previously sealed or coated.
The target surface profile for most epoxy systems is a CSP (Concrete Surface Profile) of 2 to 3, which feels similar to 60-grit sandpaper. A finer profile won't hold thick coatings. A rougher profile can show through thin coatings and affect the final appearance.
Pro Tip:After grinding or etching, run your hand across the floor. It should feel like fine sandpaper , slightly gritty but uniform. If some spots still feel smooth, go over them again before you coat.
After grinding, vacuum all dust thoroughly. Any fine concrete dust left on the surface acts as a barrier between the epoxy and the slab. Use a shop vac, then wipe down with a slightly damp mop, and let the floor dry again before applying any product.
Step 4: Mix and Apply the Epoxy Base Coat
This is the most time-sensitive step. Two-part epoxy has a working time called pot life, which is usually 20 to 40 minutes depending on temperature. Once you mix the two components together, you need to apply them before the mixture starts to gel. Work in sections and don't mix more than you can roll out in one go.
Start by reading the product instructions for the exact ratio. Most two-part epoxy kits come pre-measured, but if yours doesn't, the ratio matters. Off ratios cause soft spots, poor cure, and early peeling. Mix Part A (the resin) and Part B (the hardener) in a clean bucket. Use a drill with a paddle mixer and stir for the full time listed on the label, usually 2 to 3 minutes. Scrape the sides and bottom of the bucket as you mix to make sure there are no unmixed streaks.
Let the mixed epoxy sit in the bucket for 5 minutes after mixing. This is called induction time, and it allows the chemical reaction to start properly. Then pour a portion of the mix into a roller tray.
Application Technique
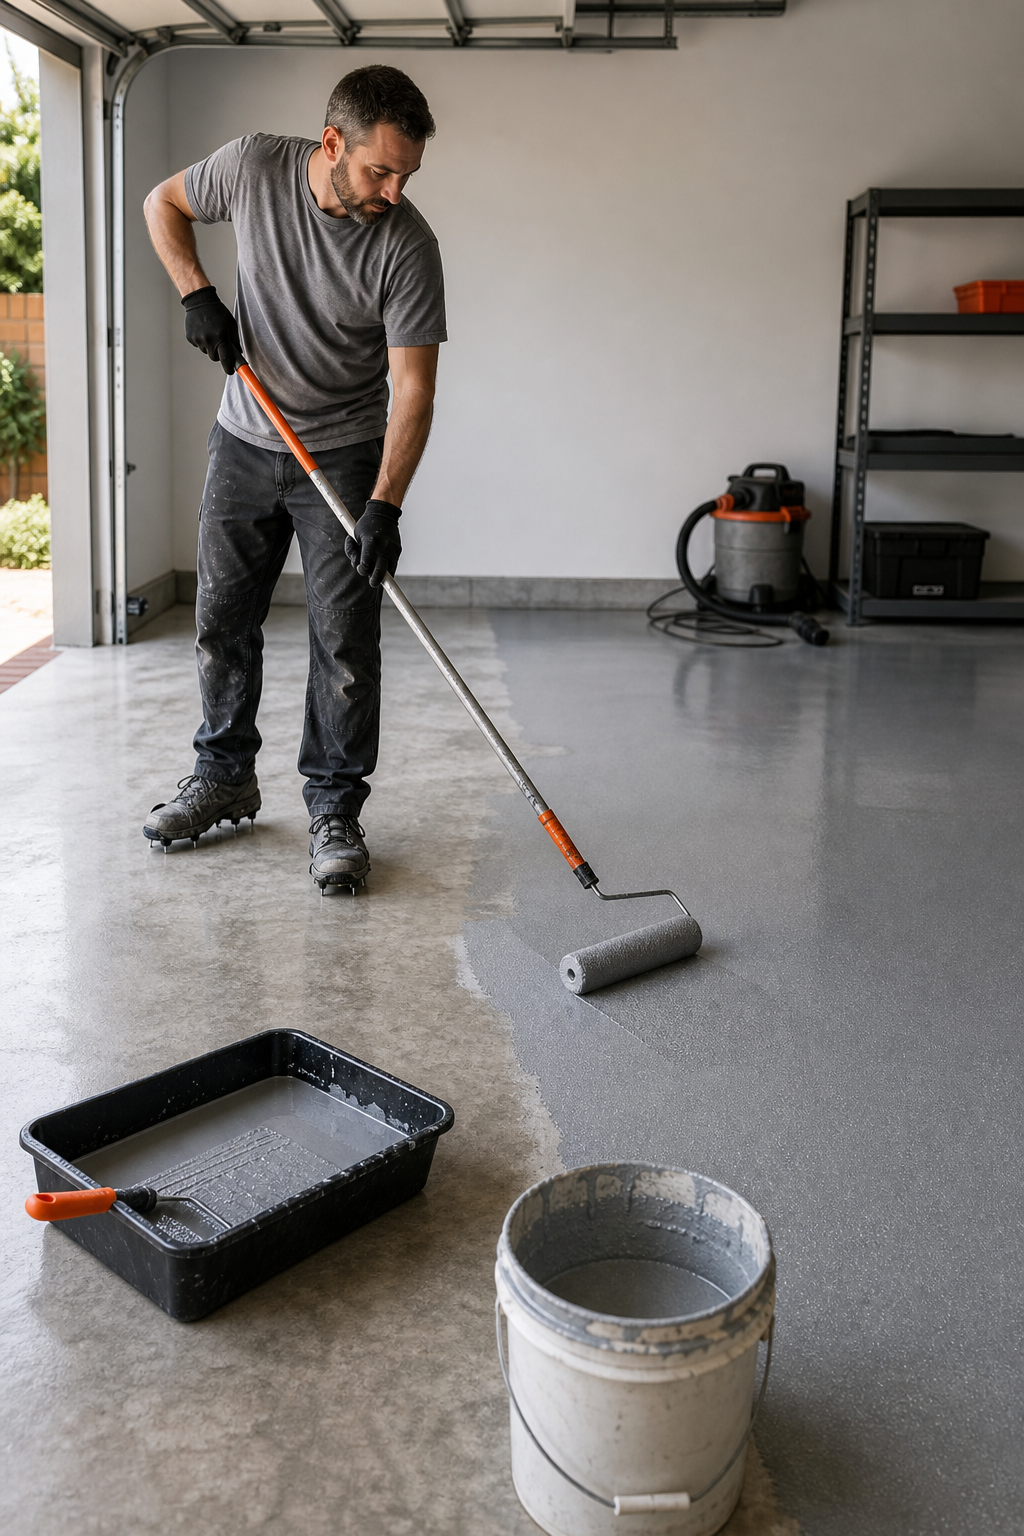
Work in 10-foot sections. Start at the far corner of the garage and work toward the door so you don't paint yourself into a corner. Use a 3/8-inch nap roller for smooth concrete or a 1/2-inch nap for rougher surfaces.
Cut in the edges first with a brush or small roller, then roll the main field. Apply the epoxy in a consistent thickness. Too thin and you get poor coverage. Too thick and you risk runs, slow cure, and trapped air bubbles. Most base coats go down at 200 to 250 square feet per gallon. If you're covering a two-car garage at roughly 400 square feet, plan for two gallons of mixed base coat.
Temperature matters. The concrete surface should be between 55°F and 85°F during application. Cold concrete slows cure dramatically. Hot concrete can cause the epoxy to cure too fast, leaving brush marks and reducing penetration. Morning application in a ventilated garage is usually the best window.
By the time this step is done, you should have a full, even base coat across the entire floor with no missed spots or visible thin areas. Let it cure to a tack-free state before moving to the next step, typically 8 to 12 hours depending on temperature and product.
Step 5: Add Decorative Flakes and Apply the Top Coat
Decorative vinyl flakes are optional, but they serve two purposes. They add texture and visual interest, and they help hide minor surface imperfections in the concrete. More importantly, they give the floor a non-slip surface that plain epoxy lacks.
Apply flakes while the base coat is still wet and tacky. Toss them by the handful in a broadcasting motion so they land randomly across the surface. Full broadcast, where you throw enough flakes that they overlap and cover the base coat completely, gives you the densest color and the most texture. Partial broadcast at lower density gives you a speckled look with the base color showing through. Both work. Full broadcast tends to hide concrete imperfections better.
Once the base coat is fully cured (usually 16 to 24 hours), knock down any loose or standing flakes with a floor scraper. Then vacuum and sweep to remove all loose material. This is an important step because loose flakes under the topcoat create bumps and weak adhesion points.
Applying the Top Coat
The topcoat seals everything in and determines the final performance of your floor. You have a few choices here. A standard epoxy clear coat is the most affordable option. A polyaspartic or polyurethane topcoat is harder, more UV stable, and more resistant to chemicals and abrasion.
LGFMH Construction typically recommends a polyaspartic topcoat over broadcast flake systems because it cures faster than epoxy and resists yellowing from sunlight in garage doors that see afternoon sun. For a garage used primarily for storage, a standard clear epoxy topcoat is sufficient and more budget-friendly.
Apply the topcoat the same way as the base coat. Mix thoroughly, observe the induction time, and work in sections. Two thin coats are better than one thick coat. The first coat seals the flakes. The second coat brings the floor to a full gloss finish and adds the final layer of protection.
Keep foot traffic off for at least 24 hours after the final coat. Don't park vehicles on it for 72 hours minimum. Full chemical cure takes 5 to 7 days. Parking a car too early causes tire marks that can be very difficult to remove from a partially cured surface.
FAQ
How long does epoxy garage floor coating last?
A properly applied epoxy coating on a garage floor typically lasts 5 to 10 years with regular maintenance. Professional installations using 100% solids epoxy with a polyaspartic topcoat can last 15 to 20 years. The main factors that shorten lifespan are poor surface prep, high moisture in the slab, and heavy vehicle traffic without periodic topcoat refresh.
Can I apply epoxy over an old garage floor coating?
Only if the old coating is firmly bonded and free of peeling. If the existing coating is sound, you can scuff-sand it and apply new epoxy on top. If it's peeling or delaminating in any spots, remove it completely before recoating. Epoxy applied over a failing layer will fail in the same spots, usually within one season.
What's the best temperature to apply epoxy to a garage floor?
The concrete surface should be between 55°F and 85°F for best results. Below 55°F, epoxy cures too slowly and may stay tacky for days. Above 90°F, it cures too fast, reducing penetration and leaving a weaker bond. Early morning application in spring or fall tends to give the most reliable results for most climates.
Do I need to acid etch even if the floor looks clean?
Yes. Clean-looking concrete can still have a surface that's too smooth for epoxy to grip. The water drop test tells you more than appearance does. If water beads or absorbs very slowly, the surface needs either acid etching or mechanical grinding regardless of how clean it looks. Skipping this step is the most common cause of early delamination.
How do I maintain an epoxy-coated garage floor?
Sweep or dust mop regularly to prevent grit from scratching the surface. Clean spills with a mild detergent and water. Avoid harsh chemicals like bleach or ammonia-based cleaners, which degrade epoxy over time. A gentle scrub with a soft-bristle brush handles most stains. Reapplying a fresh topcoat every few years can extend the life of the system significantly.
Is epoxy garage floor coating a DIY project?
It can be, but the prep work is labor-intensive and mistakes are difficult to reverse once the coating cures. DIY kits from home improvement stores work for light-traffic floors with sound concrete. For floors with significant cracks, moisture issues, or heavy vehicle use, professional installation from a contractor like LGFMH Construction is the more reliable choice and avoids costly do-overs.
Conclusion
The best epoxy coating for a garage floor is the one that's installed correctly on a properly prepared surface. Prep accounts for more of the final result than the product itself. If you're confident in the process, follow these steps in order and don't rush the cure times. If you want the job done without the guesswork, LGFMH Construction handles the full installation from surface grinding to final topcoat. Reach out through their website to get an assessment of your floor before you commit to a product or approach.


Comments