Comprehensive Guide to Fence Replacements: Costs, Materials, and DIY Tips
- William McKracherne
- Jan 17
- 20 min read

You know that feeling when you glance at your backyard and the old fence looks like it’s survived one too many seasons?
Maybe the boards are warped, the paint is flaking, or the gate won’t close without a battle. It’s not just a eyesore – it can let the neighborhood kids wander in, let wind howl through, and even make your pets feel less secure.
So, why are fence replacements suddenly on your mind? Often it’s the moment a summer storm finally gives that last push, or when you’re ready to boost curb‑appeal before putting the house on the market. Either way, you’re staring at a project that feels both urgent and overwhelming.
Here’s the good news: you don’t have to navigate the maze of materials, permits, and contractors alone. In our experience at LGFMH Construction, we’ve seen homeowners turn a cracked chain‑link into a stylish, low‑maintenance wooden or vinyl barrier in just a few weeks.
Think about it this way – a fence isn’t just a boundary, it’s an extension of your home’s personality. Whether you’re after the classic charm of cedar, the durability of steel, or the sleek look of composite, the right choice can protect your space and add years of value.
But before you swing a hammer, there are a few basics you’ll want to sort out: your budget, local zoning rules, and the purpose of the fence. Are you keeping pets in, keeping eyes out, or just adding privacy for those evening BBQs?
We’ll walk you through those decisions, share tips on picking the perfect material, and flag the common pitfalls that can turn a smooth upgrade into a costly headache.
Ready to stop guessing and start planning? Let’s dive in and make your fence replacement project feel less like a chore and more like a confident step toward a better‑looking, more secure home.
TL;DR
Fence replacements can boost curb appeal, protect pets, and add lasting value without a massive hassle; we break down budgeting, material choices, permits, and common pitfalls so you feel confident planning your project.
Follow our step‑by‑step guide and turn that worn fence into a stylish, low‑maintenance boundary for years today.
Step 1: Assess Your Existing Fence and Determine Replacement Needs
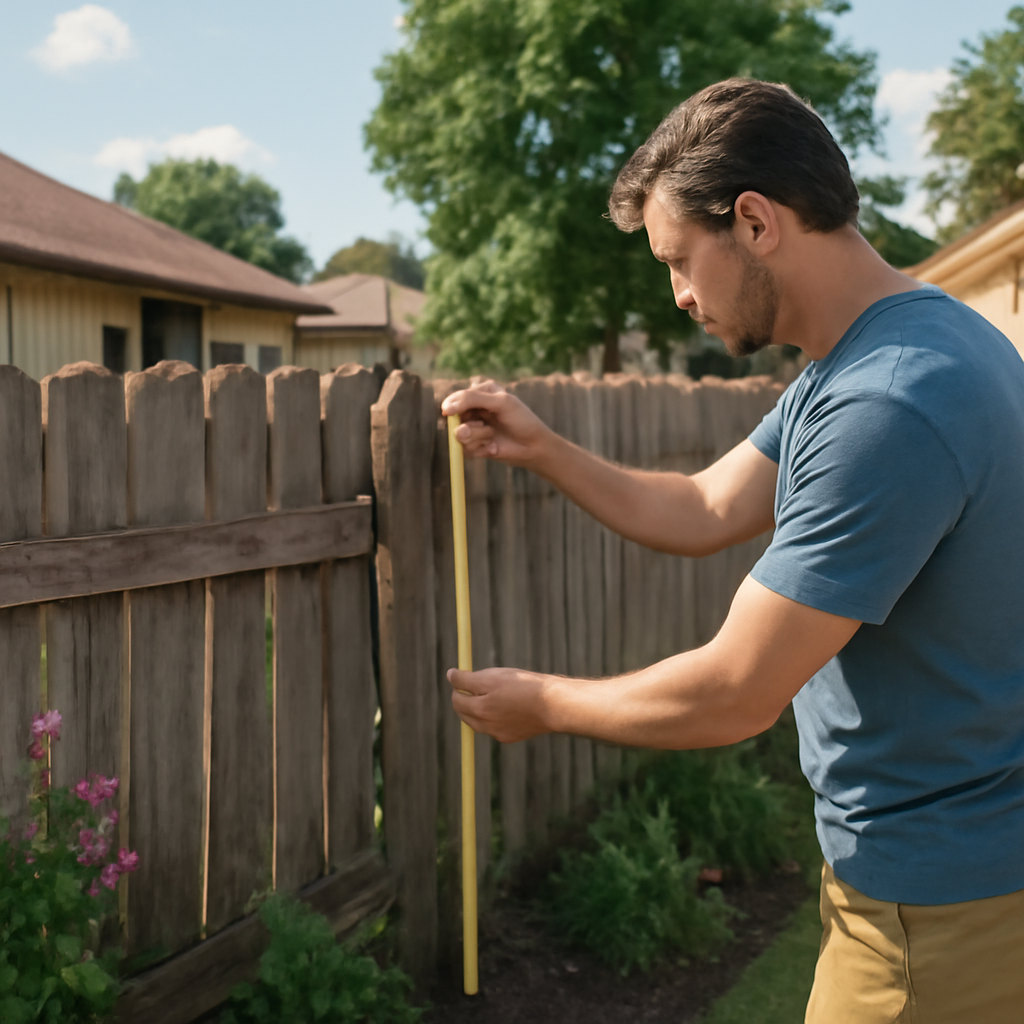
First thing’s first: walk the perimeter and actually look at what you’ve got. It’s easy to glaze over a fence that’s been there for years, but the details matter. Are the posts still solid in the ground, or do they wobble like a loose tooth? Do the boards have rot, warping, or cracks that let the wind whistle through? Grab a flashlight, lean in, and let yourself notice the little things – that’s where the truth lives.
And why does this matter? Because a quick visual check can save you from a costly surprise later. In our experience, homeowners who skip this step often end up replacing the entire fence when only a few panels needed a fix.
1. Make a quick condition checklist
Grab a notebook or your phone and run through these prompts:
Post stability – tap each post; does it feel solid?
Board integrity – any splinters, rot, or missing pieces?
Gate functionality – does it latch properly, or do you need to wrestle it shut?
Surface wear – is paint or stain flaking away, exposing raw wood?
Alignment – is the fence leaning or pulling away from the house?
Mark each issue with a simple “yes” or “no.” At the end you’ll have a clear picture of what’s salvageable and what needs a full replacement.
2. Consider the purpose of your fence
Ask yourself: what’s the main reason you’re looking at fence replacements?
Maybe you’re a pet owner who needs a secure barrier so your dog can’t escape. Or perhaps privacy is the priority for evening barbecues. Some folks are after curb appeal to boost resale value. Each goal nudges you toward a different material and design.
Here’s a quick example: a family with two energetic dogs in Decatur discovered that their old chain‑link fence had gaps where the dogs slipped through. After measuring the gaps, they chose a solid wood fence with a “dog‑proof” height, turning a security nightmare into a backyard oasis.
3. Estimate the scope and budget
Take your checklist and translate it into numbers. Measure the linear footage of fence that needs replacement. Multiply by the average cost per foot for your chosen material – wood runs about $12‑$20/ft, vinyl $15‑$25/ft, and aluminum $20‑$30/ft in most markets. Add about 10‑15% for waste and unforeseen issues.
Real‑world data from a local fencing contractor shows that homeowners who budget an extra 12% for “contingency” end up with smoother projects and fewer pauses.
4. Decide if you can DIY or need a pro
If you’re comfortable with a hammer and a level, a small‑scale repair might be doable. But full‑scale replacement often involves permits, proper post setting depth, and ensuring the fence meets local zoning setbacks. In Virginia Beach, for instance, a permit is required for fences over 6 feet tall.
When you’re on the fence (pun intended), a quick call to a reputable contractor can clarify what’s realistic for your skill set and timeline.
For a deeper dive into material choices and maintenance tips, check out A Practical Guide to Selecting, Installing, and Maintaining Your Fence . It walks you through the pros and cons of each option without the jargon.
Now, a little side note that often gets overlooked: drainage. If water pools near your fence line, wooden posts can rot faster. A simple French drain or a slight slope away from the fence can extend the life of any material.
5. Capture photos for reference
Before you order any materials, snap photos of problem areas. These images become handy when you talk to a contractor – they’ll know exactly what you’re dealing with, and you’ll avoid miscommunication that can cost you time and money.
And here’s a pro tip: take a wide‑angle shot of the entire fence line so the contractor can see the overall layout, plus close‑ups of the trouble spots.
Once you’ve completed the checklist, tallied the footage, and clarified your goals, you’ll have a concrete foundation for the next steps – budgeting, material selection, and permitting. It may feel like a lot, but breaking it down into these bite‑size actions makes the whole fence replacement journey feel manageable.
Thinking about turning that old fence into a stylish backdrop for your garden? You might also be interested in some creative garage‑to‑apartment ideas – Creative Garage Apartment Ideas for Every Budget offers inspiration that pairs well with a fresh fence upgrade.
And if you’re planning a weekend getaway after the work is done, here’s a handy guide on getting from Boston to Cape Cod – How to Get from Boston to Cape Cod . A little road‑trip can be the perfect reward for a job well finished.
Step 2: Choose the Right Fence Material for Your Property
Now that you’ve measured, noted the problem spots, and figured out what you want the fence to do, the next big decision is the material. It feels a bit like picking a new outfit for your home – you want something that fits the vibe, handles the weather, and doesn’t empty your wallet.
What’s the main job your fence will perform?
Think about the day‑to‑day. Are you mainly keeping a rambunctious dog from staging a jailbreak? Do you need a solid privacy screen for evening barbecues? Or is curb appeal the headline act for a future sale? Your answer will push you toward wood, vinyl, metal, or composite.
Wood – classic charm, but a bit high‑maintenance
Nothing says “homey” like a cedar or pressure‑treated pine fence. It ages gracefully, can be stained or painted, and blends well with gardens. The downside? It needs regular sealing, especially in rainy New England climates where moisture loves to sneak into grain. If you’re okay with a yearly coat of sealant, wood can be a beautiful, budget‑friendly choice – typically $12‑$20 per foot.
Vinyl – low‑maintenance, but less “hand‑crafted” feel
Vinyl fences are popular because they don’t rot, warp, or need paint. They’re great for families who hate the upkeep and for homeowners in humid zones where wood struggles. The trade‑off is a higher upfront cost, usually $15‑$25 per foot, and limited colour options. If you’re after a clean, uniform look and want to forget about staining for years, vinyl is worth the extra dollars.
Metal (Aluminum or Steel) – strength and sleek lines
Aluminum fences give you a light‑weight, rust‑resistant option that looks modern. Steel is tougher, perfect for security‑focused projects, but it can be heavier and pricier ($20‑$30 per foot). Both metal types stand up to wind and don’t need painting if you pick a powder‑coated finish. They’re also a smart pick if you have a sloping yard – the panels stay straight without sagging.
Composite – the best of both worlds?
Composite blends wood fibers with plastic. It mimics the grain of wood while resisting rot and insects. The cost sits near the top end, often $25‑$35 per foot, but the low‑maintenance promise can pay off over a decade. If you love the look of wood but dread the upkeep, composite might be your happy medium.
So, how do you narrow it down?
Quick decision checklist
Budget ceiling – set a realistic per‑foot limit.
Climate – does your area get salty sea air, heavy snow, or constant humidity?
Maintenance appetite – can you spare a weekend a year for staining?
Design vibe – does your home lean traditional, modern, or somewhere in between?
Longevity – how long do you plan to stay in the house?
Take a moment with this list and rank each material on a scale of 1‑5. The highest total usually points you to the right choice.
Here’s a real‑world snapshot: a couple in Portsmouth, New Hampshire, wanted a pet‑proof fence that also looked good from the street. They scored wood low on maintenance (2) but high on charm (5). Vinyl scored high on maintenance (5) but low on curb appeal (2). Their final pick was a premium cedar, paired with a simple sealant schedule. The result? A fence that blends with their colonial façade and holds their Labrador without a fight.
One more thing – don’t forget about the post material. Even the fanciest panel will flop if the post isn’t sturdy. Pressure‑treated wood posts work well with wood panels, while metal posts pair nicely with vinyl or aluminum. Matching the post to the panel can save you headaches later.
And if you’re still on the fence (pun intended), watching a short video can clarify the look and feel of each option. Below is a quick rundown that walks you through the pros and cons.
After the video, take a fresh look at your checklist. Picture the fence standing tall next year – does it still feel right? If you’re leaning toward wood, plan for a yearly seal; if vinyl, budget the higher upfront cost now to avoid future paint jobs. Whatever you choose, the right material will protect your property, boost curb appeal, and keep your fence replacements on schedule.
Step 3: Compare Costs and Lifespan Across Materials
Now that you’ve narrowed down the style, it’s time to look at the money side of things. How much are you really paying today, and what will that price look like in five, ten, or twenty years?
Upfront price vs. long‑term value
Wood usually feels friendly to the wallet – $12‑$20 per foot for cedar or pressure‑treated pine. Vinyl sits a bit higher, $15‑$25 per foot, while aluminum or steel can push $20‑$30. Composite? Think $25‑$35.
Those numbers are only the start. A cheap‑looking fence that needs a fresh coat every spring can quickly outpace a pricier option that barely needs attention.
Maintenance mileage
Wood loves a good seal, but that’s an annual or bi‑annual task. If you skip it, rot, splinters, and costly post replacement show up fast. Vinyl’s biggest upkeep is a quick wash now and then – no paint, no stain. Metal fares well if you choose a powder‑coated finish; occasional rust‑spot touch‑ups keep it looking sharp. Composite boasts “near‑zero” maintenance, which is why many equine property owners swear by it.
Our own projects have shown that the total cost of ownership for wood can balloon by 30‑40% over a decade once you factor in sealant, staining, and repair labor.
How long does each material really last?
Wood, when well‑maintained, can give you 10‑15 years before you’re thinking about replacement. Vinyl typically hits the 20‑year mark, and metal often pushes 25‑30 years if the coating stays intact. Composite can sit on a property for 30+ years with minimal fuss.
When you add the cost of periodic upkeep, the gap narrows – that’s why many homeowners opt for a higher upfront spend on vinyl or metal.
Quick decision table
Material | Upfront Cost (per ft) | Typical Lifespan | Maintenance Frequency |
Wood (cedar/p.t. pine) | $12‑$20 | 10‑15 years | Seal/stain every 1‑2 years |
Vinyl | $15‑$25 | 20 years | Wash occasionally; no paint |
Metal (aluminum/steel) | $20‑$30 | 25‑30 years | Inspect for rust; touch‑up as needed |
Composite | $25‑$35 | 30+ years | Rare – occasional cleaning |
So, what does this mean for your fence replacements?
If you love the classic look and don’t mind a weekend with a brush, wood can still be a solid choice – just budget for that sealant every year. If you’d rather set it and forget it, vinyl or metal give you peace of mind and a smoother budget over the life of the project.
And for those who want the look of wood without the upkeep, composite may feel like the sweet spot, especially if you plan to stay in the home for a while.
Need a deeper dive on how material costs stack up against maintenance? Check out this material cost and maintenance guide – it breaks down the numbers in a clear, decade‑long view.
Bottom line: line up the upfront price, estimate the regular upkeep, and picture the fence standing strong for the next 10‑30 years. When the numbers line up with your lifestyle and budget, you’ll feel confident that your fence replacements are a smart investment.
Step 4: DIY vs Professional Installation – What’s Best?
So you’ve picked a material, crunched the numbers, and you’re staring at a pile of fence panels. The next fork in the road is the classic DIY‑or‑hire‑a‑pro dilemma. It’s tempting to save a few hundred bucks by doing it yourself, but a mis‑step can turn that savings into a nightmare.
Why the decision matters
Fence installations aren’t just about nailing a few boards together. You’re dealing with post depth, local setback rules, and sometimes even a permit office that loves paperwork. Get one of those wrong and you could end up with a fence that leans, warps, or fails an inspection—meaning you’ll have to redo it.
In our experience at LGFMH Construction, we’ve seen homeowners who tackled a 150‑ft vinyl fence in a weekend only to discover the posts were only 24 inches deep instead of the recommended 36‑48 inches for our climate. The result? A fence that sagged after the first winter storm.
When DIY makes sense
If you’re comfortable with basic carpentry, have the right tools, and the project is under 100 ft, DIY can be a rewarding weekend challenge. Here are three signs you’re ready:
You’ve already set the posts yourself or have a clear plan for digging to the proper depth.
The fence style is simple—think straight‑line panels without decorative arches or custom gates.
You’ve budgeted extra time for learning curves, like aligning panels perfectly and handling unexpected soil conditions.
Quick tip: before you start, lay out the entire fence line with string and a level. It sounds old‑school, but that visual guide saves you from a crooked fence that makes you cringe every time you walk by.
Red flags that point to a professional
Even the most handy homeowner hits a wall when the project gets complicated. Consider calling a pro if any of these apply:
The local code requires a permit, and you’re not sure how to navigate the paperwork.
You’re installing a tall fence (over 6 ft) that may need extra engineering for wind load.
The terrain is uneven, rocky, or you have a steep slope that demands precise post setting.
You need a custom gate with automatic openers, electrical components, or decorative hardware.
Professional installers bring a set of tools most DIYers don’t own—like a post‑hole auger that reaches 4 feet, a laser level for perfectly straight runs, and a knowledge base of code‑compliant setbacks. That expertise often translates into a faster timeline and a warranty that covers structural issues.
Cost comparison cheat sheet
Here’s a rough breakdown to help you decide where the money goes:
Option | Typical Labor Cost (per ft) | Time Needed | Risk Level |
DIY | $0‑$2 | 1‑3 days (depending on skill) | Medium‑High |
Pro Installation | $5‑$12 | 1‑2 days (crew) | Low |
Remember, the labor cost is only part of the picture. If you end up re‑digging posts because they were set shallow, that extra labor can quickly eclipse the savings you thought you were making.
Step‑by‑step decision checklist
Check local regulations: do you need a permit? If yes, note the fees and paperwork.
Assess the terrain: flat yard vs. slope or rocky soil.
Measure the fence length and height—tall fences often need engineered posts.
List the tools you own versus the tools a crew would bring.
Add a 10‑15 % contingency to your budget for unexpected issues.
If after this you still feel confident, schedule a weekend and start with the post layout.
If any answer feels shaky, reach out to a reputable installer for a quote.
One final thought: a fence is a long‑term investment. Spending a bit more up front for professional installation can pay off in years of peace of mind, especially when you’re protecting pets, kids, or valuable garden spaces.
So, what’s your gut telling you? If the idea of measuring, digging, and aligning feels exciting, go for the DIY route and enjoy the satisfaction of a job well done. If the thought of permits, wind‑load calculations, and a perfect straight line makes you break out in a cold sweat, let the pros handle it. Either way, you’ll end up with a fence that finally looks as good as the rest of your home.
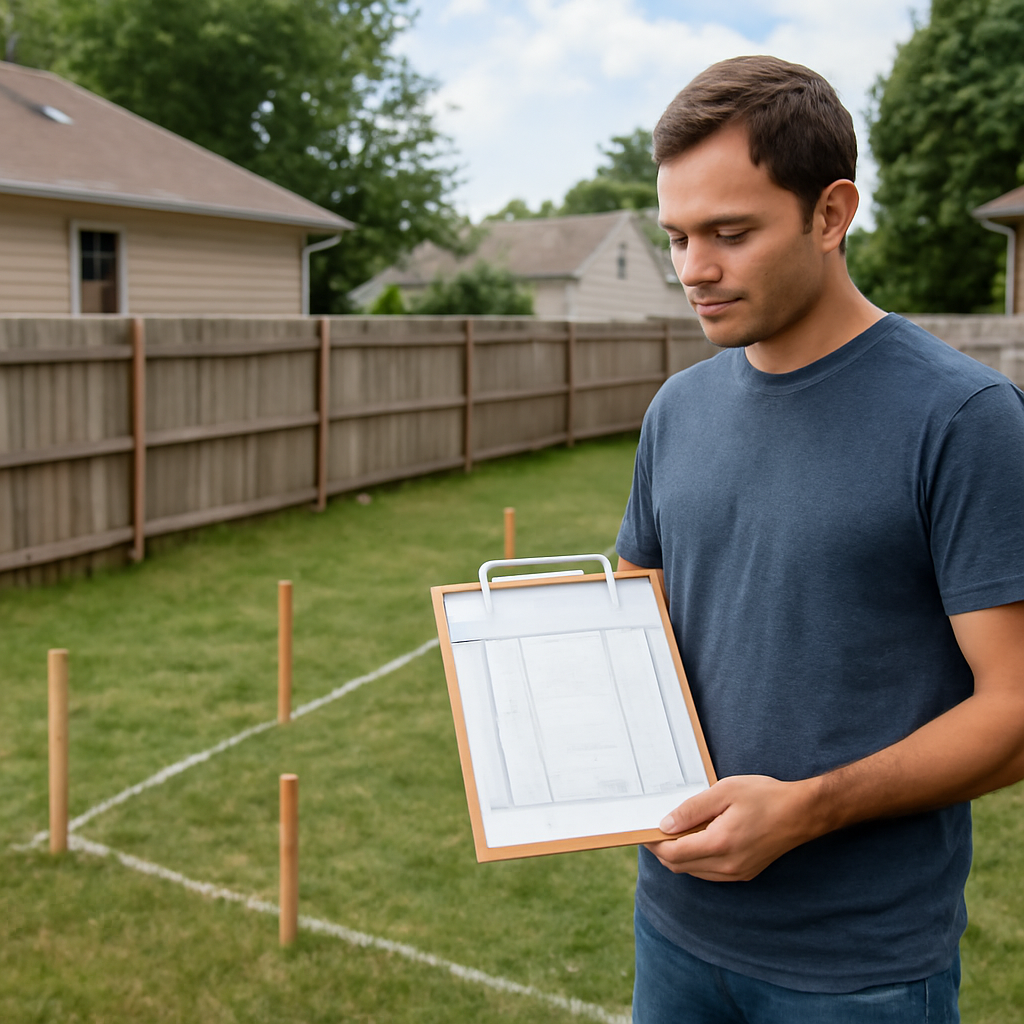
Step 5: Preparing the Site and Obtaining Permits
Before you swing that shovel, you’ve got to make sure the ground is ready and the paperwork is in order. It sounds like a hassle, but getting the site prepped and the right permits secured is what turns a fence replacement from a weekend hobby into a project that actually passes inspection.
Scope the site first
Walk the entire fence line with a tape measure, a string line, and a level. Mark where the new posts will sit, note any slopes, and flag obstacles like sprinkler heads, underground utilities, or existing garden beds. A quick “what’s down there?” call to your local 811 service can save you from digging into a gas line later.
Take photos of problem spots – a rock that might need breaking, a low‑lying drainage ditch, or a spot where the old fence leans into a tree. Those images become handy when you talk to a permit clerk or a contractor, and they also help you remember why you chose a particular post depth.
Know the local code
Every municipality has its own fence height limits, setback requirements, and material rules. In the District of Columbia, for example, any replacement, repair, or new installation on private property requires a permit, and the city provides a clear checklist of what’s needed ( DC Department of Buildings guide ).
Typical red‑flags include: fences taller than six feet in front yards, fences within a certain distance of a property line, or structures that need wind‑load calculations. If you’re not sure, pull up your city’s zoning map or give the building department a quick call.
Gather the paperwork
Most permits ask for a simple site plan. Sketch a rectangle that shows the property line, existing structures, and where each post will go. Include dimensions, fence height, and the material you’ve chosen. If you’re using a pre‑engineered system, attach the manufacturer’s installation specs – they often satisfy the city’s structural requirements.
Don’t forget the fee schedule. Permit costs can range from $50 for a short residential fence to a few hundred dollars for a large, custom installation. Adding the fee to your budget now prevents a nasty surprise when the permit office hands you a bill.
Submit and wait
Online portals are the norm these days, but some cities still accept paper applications. Double‑check that you’ve signed every required field, attached the site plan, and included any supporting documents (like a survey or a homeowner association approval). Once you hit “submit,” the review can take anywhere from a day to a couple of weeks, depending on workload.
While you wait, keep the site tidy. Clear debris, level the ground where posts will sit, and protect any landscaping you plan to keep. A clean site not only looks professional to the inspector but also speeds up the actual installation when the permit is finally approved.
Quick checklist before you dig
Call 811 to locate underground utilities.
Measure and mark post locations, noting slopes and obstacles.
Review local height and setback rules (DC needs a permit for any fence work).
Draw a simple site plan with dimensions, height, and material.
Calculate permit fees and add them to your budget.
Submit the application with all required docs.
Keep the work area cleared while you wait for approval.
Does all that feel overwhelming? Think of it as a pre‑flight checklist. You wouldn’t take off without checking fuel, weather, and controls – the same idea applies to fence replacements.
And here’s a little secret: once the permit is in hand, you’ll notice the installation itself goes a lot smoother. You won’t be stopping every few minutes to double‑check whether a post is deep enough or if you’ve accidentally violated a setback. That confidence translates to fewer trips to the hardware store and a fence that stays straight for decades.
So, grab that tape measure, sketch out the line, and get that permit rolling. It’s the groundwork that turns a vague idea into a solid, code‑compliant fence that protects your family, pets, and garden for years to come.
Step 6: Installing Your New Fence – Step‑by‑Step Process
Alright, the paperwork’s out of the way and the ground’s cleared – now it’s time to get those panels up. If you’ve ever felt a little jittery about the “real” work, you’re not alone. Most folks think the hard part is the planning; the actual installation is a series of tiny, repeatable moves that feel almost meditative once you get the rhythm.
Step 1: Lay Out Your Line
Grab a long string, a line level, and a few stakes. Snap the string along where you want the fence to sit, then pull it tight and check it with the level. This visual guide saves you from a crooked fence that makes you wince every time you walk by.
Pro tip: measure from a fixed point – like the edge of your house foundation – rather than from the first post. That way each subsequent post lines up with the same reference.
Step 2: Dig the Post Holes
Most residential fences need posts set 24‑36 inches deep, but in areas with frost heave (think Maryland winters) you’ll want at least 36 inches. A post‑hole auger makes quick work of the soil; if you don’t have one, a sharp spade will do, just take your time to keep the sides straight.
Don’t forget to add a few inches of gravel at the bottom for drainage – that simple step keeps wood from soaking up moisture and rotting.
Step 3: Set the Posts
Place the post in the hole, then use a level on both sides to make sure it’s perfectly vertical. Fill the hole with concrete or a mix of soil and gravel, tamping as you go. If you’re using concrete, slope the top away from the post so water runs off.
Give the concrete a 24‑hour cure before you attach anything. While you wait, double‑check that the spacing matches your fence panel specs – most panels are 6‑8 feet apart.
Step 4: Attach the Rails
Once the posts are solid, slide the horizontal rails into the pre‑drilled slots or nail them to the post faces. Start with the bottom rail, then the top, and finally the middle (if your design has one). Use a rubber mallet to tap the rails into place without cracking the wood.
If you’re installing a vinyl or metal system, follow the manufacturer’s bracket guide – they’re usually designed to snap in without extra fasteners.
Step 5: Hang the Panels or Boards
Start at one end and work your way across. For wood, pre‑drill pilot holes to avoid splitting, then screw the panels to the rails with deck‑type screws. Vinyl panels often have a “clip‑in” method; just line them up and press until they lock.
Keep a level handy; a slight twist early on compounds down the line, and you’ll thank yourself for catching it now.
Step 6: Install Gates
Gates are the tricky part because they need to swing freely yet stay aligned. Mount the hinges on the post first, then attach the gate leaf. Use a gate latch that can be adjusted – you’ll likely need a few tweaks after the first test swing.
Make sure the gate clears any landscaping or driveway edge; a few inches of clearance prevents future frustration.
Step 7: Finishing Touches
Walk the entire fence, checking for any loose screws, uneven panels, or gaps. Apply a coat of sealant to wooden sections if you haven’t already – it protects against moisture and UV damage.
Finally, clean up the site: remove stray debris, level any disturbed soil, and store tools safely. A tidy job site means you won’t trip over a stray post when you’re admiring your new fence.
If you’re in Montgomery County, double‑check that your fence height and setback match the local code – the county’s fence permit guidelines are a quick read and can save you a costly re‑install later. Montgomery County fence permit guidelines
Conclusion
Key Takeaways
We've walked through everything from assessing your old line to picking the right material and deciding DIY or pro help.
Now, when you look at the finished job, the biggest feeling should be relief – you finally have a fence that actually works for you.
So, what's the next step after all that planning?
If you’re still unsure about permits or want a second set of eyes on your layout, a quick call to LGFMH Construction can clear the fog and keep your timeline on track.
Remember: measure twice, check local codes, choose a material that matches your maintenance appetite, and don’t skimp on post depth. Those four habits keep fence replacements from becoming a headache.
And finally, schedule a yearly walk‑around – a quick visual check after each season helps you spot loose screws or emerging rot before they turn into costly repairs.
Does it feel overwhelming?
Break it down into bite‑size tasks – a checklist for each phase, a photo of every problem spot, and a budget buffer for the unexpected – and you’ll stay in control.
When the last panel snaps into place, take a step back, enjoy the view, and know you’ve built something that protects your home and your peace of mind for years to come.
FAQ
How much does a typical fence replacement cost?
Most homeowners see a price range between $12 and $30 per linear foot, depending on the material. Wood usually lands on the lower end, while vinyl, aluminum, and composite push the price up. Don’t forget to add 10‑15% for waste, fasteners, and any unexpected site work – that buffer can save you a surprise at checkout.
Do I need a permit for fence replacements in my city?
Yes, many municipalities require a permit once the fence exceeds a certain height or sits near a property line. The exact rules vary – some places only ask for a simple application, while others need detailed site plans and engineering calculations. A quick call to your local building department (or a look at their website) will tell you what paperwork to file before you swing a shovel.
What material is best for fence replacements if I have pets?
For active dogs or cats that love to test boundaries, a sturdy wood or vinyl fence works well. Wood can be reinforced with tighter board spacing, and vinyl’s solid panels leave no gaps for a curious pet to squeeze through. If you’re worried about chewing, a metal fence with smooth finishes offers durability without the temptation of gnaw‑able wood.
Can I handle fence replacements myself, or should I hire a pro?
If you’re comfortable digging post holes, leveling a string line, and have the right tools, a DIY job under 100 ft can be rewarding and save money. However, once you hit steep slopes, need a permit, or plan a tall fence, the risk of a crooked or non‑code‑compliant installation rises quickly. In those cases, a professional crew brings the equipment and experience to get it right the first time.
How often should I maintain my fence after a replacement?
A good rule of thumb is an annual walk‑around after each season. Look for loose screws, rust spots, or wood that’s starting to splinter. Apply a fresh coat of sealant to wood every 1‑2 years, and give vinyl or metal a quick wash and rust‑touch‑up as needed. Spot‑checking now and then prevents small wear from turning into costly repairs later.
What common mistakes should I avoid during fence replacements?
Skipping the post‑depth calculation is a classic error – shallow posts lead to sagging after the first storm. Ignoring local setback rules can force you to redo the whole line. Also, don’t skimp on a gravel base; proper drainage keeps wood from rotting. Finally, avoid buying just enough material; a few extra panels save you a frantic trip to the store mid‑project.
Will a fence replacement boost my home’s resale value?
Absolutely. A fresh, well‑maintained fence adds curb appeal and signals that the property has been cared for. Buyers often estimate a $5‑$10 per‑square‑foot value bump, especially if the fence matches the home’s style and the neighborhood’s aesthetic. Even a modest upgrade can tip the scales when a buyer is weighing multiple listings.


Comments