Comprehensive Guide to Gutter Cleaning for Homeowners
- William McKracherne
- Feb 19
- 17 min read

Ever looked up at your gutters after a rainstorm and felt that knot in your stomach? You know the one—watching water spill over the edge, wondering if you missed a spot, and thinking, ‘Maybe I should have cleaned them sooner.’
You’re not the only one feeling that mix of frustration and dread. Most homeowners notice the problem only when a leak shows up, and by then the cleanup can feel like a full‑time job.
Think about the last time you tried to scoop out leaves with a flimsy hand‑trowel, only to have half the debris cling to the sides and the rest tumble onto your driveway. It’s messy, it’s tiring, and it leaves you wondering if you’re actually fixing anything at all.
That’s where proper gutter Cleaning steps in like a quiet hero. It’s not just about pulling out leaves; it’s about keeping water flowing where it’s supposed to, protecting your roof, siding, and even your foundation from costly water damage.
In our experience at LGFMH Construction, a quick visual inspection before the first heavy rain can save you hours of scrubbing later. Look for standing water, rusted seams, or sagging sections—those are the early warning signs.
But it’s not just about the look; safety matters too. Climbing a ladder with a shaky footing is a recipe for a bruised ego—or a broken bone. If the height feels daunting, or the gutters are hard to reach, that’s a perfect cue to call in professionals who have the right gear and know the local building codes.
Here’s a simple mental checklist you can run through every spring: 1) Clear visible debris by hand or with a scoop. 2) Flush the lines with a garden hose to spot clogs. 3) Inspect joints and downspouts for cracks. 4) Tighten any loose brackets. If anything feels off, note it and decide whether it’s a DIY fix or a job for the pros.
And if you ever feel unsure—maybe the ladder wobbles, or the gutters are rusted beyond a quick patch—remember that a professional gutter Cleaning service can handle the heavy lifting, leaving you with peace of mind and a dry basement.
Bottom line: regular gutter Cleaning isn’t a chore you can afford to ignore. It’s an investment in your home’s health, your wallet, and your sanity. So, grab a ladder, set a reminder for early spring, and keep those gutters humming—your future self will thank you.
TL;DR
Regular gutter Cleaning prevents water damage, saves money, and keeps your home safe by ensuring rain flows where it belongs. Follow our checklist—clear debris, flush lines, inspect joints, tighten brackets—and call LGFMH Construction if anything feels unsafe, so you can enjoy a dry basement and peace of mind all year.
Step 1: Assess Your Gutter System
Before you even think about scooping leaves, take a step back and look at the whole system. It’s like checking the foundation of a house before you paint the walls – if the base is shaky, everything else suffers.
First, walk around the house and give each gutter a quick visual scan. Are there sagging sections? Do you see water pooling at the edges after a rain? Those are the red flags that say, "Hey, something’s off."
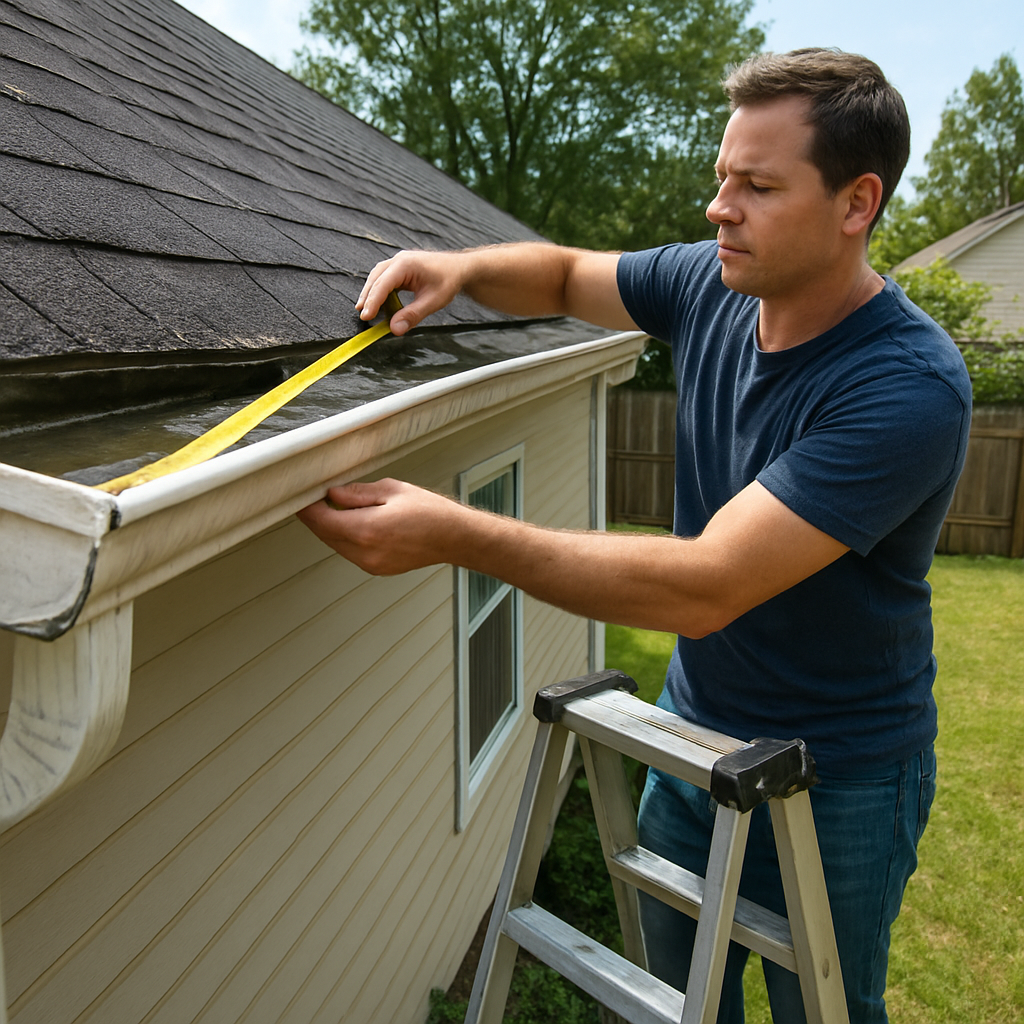
Measure length, height, and pitch
Grab a tape measure and jot down the linear footage of each run. A typical two‑story home in Virginia Beach averages about 200 feet of gutter. Knowing the exact length helps you estimate how much debris you’ll actually have to move.
Next, note the height of the roofline. Every extra story adds roughly 10‑15 seconds of ladder setup time per foot, and it also raises the risk factor. If you’re standing on a 20‑foot ladder, you might need a safety harness – a detail we always stress at LGFMH Construction.
Pitch matters, too. A steep roof (over 30°) means water will rush faster, but it also makes it harder to reach the gutter from the ground. Mark any sections that require you to climb onto the roof itself.
Inspect for common problem spots
Look for three tell‑tale signs:
Standing water in the gutter after a light rain – indicates a blockage.
Rusty or cracked seams – water can seep into the fascia and cause rot.
Loose brackets or missing fasteners – the gutter might sag and pull away from the house.
In a recent job in Norfolk, we found a homeowner who’d never noticed a tiny rust patch at the downspout. That patch turned into a 3‑inch hole after a single storm, flooding the basement. A quick inspection would have saved them $1,200 in water damage.
Document what you find
Take photos of each issue and note them in a simple checklist. A photo of a clogged corner or a sagging span is worth a thousand words when you’re explaining the repair to a contractor.
For those who like a tech‑savvy approach, using a mobile takeoff tool like ArcSite to estimate your gutter cleaning job can streamline this step. Snap a picture, draw the perimeter, and the app will calculate footage for you – no more guesswork.
Now that you’ve gathered the data, you can decide whether it’s a DIY fix or a call for professional help. If you see more than two problem areas, or if any section is above 15 feet, it’s probably safer to let the pros handle it.
Having a clear picture of your gutter’s condition sets the stage for an efficient cleaning session. It also helps you budget accurately – you won’t waste time on a gutter that needs a full replacement instead of a simple scrape.
And remember, safety first. If the ladder feels wobbly, or if you’re unsure about the roof’s pitch, it’s better to pause than to risk a fall. A professional crew brings the right gear, and they know local building codes that keep everyone safe.
Once your assessment is complete, you’ll move on to actually clearing the debris, but that’s a story for the next step.
Step 2: Gather Tools and Safety Gear
Let’s be honest: you won’t get far in gutter Cleaning if you don’t have the right tools and safety gear within arm’s reach. The goal is to move quickly, stay safe, and actually remove debris you can see from the ground up.
Here’s what you’ll want on your bucket list before you lift a rake or reach for a ladder.
Essential tools for effective gutter Cleaning
A simple gutter scoop or spoon – the go-to to yank out leaves and gunk without damaging the gutter hangers.
An extendable pole (20 ft is a sweet spot for most two-story homes) with a brush head or gutter-cleaning attachment – let you work from the ground for most runs.
A sturdy bucket or bag to collect debris as you go. A small tarp can also be handy for mess-free cleanup.
Gloves, eye protection, and non-slip shoes. Think of gloves that grip wet leaves and protect fingers; eye protection stops pine needles from becoming projectiles.
Gardening or utility trowel for tight corners, plus a garden hose with a spray nozzle to flush out clogs once you’ve loosened them.
Safety gear and setup you can’t skip
Quality ladder with non-slip feet. Make sure it’s tall enough to reach the gutter comfortably without standing while on the top rungs.
A safety harness or rope system for high or steep roofs. For many Virginia Beach homes, a simple harness adds peace of mind on taller nodes.
Eye protection and gloves are not optional – they’re your first line of defense against debris and sharp edges.
Plan your route. Keep one hand on the ladder, and set the bucket and tools on the ground or on a stable surface within reach.
Ladder setup rules you’ll thank yourself for later
Set the ladder at a 4-to-1 angle: for every four feet up, your base should be one foot away from the wall.
Always maintain three points of contact. Don’t reach too far; move the ladder as you progress.
Have a spotter if you’re on a windy day or a particularly tall setup. It’s not a failure to ask for help—it’s smart safety.
From our experience at LGFMH Construction, the right gear isn’t flashy; it’s practical. A 20-foot extension pole and a good gutter scoop cut clean-up time dramatically and keep you off unstable ladders. If you’re unsure about a tool, think about its core job: it helps you remove debris efficiently from the ground or from a safe position, not fight gravity on a pivoting ladder.
And yes, safety matters. If you’re in doubt about the weather or your footing, pause. There’s no shame in calling a pro when a section is above 15 feet or you’re dealing with a roof pitch you’re not comfortable handling.
For more in-depth safety guidelines, check out reputable resources like safety practices for cleaning your own gutters, then pick tools that suit your home’s layout. These resources can help you align your toolkit with your local needs. safety practices for cleaning your own gutters.
Similarly, if you’re curious about top-rated gutter-cleaning tools, This Old House offers a well-regarded overview you can skim: best gutter cleaning tools .
So, what should you do next? Gather the gear, set up your ladder properly, and make a quick plan for debris collection. Let’s do this safely and efficiently—your gutters (and your future self) will thank you.
Step 3: Clean the Gutters Thoroughly
Alright, you’ve got your ladder set, your scoop ready, and a bucket waiting. Now comes the part that actually makes the water flow the way it should – the deep clean.
Start at the low end and work up
Imagine you’re sweeping a kitchen floor: you start at one corner and push debris toward the trash. Do the same with your gutters. Begin at the lowest point, scoop out the bulk of leaves and twigs, then move upward. This prevents you from dumping fresh debris onto a spot you’ve already cleaned.
Pro tip: keep the scoop angled so the debris falls into the bucket rather than spilling back onto the roof. A small tarp under the bucket catches any stray bits and saves you a second cleanup later.
Flush with a hose
Once the big stuff is out, grab a garden hose with a good‑strength nozzle. A steady stream from the top of the gutter pushes remaining silt, pine needles, and fine debris toward the downspout. Watch the water rush out – if it pools or runs slowly, you’ve found a blockage.
In the BELFOR guide to gutter cleaning , they note that lingering silt is the main cause of overflow, which can eventually damage foundations. A quick flush now saves you a costly repair later.
Don’t forget the downspouts
Even a perfectly clean gutter can back up if the downspout is clogged. Point the hose directly into each downspout and watch for a strong, uninterrupted flow. If water sputters, use a plumber’s snake or a stiff wire to poke through the blockage.
Tip: a ½‑inch garden hose works surprisingly well as an improvised snake. Insert it, wiggle gently, then blast water again. Most residential blockages give up within a minute.
Inspect while you’re at it
As you move along, keep an eye on the gutter’s condition. Look for rust spots, cracks, or loose brackets. A tiny rust patch can turn into a hole after a heavy rain, as we’ve seen on several Virginia Beach homes.
If you spot a sagging section, note it and consider calling LGFMH Construction for a quick repair. A well‑secured gutter lasts decades, and fixing a problem now prevents water damage down the road.
Use a two‑bucket system for efficiency
One bucket for the bulk debris, another for the finer material that the hose pushes out. Swap them when the first fills up – it keeps you from constantly climbing down to dump the load.
And don’t forget to wear thick gloves; wet leaves can be sharp, and the last thing you want is a torn hand while you’re halfway up a ladder.
Check your work
After you’ve flushed every run, give the whole system a once‑over with your eyes. Look for any remaining standing water, especially after a light spray. If you see pockets, repeat the hose flush in that spot.
A quick visual check is all it takes to catch a missed clog before the next storm hits.
Timing is everything
We recommend cleaning twice a year – once in the spring after the trees leaf out, and once in the fall before the first freeze. If you have pine trees or a lot of overhanging branches, a third pass in late summer can keep the buildup manageable.
Consistent cleaning keeps your gutters functional for over 20 years, according to the same BELFOR research.
When to call in the pros
If any section sits above 15 feet, or if the roof pitch feels steep, it’s wise to pause and call a professional. A quick call to LGFMH Construction can save you a dangerous climb and ensure the job is done right.
Even a short consultation can give you a clear estimate and peace of mind.
Wrap‑up checklist
Start low, work upward.
Remove bulk debris with a scoop.
Flush each run with a hose.
Clear downspouts with a hose or snake.
Inspect for rust, cracks, sagging brackets.
Do a final visual check for standing water.
Schedule next clean for spring/fall (or quarterly if you have many trees).
That’s it – a thorough clean that leaves your gutters humming and your home protected. Ready to grab that bucket and get to work?
For a visual walk‑through, you might find this quick video demonstration helpful, but the steps above are all you need to get the job done safely.
Step 4: Inspect and Repair Damage
Let’s pick up where you’ve just finished the clean. Now it’s about proof, not vibes—spotting damage early saves big bucks and headaches later.
So what should you be looking for as you move along the gutter line? Sagging sections, rusted seams, cracks in the trough, loose hangers, and downspouts that peter out instead of draining smoothly. These aren’t cosmetic gripes. Left unchecked, they invite leaks that threaten fascia, siding, and even your foundation.
Identify common gutter ailments
Sagging gutters are the most obvious clue. You’ll notice a slow dip that pools water. Leaking seams creep in at joints, especially after freeze-thaw cycles. Rust isn’t glamorous here—it’s a warning sign. Cracks in the gutter trough can widen and spray water into soffits if you ignore them.
Does this demand a pro every time? Not always. Some fixes are DIY-friendly, but others require the right hardware and a ladder you trust. In our experience at LGFMH Construction, safer, longer-lasting results come from addressing root causes: re-hanging sections, replacing corroded brackets, and sealing joints with the proper sealant.
Practical repair steps you can take (or verify with a pro)
First, tighten or replace loose hangers. A sagging span often needs a few extra screws between the existing ones. Then inspect the downspouts for obstructions; a quick snake-through usually restores flow. If joints leak, apply a gutter-approved sealant from the outside edge inward to avoid trapping moisture.
For stubborn leaks or damaged sections, weigh long-term costs. A mid-length run with rusty seams might be cheaper to replace than patch repeatedly. Coastal climates, like Virginia Beach, tend to reward seamless gutters that resist corrosion—something we routinely recommend to homeowners who want lasting results.
Thinking about cost? It’s smart to plan a professional assessment if you spot multiple issues or anything higher than 15 feet. A quick consult can give you a clear estimate and peace of mind—without turning your weekend into a ladder marathon.
Quick reference table
Damage type | Inspection cue | Repair approach |
Sagging gutters | Visible dip, standing water | Rehang with proper hardware; add screws |
Leaking seams | Water at joints | Seal or replace joint sections |
Rust or corrosion | Orange/brown patches | Patch if small; replace severely corroded sections |
A quick-forward mindset
Take photos as you go. A simple before-and-after helps you plan subsequent maintenance. And if you’re unsure about a high-up section, call a pro. A quick safety check can prevent a fall and keep your project on track.
As a practical reality, you don’t have to go it alone. Platforms like LGFMH Construction make this easier by providing targeted exterior repair options when you discover more than simple fixes are needed.
For a deeper dive into common gutter problems, this guide is a solid reference: Common gutter problems and their solutions.
Another reliable read is the same resource’s practical breakdown of sagging and leaks, which complements what you’ll see on your home. Common gutter problems and their solutions.
Step 5: Maintenance Schedule and Best Practices
Alright, you’ve cleared the gutters, spotted a sag, maybe even tightened a bracket. What now? The real magic happens when you turn that one‑off clean‑up into a rhythm you can live with.
Seasonal timing that actually works
Think of your gutter system like a car’s oil change schedule – you don’t wait until the engine seizes. In most Virginia Beach climates, the sweet spot is late spring (after the last big bloom) and early fall (before the leaves start a slow descent). Those two windows clear out winter debris and catch the bulk of leaf fall before the first freeze.
If you’ve got maples or oaks nearby, add a quick post‑leaf‑drop check in late fall. Pine‑needles? They’re year‑round, so a light sweep after a heavy summer thunderstorm can save you a weekend of back‑breaking scooping.
Does that sound like a lot? Not really – a 15‑minute walk around the house with a flashlight is all it takes to spot a clogged corner.
Quarterly visual inspections
Cleaning twice a year is the baseline, but a quick visual inspection every three months catches sneaky issues before they become money‑draining repairs. Pull the ladder down, stand on solid ground, and look for three tell‑tale signs: standing water, rust spots, and loose brackets.
When you see water pooling in a low‑point, it’s a red flag that something upstream is blocked. A speck of rust? That could be the first bite of corrosion that later turns into a hole. Loose brackets? Tighten them now and avoid a sag that forces water onto your siding.
Quick tip: snap a photo with your phone and jot a one‑line note. Over time you’ll build a visual diary that tells you, “Hey, that spot got worse in six months.”
Weather‑driven adjustments
Storm season isn’t a one‑size‑fits‑all. If a heavy rainstorm rolls through, give your gutters a once‑over the next day. A sudden overflow usually means a new clog formed – maybe a pinecone or a nest.
Winter? Don’t wait for an ice dam to crack your roof. On a sunny, midday afternoon when any frost has melted, walk the perimeter and brush off any snow that’s built up. Ice adds weight fast, and a clogged gutter can turn a light snowpack into a dangerous load.
And if you notice a squirrel or wasp activity, don’t try to wrestle it yourself. A quick call to a professional can remove the critter safely and keep you from a nasty bite.
Tools, safety, and a cheat‑sheet
Keep a “maintenance kit” near your garage: a sturdy ladder with a stabilizer, a 20‑foot pole attachment, a small bucket, gloves, and a basic sealant for minor cracks. Having everything at arm’s reach turns a random weekend into a streamlined session.
Safety first – always test the ladder’s footing on level ground, maintain three points of contact, and never lean too far. If you’re above 15 feet, consider a simple harness; it’s a cheap insurance policy that could save a fall.
Here’s a quick checklist you can tape to the inside of your garage door:
Spring (late March‑early May): Remove winter debris, flush with hose, tighten brackets.
Mid‑summer (after heavy rain): Spot‑check for clogs, clear pine‑needles.
Fall (late September‑early November): Full clean‑out, inspect for rust, consider gutter guards.
Winter (mid‑December‑early January): Melt snow, check for ice dams, ensure downspouts stay clear.
Pro tips from the field
In our experience at LGFMH Construction, homeowners who trim overhanging branches by at least six inches see 30‑40% less leaf load in the fall. It’s a small upfront effort that pays off in fewer cleanings.
Another tip: add a splash guard or leaf guard at the front of high‑traffic downspouts. It’s a cheap DIY fix that can cut down on debris buildup by half.
Finally, schedule a professional check‑up every 2–3 years if you have a complex roofline or historic home. A pro can spot hidden cracks or corrosion that a casual eye might miss, saving you from costly water damage later.
Putting it all together
So, what should you do next? Grab that checklist, mark your calendar for late spring and early fall, and keep a small tool kit handy year‑round. By turning gutter care into a predictable habit, you’ll protect your home, extend the life of your gutters, and avoid that dreaded “water everywhere” moment.
FAQ
How often should I schedule gutter Cleaning for a typical Virginia Beach home?
Because the coast brings a mix of pine needles, oak leaves, and occasional storm debris, most homeowners find a twice‑a‑year rhythm works best. Aim for a deep clean in late spring (after the last big bloom) and another in early fall (before the first freeze). If you have lots of ever‑green trees, add a quick visual check after a heavy summer rain. The extra look‑around only takes 10‑15 minutes and can prevent a surprise overflow.
Can I safely clean my gutters myself, or should I always call a professional?
You can handle most of the routine work if the highest point of your gutter is under 15 feet and the roof pitch isn’t steep. Use a sturdy ladder, keep three points of contact, and wear gloves and eye protection. If the ladder feels wobbly, the roof is slick, or you notice rusted seams that need sealing, it’s smarter to pause and let LGFMH Construction step in. A professional crew brings the right harnesses and can spot hidden damage you might miss.
What tools give the best results without breaking the bank?
A basic gutter scoop or large garden trowel does the heavy lifting for bulk debris. Pair it with a 20‑foot extendable pole that has a soft brush head—this lets you reach most runs from the ground. Finish each pass with a garden hose set to a strong spray; the water flushes out silt and tests flow. A small bucket or tarp beneath the ladder catches the mess, keeping the clean‑up quick and tidy.
Why does water sometimes pool in the gutter even after I’ve cleared out the leaves?
Pool‑ing usually means there’s a hidden blockage downstream—often a downspout clogged with pine needles, a broken outlet, or a small nest. After you’ve cleared the main trough, run water from the top of each run and watch it exit the downspout. If it slows or sputters, insert a garden hose or a plumber’s snake into the downspout to dislodge the obstruction. A quick flush can save you from a costly repair later.
What signs indicate that my gutters need repair rather than just cleaning?
Look for sagging sections, rust‑colored patches, or cracks that let water seep out. If you notice standing water after a light rain, that’s a red flag that the gutter’s pitch or a joint is compromised. Loose brackets that wobble when you tap them also signal that the system is losing its grip on the fascia. When you spot any of these, note the location and consider a professional repair to avoid water damage to your siding or foundation.
How do I prevent ice dams from forming on my gutters during a Virginia Beach winter?
First, keep the gutters clean so water can flow freely—ice forms when water backs up and freezes. On a sunny, thawed day, use a soft brush to clear any lingering snow or ice buildup. Consider installing a leaf guard or splash guard at high‑traffic downspouts; they reduce the amount of debris that can trap water. If you live in a spot that sees frequent freezes, a quick professional check‑up before the season starts can help you spot vulnerable areas.
Is gutter Cleaning really worth the effort for home resale value?
Absolutely. A well‑maintained gutter system shows buyers that the house has been cared for, reducing the perceived risk of water‑related issues. In recent local market data, homes with documented gutter maintenance sold about 3‑5 % faster and fetched a modest price premium. Even if you’re not planning to move soon, keeping the gutters in top shape protects your foundation, siding, and landscaping—saving you money in the long run.
Conclusion
We've walked through every step of gutter Cleaning, from the first visual check to the final seal, and you now have a roadmap that feels doable, not daunting.
Remember, a clogged gutter is the silent thief that can steal years off your roof, rot your fascia, and even flood your basement—issues you’ve seen in Norfolk and Chesapeake homes.
The fastest way to stay ahead is a simple habit: set calendar reminders for a spring sweep and a fall flush, then do a quick visual check after any heavy rain.
If you spot standing water, rust patches, or loose brackets, jot the location, take a photo, and either tighten the hardware yourself or give us a call; a 15‑minute assessment can prevent a $1,200 repair later.
Our crew at LGFMH Construction has spent over three decades perfecting the balance between DIY safety and professional precision, so when you need a hand—whether it’s a sagging span or a full gutter guard install—we’re ready to step in.
Want a quick refresher on the full step‑by‑step process? Check out our Essential Guide to Gutter Cleaning Virginia Beach and keep it bookmarked for next season.
Take the first step today: grab your ladder, run through the checklist, and give your home the protection it deserves. A dry basement means peace of mind for you and yours.


Comments