Comprehensive Guide to Siding Repairs for Homeowners
- William McKracherne
- Jan 5
- 19 min read

Ever walked up to your house and caught a glimpse of a jagged crack or a warped board on the siding, and thought, “Did that just happen overnight?” That moment of “uh‑oh” is the opening act of a siding repairs story that many homeowners share.
But why does it feel like the exterior of your home can go from looking fresh to looking tired in the blink of an eye? The truth is, weather, age, and even the occasional stray baseball can take a toll, and the damage often hides in plain sight.
We get it—your schedule is packed, the kids are busy, and the last thing you want to worry about is a piece of vinyl or wood that’s starting to peel. Still, that little flaw can let moisture sneak in, and before you know it you’re dealing with rot, mold, or a draft that hikes up your heating bill.
Common culprits include relentless sun bleaching, freeze‑thaw cycles that expand tiny gaps, and impact from branches or moving objects. Even the best‑quality siding can develop hairline fractures when the house settles after a new roof installation.
If you let those cracks linger, the water finds its way behind the panels, saturating the sheathing and compromising structural integrity. That’s the nightmare scenario we’ve seen turn a simple repair into a major renovation.
That’s why timely siding repairs matter: a quick patch or replacement can preserve your home’s curb appeal, protect the insulation, and keep energy costs predictable. In our experience, addressing the issue within a few weeks saves both money and future headaches.
In this guide, we’ll walk you through the signs that scream “call a pro,” the tools you might need for a DIY touch‑up, and how to decide when it’s smarter to call in specialists.
Ready to take the mystery out of siding repairs and give your home the protection it deserves? Let’s dive in.
TL;DR
If you spot cracked, peeling, or warped siding, act fast—quick repairs stop water intrusion, protect insulation, and keep energy bills low.
We’ll show you the tell‑tale signs, simple DIY tools, and when it’s smarter to call LGFMH Construction so your home stays safe and looking great and reliable for years.
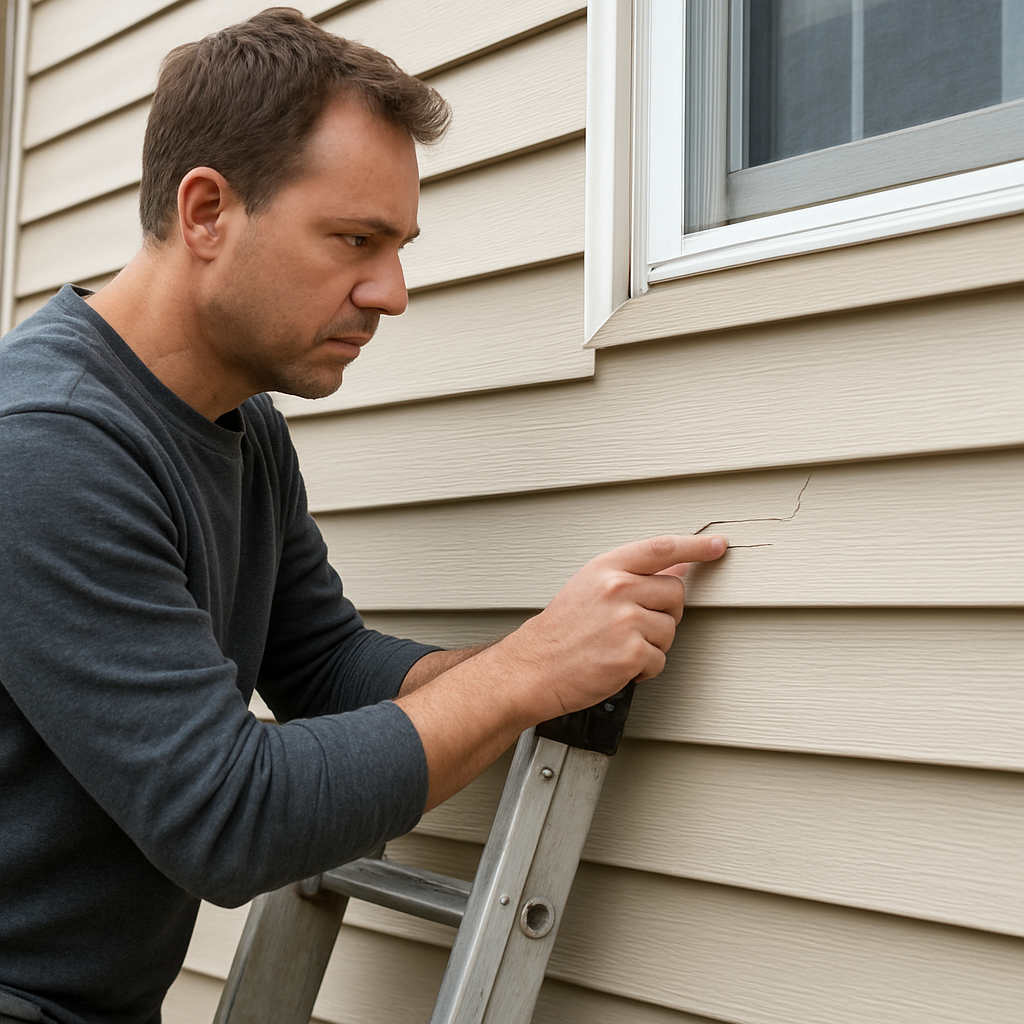
Step 1: Inspect Your Siding
Alright, you’re standing on your porch, coffee in hand, and you notice a faint line curling up the side of the house. That little crack might feel harmless, but it’s often the first whisper that your siding is begging for attention.
Before you grab a ladder or call anyone, let’s walk through a quick, no‑stress inspection. Think of it as a health check‑up for your home’s skin – you’d never skip a doctor’s visit, right?
Why an inspection matters
Every year, moisture, UV rays, and temperature swings take a tiny toll. According to Voyager Exteriors, unchecked cracks can let water seep in, leading to mold, rot, or even higher energy bills. Spotting those issues early can save you hundreds on siding repairs and keep your home’s value intact.
What to look for
Grab a flashlight and start at the bottom of the wall. Scan for these red flags:
Cracks or gaps in seams, especially around windows and doors.
Warps or buckling panels – they might feel loose to the touch.
Faded or chalky paint that signals UV damage.
Signs of pest activity – tiny holes or chewed edges.
And don’t forget the corners. That “L” shape where two siding pieces meet is a magnet for water pooling.
Step‑by‑step checklist
1.Walk the perimeter.Move slowly, keeping an eye on each panel. Use the flashlight to highlight shadows.
2.Press lightly.A gentle tap with your knuckle will reveal hollowness – a sign of moisture behind the surface.
3.Check the trim.Vinyl or wood trim can shrink and pull away, creating gaps.
4.Feel for temperature differences.On a sunny day, run your hand across the siding; colder spots may indicate moisture accumulation.
5.Document.Snap a quick photo of any suspect area. A visual record helps you decide whether a DIY patch will do or if you need a pro.
Need a visual aid? Here’s a short video that walks you through the inspection process step by step.
After you’ve watched the video, grab your notebook and tick off each item on the list. If you find more than two problem spots, or if any damage looks extensive, it’s time to bring in the experts.
When to call a pro
We’ve seen homeowners try to patch a warped board with just caulk, only to watch the same spot water‑log again weeks later. If you notice any of these conditions, schedule a professional siding inspection:
Multiple panels warped or buckled.
Persistent moisture stains inside the wall.
Signs of rot or insect damage.
Age of siding approaching its typical lifespan (20‑30 years for vinyl, 40‑50 for fiber cement).
In those cases, a seasoned crew like LGFMH Construction can assess structural integrity and recommend whether a targeted repair or a full replacement makes more sense.
For a deeper dive into the exact signs to watch, check out this detailed siding inspection checklist from our trusted partners.
Bottom line: a thorough inspection takes about 20‑30 minutes, but the peace of mind it buys you lasts years. Keep a calendar reminder to repeat the process each season – especially after a harsh winter or a summer storm.
Step 2: Identify Damage Types
Now that you’ve taken a good look at the surface, the next question is: what kind of damage are you actually dealing with? Not all cracks are created equal, and the repair method you choose hinges on the underlying issue.
Cracks and Splits – Are they superficial or structural?
If the line looks hair‑thin and the surrounding panel feels solid, you’re probably looking at a surface crack. Those usually happen when the material expands and contracts with temperature swings. A quick sand‑and‑paint can seal them, but be sure the crack isn’t widening each time you tap it with a knuckle.
On the other hand, a deep split that rattles or feels hollow underneath signals moisture has gotten behind the siding. That’s a red flag for rot or mold, and you’ll need to peel back the panel to check the sheathing.
So, how do you tell the difference? Press gently along the crack – if you hear a dull thud, the wood or fiber cement is still sound. If it sounds more like a “squish,” water has soaked in.
Warped or Buckled Panels – The tell‑tale signs of water intrusion
Ever notice a siding board that looks like it’s trying to pop out of the wall? That’s warping, and it’s usually caused by prolonged exposure to moisture. Vinyl can bow, and fiber‑cement can become brittle and then swell when it absorbs water.
Progressive Foam points out that fiber cement siding, while sturdy, can absorb moisture if the gaps aren’t properly caulked, leading to “panel damage, rot, and even mold problems.” Learn more about common fiber‑cement issues If you see a panel that’s bulging or has a noticeable dip, treat it as a priority repair.
Check the edges: if the warping is isolated to one corner, you might be able to replace just that board. If several panels are affected, it could indicate a broader moisture issue that needs a full‑wall assessment.
Peeling Paint and Fading – More than an eyesore
When paint starts to lift or the color looks chalky, it’s often the first visual cue that the siding is losing its protective coating. This can happen on any material, but especially on fiber cement which requires regular repainting to keep its barrier intact.
According to This Old House, water‑damaged siding often shows “soft or spongy areas with visible mold or mildew growth” and “peeling paint or discoloration.” Read the guide on water‑damaged siding If the paint is flaking off in patches, it’s time to scrape, prime, and repaint – but only after you’ve confirmed the substrate isn’t rotted.
Spotting Rot and Mold – The hidden enemies
Rot smells faintly of damp wood and feels mushy when you press it. Mold shows up as dark spots or a fuzzy growth, especially in shaded areas. Both indicate that water has been lurking behind the siding for a while.
When you encounter rot, you’ll need to cut out the damaged section, replace the sheathing, and reinstall new siding. It’s a bigger job, but skipping it only guarantees the problem will spread.
Fast‑Check Checklist
Tap the panel – solid vs. hollow sound.
Look for cracks: hairline vs. deep split.
Feel for warping or bowing.
Inspect paint: peeling, fading, chalkiness.
Search for mold, mildew, or soft wood.
Count the number of problem spots – more than two? Call a pro.
By running through these quick questions, you’ll know whether you’re dealing with a simple DIY fix or a situation that calls for a professional siding repair crew. Remember, catching the right damage type early can save you from a costly full‑wall replacement down the line.
Ready to move on? Once you’ve identified the damage, the next step is choosing the right repair method – stay tuned.
Step 3: Gather Materials and Tools
Alright, you’ve pinpointed the cracked panel and know whether you’re dealing with rot or a simple surface split. Before you climb that ladder again, the next move is to pull together the right tools – because a missing wrench or a dull blade can turn a quick fix into a half‑day nightmare.
Measure twice, cut once
Grab a sturdy measuring tape and jot down the length, width, and any odd angles of the damaged piece. Double‑checking your numbers at this stage saves you from ordering extra panels or, worse, having a gap that lets water sneak back in.
Essential cutting tools
A sharp utility knife is your best friend for trimming the edges of a replacement panel. Look for an ergonomic handle and keep extra blades on hand so the cut stays clean every time. For larger sections, a circular saw fitted with a fine‑tooth blade will give you straight, splinter‑free cuts, while tin snips handle the tight curves around windows or trim.
Removing the old panel safely
A pry bar or a dedicated siding removal tool lets you lift the damaged board without cracking the neighbors. The right grip and a bit of leverage keep the surrounding siding intact, which means you won’t have to redo more work than necessary.
Fastening and securing
Once the new piece is in place, you’ll need a pop rivet gun or corrosion‑resistant nails to hold it down. Rivets give a flexible hold that lets the siding expand and contract with temperature changes – a small detail that makes a big difference over the years.
Finishing touches
Don’t forget a high‑quality exterior‑grade caulk for the seams, a putty knife to smooth it out, and a paint‑ready primer if you’re working with vinyl that needs a fresh coat. A good brush or rollers will help you blend the repair with the rest of the wall so the fix disappears.
So, what should you pack in your toolbox?
Measuring tape (retractable, both metric and imperial)
Utility knife with extra blades
Circular saw + fine‑tooth blade
Tin snips for curves
Pry bar or siding removal tool
Pop rivet gun and appropriate rivets (or corrosion‑resistant nails)
Safety gear – gloves, goggles, sturdy boots
Exterior caulk, putty knife, primer, paint
That list might look long, but each item plays a role in keeping your siding repair professional‑grade. If you’re missing a piece, you can usually snag a loan‑er at your local hardware store – no need to wait for a delivery.
Here’s a quick sanity check before you start: Are your blades still sharp? Is your rivet gun loaded with the right size? Do you have a clean work area free of debris? Answering “yes” to these questions cuts down on frustration and keeps the job moving.
When you’re ready to buy replacement panels, remember that price isn’t the only factor. According to recent industry data, the average cost to replace siding sits around $11,500, with material prices ranging from $3 to $12 per square foot for vinyl options. Knowing the price range helps you budget for both the material and the tools you’ve gathered average siding replacement cost .
If you’re new to DIY siding, the essential vinyl siding tools guide breaks down each piece of equipment with buying tips, so you can avoid overspending on fancy gadgets you’ll never use.
Finally, a little pro tip: schedule your repair for a mild day – not too hot, not freezing. Extreme temperatures can make vinyl brittle or overly flexible, which makes cutting and fitting trickier.
With your measurements taken, tools ready, and a clear plan in place, you’re set to swap out that busted panel and get your home’s skin looking smooth again. Remember, a well‑executed repair not only stops water from getting in but also keeps your curb appeal (and your peace of mind) intact.
Step 4: Perform Common Repairs
What you’ll actually be fixing
Now that you’ve got the damaged panel off the wall, it’s time to ask yourself: what’s the root of the problem? Most DIY folks run into three common scenarios – a cracked vinyl strip, a warped board, or a little bit of rot that’s started to eat away at the sheathing. Each one needs a slightly different approach, but the good news is none of them require a full‑blown remodel.
1. Patch a cracked or split vinyl panel
Start by cleaning the area with a soft brush and a mild detergent. You want any dust or loose fragments out of the way so the new material adheres properly. Next, cut a replacement piece that’s a hair longer than the gap; the extra length gives you room to trim it down later for a perfect fit.
Lay the new piece into the opening and secure it with corrosion‑resistant nails or pop‑rivets – the latter let the siding expand and contract without stressing the surrounding boards. Once it’s snug, run a bead of exterior‑grade caulk along the seams, smoothing it with a putty knife. This seals out moisture and gives the joint a seamless look.
In our experience, a quick sand‑and‑paint after the caulk dries makes the repair virtually invisible. Use a fine‑grit sandpaper, then apply a primer that’s rated for vinyl, followed by a paint that matches the existing color.
2. Replace a warped or bowed board
Warped panels usually happen because water got behind the siding and the material expanded. The first step is to pry the damaged board free with a siding removal tool, being careful not to yank the neighboring pieces.
Measure the exact height and width, then cut a fresh piece from a new sheet of vinyl. If the board is near a window or trim, you may need a jig‑saw or tin snips to get the right curve. When you fit the new board, make sure the top edge sits level with the surrounding rows – a small shim of thin foam can help if the wall isn’t perfectly flat.
Secure it with the same fasteners you used for the patch, then seal the edges with caulk. Finally, run a quick “finger‑test” – run your fingertips along the seam; you should feel a smooth, uniform surface with no gaps.
3. Cut out and replace rot‑affected sheathing
If you hear a hollow thud when you tap the panel, you’re probably dealing with rot behind the siding. This is the only scenario where you’ll need to cut back to the studs.
First, remove the damaged siding and any compromised sheathing. Use a reciprocating saw to cut a clean rectangle around the rotten wood, then pry it out. Replace it with pressure‑treated plywood or OSB that’s rated for exterior use. Screw the new sheathing into the studs, making sure each fastener is at least 1‑inch from the edge to avoid splitting.
After the sheathing is in place, re‑install a new piece of siding using the same methods as above. Because you’ve opened the wall, it’s a perfect time to add a thin layer of house wrap or a self‑adhesive weather barrier – this extra step can keep future moisture at bay.
Quick‑check checklist before you call it a day
All new pieces are cut a little longer than the gap.
Fasteners are corrosion‑resistant and properly spaced.
Every seam is sealed with exterior‑grade caulk.
Paint or primer matches the surrounding siding.
Any exposed sheathing is covered with a weather barrier.
If you’re still unsure whether a repair is holding up, grab a garden hose, set it on a gentle spray, and run water over the area for a few minutes. Look for any drips on the interior side – if you see none, you’ve done it right.
Need a visual walk‑through? Check out this short video that shows the exact steps for removing and reinstalling a vinyl panel – it lines up perfectly with what we just described. repair demo video . And if you want a deeper dive on dealing with rot, this other clip breaks down the sheathing replacement process. rot removal guide .
When the job’s finished, step back and take a look from ground level. The repair should blend in, the wall should feel solid, and you should feel that quiet confidence that comes from fixing something yourself. If anything feels off, remember that a quick call to LGFMH Construction can save you from a hidden issue down the road – we’ve seen a lot of “good enough” fixes turn into bigger headaches later.
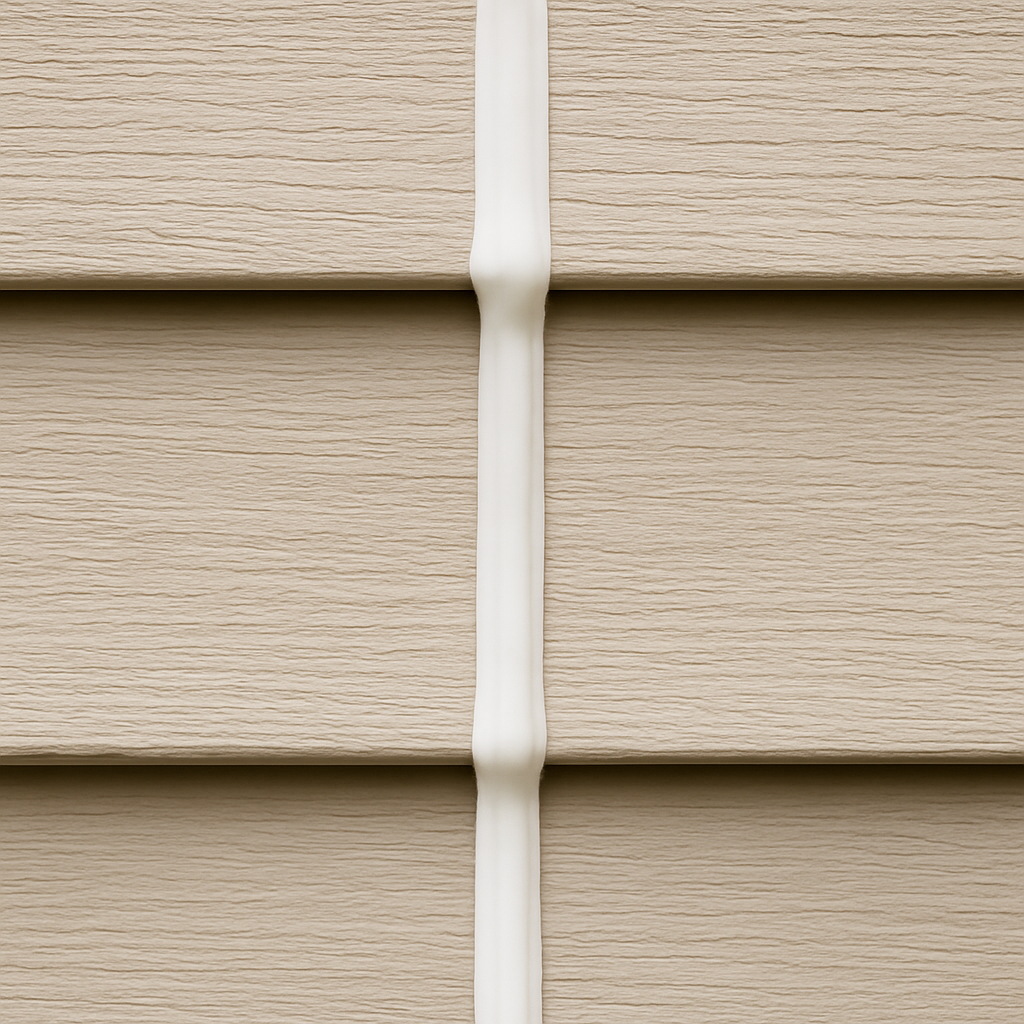
Step 5: Seal and Protect
Alright, you’ve gotten the new panel in place – now comes the part that actually keeps water out for good. Think of sealing like putting a rain‑proof jacket on your repair; if the jacket is too tight or has holes, the rain still gets in.
First, clean the joint. Grab a soft brush, a bucket of warm soapy water, and wipe away any dust or old caulk residue. A clean surface lets the new sealant adhere properly and prevents future cracks.
Choosing the right sealant
Not all sealants are created equal. For siding repairs we love a product that moves with the house – expansion and contraction are normal, especially in our Virginia‑Beach climate where summer heat and winter chill swing wildly. A sealant with at least 25% joint movement capability does the trick. One popular choice is OSI’s QUAD® Clear, a solvent‑based sealant that stays flexible, resists UV, and won’t yellow over time.
When you’re shopping, look for these three specs:
Sealant Type | Joint Movement | UV & Water Resistance |
OSI QUAD® Clear | ≈25% | UV‑stable, water‑proof |
Standard acrylic caulk | ≈10% | Moderate UV, water‑resist |
Silicone‑based sealant | ≈20% | Excellent UV, waterproof |
Pick the one that matches the material you’re working with. Vinyl loves a flexible, paint‑compatible sealant; wood or fiber‑cement can handle a bit stiffer acrylic.
Applying the sealant like a pro
Step 1: Cut the tip of the caulk tube at a 45‑degree angle. The opening should be just wide enough to fill the joint without spilling.
Step 2: Load the tube into a caulk gun and run a steady bead along the seam. Don’t rush – a continuous bead eliminates gaps.
Step 3: Smooth it with a wet putty knife or your fingertip (wear a glove). The goal is a concave “U” shape that sheds water.
Step 4: Let it cure. Most exterior‑grade sealants need 24‑48 hours before they’re fully weather‑ready. During that time, keep the area shaded and avoid rain.
Real‑world examples
One homeowner in Chesapeake noticed a tiny hairline crack near a window after a spring storm. They applied a bead of OSI QUAD® Clear, let it cure, and painted over it. Six months later the same spot still looks flawless, even after another heavy rain.
Another case: a rental property with multiple warped vinyl panels. The landlord used a silicone‑based sealant on the seams before reinstalling the panels. The flexibility of the silicone absorbed the seasonal expansion, and the siding stayed straight for three years without further touch‑ups.
Final checklist before you call it done
All joints are filled – no visible gaps.
Sealant matches the material’s flexibility needs.
Surface is smooth, no ridges that could trap water.
Paint or primer is applied if the sealant is paint‑compatible.
Give the sealant the full cure time before exposing it to heavy rain.
If you’re ever unsure whether you’ve sealed enough, grab a garden hose and give the repaired area a gentle spray. No water should seep behind the panel – if it does, you probably missed a spot.
Need a deeper dive on best‑in‑class sealants? Check out the Siding Repair Virginia Beach guide for more product recommendations and step‑by‑step photos.
And for a quick tip that many DIYers overlook: always store a small tube of your chosen sealant in the garage. Weather will always surprise you, and a fresh bead on hand saves you a trip to the store.
Finally, if you’d like to see how a well‑sealed repair stacks up against other home‑maintenance tasks, you might find it interesting to read how to choose earplugs for side sleepers . Both topics revolve around protecting a vulnerable area from unwanted intrusion – whether it’s noise or water.
Step 6: Maintenance Tips
After you’ve sealed that crack and the new board is snug, the real secret to keeping your siding looking fresh for years is showing up for the little maintenance chores most homeowners skip.
Seasonal inspection routine
Think of your siding like a car’s tires – you don’t wait until they’re flat to check the pressure. Once a spring and once a fall, walk the perimeter, run a quick finger‑test on each seam, and note any new gaps, loose fasteners, or faded paint.
Grab a garden hose on a low‑pressure setting and spray a 10‑foot section. If water beads off, you’re good. If it seeps behind the panel, you’ve spotted a new weakness that needs immediate attention.
Fastener health check
Loose nails or screws are the silent killers of siding integrity. The most common cause of “loose siding” is fasteners that have backed out over time because of expansion, contraction, or wind pressure. Give each visible nail a gentle tap with a hammer; it should feel solid, not rattly.
When you find a wobbly fastener, pull it out and replace it with a corrosion‑resistant screw that’s at least 1½ inches long, driving it into the stud behind the siding. This simple step can stop a whole panel from bowing later.
For a deeper dive on why fastener checks matter, see C&L Ward’s guide to loose siding.
Cleaning without damage
A soft‑brush or low‑pressure washer (under 1500 psi) is enough to whisk away dust, pollen, and mildew. Avoid abrasive scrubs; they can grind away the protective coating and open up micro‑cracks.
Mix a bucket of warm water with a few drops of mild dish soap. Rinse with the hose, then dry the surface with a clean microfiber cloth. Doing this twice a year cuts down on mold growth by up to 30 % according to industry surveys.
Sealant upkeep
Even the best exterior‑grade caulk ages. Every 3‑5 years, run your fingertip along each bead; if it feels hard or cracks, pull it out with a utility knife and reapply a fresh line of sealant.
When you re‑caulk, use a product that matches the material’s movement needs – OSI QUAD® Clear for vinyl, acrylic for fiber‑cement, and silicone for wood trim. James Hardie suggests a “basic care plan” that includes annual visual checks and resealing as needed; you can read their quick maintenance checklist here .
Protective landscaping
Trim trees and shrubs so they stay at least a foot away from the siding. Branches that rub the surface can shave paint, chip sealant, and create hidden gaps where water loves to hide.
Also, keep mulch or soil piles a few inches from the foundation; excess moisture can wick up through the wall cavity and eventually work its way into the siding seams.
Quick‑action checklist
Spring and fall walk‑around – look for cracks, gaps, loose fasteners.
Low‑pressure hose test – water should bead off.
Fastener tap – solid feel, no rattling.
Gentle cleaning – soft brush, mild soap, low‑psi rinse.
Sealant feel check – replace any hard or cracked beads.
Trim vegetation – maintain a 12‑inch buffer.
Stick to this routine and you’ll catch problems before they turn into costly siding repairs. And remember, a few minutes of proactive care now saves you hours of frustration – and a lot of money – later.
FAQ
How often should I inspect my siding for needed repairs?
Give your home a quick walk‑around at least twice a year—once in spring after the snow melts and once in fall before the first freeze. While you’re out, run a fingertip over each seam, tap any panel that sounds hollow, and note any paint that’s peeling or cracks that have widened. A 5‑minute visual check each season catches most problems before water sneaks behind the siding.
What’s the difference between vinyl and fiber‑cement siding when it comes to repairs?
Vinyl siding is flexible and tolerates a bit of movement, so most minor cracks can be sanded, caulked, and painted without removing the board. Fiber‑cement, on the other hand, is rigid and prone to cracking when water gets behind it; you’ll often need to cut out the damaged piece and replace it with a new panel. Knowing which material you have dictates whether a simple DIY patch will hold or a professional replacement is safer.
Can I fix a small crack in siding myself, or should I call a pro?
If the crack is hair‑thin, the surrounding panel feels solid, and there’s no sign of rot, you can patch it yourself with a quality exterior caulk and a coat of paint. Just clean the area, apply the bead, smooth it, then let it cure before painting. However, when the crack widens after a tap, or you hear a hollow thud, that’s a red flag that water’s inside and you should call a pro to assess and replace the sheathing.
What tools are absolutely necessary for a DIY siding repair?
At a minimum you’ll need a sturdy tape measure, a sharp utility knife with extra blades, a pry bar or siding removal tool, and a caulk gun loaded with exterior‑grade sealant. A cordless drill with the right screw bit makes fastening new panels quick, and a fine‑tooth blade for a circular saw helps you cut panels to exact dimensions. Don’t forget safety gear—gloves, goggles, and sturdy boots keep you from nasty cuts or bruises.
How do I know when sealant needs to be replaced?
Feel the caulk with your fingertip; it should stay soft and pliable. If it feels hard, cracks, or peels away from the surface, the sealant has lost its elasticity and needs to be removed. Use a utility knife to cut the old bead, clean the joint, then apply a fresh line of a sealant that matches the siding’s movement rating—usually 20‑25 % for vinyl. Re‑checking every 3‑5 years prevents water from finding a new path.
Is it safe to paint over repaired siding, and what prep does it need?
Yes, you can paint over a repaired area, but proper prep is key. First, sand the cured caulk until it’s flush with the surrounding surface, then wipe away dust with a damp cloth. Apply a high‑quality, exterior‑grade primer that’s compatible with your siding material—this helps the paint bond and hides any tiny imperfections. After the primer dries, use a paint formulated for the specific siding (vinyl, wood, or fiber‑cement) to blend the patch seamlessly.
What are the warning signs that a simple repair won’t be enough?
When you see more than two cracks in the same area, warped panels that don’t sit flat, or persistent water stains inside the wall, it usually means the problem has spread beyond a simple surface fix. In those cases the underlying sheathing may be rotted, or the house wrap could be compromised. That’s a clear sign you need a professional assessment—often a full‑wall replacement is cheaper in the long run than repeatedly patching.
Conclusion
By now you’ve seen how a quick visual check, the right tools, and a careful seal can turn a worrying crack into a simple fix.
So, what’s the bottom line for siding repairs? Spot problems early, use a flexible, paint‑compatible caulk, and don’t skip the final water test.
If a panel feels hollow, if more than two cracks appear in the same area, or if paint starts to peel, it’s a sign the issue has moved beyond a DIY patch.
In our experience, homeowners who schedule a seasonal walk‑around and replace any hardened beads every 3‑5 years avoid costly wall replacements for years.
Remember, a well‑sealed seam is like a rain jacket for your home – it lets the house breathe while keeping moisture out.
When you’re ready to take the next step, a quick call to LGFMH Construction can give you a free assessment and peace of mind that the job is done right.
Until then, keep that tape measure handy, trust your fingertips, and enjoy the confidence that comes from a job well done.
And don’t forget to note the repair date in your home maintenance calendar – a simple reminder can save you time and money down the road.
Happy repairing!


Comments