Step-by-Step Guide to Gutter Installation for Homeowners
- William McKracherne
- Jan 7
- 17 min read

Picture this: a gentle rain starts, and you hear that familiar drip‑drip from your roof because the gutters are clogged or misaligned. That moment of worry is all too common for homeowners in Virginia Beach.
So, why does proper gutter installation matter more than you might think? It’s not just about keeping water off your siding; it protects your foundation, prevents mold, and saves you from costly repairs down the line.
In our experience at LGFMH Construction, we’ve seen a single mis‑aligned downspout turn a simple rainstorm into a mini‑flood in the basement. That’s the kind of nightmare that could have been avoided with a correctly pitched gutter system.
But don’t worry—getting it right isn’t rocket science. It starts with measuring the roof’s slope, choosing the right gutter material, and securing brackets at the proper spacing. Those small details make the whole system work like a charm.
You might be wondering if DIY is an option. Sure, if you’ve got the right tools and a bit of patience, you can handle a basic installation yourself. Just remember safety first—ladder stability and proper protective gear are non‑negotiable.
If you’re not comfortable climbing onto the roof, that’s where professionals like us step in. We handle permits, ensure proper drainage away from your foundation, and finish with a clean look that blends with your home’s style.
Think about the peace of mind you’ll have after a heavy storm passes and your gutters are doing exactly what they’re supposed to—channeling water safely away without a single splash inside your house.
Ready to take the next step? Whether you opt for a DIY project or call in the pros, a solid gutter installation is the foundation of a dry, protected home. Let’s make sure your roof’s first line of defense works flawlessly.
We’re here to help you every step of the way.
TL;DR
Choosing the right gutter installation method—whether DIY with the proper tools and safety gear or hiring LGFMH Construction for expert fitting—prevents water damage, mold, and costly foundation repairs. Follow our quick guide to measure your roof slope, select durable material, and securely fasten brackets for lasting protection all year round.
Step 1: Assess Your Home’s Gutter Needs
First thing’s first – you need to know exactly what your house is asking for before you even think about buying a roll of gutter. That moment of realization feels a lot like spotting a leaky faucet: you know something’s off, but you haven’t yet pinpointed the source.
Grab a sturdy ladder, a tape measure, and a notepad. We’ll walk through the whole assessment in bite‑size steps so you don’t get overwhelmed.
1️⃣ Take a visual walk‑around
Start on the ground and look for obvious red flags: water streaks on the siding, moss or algae growing near the roofline, and any sagging sections that dip like a tired rope. In Virginia Beach, the salty air can accelerate rust, so pay extra attention to any copper‑green discoloration.
Tip: If you see water pooling at the base of a downspout after a light rain, the gutter’s pitch is probably off.
2️⃣ Measure the existing gutter length and width
Run your tape from end to end of each run. Write down the total linear footage – this tells you how much material you’ll need. Most homes in our area use 5‑inch K‑style gutters, but older homes might still have 4‑inch half‑round sections.
Don’t forget to note the diameter of the downspouts; a 3‑inch pipe handles most residential flow, but larger homes often need 4‑inch for heavy storms.
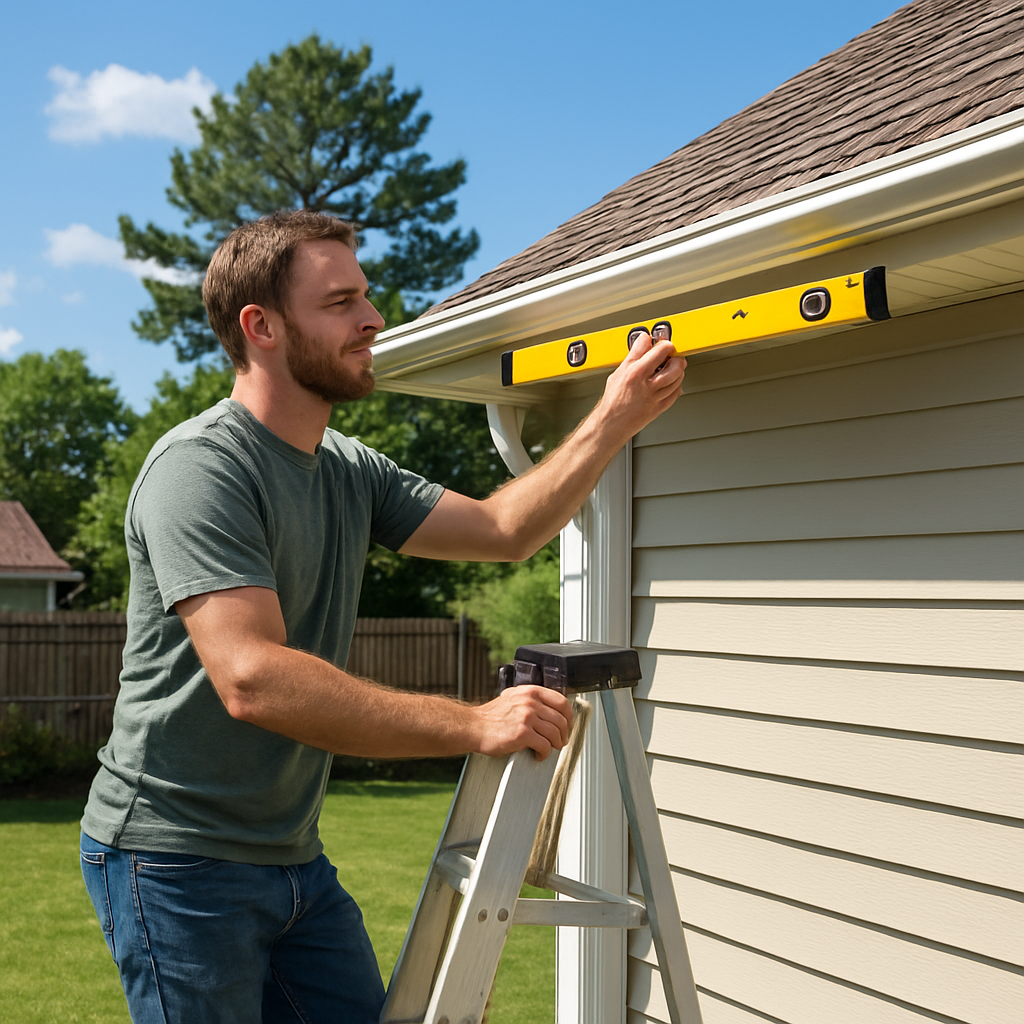
3️⃣ Check the slope (pitch)
The rule of thumb is about ¼ inch of drop for every 10 feet toward the downspout. Grab a level, place it on the gutter, and measure the vertical gap. If water sits flat or backs up, you’ll have to adjust the brackets during installation.
Here’s a quick sanity check: run a garden hose along the gutter’s length and watch where the water exits. If it drips from joints before reaching the downspout, you’ve got a leak that needs sealing.
4️⃣ Inspect the fascia and roof edge
Before you nail anything, the surface you’re attaching to must be solid. Look for rot, cracks, or loose nails in the fascia board. In our experience, a rotten fascia is the silent culprit behind gutter sagging – the wood can’t hold the weight and the system pulls away.
Repair any damage with exterior‑grade wood filler or replace the board entirely. A clean, painted fascia also helps the gutter seal tighter.
5️⃣ Identify special conditions
Do you have a large deck, a side‑loaded driveway, or a steep roof pitch? Those factors can change the type of brackets you need and the spacing between them (usually every 24‑30 inches for residential gutters).
And if you’re in a high‑wind zone, consider adding hurricane‑rated brackets – they’re a small extra cost that can save you from a gutter blowing off during a storm.
6️⃣ Gather the data and decide
Now that you have measurements, condition notes, and a sense of any special requirements, you can compare DIY versus professional installation. If the fascia needs major repair or you’re uncomfortable working at height, it might be time to call a pro.
For a deeper dive into the actual installation steps, our Step‑By‑Step Gutter Installation Virginia Beach Guide walks you through everything from permits to final sealing.
On the other hand, if you’re tackling a whole‑home move, you’ll probably want to think about who’s handling the heavy lifting. That’s why I often recommend checking out Your Complete Guide to Removalists – a solid resource when you need to coordinate moving trucks and protect your new home’s exterior.
And if you enjoy hands‑on projects beyond gutters, this calming DIY kit Come creare un barattolo della calma can be a fun side‑step for the whole family while you wait for the rain to stop.
Bottom line: a thorough assessment saves you from guesswork, prevents costly re‑work, and gives you confidence whether you roll up your sleeves or hand the job to a professional.
Step 2: Choose the Right Gutter Material
Alright, you’ve measured the roof, checked the fascia, and now you’re staring at a wall of options – aluminum, copper, vinyl, galvanized steel, maybe even zinc. It feels a bit like picking a paint color when the house is already built, doesn’t it? The good news is you don’t have to guess. Let’s break down what matters most so you can pick a material that fits your budget, your climate, and your aesthetic.
Know your climate first
Virginia Beach gets salty sea breezes in the summer and occasional winter freezes. That mix can be ruthless on metal. Aluminum handles salt‑air corrosion pretty well, especially when it’s painted with a rust‑inhibiting coat. Copper develops that classic green patina, which actually protects the metal underneath, but it’s pricey and a magnet for thieves.
If you live farther inland where winters bring heavy snow, galvanized steel’s strength against ice dams might be appealing, though you’ll need to keep an eye on rust. Vinyl (PVC) looks great for a low‑budget project, but it can become brittle when temperatures swing wildly – not the best choice for our coastal swings.
Budget vs. longevity
Here’s a quick reality check: cheap today can cost you more tomorrow. Vinyl gutters can run as low as $2‑$3 per foot, but the average lifespan is 10‑15 years. Aluminum sits in the sweet spot – $4‑$6 per foot and 20‑30 years with proper maintenance. Copper and zinc sit at the high end, $10‑$15 per foot, but they can last half a century or more.
Think of it like shoes: a cheap pair might get you through a few months, but a sturdier pair saves you the hassle of replacing them every season. The same principle applies to gutters.
Common material options – pros and cons at a glance
Below is a concise table that captures the most relevant trade‑offs. It pulls from a comprehensive guide to gutter materials and our own field experience.
Material | Pros | Cons |
Aluminum | Lightweight, easy DIY, rust‑resistant when painted, 20‑30 yr life | Can dent, may need repainting in salty air |
Copper | Elegant patina, 50‑100 yr life, naturally resists algae | High cost, professional install recommended, theft risk |
Vinyl (PVC) | Budget‑friendly, rust‑free, easy snap‑together install | Brittle in extreme temps, 10‑15 yr lifespan, more seams → potential leaks |
Galvanized Steel | Strong, handles heavy snow/ice, affordable | Prone to rust over time, heavier → may need stronger brackets |
Zinc | Corrosion‑resistant, 50‑100 yr life, eco‑friendly | Expensive, professional install usually required |
Actionable steps to lock in the right choice
Write down your climate challenges – salty air, heavy rain, occasional snow.
Set a realistic budget range (including potential painting or protective coating).
Match the material’s lifespan to how long you plan to stay in the home.
Consider aesthetic goals – do you want a sleek modern look or a historic patina?
Check local building codes; some coastal municipalities require hurricane‑rated brackets with metal gutters.
Ask yourself if you’re comfortable handling seams and seams‑sealing yourself; if not, lean toward seamless aluminum or schedule a pro.
For many Virginia Beach homeowners, the sweet spot ends up being aluminum with a corrosion‑inhibiting paint and a Gutter Topper leaf‑guard system. That combo gives you durability, reasonable cost, and a low‑maintenance profile – perfect for the salty breezes and occasional storms we see here.
But remember, every house is unique. If you have a historic property, copper might be worth the splurge for its visual appeal and longevity. If you’re on a strict budget and plan to replace the system in a few years, vinyl could be a stop‑gap solution while you save for a longer‑lasting upgrade.
Bottom line: don’t let the material choice become a guess‑work game. Use the checklist, weigh the pros and cons in the table, and you’ll walk into your next gutter installation with confidence.
Step 3: Measure and Plan the Layout
Now that you've picked your material, it's time to turn those numbers into a real‑world layout. I know it sounds like math class again, but trust me—once you see the chalk line on the fascia, the whole system clicks into place.
Grab the right tools before you start
Grab a sturdy tape measure, a level (or a laser level if you have one), a chalk line, and a notepad. A piece of string with a weight can double as a quick plumb line for checking the vertical of your downspout brackets. If you’re not a fan of climbing ladders, consider using a telescoping pole with a magnetic hook to pull the chalk line up high.
Map each eave and decide on downspout locations
Walk the perimeter and write down the length of every eave run. In Virginia Beach a good rule of thumb is one downspout every 30‑40 feet, but you might need more if you have a big roof or heavy rainfall. Sketch a simple diagram: mark where each downspout will exit, and note any obstacles like decks or side‑loaded driveways.
Here’s a quick tip: aim to discharge water at least three feet away from the foundation, on a slope that carries it toward the lawn or a drainage ditch. That little extra distance can keep your basement dry for years.
Set the slope (pitch) with a chalk line
Most gutter systems need about ¼ inch of drop for every 10 feet toward the downspout. Snap a chalk line along the front edge of the fascia, then use your level to check the height at the high end. If the line sits too flat, lift the brackets a hair at the high end until you hit that ¼‑inch rule.
RoofScope suggests a “center‑to‑both‑ends” pitch for long runs; it helps avoid standing water in the middle of the gutter. In practice, you’ll draw a line from the midpoint of the run to each downspout, then average the two measurements. It sounds fancy, but it’s just a way to keep the slope consistent.
Plan bracket spacing and type
Standard residential brackets are spaced every 24‑30 inches. If you’re in a snow‑prone area—or expect occasional ice dams—tighten that to 18 inches for extra pull‑out resistance. Hidden hangers give a clean look, while traditional spikes are easier to install yourself.
When you’re working with aluminum or copper, lightweight brackets usually do the trick. Heavier steel gutters benefit from reinforced brackets that attach directly into the rafter tails.
Dry‑fit everything before you cut
Lay the gutter sections on the ground and line them up with your chalk line. Snap the pieces together at the corners and run a test with a garden hose to watch the flow. This dry‑fit step catches mis‑measured cuts early, saving you a lot of frustration later.
If a seam lands right under a downspout outlet, you’ll have a hard time sealing it later. Move the joint a few inches away, or add an extra piece to shift the seam to a more accessible spot.
For a visual walk‑through, check out this short video that shows the chalk‑line method in action:
After the video, take a moment to double‑check your notes. A quick spreadsheet with columns for "Eave length," "Downspout count," "Bracket spacing," and "Slope (inches)" can turn a messy scribble into a clear plan you can hand to a crew—or keep for your DIY toolbox.
Use technology to verify measurements
If you’d rather skip the ladder, tools like RoofSnap’s gutter measurement reports can generate accurate lengths from aerial imagery. It’s a neat shortcut that many pros swear by, especially when the house has multiple levels or hard‑to‑reach corners.
And if you feel confident after the dry‑fit, the RoofScope DIY gutter installation guide walks you through the final fastening, sealing, and testing steps. Pair that with the layout you just planned, and you’ll have a system that drains rain away without a single splash inside your home.
Bottom line: measuring and planning the layout isn’t just a checkbox—it’s the foundation of a gutter installation that actually works. Spend a little extra time now, and you’ll thank yourself when the next storm rolls in and your gutters glide water away like they were meant to.
Step 4: Install the Gutter System
Now that your layout is nailed down, it’s time to turn those dry‑fit pieces into a working gutter system. If you’ve ever wondered why some gutters sag after a season, it usually comes down to one thing: the brackets weren’t set at the right pitch or spaced evenly. In this step‑by‑step guide we’ll walk you through attaching brackets, cutting sections, sealing seams, and hanging downspouts so the water flows exactly where you want it.
First, gather your tools: a drill with a screwdriver bit, stainless‑steel lag screws, a level, a tin snip or hacksaw, sealant, pop rivets (or sheet‑metal screws), and a helper to pass the pieces. Safety first—use a sturdy ladder with a stand‑by partner, wear gloves, and keep a bucket for scrap metal.
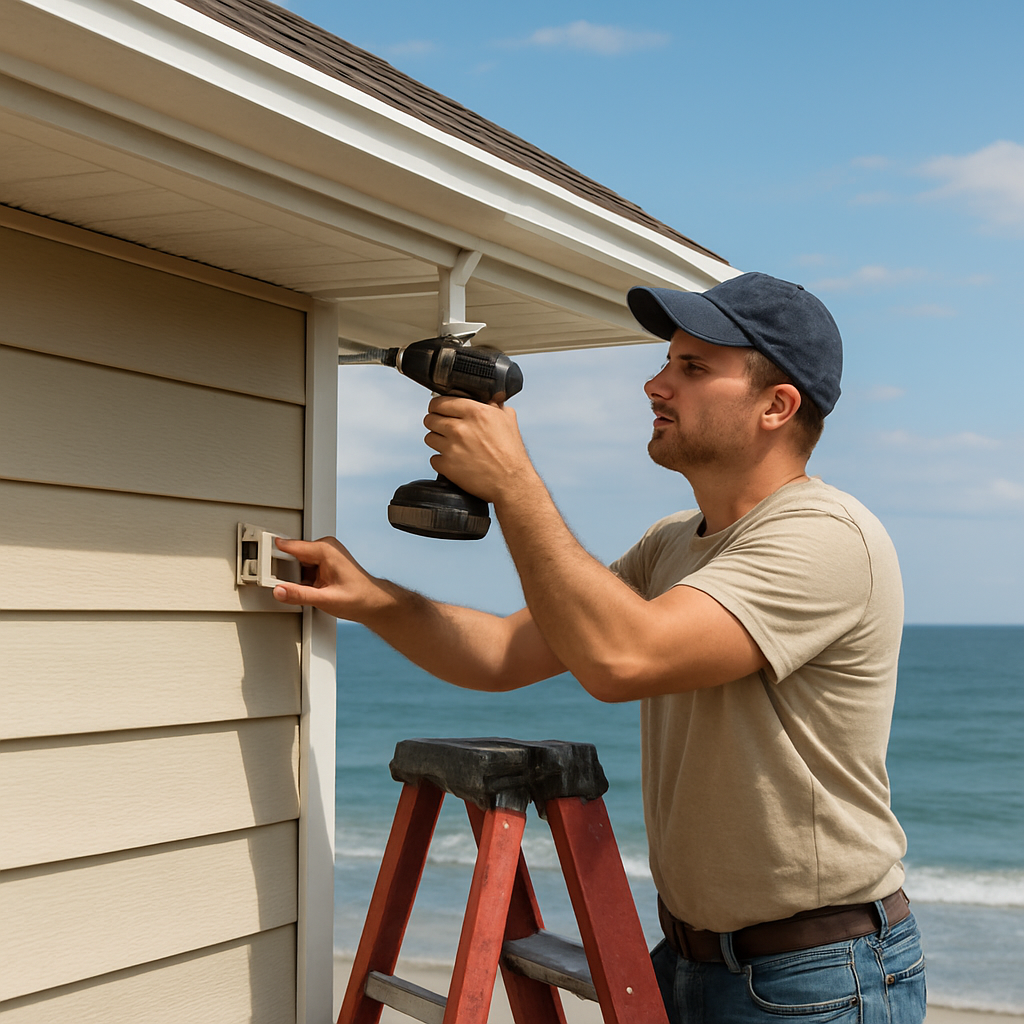
1️⃣ Attach the fascia brackets
Start at the highest point of the run. Using the chalk line you snapped earlier, mark the exact spot where each bracket will sit. Most residential systems call for brackets every 24‑30 inches; tighten to 18 inches if you live in a high‑wind zone or have heavy‑gauge aluminum. Drill pilot holes, then drive lag screws until the bracket is flush with the fascia but still allows a tiny gap for the gutter’s slope.
Tip: double‑check the level after the first three brackets. If the line tilts more than ¼ inch per 10 feet, loosen the high‑end brackets just a little and retighten. A small adjustment here saves you from a leaky joint later.
2️⃣ Cut and prep the gutter sections
Measure the distance between two adjacent brackets, then add the 2‑inch overlap your plan called for. Mark the cut on the gutter, then snap a straight line with a utility knife. Tin snips work great for aluminum; a hacksaw is safer for steel. After the cut, deburr the edge with a file so the end cap slides on smoothly.
While the pieces are still on the ground, slide the end caps onto the ends and secure them with pop rivets or sheet‑metal screws. Apply a bead of silicone sealant along the inside of the overlap; this creates a watertight joint that can handle the expansion and contraction that Virginia Beach’s salty air loves to throw at metal.
3️⃣ Hang the gutters
Turn the gutter sections upside down and line the rear edge with the bracket’s hook. Gently lower the front edge into the bracket’s slot, making sure the high end sits a hair higher than the low end. Once it clicks into place, drill two ¼‑inch holes through the gutter and the bracket, then secure with stainless‑steel screws and flanged nuts. Repeat for each section, keeping the slope consistent.
If you hit a corner, use a strip‑miter connector. Shape the miter to match the gutter’s profile, attach it with screws, and seal the seam with the same silicone you used on the end caps. In our experience, a well‑sealed corner is the difference between a clean run and a drip‑drip at the joint.
4️⃣ Install downspouts and elbows
Mark the lowest point of each gutter run—this is where the downspout will emerge. Cut a 4‑inch hole in the gutter using a hole‑saw; the hole should be centered on the front edge. Slip the downspout elbow into the opening, then fasten it with rivets and a line of sealant. Hang the vertical section of the downspout using U‑shaped brackets spaced every 3‑4 feet, and attach a splash‑guard at the bottom to keep water from eroding the foundation.
Remember to angle the downspout outlet at least three feet away from the house and grade the soil so water runs toward the lawn or a drainage ditch. A quick field test—run a garden hose through the gutter and watch the water pour out the downspout—will reveal any unexpected pooling.
5️⃣ Final seal and test
Run a continuous stream of water from a hose along the entire length of the installed gutters. Watch for any leaks at seams, brackets, or downspout connections. If you spot a drip, wipe the area dry, apply more sealant, and re‑tighten the fastener. Once the water runs cleanly to the ground, give the system a once‑over with a brush to remove any metal shavings.
For added peace of mind, consider installing mesh‑style gutter guards. They keep leaves and pine needles out, reducing the chance of clogs that force water to back up and seep behind the fascia. TaskRabbit’s guide notes that guards can extend the life of a gutter system by up to 20 % in coastal climates — a worthwhile investment for Virginia Beach homes.
When you’ve confirmed everything is sealed and the downspouts are directing water away, step back and take a look. You’ve just turned a series of metal strips into a defensive moat for your roof. If at any point the project feels overwhelming, remember that LGFMH Construction can step in with professional installation, permitting, and a tidy cleanup—so you can enjoy a dry basement without the hassle.
Step 5: Inspect, Seal, and Maintain
All that hammering and sealing feels great—until the first storm shows you whether the system holds together. Do you hear a drip, see a sag, or spot water pooling at the fascia? That’s your cue to stop guessing and start a systematic check.
Final visual inspection
Walk along the roofline with a sturdy ladder and a flashlight. Look for any gaps at seams, loose brackets, or mis‑aligned sections. A quick finger‑press on each joint should feel solid; any give means the seal isn’t set.
Don’t forget the downspout outlets. If water backs up before it reaches the ground, the outlet may be clogged or the connection loose. A simple test—run a garden hose into the gutter and watch the water exit the downspout—will reveal hidden blockages.
And while you’re up there, double‑check that every bracket still sits at the ¼‑inch‑per‑10‑feet pitch we aimed for during installation. A sagging gutter throws the whole slope off and forces water to pool, which can quickly turn a minor leak into a foundation problem.
Sealing joints and leaks
If you spot a drip, pull the gutter away from the seam, wipe the metal clean, and sand any rusted edge. Apply a thin bead of silicone‑based sealant with a putty knife, then press a matching metal patch over the top. The patch should be the same material—aluminum on aluminum, for example—to avoid galvanic corrosion.
For tiny pinhole leaks, a quick dab of roofing cement works just as well. Let it cure for the manufacturer’s recommended time, then run water again to confirm the fix.
Need a refresher on safe ladder practices while you’re up there? Angi’s gutter‑repair safety guide covers ladder levelers, stand‑offs, and the three‑point‑of‑contact rule to keep you steady on the job gutter repair safety tips .
Cleaning and maintenance routine
Even the best‑sealed system will collect leaves, pine needles, and tiny debris. Schedule a light clean‑out twice a year—early spring and late fall are ideal. Use a gloved hand or a small scoop to remove the bulk, then flush the channel with a garden hose to chase the last bits out.
When you flush, watch the flow speed. If water rushes out of the downspout in a steady stream, the slope is still correct. If it sputters or backs up, you probably have a clog near the elbow or inside the downspout. A handheld auger or a pressure‑washer nozzle can dislodge stubborn material.
Consider installing a mesh guard next season if your trees shed heavily. A guard cuts down on cleaning time and reduces the chance of clogs that force water to overflow the gutters.
When to call a professional
Some issues are quick fixes; others signal deeper damage. If you find rust‑eaten fascia, cracked brackets, or recurring leaks despite sealing, it’s time to bring in a gutter installation specialist. Replacing a sagging section or installing new brackets is often more cost‑effective than repeatedly patching old metal.
Also, if the gutter system is over 20 years old, the aluminum may have thinned to the point where it can’t hold a seal. A professional can assess whether a targeted repair or a full replacement makes sense for your home’s long‑term health.
Remember, a well‑maintained gutter line isn’t just about keeping walls dry; it protects your foundation, prevents mold, and saves you from costly water damage down the line. A little routine now pays off in peace of mind for years to come.
FAQ
How often should I inspect my gutters after installation?
We recommend a visual check at least twice a year—once in the spring after the trees leaf out and again in the fall after leaves have dropped. During each inspection, look for sagging sections, loose brackets, and any water stains on the fascia. A quick hose test can reveal hidden leaks. If you notice debris buildup or water backing up, give the system a more thorough clean before the next rain.
What is the best way to seal gutter seams to prevent leaks?
Start by cleaning the joint with a wire brush to remove rust and old sealant. Apply a continuous bead of silicone‑based sealant on the inside of the overlap, then press the two sections together and smooth the seal with a putty knife. For aluminum, a waterproof tape can add extra protection, but the sealant should cure for at least 24 hours before you run water through the system.
Can I install gutters myself if I have no prior experience?
Yes, DIY is doable if you’re comfortable working on a ladder and have basic tools like a drill, level, and tin snips. The trickiest parts are setting the correct pitch and securing brackets evenly. Take your time to dry‑fit each section, use a chalk line to mark the slope, and test the flow with a garden hose before you fasten anything permanently. If you hit any surprises—like rotten fascia—you might want to call a pro.
How do I choose the right pitch for my gutter system?
The rule of thumb is a ¼ inch drop for every 10 feet toward the downspout. Measure the highest point of the run, then use a level to confirm the drop at the low end. If you’re on a long run, split the distance into two sections and check each half; this helps avoid a flat spot in the middle that can trap water. Adjust the high‑end brackets a fraction until you hit the target slope.
What are the signs that my gutter brackets need tightening?
Look for any sagging or a noticeable dip in the gutter line, especially after a heavy rain. Loose brackets often let the gutter shift, causing the pitch to flatten and water to pool. You may also hear a creaking sound when wind blows. Grab a wrench and give each bracket a quarter‑turn; if it still moves, replace the screw with a longer stainless‑steel fastener to hold up against coastal corrosion.
Is it necessary to add leaf guards, and how do they affect gutter performance?
Leaf guards aren’t mandatory, but they can cut maintenance time in half for homes with many trees. Mesh or bottle‑brush styles keep larger debris out while still allowing water to flow, which helps maintain the proper pitch and reduces the risk of clogs that cause overflow and leaks at the seams. Just make sure the guard you choose is compatible with your gutter material; a poorly fitted guard can create turbulence and lead to leaks at the seams.
When is it time to replace my gutters instead of repairing them?
If the gutters are more than 20 years old, you’ll often see thinning metal, rust patches, or repeated seal failures. Frequent repairs—especially on the same joints—signal that the material has reached the end of its useful life. Also, if you notice water seeping behind the fascia despite new sealant, it’s a good indicator that the entire system has degraded. In those cases, a full replacement saves you money and headaches in the long run.
Conclusion
We've walked through everything from measuring the pitch to sealing the final joint, so you now know what a solid gutter installation looks like.
Think about the last time you saw water pooling by your foundation—does that feeling of frustration still linger? With the steps you’ve just learned, you can turn that worry into a confident DIY project or a clear brief for a pro.
Remember the three golden rules: get the slope right, space brackets evenly, and seal every seam. Even a small adjustment of a quarter‑inch can mean the difference between a dry basement and a costly repair.
If you’re still on the fence, start with a quick visual check this weekend. Spot a sagging section? Grab a level and tighten those brackets. Still unsure? A brief call to LGFMH Construction can give you a no‑obligation assessment and help you decide whether to finish the job yourself or let the experts handle it.
At the end of the day, a well‑installed gutter system protects your home, saves you money, and lets you enjoy those Virginia Beach rains without a second thought. So, what’s your next move?
Keep this checklist handy, revisit it each season, and your gutters will stay reliable year after year.


Comments