Comprehensive Painting Guide: Techniques, Materials, and Tips for Every Artist
- William McKracherne
- Jan 10
- 18 min read

Ever stood in front of a blank wall and felt that tiny spark of excitement, like the room could suddenly breathe new life? That's the magic of painting, and if you’ve ever wondered how to turn that spark into a finished masterpiece, you’re in the right place. Let’s explore what makes a paint job go from “just okay” to truly stunning.
But before you grab a brush, there are a few things most DIY‑enthusiasts overlook. The surface preparation, the type of paint you choose, and even the weather on a sunny Saturday can all steer the outcome one way or another. In our experience at LGFMH Construction, we’ve seen simple tweaks like cleaning the wall with a mild detergent or picking a low‑VOC interior paint save both time and money.
So, what does that mean for you? It means you don’t have to be a professional painter to achieve a fresh, professional look. It means you can plan ahead, budget wisely, and avoid those dreaded “oops” moments when the colour looks wrong under the kitchen lights. And yes, you’ll still have fun watching the transformation happen right before your eyes.
Ready to dive deeper? We’ll walk through the essential steps—choosing the right paint, prepping surfaces, applying techniques that reduce streaks, and finishing with a flawless seal. By the end, you’ll feel confident enough to pick up that roller and see the results you’ve been picturing in your mind’s eye.
Let’s get started and turn those walls into a canvas you’ll actually love looking at every day.
One common pitfall is skipping the primer, especially on previously painted surfaces. Without that extra layer, even the best‑quality paint can look blotchy or peel sooner than expected. On the flip side, using a primer designed for your wall type—whether drywall, plaster, or wood—creates a smooth canvas that lets the colour shine through and lasts longer, saving you a future re‑paint.
Another tip we swear by is timing. Painting on a humid day can trap moisture behind the film, leading to bubbles or a dull finish. Aim for a dry day with moderate temperatures—think 55‑75°F (13‑24°C)—and you’ll notice the difference instantly. Trust us, a little weather check now prevents a whole weekend of touch‑ups later.
TL;DR
Painting your walls can transform a room, boost curb appeal, and protect surfaces when you follow the right prep, product, and technique.
Stick to our proven steps—choose quality paint, prime correctly, work in ideal weather, and apply smooth, even coats—to achieve a flawless, lasting finish for any home you'll love.
Step 1: Selecting the Right Painting Surface
Ever walked into a room and felt that tiny spark, like the walls are begging for a fresh coat? That moment is the cue to think not just about colour, but about what you're actually painting.
The surface is the silent partner in every paint job – it decides whether the colour glides on smooth or fights you with peeling patches later. Skipping this step is like laying down wallpaper on a shaky drywall; the result looks cheap fast.
In most homes you’ll encounter drywall, plaster, wood siding, or concrete. Each one has its own personality: drywall loves a light‑weight primer, plaster craves a sealing coat to stop tannin bleed, wood needs a rust‑inhibiting primer, and concrete benefits from a masonry‑type sealer.
Know your wall type
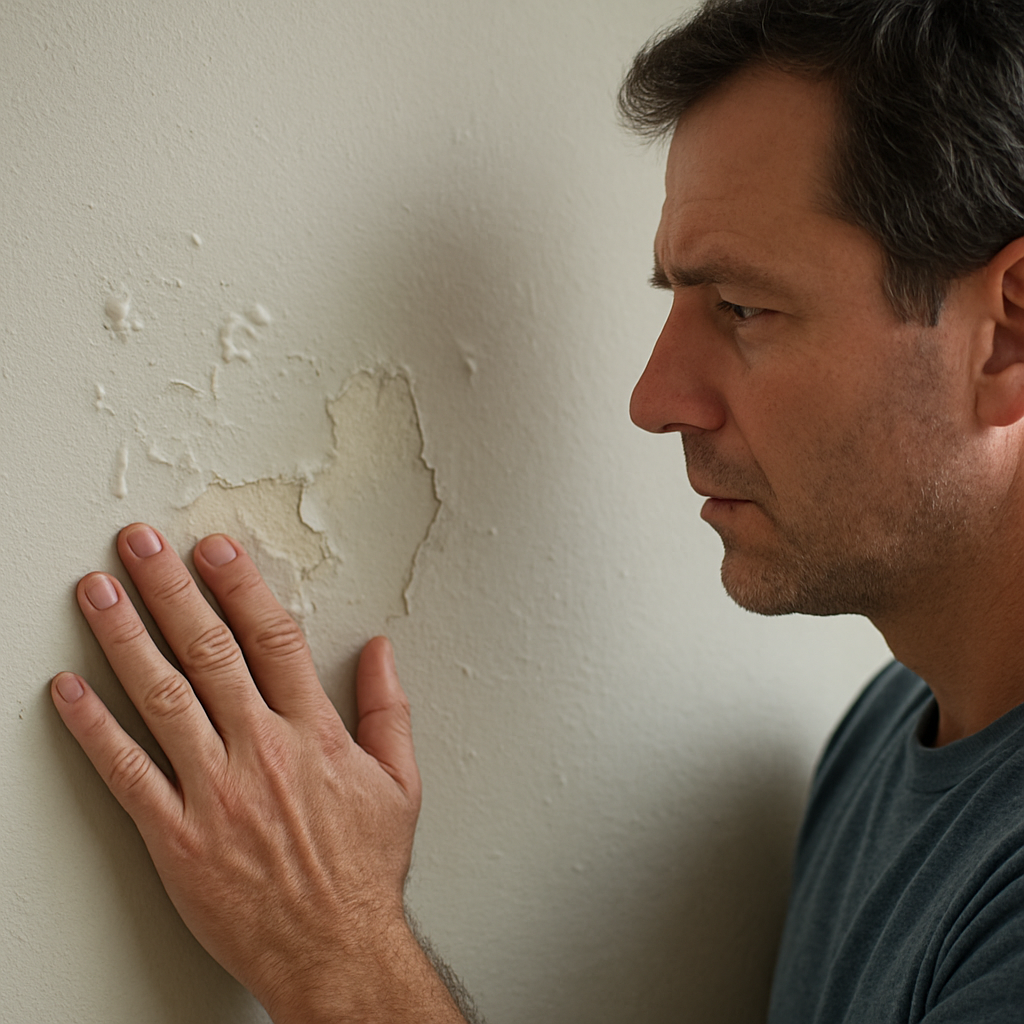
First, run your hand over the wall. If it feels powdery, you’re probably looking at drywall that’s never been primed. If it’s cool and hard, it’s likely plaster or cement. A faint wood grain under the paint usually means siding or a board wall.
Second, check for moisture. A damp spot will feel cooler and may even fog up when you breathe on it. Tap it with a screwdriver – a hollow thud signals a hollow‑core block, while a solid thump means solid wood or cement.
If you spot any cracks, sand them smooth and fill with a suitable filler. Cracks act like tiny gutters for paint, pulling the colour away from the rest of the wall. A quick skim coat can turn a cracked surface into a fresh canvas.
Cost matters, too. A 12×16 inch canvas panel can run $10‑$30, while a sheet of MDF for a wall can be under $1 per square foot, but remember MDF releases formaldehyde fumes that linger in a home studio — something we avoid. For a solid comparison of panel, canvas and paper costs, see this cost comparison guide .
That video walks you through a quick surface‑prep routine – wipe, sand, prime – so you can see each step in action. Pause it at the sanding demo and compare the before‑and‑after on your own wall; it’s the kind of visual cue that makes the whole process feel doable.
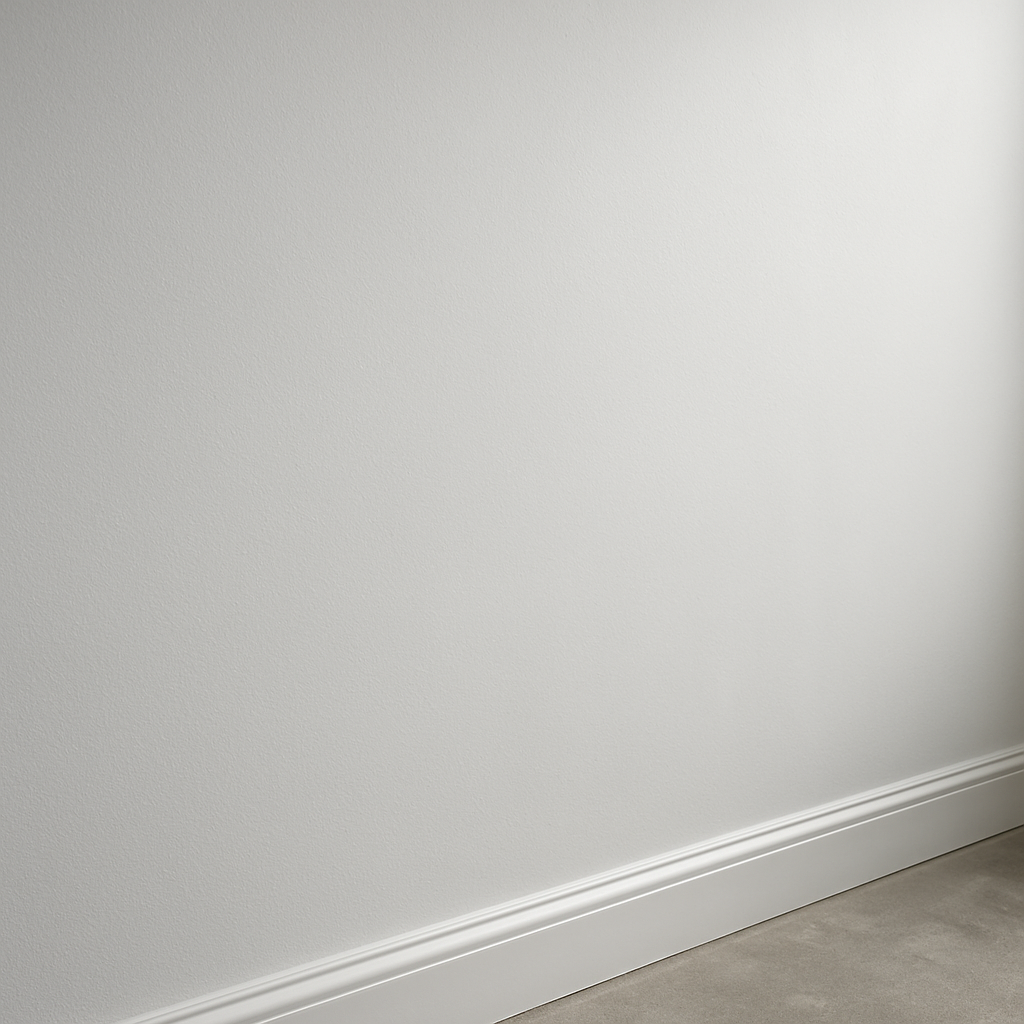
Seeing a clean, primed surface in a photo can help you set realistic expectations before you even lift a brush.
Now that you know how to identify and treat each wall type, here’s a quick actionable checklist you can print out and hang in your garage.
Inspect surface texture and moisture.
Repair cracks, sand rough spots.
Apply appropriate primer (drywall, plaster, wood, masonry).
Let primer dry 24 hrs; verify tackiness.
Gather tools: roller, brush, drop cloth, sandpaper.
Follow these steps, and you’ll walk into the next room feeling confident that the surface is primed for a flawless paint finish. When you’re ready, the next step is choosing the right paint – stay tuned!
Different rooms have different demands. In a kitchen, opt for a moisture‑resistant primer that can handle occasional steam, while a bedroom benefits from a low‑odor, low‑VOC formula so you can sleep early. Bathrooms require a mold‑blocking primer before the topcoat, otherwise the paint will blister. Tailoring the surface prep to the room’s environment saves you re‑work down the line.
Step 2: Choosing Paint Types and Materials
Now that the walls are prepped and primed, the next decision feels a lot like picking a wine for dinner – you want something that matches the mood, the room’s traffic, and your own comfort level.
The paint world is surprisingly varied. You’ve got latex (water‑based) versus oil‑based, interior‑specific versus exterior‑grade, and then the finish spectrum from flat to high‑gloss. Each combo brings its own trade‑off in durability, washability, and how it reacts to light.
Latex vs. Oil‑Based
Latex paints dry quickly, emit low odor, and clean up with just soap and water – perfect for a bedroom or living room where you don’t want to hold your breath. Oil‑based paints, on the other hand, give a tougher film that resists scratches and is great for trim, doors, or a kitchen backsplash that gets a lot of scrubbing.
Action step:Test a small patchwith a brush‑on sample of each type. After 24 hours, run your hand across the surface. If it feels tacky, stick with latex; if it feels hard and smooth, oil‑based might be worth the extra effort.
Choosing the Right Finish
Finish is where personality meets practicality. Here’s how we break it down:
Flat/Matte– hides wall imperfections, but can’t take a lot of moisture. Ideal for ceilings or low‑traffic bedrooms.
Eggshell– a subtle sheen, easy to clean, works well in most living spaces.
Satin– a bit more sheen and excellent washability; our go‑to for family rooms and hallways.
Semi‑Gloss– perfect for trim, doors, and bathrooms because it resists water and stands up to frequent wiping.
High‑Gloss– looks like lacquer; use sparingly on cabinets or accent walls where you want drama.
Tip: If you’re unsure, start with an eggshell on walls and reserve satin or semi‑gloss for trim. It creates a gentle contrast without the “paint‑splatter” look.
Specialty Paints for High‑Moisture Areas
Bathrooms, laundry rooms, and kitchens demand extra protection. A mold‑blocking primer followed by a moisture‑resistant topcoat stops the dreaded paint blister you’ve seen in other homes.
Real‑world example: A client in Norfolk swapped a standard interior latex for a bathroom‑grade acrylic with added mildewcide. After a year, the paint showed no signs of pink‑ring mold, saving them a costly touch‑up.
Actionable checklist:Apply a mold‑resistant primer (look for “mildewcide” on the label).Choose a satin or semi‑gloss acrylic formulated for bathrooms.Ventilate the room for at least 30 minutes after each coat.
Budget‑Friendly Tips Without Skimping on Quality
Paint can eat up a big chunk of your renovation budget, but you don’t have to sacrifice performance. Here’s how we stretch every dollar:
Buy paint in gallon buckets and use a roller‑sized tray liner – you’ll waste less than 5 % compared to aerosol cans.
Look for “store‑brand” lines from reputable manufacturers; they often match the premium line’s pigment load at a fraction of the price.
Plan for two coats. Skipping the second coat saves time, but you’ll likely need a third touch‑up later, which adds up.
Check our how much interior painting costs guide for budgeting benchmarks that keep surprises out of the pocket.
Finally, keep a small “touch‑up kit” on hand – a tiny paint tin, a mini‑brush, and a piece of sandpaper. When a scuff appears weeks later, you’ll fix it before it becomes an eyesore.
So, what’s the next move? Take a look at your room’s traffic, moisture level, and style preference, then match those variables to the paint type, finish, and any specialty additives you need. With a clear plan, you’ll walk away with walls that not only look great but stand up to everyday life.
Step 3: Mastering Fundamental Painting Techniques
Alright, you’ve got the right surface and the right paint – now it’s time to actually get the brush moving. The difference between a wall that looks “just painted” and one that feels like a finished piece is all in the basics.
1. The “cut‑in” first pass
Before you roll a whole wall, grab a good‑quality angled brush (2‑inches works for most trims). Paint a thin line where the ceiling meets the wall, around windows, and along baseboards. This creates a clean edge and prevents the roller from dragging paint into corners.
Pro tip: dip the brush just enough to wet the bristles, then tap off excess on the side of the can. Too much paint = drips, too little = streaks.
2. Roller technique – the “W” pattern
When the roller hits the wall, think of drawing a giant “W” or “M” shape. Start at the top of the section, roll forward in a “W”, then roll back over the same area to smooth it out. This distributes paint evenly and eliminates roller marks.
Imagine you’re spreading frosting on a cake – you want a thin, even layer, not thick dollops. If you notice a glossy patch, go back with a light pass before the paint dries.
3. Maintaining a wet edge
One of the biggest culprits behind lap lines is letting a section dry before you reach the next. Work in sections about three feet wide and keep the edge wet as you move along. If you see a dry line forming, lightly feather it with a dry roller.
Does this sound like a lot of juggling? It becomes second nature after a couple of rooms.
4. Brushstroke fundamentals from the art world
Even if you’re not painting a canvas, the same brushstroke principles apply. Jessi from EttaVee breaks down a “down‑up” brushstroke that gives you both coverage and a soft edge. She suggests starting a stroke with firm pressure on the down‑stroke, then easing off on the up‑stroke for a wispy finish. Try that on your wall’s base coat – it helps the colour settle without harsh lines.
Read more about those brushstroke tricks in her brushstroke tutorial . You’ll see how a simple pressure change can turn a bland wall into a subtly textured surface.
5. The “wet‑on‑wet” blend for seamless colour transition
If you’re tackling two complementary shades in one room (think a lighter hue on the ceiling and a deeper tone on the walls), apply the lighter colour first, let it stay tacky, then roll the darker shade next to it while the first is still wet. The two will feather together, giving a soft gradient without harsh lines.
We’ve used this trick in a recent kitchen remodel in Norfolk – the cream ceiling melted gently into a warm greige wall, and the homeowner loved the organic feel.
6. Quick checklist before you step back
Cut‑in all edges with an angled brush.
Roll using the “W” pattern, then back‑roll for smoothness.
Keep each section’s edge wet; feather any dry lines.
Apply light pressure on the down‑stroke, release on the up‑stroke for subtle texture.
If blending shades, work wet‑on‑wet and feather with a dry roller.
Inspect under different lighting – natural light, ceiling light, and a flashlight to catch missed spots.
So, what’s the next step after you’ve mastered these fundamentals? Grab your tools, set a timer for 15‑minute intervals, and practice on a piece of scrap drywall. The more you rehearse, the more confident you’ll feel when the real walls call.
Need a visual walk‑through? A short demonstration on YouTube shows the “W” roller motion in action – it’s only a few minutes and worth the watch.
When you combine solid prep with these core techniques, painting stops feeling like a chore and starts feeling like a craft. You’ll end up with walls that look professionally finished, even if you’re doing it yourself.
Step 4: Color Theory and Mixing Strategies
Ever stare at a paint chip and wonder why some shades just feel right while others scream “wrong”? That moment of indecision is where color theory steps in, and trust me, once you get the basics, picking and blending paint becomes almost second‑nature.
First off, think of the color wheel as a friendly map, not a textbook diagram. Opposite colors—like teal and coral—are complementary, so they pop when placed side by side. Adjacent colors—say, soft sage and muted olive—create a harmonious, soothing vibe. When you’re deciding on a living‑room palette, ask yourself: do I want drama or calm?
Here’s a quick trick we love: pick a “base” hue you’re comfortable with, then add a “accent” that sits either one step clockwise or counter‑clockwise on the wheel. The result feels intentional without looking over‑designed.
Mixing Paint the Right Way
Now that you have a color direction, the mixing part can feel a little like cooking. Too much of one ingredient and the dish is off; too little and it’s bland. Start with a small amount of the primary paint in a clean mixing cup. Add the secondary shade drop by drop, stirring gently with a stir stick. Test the mixture on a scrap piece of drywall and let it dry for a few hours—paint often looks lighter when it’s wet.
Pro tip: always keep a “record” of your ratios. Write down “2 parts base, 1 part accent” on the side of your mixing tray. That way, if you need more for touch‑ups later, you can replicate the exact shade.
What if you’re working with a limited color palette and want a gradient effect? Use the wet‑on‑wet method: roll the lighter color on the ceiling, then, while it’s still tacky, roll the darker shade on the wall and feather the edge with a dry roller. The two colors will naturally blend, giving you that seamless transition we showed in the previous step.
Choosing the Right Tools
A quality stir stick, a dedicated mixing cup, and a palette knife can make a world of difference. Avoid using the roller itself to mix—that just spreads pigment unevenly and can leave streaks in the final coat.
And don’t forget about lighting. Natural daylight reveals true color, while incandescent bulbs can warm it up. Always check your mix under the light conditions of the room you’re painting.
Common Pitfalls (and How to Dodge Them)
Adding too much water to thin paint. It can cause streaks and reduce coverage.
Mixing directly in the paint can. That contaminates the whole bucket.
Skipping the “let‑it‑dry” test. Wet paint often looks brighter than the final finish.
Got a tricky space like a narrow hallway? Try a muted neutral as the base and sprinkle in a bold accent on the trim. The neutral expands the visual space, while the accent adds personality without overwhelming the eye.
So, what’s the next step after you’ve nailed your color mix? Grab a clean brush, apply a small swatch, step back, and let your gut do the final check. If it feels right, you’re good to go.
Aspect | Tool/Method | Key Note |
Color selection | Color wheel (complementary or analogous) | Choose base + one step adjacent for harmony |
Mixing ratio | Mixing cup + written ratio | Record “2:1” etc. for repeatability |
Gradient blending | Wet‑on‑wet + dry roller feather | Works best with similar light values |
Remember, painting is as much about feeling as it is about technique. When the colors you choose make you pause and smile, you’ve hit the sweet spot. Happy mixing!
Step 5: Finishing, Varnishing, and Displaying Your Artwork
You've spent time mixing, cutting in, and rolling. Now it's time for the part that makes a wall feel like a gallery: the finish. A good varnish not only protects your paint but also brings out the depth you worked so hard to create.
Why a varnish is more than a glaze
Think of varnish as a thin, invisible shield. It keeps dust, humidity, and even the occasional spilled coffee from dulling your colour. As Pamela Wilson puts it, varnish is "the great barrier" that preserves every brushstroke for years to come.
Besides protection, a varnish can change the mood of a room. A matte coat whispers, while a satin or gloss finish shouts confidence. Choosing the right sheen lets you fine‑tune the atmosphere without repainting.
Choosing the right varnish for your project
If you're painting a high‑traffic hallway, go for a satin or low‑gloss acrylic varnish – it tolerates scrubbing and hides minor imperfections. For a feature wall where you want a subtle glow, a matte varnish keeps the surface soft and elegant.
For oil‑based paints or art‑level finishes, many professionals gravitate toward MSA varnish because it can be thinned to a "maple syrup" consistency and offers matte, satin, and gloss options. Just remember that MSA is a permanent finish; once it cures, you can't paint over it without sanding away some of the original layer. Learn more about varnish options .
Applying varnish like a pro
Start with a clean, dust‑free surface. Lightly sand any raised texture with 220‑grit paper, then wipe away the residue with a tack cloth.
Mix your varnish in a separate container – a small amount is easier to control. Thin it with the manufacturer’s recommended solvent until it flows like thick maple syrup. Too thin and you’ll get runs; too thick and you’ll end up with a gummy finish.
Use a high‑quality foam brush or a lint‑free microfiber pad. Work in the shape of a large "W" then fill in without over‑brushing. This keeps the coat even and prevents lap lines. Apply a thin first coat, let it dry to the touch (usually 30‑45 minutes for water‑based varnish), then repeat with a second coat for durability.
Curing, handling, and safety tips
Even though the surface feels dry, the varnish continues to cure for up to 48 hours. Keep the room at a stable temperature (around 68‑72°F) and avoid direct sunlight, which can cause premature drying and a hazy finish.
While the varnish cures, treat the wall like a newborn. Don't hang heavy frames or lean furniture against it. If you need to move the piece, support the whole panel and avoid touching the freshly varnished side with bare hands – oils from your skin can leave streaks.
Displaying your finished artwork
Now that the paint is sealed, think about how you’ll showcase it. For large walls, consider a matte finish that reduces glare from ceiling lights. For accent walls or pieces you want to highlight, a satin sheen reflects just enough light to make colours pop without blinding glare.
When hanging, use picture‑hanging hooks rated for the weight of your framed piece. A good rule of thumb: one hook for every 5 pounds. If you’re displaying a painted canvas without a frame, a French cleat system spreads the load evenly and makes future adjustments painless.
Lighting matters too. Position a soft‑white LED strip a few inches above the top edge of the artwork; it creates a gentle wash that emphasizes texture while protecting the varnish from UV exposure.
Finally, step back and live with your work. The right finish will let you enjoy the colour night after night, and the varnish will keep it looking fresh for years. If you ever notice a dull spot, a quick touch‑up with a small brush and a dab of the same varnish will restore the shine without a full re‑coat.
Step 6: Troubleshooting Common Painting Problems
You've just sealed your masterpiece, but maybe a few things aren't looking quite right. Don't worry—most hiccups are fixable with a bit of patience and the right technique.
Peeling or Flaking Paint
First sign? A patch that lifts like wallpaper. That usually means moisture got in before the surface was fully dry, or the old paint wasn't properly removed.
What to do: Scrape the loose area with a putty knife, sand back to a smooth edge, then clean the dust with a tack cloth. Apply a thin coat of primer that matches the substrate (drywall, wood, or masonry) and let it cure before you re‑coat. In our experience, a water‑based primer works wonders on previously painted drywall.
Bubble Formation
Ever notice tiny balloons under the finish? Bubbles often appear when you paint on a humid day or when the paint is applied too thickly.
Step‑by‑step fix: Lightly pop the bubbles with a needle, then smooth the area with a foam roller using gentle pressure. If the bubbles are widespread, you may need to sand the whole wall lightly (220‑grit) and re‑apply a thinner coat, keeping the room temperature between 55‑75°F.
Brush or Roller Marks
Those unsightly streaks can make a fresh room feel amateur. They usually happen when the paint dries before you finish a section, or when the brush is overloaded.
Solution: Keep a wet edge. Work in 3‑foot sections, and if a line appears, go back over it with a dry roller to feather it out. Also, dip your brush just enough to wet the bristles, then tap off excess. A quick tip we love: roll in a “W” pattern, then fill in without over‑brushing.
Uneven Colour or Patchy Coverage
Maybe one corner looks darker than the rest. That can be caused by missed spots during the first coat or by using paint that’s too thick.
How to correct it: Lightly sand the uneven area, wipe clean, then apply a thin second coat using a roller with a smooth nap. For stubborn patches, a “wet‑on‑wet” touch‑up works—apply the new paint while the previous coat is still tacky, then blend with a dry brush.
Streaks from Light Reflections
Sometimes the wall looks perfect up close, but under a ceiling light you see a faint line. That’s a light‑reflection streak, usually from a missed spot in the varnish.
Fix it by lightly sanding the affected strip with 320‑grit paper, wiping away dust, then applying a thin varnish coat just over the streak. Let it dry completely before checking again under the same light.
So, what’s the best way to stay ahead of these issues? A quick checklist before you finish any paint job can save you hours of rework:
Inspect the surface for moisture or old paint failures.
Use a primer suited to the material.
Maintain a consistent temperature and humidity.
Work in small sections, keeping a wet edge.
Use the proper roller nap for the texture.
Do a final light‑check with different lighting angles.
A quick final tip: keep a small notebook handy while you work. Jot down which primer you used, the temperature, and any hiccups you notice. That log becomes your cheat‑sheet for the next room, cutting down guesswork and keeping your results consistently flawless.
Remember, a little extra prep now prevents a big headache later. If you run into a problem that feels beyond DIY, a professional paint crew can step in, sand, prime, and finish with a flawless coat—saving you time and ensuring the colour stays vibrant for years.
Now you’ve got the tools to diagnose and fix the most common painting problems. Grab your scraper, your sandpaper, and that trusty roller, and turn those imperfections into a smooth, gallery‑ready finish.
Conclusion
We've walked through everything from surface prep to the final varnish, so you now have a clear roadmap for a paint job that feels as smooth as a fresh‑cut canvas.
Remember, the biggest wins come from those tiny habits: jotting down the primer batch, checking humidity, and keeping a wet edge. Those habits turn a daunting weekend project into a series of confident, repeatable steps.
So, what should you do next? Grab your notebook, pick the right primer for the wall type, and set a temperature sweet spot—think 55‑75°F. Then, let the rollers do the work while you focus on the details that matter.
If you hit a snag that feels out of scope, don't sweat it. A quick call to a local pros team—like LGFMH Construction—can save you time and keep the colour looking vibrant for years.
Finally, celebrate the finish. Step back, turn on the lights, and admire that even sheen or matte hush you aimed for. That sense of accomplishment is the real payoff of thoughtful painting.
Ready to start your next room? Your checklist is waiting, and the walls are ready for you.
Keep this guide handy, revisit it whenever you plan a new colour, and watch your confidence grow with every brushstroke.
FAQ
How often should I repaint interior walls?
Most homeowners find that 5‑7 years is a comfortable rhythm for high‑traffic rooms like kitchens or hallways. Bedrooms and formal spaces can stretch to a decade if you use a low‑sheen finish and keep the humidity stable. The rule of thumb? If you notice fading, chalky spots, or the paint losing its smooth feel, it’s probably time for a fresh coat.
What’s the best way to choose the right primer for different surfaces?
Start by asking yourself what the wall is made of. Drywall loves a light‑weight, latex‑based primer that seals quickly. Plaster benefits from a sealing primer that blocks tannin bleed. Wood or plywood needs a rust‑inhibiting, oil‑based primer, especially if there’s any moisture history. A quick test – dab a little water on the surface; if it beads, you’re likely dealing with a non‑porous material that needs a stronger bonding primer.
How can I avoid roller marks and get a smooth finish?
Think of the roller as a pastry chef spreading frosting: you want a thin, even layer. Load the roller just enough to wet the nap, then roll in a “W” pattern and immediately back‑roll to flatten. Keep a wet edge by working in sections no wider than three feet. If a line appears, go back with a dry roller and feather it before the paint sets.
What temperature and humidity range is ideal for painting?
We’ve seen the best results when the room stays between 55 °F and 75 °F (13‑24 °C) with humidity under 60 %. Too cold and the paint dries sluggishly, leading to sagging; too hot and it can skin over before you’ve had a chance to smooth it out. A quick glance at your thermostat and a hygrometer can save you a weekend of touch‑ups.
How do I fix small cracks before painting?
First, clean out any loose dust with a brush. Fill the crack with a flexible joint compound or patching plaster, pressing it in with a putty knife. Once it’s dry, sand the spot smooth with 120‑grit sandpaper, wipe away the dust, and prime the area. The repaired spot will blend seamlessly once you roll the final coat over it.
Should I use a brush or roller for trim?
Trim loves a brush because it gives you control around corners and tight spots. An angled 2‑inch brush works well – dip it, tap off excess, and feather the paint along the edge. For broader flat surfaces on the trim, you can switch to a small foam roller to speed things up, but always finish with a brush to catch any missed lines.
When is it worth hiring a professional painter?
If you’re tackling high‑gloss finishes, large exterior projects, or rooms with extensive moisture issues, a pro can save you headaches. Professionals bring specialty primers, proper ventilation, and experience with temperature swings that DIYers often overlook. Also, if you’re short on time or simply want a flawless result without the learning curve, calling a trusted crew like LGFMH Construction can be a smart investment.


Comments