Comprehensive Roof Inspections Guide for Homeowners
- William McKracherne
- Jan 2
- 20 min read

Ever stood under a leaky ceiling and wondered if a simple roof inspection could have saved you the mess? It’s one of those moments that makes you swear you’ll never ignore the roof again. Let’s face it—most of us only think about a roof when the rain starts pounding through the attic.
But why do roof inspections feel like an optional chore instead of a routine check‑up? In our experience at LGFMH Construction, we’ve seen homeowners skip that yearly walk‑around until a tiny shingle pops loose, and suddenly they’re juggling emergency repairs, insurance calls, and a flooded basement.
Imagine stepping onto your ladder, flashlight in hand, and discovering a few cracked tiles before they turn into a water‑logged nightmare. That early heads‑up not only saves you a bundle on repairs but also keeps your home’s energy efficiency intact, because a well‑ventilated roof stays dry and lets your HVAC work smarter.
So, what should a diligent homeowner actually look for during that inspection? Start with the obvious – missing or curling shingles, rusted flashing, and any moss or algae patches that trap moisture. Then glide down to the eaves and gutters; a clogged gutter is the silent accomplice that forces water up under the roof deck.
A quick test you can run on the spot is the “water spray” method – grab a garden hose, spray a section of the roof while someone watches the attic for drips. If you see even a single bead of water, you’ve just uncovered a leak before the next storm hits.
And here’s the part that keeps most people from procrastinating: schedule that inspection at least once a year, ideally in the spring after the heavy rains have passed. Mark it on your calendar like a dentist appointment – you wouldn’t skip that, so why skip a roof check?
Take action today.
TL;DR
Regular roof inspections catch small problems—like cracked shingles or clogged gutters—before they become costly leaks, saving you time, money, and stress. Follow our simple checklist, test with a garden hose, and schedule an annual walk‑around each spring to keep your home dry, energy‑efficient, and worry‑free for peace of mind today.
Step 1: Prepare Your Inspection Tools
Before you even step onto the ladder, think of your roof inspection like gearing up for a backyard DIY project. You wouldn’t grab a hammer without checking the nails, right?
First things first: a sturdy ladder. A 6‑to‑8‑foot extension ladder with slip‑resistant feet is ideal for most residential roofs. Make sure it’s rated for at least 250 lb and that the feet are firmly planted on stable ground.
Safety gear is non‑negotiable. A hard hat protects against stray nails, while safety glasses shield your eyes from debris. Gloves give you grip and keep your hands from splinters. If you’re working on a steep pitch, consider a safety harness attached to a secure anchor point.
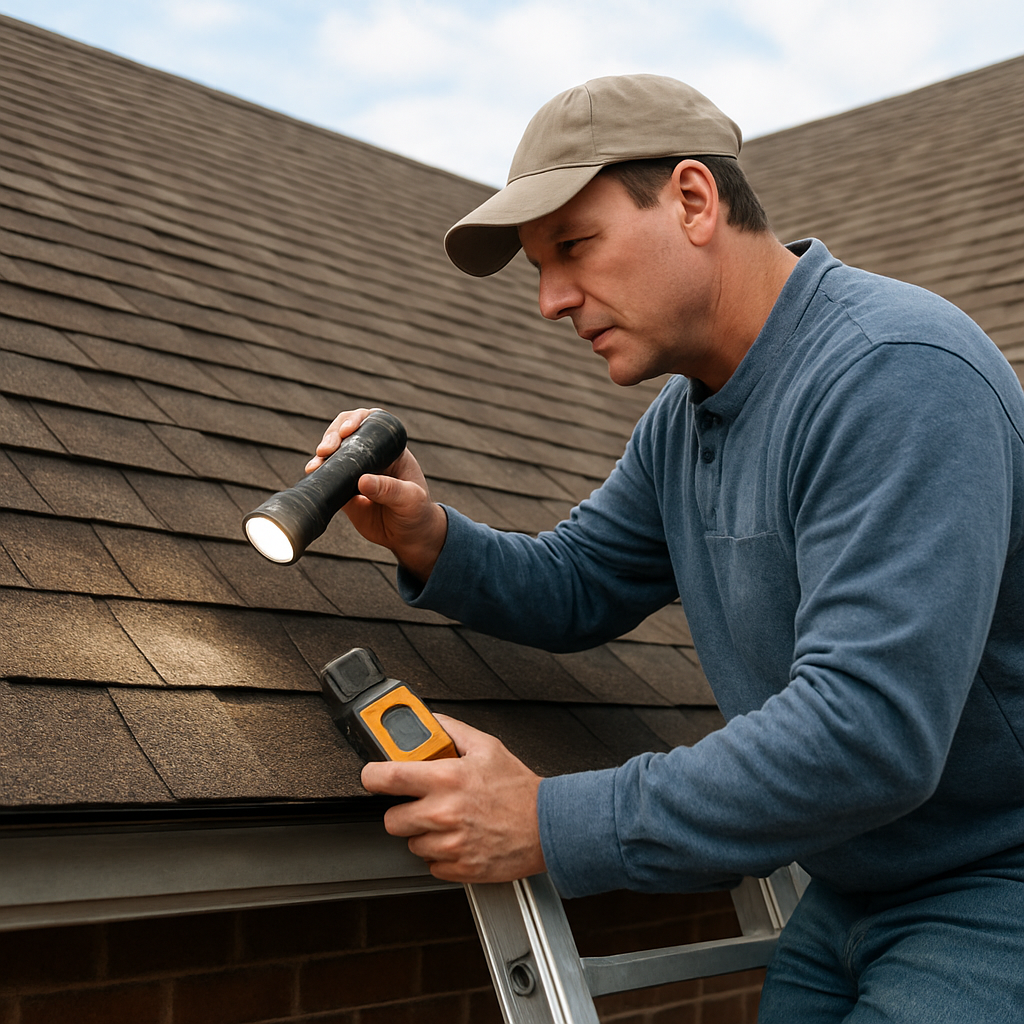
Next, grab a reliable flashlight or headlamp. Early morning or late afternoon inspections often leave you in shadowy corners, and a bright beam helps you spot cracked shingles or damaged flashing before they become a leak.
One tool many DIYers overlook is a moisture meter. These pocket‑sized devices beep when they detect hidden dampness under shingles, saving you from costly surprises later on.
Don’t forget a good pair of binoculars. They let you survey the roof from the ground, spotting missing tiles or rusted flashing without climbing up for every little detail.
Bring a sturdy clipboard or a note‑taking app on your phone. Jot down the location of each issue, snap a quick photo, and rate the severity on a simple 1‑to‑3 scale. This creates a clear action plan for yourself or a professional later.
Speaking of photos, a smartphone camera is more than enough. Capture close‑ups of cracked shingles, curled edges, or any moss growth. When you later compare before‑and‑after shots, you’ll see exactly what needed fixing.
For those with older roofs, a small hand‑held infrared thermometer can reveal hot spots where insulation may be missing, indicating potential leaks or ventilation problems.
Now, let’s talk about the optional but super handy tool: a roof‑inspection checklist. It walks you through each area of the roof, ensuring you don’t miss anything important. Our roof inspection checklist breaks the process down step‑by‑step, from eaves to ridge.
Got a ladder ready, safety gear on, and tools in hand? Great. Before you climb, clear the area of any obstacles—garden hoses, toys, or pets. A tidy work zone reduces the risk of tripping.
When you reach the roof, start at the lowest point and work upward. Check the eaves first: look for missing or loose shingles, and make sure the gutter line is clear. Then move to the valleys, where water tends to collect.
Pay special attention to flashing around chimneys, vent pipes, and skylights. If the metal looks corroded or the sealant is cracking, note it immediately.
As you scan each section, use the moisture meter on the underside of the decking (if you can access it safely). A reading above 15 % may indicate trapped water.
Finally, step back and give the roof a once‑over from the ground with your binoculars. You might spot a loose tile you missed up close.
Once you’ve cataloged everything, you’ll have a clear picture of what needs repair, replacement, or just a good cleaning. This prep work pays off whether you DIY the fix or call a pro.
Need a quick visual refresher? Watch this short video that walks through the essential tools and safety steps for a thorough roof inspection.
After the video, you’ll feel confident to start climbing. Remember, the goal isn’t just to spot problems but to understand why they’re happening, so you can prevent future damage.
When you’re done, compare your notes with the OSHA safety guidelines for working at heights. Following these standards keeps you safe and ensures your inspection is thorough.
That’s it—your toolbox is now ready, and you’ve got a solid plan to tackle the roof. Ready to climb? Issue Typical Sign Quick Check/Tool Curling shingles Edges lift like a tiny roof Visual inspection, hand feel Cracked or missing shingles Visible gaps or broken pieces Walk the roof, count Flashing deterioration Rust, cracks, lifted metal Inspect joints, use moisture meterStep 2: Assess Roof Shingles and Flashing
Now that you’ve got your ladder and gear, it’s time to zero in on the shingles and flashing – the front‑line soldiers that keep rain out.What to look for on the shingles
First, walk the roof slowly and keep your eyes on the shingle surface. Curling edges are a red flag; they mean the shingle’s granules are losing their grip and water could slip under.In one of our recent jobs in Virginia Beach, a homeowner thought a few “dry spots” were harmless, but a closer look revealed a cluster of cracked shingles that let water seep into the attic within weeks.Don’t forget granule loss. If you see a powdery trail in the gutters or on the ground, those tiny ceramic beads are wearing down faster than they should. A quick test is to run your hand across a shingle – if it feels gritty, the protective layer may be gone.Flashing: the often‑overlooked seal
Flashing wraps around chimneys, vent pipes, skylights, and valleys. Look for rust, cracks, or any gaps where the metal has pulled away from the roof deck.One homeowner in Barrie called us after spotting a small rust patch on chimney flashing. We found water had already started to creep into the attic, causing a musty smell and a spike in the heating bill.When you spot a loose piece, gently press it back into place with a flat pry bar. If the metal bends or cracks, it’s time to replace that flashing segment.Quick actionable checklist
Grab a clipboard and tick each item as you move:
These five points take under five minutes per roof section and give you a solid snapshot of what needs fixing.Tools that make the job easier
A small hand‑held infrared thermometer can spot cold spots where moisture is hiding. A moisture meter, which many of you already have from step 1, will beep louder on a wet shingle or around compromised flashing.For those who prefer a bird’s‑eye view, a drone with a camera can capture hard‑to‑reach valleys without you risking a slip.If you need a deeper dive into why a professional inspection matters, Owens Corning explains how a thorough roof inspection can uncover hidden issues that DIY eyes often miss. Learn more about professional roof inspections .Real‑world example roundup
Imagine you’re inspecting a 20‑year‑old asphalt roof after a windy storm. You notice three shingles near the ridge are feather‑edged and one flashing piece around a vent pipe is slightly lifted. You mark those spots, take photos, and later discover that the lifted flashing allowed a slow drip that caused mold in the attic. Fixing the flashing and replacing the three shingles stopped the problem before it became a $5,000 repair.Another case: a family with a metal roof thought everything was fine until they saw water stains on the interior ceiling. A quick look at the roof revealed that the seams where panels meet are not sealed properly – a classic flashing issue on metal roofs. Re‑sealing the seams saved them from a costly water‑damage claim.Table: Quick reference for shingle and flashing issues
Step 3: Inspect the Roof Deck and Underlayment
Now that the shingles and flashing have had their moment in the spotlight, it’s time to peel back the next layer – the roof deck and its underlayment. Think of the deck as the floor of a house you can’t see from the street; if that floor gets soggy, the whole structure starts to wobble.Why the deck matters
Even the most flawless shingle job can’t protect a home if water slips through and saturates the plywood or OSB beneath. A wet deck loses its structural strength, can sag, and creates a perfect breeding ground for mold. In our experience, homeowners who skip this step end up paying three‑to‑four times more in repairs because the damage has already spread.Tool time: moisture detection
Before you lift a foot onto the deck, grab a reliable moisture meter. A handheld device like the Tramex Dec Scanner moisture meter can scan up to six inches deep and give you instant readings. Set the meter to the “deck” sensitivity range, find a dry reference spot, then sweep across each section. Anything reading above 15 % moisture is a red flag.Step‑by‑step deck inspection
1. Choose a safe entry point. Use a sturdy ladder, place a plank or board over the roof surface, and step onto it rather than the shingles themselves. This protects both you and the roofing material.2. Visual check from below. Crawl into the attic and look up at the deck underside. You’re hunting for water stains, dark rings, or wood that looks lighter than the surrounding area. Those discolorations are often the first clue that water has found its way under the surface.3. Probe with a moisture meter. Run the meter across the deck in a grid pattern – imagine you’re drawing a checkerboard. Mark any hot spots on a simple sketch or with masking tape. In one real‑world case, a homeowner in Charlotte thought the attic was dry until we mapped a moisture‑rich zone directly above a vent boot. The deck under that boot was 22 % wet, and the vent boot had a tiny crack that was invisible from the roof.4. Look for delamination or soft spots. Gently press a screwdriver or a small pry bar into the deck. If it sinks too easily or the wood feels spongy, that area is likely compromised. A family in Phoenix discovered a section of OSB that had begun to rot after a summer thunderstorm; the deck had softened enough that the next heavy rain caused a small sag, which later turned into a full‑blown roof collapse.5. Check the underlayment. Underlayment is the waterproof barrier that sits between the deck and the shingles. Look for tears, missing sections, or excessive granule loss. On a 15‑year‑old roof in Austin, we found a 12‑square‑foot tear where a previous DIY repair had been done with just roofing cement. The tear let water soak the deck for years before the homeowner noticed a musty smell.What to do when you find trouble
If you spot moisture, soft wood, or damaged underlayment, don’t panic. First, document everything – photos, measurements, and meter readings. Then prioritize:
In each scenario, a quick repair now can save you from a $10,000+ replacement down the line.Quick checklist you can print
Print this on a single sheet and keep it in your toolbox:
Once you’ve ticked every box, you’ll have a clear picture of whether you need a simple patch or a full‑deck replacement. And if you ever feel the job is beyond your comfort zone, a quick call to LGFMH Construction can get you a professional opinion before the problem spreads.Bottom line: inspecting the deck and underlayment is the hidden hero of roof inspections. It’s the step that turns a “maybe there’s a leak” into a solid action plan, and it’s the one that protects the heart of your home for years to come.Step 4: Evaluate Gutters, Downspouts, and Drainage
Now that the deck and flashing are clean, it’s time to ask yourself a simple question: are the gutters actually doing their job, or are they just a decorative trim? Most homeowners assume the gutter line is a set‑and‑forget feature, but a clogged or mis‑aligned system is the silent culprit behind a lot of roof‑related headaches.Why gutters matter in roof inspections
When rain hits the roof, the water should flow straight into the gutters, travel down the downspouts, and be deposited at least three feet away from the foundation. If any link in that chain breaks, water backs up, seeps under the shingles, and eventually finds its way into the attic. Russell Roofing points out that blocked gutters often lead to pooling water and leaks (see common roofing problems). In short, good drainage is the first line of defense for a healthy roof.Step‑by‑step gutter and downspout check
1. Visual sweep from the ground. Grab a ladder, stand back, and scan the entire perimeter. Look for sagging sections, rust spots, or sections where water is spilling over the edge. A quick “water test” with a garden hose can reveal leaks you’d otherwise miss.2. Clear the debris. Use a sturdy scoop or gloved hands to pull leaves, twigs, and pine needles out of the trough. If the debris is caked on, a garden hose on a low pressure setting can loosen it. Remember, a clean gutter can handle up to 2,000 gallons per hour during a heavy storm.3. Check the pitch. Gutters need a ¼‑inch drop for every 10 feet of run. Grab a level or a simple string‑and‑weight setup and confirm the slope. If water pools, add a few extra brackets or a gentle tilt.4. Inspect downspouts. Make sure each downspout is firmly attached and not clogged. Run water through each one; it should flow freely. If you notice slow drainage, a plumber’s snake or a high‑pressure hose can clear the blockage.5. Verify termination. The water should be directed away from the house via splash blocks, extensions, or underground drainage. If you see water spilling onto the foundation, add a downspout extension or a French drain.Real‑world examples
In a recent job in suburban Maryland, a homeowner noticed a musty smell in the attic after a July thunderstorm. Our inspection revealed that a handful of leaves had built up in the front gutter, causing water to overflow onto the fascia and seep behind the flashing. After cleaning the gutter and adding a small downspout extension, the attic stayed dry and the homeowner saved an estimated $1,200 in potential water‑damage repairs.Another case involved a property in Lancaster where the downspouts were undersized for a new, larger roof. Water backed up during a heavy rain, lifted the roof sheathing, and caused a subtle sag. By upsizing the downspouts and installing a simple rain‑garden at the base, the homeowner eliminated the sag and extended the roof’s life by several years.What the pros look for
Moser Roofing Solutions emphasizes that a thorough drainage assessment includes checking the entire system – gutters, downspouts, scuppers, and any hidden interior drains (professional roof inspections guide). While they focus on commercial roofs, the same principles apply to residential properties.Key signs of trouble:Actionable checklist you can print
Print this and tape it to your garage wall. Tick each item during your next roof inspection.
When you’ve marked every box, you’ll know exactly what needs a quick fix and what might require a professional upgrade.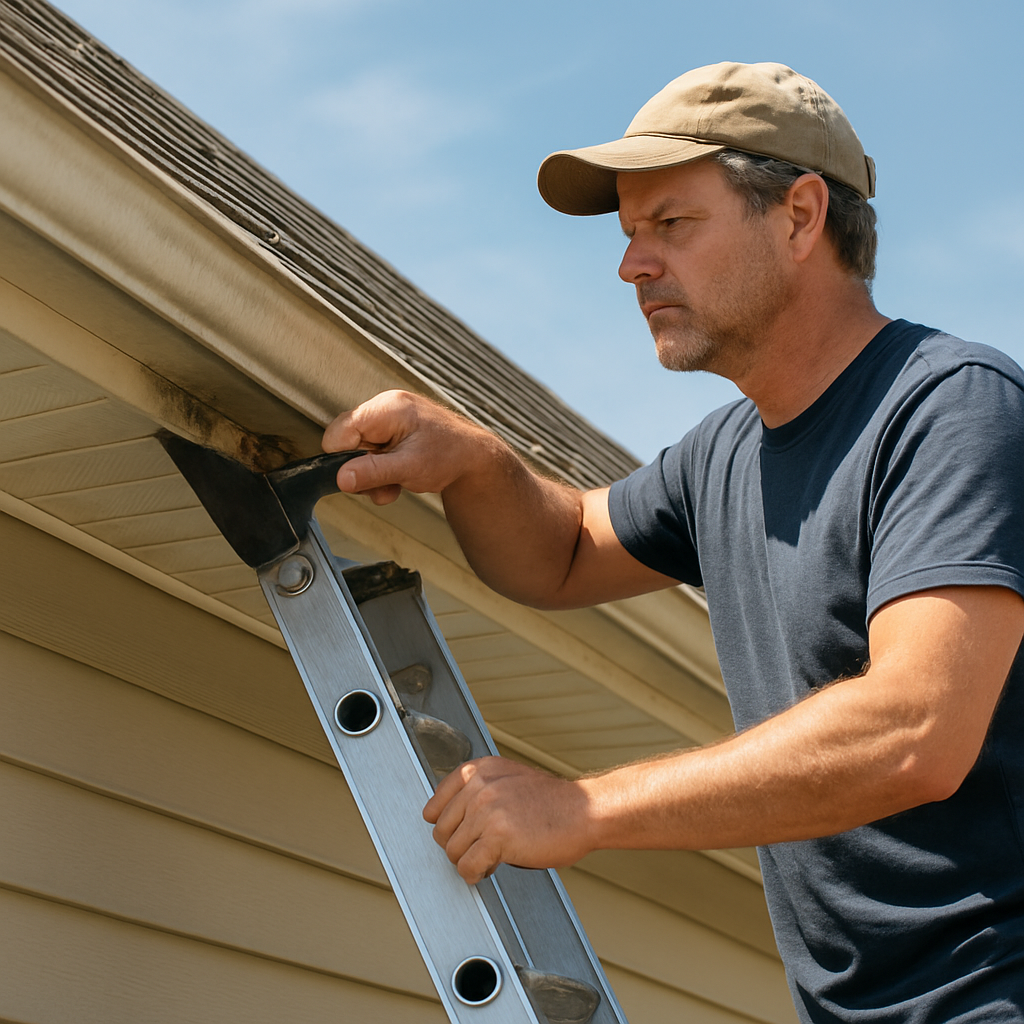
Step 5: Document Findings and Plan Maintenance
Now that you’ve walked the roof, measured moisture, and cleared the gutters, the real magic happens on the ground: turning those notes into a clear, actionable plan.Why good documentation matters
Think of a roof inspection like a medical check‑up. The doctor doesn’t just say “you feel fine” – they write down vitals, lab results, and a treatment plan. The same principle applies to roof inspections. A well‑organized report gives you a snapshot you can compare year over year, helps you prove warranty compliance, and makes it easier to get accurate quotes from contractors.In fact, ServiceTitan points out that a structured inspection report reduces paperwork loss and speeds up communication between field crews and office staff inspection report template .Step‑by‑step: Capture every finding
1. Use a master checklist. Open a printable PDF or a tablet form that mirrors the sections below: customer info, weather, roof details, exterior & interior inspection, damage assessment, recommendations, photos, and notes. Tick each box as you go – it forces you to look at everything, even the stuff you’d normally skip.2. Take photos with context. Snap a wide‑angle shot of the roof section, then a close‑up of the problem. Include a reference object (like a ruler or a coin) so future readers can gauge scale. Save the images in a folder named by date – e.g., “2025‑04‑12‑Roof‑Inspection”.3. Record moisture readings. Write the exact percentage from your meter next to the photo. If a spot reads 22 % instead of the usual 8 %, highlight it in red – that visual cue will jump out when you glance at the report months later.4. Add a brief narrative. A sentence or two that explains “what I mean.” Example: “The flashing around the vent pipe is lifting 2 inches on the north side after the March storm; water pooled behind it for three days.” This keeps the report from sounding like a spreadsheet.5. Prioritize with a simple rating. Use a three‑tier system – Low, Medium, High – based on potential cost, safety risk, and likelihood of interior damage. High‑risk items get a “fix ASAP” tag.Real‑world example
Last spring, a homeowner in Charlotte noticed a faint musty odor in the attic. During the inspection we logged a 19 % moisture reading on a deck board under a vent boot, photographed the lifted flashing, and gave it a “High” priority. Within 48 hours we installed a new boot, resealed the flashing, and ran a dehumidifier. The homeowner avoided a $4,800 water‑damage bill – all because the documentation was clear and acted on quickly.Turning findings into a maintenance plan
Once every observation is logged, sit down with the checklist and ask yourself: which items can I fix myself, which need a pro, and which are preventative?
A handy tip is to convert the priority list into a simple spreadsheet with columns for “Task”, “Cost Estimate”, “Owner (you or contractor)”, and “Target Date”. This turns vague notes into a concrete roadmap.Keeping the record alive
Don’t let the PDF sit on your desktop forever. Upload it to a cloud folder that’s backed up (Google Drive, Dropbox, or your roofing software). Label the folder “Roof Inspections – 2025”. When the next spring rolls around, you’ll have a side‑by‑side view of before and after – a powerful motivator to stay on top of maintenance.Allweather Roof stresses that regular documentation supports warranty claims and insurance adjustments roof maintenance inspections guide. Think of it as your roof’s health record.Quick printable checklist
When you tick every box, you’ve turned a chaotic walk‑around into a roadmap that protects your home, your wallet, and your peace of mind. Ready to write that report?Step 6: Seasonal Roof Inspection Checklist
Now that you’ve logged every shingle, flash, and gutter, it’s time to think ahead—what’s coming up next on your calendar? That’s where a seasonal roof inspection checklist becomes your secret weapon. Instead of letting the months slip by and hoping for the best, you’ll have a clear, repeatable routine that catches trouble before it turns into a pricey repair.Why a seasonal approach works
Roof inspections aren’t a one‑and‑done event; they’re more like a yearly health check‑up. The National Roofing Contractors Association notes that proactive maintenance can add up to 15 years to a roof’s life seasonal roof maintenance checklist. By syncing your inspections with the natural weather cycle—spring, summer, fall, winter—you’ll see patterns (like recurring moss after a wet spring) and can plan fixes at the right moment.Step‑by‑step seasonal checklist
Grab a clipboard, your phone, or a simple spreadsheet. Then run through each season with the same set of questions. Below is a ready‑to‑print table you can adapt.Spring (post‑storm)
Summer (heat & UV)
Fall (leaf load)
Winter (cold & ice)
Turning the checklist into habit
It’s easy to file the list away and forget it. Here’s a trick we use with our clients: set recurring calendar events titled “Roof Inspection – Spring” (and the other seasons). Attach the checklist file to the event so you’re prompted to open it right when the reminder pops up.When you finish a season’s walk‑around, save the photos in a folder named “Roof‑Inspections‑2025‑Spring”. Over time you’ll build a visual timeline that makes it impossible to ignore a growing crack or a slowly expanding moss patch.Quick printable snapshot
By repeating this four‑step rhythm every year, you’ll not only keep the roof in top shape but also protect your home’s energy efficiency, curb‑appeal, and resale value. And if you ever hit a snag—say a persistent leak you can’t locate—our team at LGFMH Construction is just a call away to dive deeper with a professional inspection.Ready to download a blank version of the seasonal checklist? Print it, stick it on your fridge, and make roof care as routine as changing the air filter.FAQ
How often should I schedule roof inspections?
Most experts recommend a full roof inspection at least twice a year—once in the spring after winter storms and once in the fall before the rainy season hits. If you live in an area with harsh weather, add a mid‑summer check or a post‑hurricane walk‑through. For older roofs (10+ years) consider an annual professional review, and keep a quick visual scan after any major wind event.What tools do I really need for a DIY roof inspection?
You don’t need a full contractor’s toolbox—just a sturdy ladder, slip‑resistant shoes, a flashlight or headlamp, and a basic moisture meter. A pair of binoculars helps you spot distant damage without climbing. A clipboard (or notes app) to jot observations and a smartphone for photos rounds out the kit. If you’re comfortable, add a small infrared thermometer to catch hidden cold spots.Can I safely inspect my roof in winter?
Winter inspections are doable if you take a few precautions. Dress in layered, non‑slip clothing and choose a clear, dry day—avoid icy roofs. Use a ladder with rubber feet and place a board on the shingles to spread the load. Focus on the eaves, flashing, and gutters where ice dams form; you can often see damage from the ground with binoculars. Skip any area that feels unsafe and call a pro.What are the warning signs that I need a professional roof inspection?
Look for cracked or curled shingles, rusted flashing, water stains in the attic, and any sagging gutters. If you spot moisture readings above 15 % on a deck board or hear a persistent dripping sound after a rain test, those are red flags. When multiple issues appear together—say, a leaky vent pipe plus moss growth—it usually means a professional inspection is overdue. A pro can assess structural integrity and spot hidden rot you might miss.How do I document findings so I can track roof health over years?
Start by using a printable checklist that mirrors the steps you just walked through—ladder safety, shingle check, flashing, deck, gutters. For each item, write a brief note, snap a photo, and record the moisture‑meter percentage next to the image filename. Store everything in a dated folder like ‘Roof‑Inspections‑2025‑Spring’ on a cloud drive. When you open the folder a year later, you’ll see side‑by‑side photos and can instantly spot new wear.Is a moisture meter worth the investment for homeowners?
A moisture meter is one of the few tools that tells you what’s hidden behind the shingles, so it’s a solid investment for most homeowners. The basic pin‑type models cost under $30 and beep when they detect more than 15 % moisture—enough to flag a potential leak. For a larger roof or a DIY enthusiast, the extra confidence of spotting water before it drips can save hundreds in emergency repairs.What should I do if I find a small leak during my inspection?
If you find a small drip, first dry the area with a towel and run a garden hose over the roof to see where the water reappears—that pinpoints the source. Apply roofing cement or a tarp as a temporary seal until a professional can replace the shingle or reseal the flashing. Keep a photo and note the exact spot, then schedule a repair within a week; delaying can let moisture soak into the deck and cause rot.Conclusion
After walking through every step—from ladder safety to shingle checks, flashing, deck, gutters, and finally documenting what you find—it's clear that a solid roof inspection is less about luck and more about habit.When you schedule a quick visual scan each season, grab your moisture meter, and note the odd‑looking spot, you’re buying yourself peace of mind and thousands in avoided repairs.Remember, the real power lies in the paperwork: photos, moisture percentages, and a simple priority rating turn a messy walk‑around into a clear action plan you can hand to a contractor—or follow yourself.So, what’s the next move? Grab that checklist, snap a few pictures, and file everything in a dated cloud folder. The next time a storm rolls through, you’ll already know whether you’re looking at a minor drip or a looming roof failure.If any of the steps feel beyond your comfort zone, give us at LGFMH Construction a quick call. We can walk you through the tough spots, confirm your findings, and help you keep the roof over your head for years to come.Finally, treat your roof like a health check‑up: schedule a professional inspection at least once a year, especially after severe weather, and keep the records side‑by‑side. That habit alone can extend the life of your roof by years and protect your home’s value.


Comments