Comprehensive Roof Repair Chesapeake VA Guide for Homeowners
- William McKracherne
- Dec 18, 2025
- 20 min read


Ever looked up at your roof after a storm and thought, 'Did that leak just sneak in while I was sleeping?'
You’re not alone – many Chesapeake homeowners discover a wet spot on the ceiling and suddenly wonder if their roof can hold up against the next downpour.
In our experience, the biggest surprise isn’t the damage itself, but how quickly a tiny crack can turn into a full‑blown repair nightmare if you wait.
So, what should you do the moment you spot those tell‑tale signs?
First, grab a flashlight and climb safely onto the attic (or call a friend to lend a hand). Look for water stains, moldy insulation, or rusted nails – those are the breadcrumbs that tell you where the roof is leaking.
If you’re comfortable checking the exterior, walk the perimeter on a dry day and scan for missing shingles, cracked flashing, or debris piled in the valleys. Those little details are often the first clue that a professional repair is on the horizon.
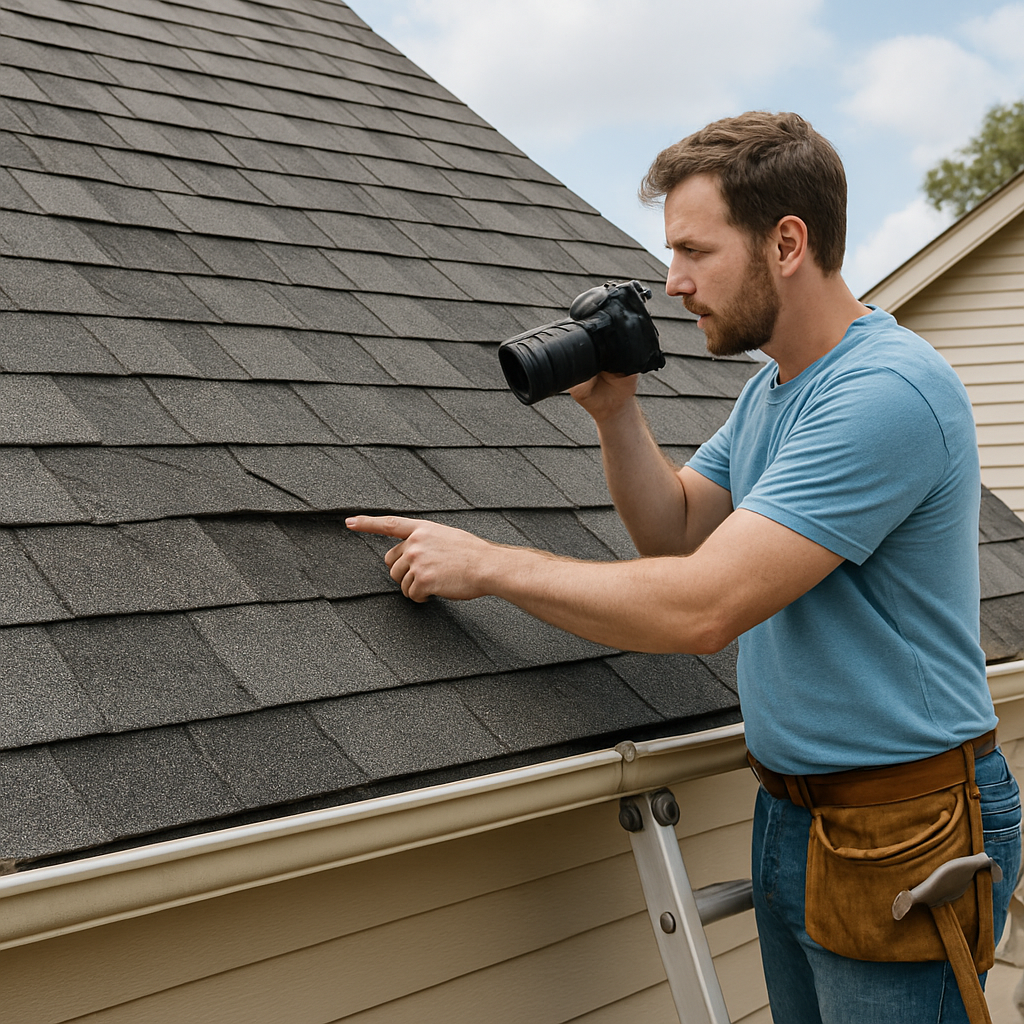
Now, here’s a tip that saves both time and money: document everything with photos. Snap a picture of each problem area, note the date, and write a quick note about the weather conditions. When you call a roofing contractor, you’ll have a clear story, and they can give you a more accurate estimate.
And remember, a roof isn’t just a roof – it’s the shield that keeps your family, your pets, and all your belongings dry. Ignoring a small leak can lead to mold growth, structural damage, and higher energy bills. That’s why acting fast matters.
So, to sum it up: spot the signs, take quick photos, and get a professional assessment before the problem spirals. In Chesapeake, the weather can be unforgiving, but with a little vigilance you can keep your roof – and your home – in top shape.
TL;DR
Spotting a leak early, snapping photos, and getting a professional assessment can save Chesapeake homeowners costly mold, structural damage, and sky‑high energy bills.
Act fast, document the issue, and trust today LGFMH Construction’s expertise for reliable roof repair Chesapeake VA, keeping your family dry and your peace of mind intact.
Assessing Roof Damage in Chesapeake, VA
When the first raindrop hits your porch and you hear that dreaded *drip‑drip* from the ceiling, it’s easy to feel a knot in your stomach. You wonder if it’s just a one‑off splash or the start of a bigger problem. That gut feeling? It’s actually your house warning you that something’s off up on the roof.
First thing’s first – grab a flashlight and head up to the attic, but only if it’s safe. Look for water stains, a musty smell, or wet insulation. Those are the breadcrumbs that point directly to where the leak is trying to sneak in.
Next, step outside on a dry day and walk the perimeter. Pay attention to missing shingles, cracked flashing, or debris piling in the valleys. Even a tiny shingle that’s curled at the edge can become a gateway for water when the wind picks up.
Here’s a quick mental checklist you can run through:
Are any shingles cracked, blistered, or missing?
Is the flashing around chimneys, skylights, and vents still sealed?
Do you see moss or algae buildup that could hold moisture?
Is your gutter system clogged, causing water to back up onto the roof?
If any of those answers are “yes,” you’ve got a red flag. And that’s where a professional eye helps – they’ll use moisture meters and infrared cameras to spot hidden trouble you can’t see.
We like to give homeowners a simple, printable roof inspection checklist so you can track what you’ve found and share it with a contractor. It saves time, cuts down on guesswork, and makes the estimate process smoother.
Now, imagine the roof is fixed, but the interior walls are still stained from the leak. That’s where a fresh coat of paint can make a world of difference. Partnering with a local painting pro can refresh your space in one go. Check out South Jersey’s Trusted Painting Services for a seamless transition from roof repair to interior makeover.
And if you’re thinking about a larger renovation – perhaps new flooring now that the water damage is gone – you’ll want a flooring specialist who understands the moisture‑proofing needs of a home that’s just been repaired. Millena Flooring offers hardwood and laminate options that can handle the humidity shifts common in Chesapeake.
Below is a short video that walks you through the most common roof‑damage patterns we see in the area and how to spot them before they turn into a costly repair.
After watching, take a moment to jot down what you saw – whether it’s a shingle missing near the ridge or a cracked flash around your vent pipe. Those notes become the backbone of a solid repair plan.
When you’re ready to call a roofing contractor, have your photos, notes, and the checklist ready. In Chesapeake, the weather can swing from calm to a sudden thunderstorm, so acting quickly prevents mold growth and structural decay.
Remember, a roof isn’t just a roof – it’s the first line of defense for everything inside your home. By catching damage early, you protect your family, your pets, and your peace of mind.
Ready to assess? Grab that flashlight, pull out the checklist, and start your own little investigation. You’ll feel more in control, and you’ll have the facts in hand when you talk to a professional.
Common Causes of Roof Damage in Chesapeake, VA
Living in Chesapeake means you love the sunshine, the occasional sea breeze, and, yep, the occasional storm. But those same elements are the chief culprits behind roof wear and tear.
Heavy rain and poor drainage
When a downpour hangs over the city for hours, water can pool on flat spots or in clogged gutters. That standing water seeps into shingle seams, lifts granules, and eventually creates soft spots that let a leak slip through. In our experience, a simple gutter cleaning twice a year cuts the risk of water‑related roof repair in Chesapeake VA by half.
Actionable tip: after the first big rain of the season, clear debris, and consider installing a splash‑guard or a larger downspout.
So, how do you know if your roof is actually “breathing” under the rain?
High winds and flying debris
Chesapeake’s coastal location means gusts can top 60 mph during a hurricane or even a strong thunderstorm. Those gusts can lift shingles, pry open flashing, or turn a loose branch into a roof‑piercing projectile.
Real‑world example: a homeowner in South Norfolk reported a single oak limb snapping off a roof ridge, leaving a three‑foot‑wide gap that let water in for weeks before the leak was noticed.
Quick step: secure any overhanging trees before storm season and reinforce ridge caps with a roofing sealant. A fast visual check after a windy night can save you a costly repair later.
Does that make you think about the trees in your own yard?
Hail impact
Even if the sky is clear, a sudden hailstorm can turn your roof into a battlefield. Small dents in metal panels or bruised asphalt shingles are signs that the protective granule layer has been compromised.
Data point: the National Weather Service records an average of 2 hail events per year in the Hampton Roads area, each capable of shaving off up to 15% of a shingle’s lifespan.
What you can do: after any hail event, walk the roof (or have a professional do it) and press a fingernail into a shingle. If the surface feels soft or the granules come off easily, schedule a roof repair Chesapeake VA before the next rain.
Tree limb damage
Even a “small” branch that brushes the roof can wear down shingle edges over time. In neighborhoods with mature oaks, it’s not uncommon to find a line of missing shingles directly under a tree’s canopy.
One homeowner shared that a 12‑inch branch hit his roof during a windstorm, knocking out three rows of shingles. He didn’t notice the leak until the attic insulation smelled musty weeks later.
Preventive measure: trim branches to at least 6 feet away from the roof surface, and use a protective barrier like a roof‑underlayment if pruning isn’t feasible.
Imagine the peace of mind you’d have knowing the trees aren’t silently chewing away at your roof.
Sun, heat, and UV aging
Chesapeake summers can push temperatures above 95 °F. UV rays break down the polymer binders in asphalt shingles, causing them to become brittle and crack.
Experts estimate that UV degradation can reduce a shingle’s effective life by 5–10 years in sun‑intense regions.
Action step: apply a UV‑resistant roof coating every 5–7 years. It’s a low‑cost treatment that adds a reflective layer, keeping your roof cooler and extending its service life.
Does the idea of a cooler roof sound appealing?
Improper installation and lack of maintenance
Even the best materials fail if they’re not installed correctly. Misaligned flashing, missing nails, or inadequate ventilation create hidden pathways for moisture.
We’ve seen homes where a DIY shingle replacement left one row offset, leading to a slow leak that only showed up after two seasons.
Checklist: during your next inspection, verify that all nails are flush, flashing around chimneys is sealed, and attic vents are clear. If anything looks off, call a professional roof repair Chesapeake VA service before the issue spreads.
And that brings us back to the big picture—knowing the why helps you act before a small problem becomes a full‑blown emergency.
DIY Roof Repair Steps for Minor Issues
So you’ve spotted a lone cracked shingle or a tiny gap around a vent, and you’re wondering if you can fix it yourself before it turns into a full‑blown roof repair chesapeake va nightmare? The good news is that most minor issues can be tackled with a few tools, a little patience, and the right safety mindset.
Before we dive into the how‑to, picture this: you’re on the ladder, the sun is warming the ridge, and you hear the satisfying click of a new shingle snapping into place. That moment of “I just saved myself a call and a few hundred dollars” is what we’re aiming for.
Step 1: Safety First
Never treat a roof like a casual backyard project. Grab a sturdy ladder, make sure it’s on firm ground, and always have a partner spot you. Wear slip‑resistant shoes, a harness if you have one, and don’t attempt repairs in wet or windy conditions. A quick safety checklist saves you from a fall that could cost far more than a new roof.
Step 2: Locate and Assess the Problem
Climb up and walk the roof slowly, feeling for soft spots and looking for obvious signs: cracked shingles, lifted edges, or rusted flashing. Take a photo of each issue – these visuals become handy if you later need a professional’s opinion.
After you’ve documented everything, step back onto solid ground and decide which spots are truly DIY‑able. If the damage is limited to a single shingle, a few nails, or a small flash‑ing leak, you’re good to go.
Step 3: Gather the Right Tools
Here’s a quick checklist: a hammer or roofing nail gun, roofing nails (1‑¼″ galvanized are standard), a utility knife, a pry bar, roofing cement, a putty knife, and a roll of waterproof underlayment. For historic homes, you might need matching architectural shingles; the City of Chesapeake explains that “historic material roofs” often require special approval before replacement (see guidelines) .
Step 4: Replace Missing or Cracked Shingles
If you want to replace a missing or cracked shingle, follow these five quick actions:
1. Gently lift the surrounding shingles with a pry bar.
2. Remove the damaged shingle by sliding it out.
3. Slide a new shingle into place, aligning it with the existing rows.
4. Secure it with two nails placed about an inch above the shingle’s cut edge; the nail heads should sit just below the surface.
5. Press roofing cement under the overlapping edge to seal any gaps.
That simple routine can stop water from sneaking in through a single cracked tile.
Step 5: Seal Small Flashing Gaps
If water is leaking around a vent or chimney, the culprit is often a compromised flashing seal. Apply a generous bead of roofing cement around the flashing, then smooth it with a putty knife. For extra durability, embed a strip of self‑adhesive roof tape over the cement before it cures.
Step 6: Clean Up and Add a Protective Layer
Once the repairs are in place, sweep away loose granules, leaves, and debris – they act like a sponge that holds moisture against the deck. If your roof is approaching the 5‑year mark since the last coating, consider a light coat of UV‑resistant roof sealant. This cheap addition can extend the life of asphalt shingles by up to 10 % and keeps your roof cooler in those Chesapeake summer spikes.
Step 7: Test Your Work
Grab a garden hose, set it to a steady stream, and wet the repaired area for a few minutes. Then check the interior for any drips. No water? Great – you’ve just earned a small victory. If you do see moisture, re‑apply cement or replace the shingle again; a little extra effort now prevents bigger headaches later.
And there you have it: a straightforward, step‑by‑step plan that lets you tackle those minor roof hiccups without immediately dialing a contractor. Of course, if you ever feel uneasy about height, or the damage spreads beyond a few shingles, give LGFMH Construction a call – we’ll handle the big jobs while you keep the small wins under your belt.
When to Call Professional Roof Repair Services
You've patched a few shingles, cleared the gutters, and even tried a quick seal with roofing cement. But there comes a moment when the DIY fixes feel more like a band‑aid than a solution. That's the point where you should pick up the phone and call a pro.
Signs you can’t ignore
Water stains that keep spreading across the ceiling, even after you’ve tried a temporary patch, are a red flag. A single drip may look harmless, but the moisture can soak insulation, warp rafters, and invite mold – a nightmare for any Chesapeake homeowner.
Another tell‑tale sign is a cluster of missing or curled shingles that cover more than a couple of squares. When the damage spreads across a roof slope, you’re not just losing a few pieces; you’re compromising the whole drainage system.
And then there’s the age factor. Most asphalt roofs last about 20‑30 years. If your roof is pushing that limit and you notice granule loss or brittle edges, it’s time to think bigger than a spot repair.
How to decide between DIY and a professional
Ask yourself three quick questions:
Is the problem isolated to one or two shingles?
Do you have the right safety gear and a sturdy ladder?
Can you see the issue without climbing onto the roof?
If you answered “yes” to all three, a DIY fix might be okay. If you’re unsure about any of them, or if the issue involves flashing, vent seals, or roof decking, call a professional. A mis‑step on those components can cost you hundreds more in the long run.
Step‑by‑step checklist before you call
1.Document the damage.Snap clear photos from the ground and, if safe, from the roof. Note the weather conditions – a recent hailstorm or heavy rain can explain sudden leaks.
2.Measure the affected area.Roughly calculate how many squares (100 sq ft each) are involved. This helps the contractor give a realistic estimate.
3.Check your warranty.Some newer roofs still have manufacturer warranties that cover repairs. Having the paperwork handy speeds up the process.
4.Clear the work zone.Move garden furniture, trim low branches, and alert pets. A clean site protects both you and the crew.
5.Write down questions.Think about ventilation, attic insulation, and any past repairs. The more details you provide, the better the pro can diagnose the problem.
When you’ve ticked those boxes, you’re ready to call a roof repair specialist who knows Chesapeake’s climate.
What to expect from a professional roof repair service
First, the contractor will do a thorough inspection – often with a moisture meter and infrared camera – to locate hidden leaks. Next, they’ll explain why a particular repair method is needed, whether it’s resealing flashing, replacing decking, or installing a new underlayment.
Finally, they’ll give you a clear, itemized estimate that includes labor, materials, and any permits. A reputable crew will also protect your landscaping with tarps or netting, and they’ll clean up every piece of debris before they leave.
That level of care is why many Chesapeake families prefer to let the experts handle anything beyond a simple shingle swap.
Condition | DIY Viability | When to Call Pro |
Single cracked shingle | Yes, with proper tools | If you’re uncomfortable on the roof |
Multiple curled shingles across a ridge | No | Immediately – risk of water intrusion |
Leaking flashing around vent/chimney | No | Professional sealant and possible decking repair |
Roof older than 20 years with granule loss | No | Full assessment; may need partial replacement |
A quick tip: schedule your roof inspection early in the spring. The weather is mild, crews are more available, and you avoid the rush of summer storms. Even a 30‑minute professional walk‑through can catch hidden cracks before they become expensive emergencies.
Bottom line: a few quick visual clues can tell you when a DIY fix is enough and when it’s smarter to let a pro step in. Trust your gut, but let the facts guide you. When in doubt, give LGFMH Construction a call – we’ll confirm the issue, outline the repair plan, and keep your home dry.
Choosing the Right Roofing Materials for Chesapeake Climate
Living in Chesapeake means you’ve got sunshine, salty breezes, and the occasional thunderstorm that feels like a drumroll. Your roof has to juggle heat, humidity, and wind without throwing a tantrum. So, how do you pick a material that won’t quit on you when the next storm rolls in?
Start with the climate checklist
First, write down the three things that matter most here: high humidity (average 70 % year‑round), summer highs that push 95 °F, and wind gusts that can top 60 mph during hurricane season. If a material can handle those three, you’re already ahead of the game.
Action step: grab a notebook and note the last time you saw a wind advisory or a heavy rain event. Use that date as a reference point when you compare roofing options.
Asphalt shingles – the tried‑and‑true workhorse
Most Chesapeake homes still wear asphalt shingles because they’re affordable and come in a rainbow of colors. In our experience, a well‑installed shingle roof lasts about 15‑20 years before you start seeing granule loss.
Real‑world example: the Johnsons, a family of four, had a 12‑year‑old shingle roof that started shedding granules after a particularly wet summer. They added a UV‑resistant coating and extended the life by another five years, saving roughly $2,500 in replacement costs.
Tip: look for a shingle with a Class A fire rating and a warranty that covers wind up to 130 mph – that’s the sweet spot for Chesapeake.
Metal roofing – durability meets energy efficiency
Metal panels are gaining popularity because they shrug off hail, resist rust, and reflect heat, keeping your attic cooler. The upfront price is higher, but you’ll often see a 50‑plus‑year lifespan and lower energy bills.
Consider the Patel family, who swapped their 10‑year‑old shingles for standing‑seam metal after a hailstorm dented three panels. Within a year, their cooling costs dropped by 12 %, and the roof showed no sign of wear even after a 70‑mph gust.
Actionable tip: when you get a quote, ask the installer to show you the underlayment they’ll use. A good synthetic underlayment adds an extra barrier against moisture and helps with sound dampening.
Tile and slate – beauty with a structural price tag
Tile (clay or concrete) and slate look stunning on historic homes, but they’re heavy. Before you fall in love with that Mediterranean vibe, have a structural engineer verify that your framing can support the extra pounds.
We helped a homeowner in the historic district replace a failing wood‑shake roof with lightweight synthetic slate. The new roof not only matched the neighborhood’s character, it cut down on maintenance because the synthetic material won’t crack like real slate does.
Quick check: if your roof slope is less than 4:12, tile might trap water. In that case, metal or synthetic options are safer choices.
Synthetic and eco‑friendly roofs – the modern alternative
Today’s synthetic shingles mimic the look of wood or slate while being lighter and more resistant to UV degradation. Some are even made from recycled plastics, which helps your home’s carbon footprint.
Example: the Lee family installed a recycled‑plastic shingle system after learning that their old asphalt roof contributed to landfill waste. The new roof came with a 30‑year warranty and required no special maintenance beyond the usual spring inspection.
Pro tip: ask the manufacturer for the product’s R‑value (thermal resistance). A higher R‑value means better insulation, which matters when Chesapeake summers feel like an oven.
Putting it all together – your decision matrix
1. **Budget** – Asphalt shingles are the most budget‑friendly; metal and synthetic options cost more upfront but pay off over time.
2. **Longevity** – Metal and slate win on lifespan; synthetic shingles are close behind.
3. **Maintenance** – Metal and synthetic require the least; tile and wood‑shake need periodic inspections.
4. **Aesthetics** – Choose a style that matches your home’s architecture and your personal taste.
Once you’ve scored each factor, add a column for “local suitability.” If a material struggles with high humidity or wind, give it a lower score. The highest‑scoring option is usually the one that will keep your roof repair chesapeake va worries at bay.
Bottom line: don’t pick a roof based on price alone. Think about how Chesapeake’s climate will treat the material over the next decade, and factor in real‑world stories like the ones above. With a clear checklist and a little homework, you’ll choose a roof that protects your home, your wallet, and your peace of mind.Cost Estimates and Financing Options for Roof RepairWhen you start looking at a roof repair in Chesapeake, the first thing that jumps out is the price tag. In our experience, a typical asphalt‑shingle repair can run anywhere from a few hundred dollars for a minor patch to nearly $23,000 for a full replacement on an average 3,415 sq ft home.instantroofer.com That number feels big, but breaking it down makes it less intimidating.Understanding the cost componentsFirst, there’s the material itself. Asphalt shingles sit around $6.72 per square foot in Chesapeake, while metal or synthetic options can climb to $12‑$15 per square foot. Then you add labor, which typically accounts for 30‑40% of the total bill, plus any extra work like flashing replacement, ventilation upgrades, or debris removal.Next, consider the size and pitch of your roof. A steeper pitch means more time on the ladder, which translates to higher labor costs. Finally, don’t forget permit fees – most cities in the area charge $100‑$300 for a roofing permit, and that’s a line item you’ll see on the invoice.Real‑world example: the Miller familyThe Miller’s 2,800‑sq‑ft ranch in Chesapeake needed a new roof after a hailstorm dented three panels. Their contractor quoted $19,800, breaking down to $6.50 per square foot for a metal roof, $2,200 for permits, and $3,000 for a warranty upgrade. By using a local financing program, they spread the cost over 36 months with a 3.9% APR, keeping the monthly payment under $600.Compare that to their neighbor, who chose an asphalt‑shingle roof at $22,950 total, because the neighbor wanted a quick aesthetic fix. The Miller’s choice saved them roughly $3,000 in long‑term energy costs, thanks to the metal’s reflective surface.Financing options you probably haven’t considered1️⃣ Home equity line of credit (HELOC) – If you’ve built up equity, a HELOC can offer low‑interest borrowing that you repay as you’d a credit card, but usually at 4‑6%.2️⃣ HUD Title 1 loans – These are federal loans for homeowners who need to repair or improve a property. Eligibility depends on income and the condition of the home. You can learn more about the program on USA.gov .3️⃣ 203(k) rehabilitation mortgage – If you’re buying a home or refinancing, you can bundle up to $35,000 of repair costs into your mortgage. The interest rate is the same as your primary loan, so you don’t get a separate, higher‑rate loan.4️⃣ Reverse mortgage (HECM) – Homeowners over 62 can tap into equity without monthly payments, using the funds for roof repair and then settling the debt when the house is sold.5️⃣ Contractor financing – Many local roofers partner with third‑party lenders to offer 0% interest for 12 months or longer term plans with modest rates. Always read the fine print; some deals have hidden fees.Step‑by‑step budgeting checklistStep 1: Get three written estimates. Use a free calculator like the one on Instant Roofer to verify square footage and material costs.Step 2: List all potential financing sources side by side. Note interest rates, fees, and repayment terms.Step 3: Check your credit score. A score above 700 usually unlocks the best HELOC and contractor‑financing rates.Step 4: Apply for any applicable government programs early. HUD Title 1 applications can take 30‑45 days, so start now if you’re on a tight schedule.Step 5: Factor in post‑repair savings. Metal roofs can shave 10‑15% off cooling bills; that reduction can offset a higher upfront cost within a few years.Expert tip: bundle repairsIf you’ve already noticed gutter issues or attic ventilation problems, ask your roofer to include those in the same contract. Bundling often reduces labor overhead and can qualify you for larger financing packages.And remember, the cheapest upfront quote isn’t always the most economical long‑term. Look at the total cost of ownership, including maintenance, energy savings, and resale value.Bottom line: you have more than one way to make a roof repair affordable. Whether you tap into home equity, qualify for a HUD Title 1 loan, or negotiate a payment plan with a trusted contractor, the key is to do the math, compare the options, and choose the path that protects both your roof and your wallet.FAQHow do I know if I need roof repair in Chesapeake VA?First, look for the tell‑tale signs: water stains on your ceiling, missing or curled shingles, granule buildup in gutters, or a musty smell in the attic. If you notice any of these after a rainstorm, it’s a good time to climb up (or call a pro) and check for soft spots or rusted flashing. In our experience, catching a leak early can save you hundreds of dollars in water‑damage repairs.What are the most common causes of roof damage in Chesapeake VA?Chesapeake’s climate throws three main culprits at your roof: heavy rain that overwhelms clogged gutters, high winds that lift shingles or slam debris, and hail that dents metal panels or bruises asphalt. Add to that the relentless UV heat that makes shingles brittle over time. Tree limbs that brush the roof also chew away at the edges, especially after a storm. Knowing these drivers helps you target preventative steps before a small problem turns into a full‑blown repair.How much does roof repair typically cost in Chesapeake VA?Pricing varies by material, roof pitch, and extent of damage, but a typical asphalt‑shingle patch runs between $300 and $800, while a larger section replacement can climb to $5,000‑$7,000. Metal‑panel repairs tend to be on the higher end of that range because of material costs. Don’t forget permit fees (usually $100‑$300) and any needed flashing or underlayment upgrades. Getting three written estimates and comparing line items will give you a realistic budget.Can I finance roof repair in Chesapeake VA?Absolutely. Homeowners often use a home‑equity line of credit, a HUD Title 1 loan, or a contractor‑offered payment plan to spread the cost over 12‑36 months. A 203(k) rehabilitation mortgage is another option if you’re refinancing or buying a fixer‑upper. Before you sign, check the interest rate, any origination fees, and whether the financing covers both labor and materials. A clear repayment schedule keeps the project affordable without draining your savings.What should I look for when hiring a roof repair contractor in Chesapeake VA?Start with a valid Virginia contractor’s license and insurance proof—never skip that step. Ask for at least three recent references and look for a written warranty that covers both materials and workmanship. A reputable crew will also perform a detailed inspection, provide a photo‑documented scope, and explain why they recommend a particular repair method. In our experience, transparency during the estimate phase predicts a smoother job site and fewer surprise costs.How long does a typical roof repair take in Chesapeake VA?Minor fixes, like replacing a single shingle or resealing a vent flash, can be done in a half‑day. More extensive work—replacing a section of decking or installing new underlayment—usually takes 2‑3 days, depending on weather and crew size. Always build a buffer for unexpected rain; most contractors will protect the work area with tarps, but a dry day is still the safest bet for a quality finish.What maintenance steps can I take to extend the life of my roof after repair?Schedule a bi‑annual visual inspection, preferably in spring and fall, to clear leaves, check for loose nails, and verify that gutters flow freely. Trim any branches that come within six feet of the roof surface, and consider applying a UV‑resistant roof coating every 5‑7 years to combat sun‑aging. Finally, keep attic ventilation balanced—adequate airflow reduces moisture buildup, which is a silent enemy of any repaired roof.ConclusionBy now you’ve seen how Chesapeake’s humidity, wind and sun can turn a tiny shingle crack into a costly leak. The good news? Most of those problems are fixable with a clear plan and a little know‑how.Remember the three things we kept coming back to: spot the issue early, choose the right material for our climate, and don’t skimp on proper installation or maintenance. A half‑day repair for a single shingle or a quick underlayment seal can save you hundreds – and those same steps keep your roof performing for years.So, what’s the next move? Walk your roof (or have a trusted crew do it) after the next big rain, note any soft spots, and compare what you see with the checklist we shared. If you’re unsure about flashing, decking or warranty coverage, give LGFMH Construction a call. We’ll do a photo‑documented inspection, explain the why behind every recommendation, and give you a transparent estimate.Finally, set a reminder for a spring and fall visual check, trim any low branches, and consider a UV‑resistant coating every five to seven years. Those tiny habits are the difference between a roof that lasts and one that needs a full replacement.When you protect your roof, you protect your home, your family, and your peace of mind. Ready to take the first step toward a hassle‑free roof repair chesapeake va solution? Let’s get it done together.


Comments