Comprehensive Roof Repair Virginia Beach Guide: Costs, Steps, and Choosing the Right Contractor
- William McKracherne
- Dec 4, 2025
- 19 min read

Ever looked up at a leaky ceiling on a rainy Virginia Beach night and felt that gut‑wrenching mix of panic and annoyance?
You're not alone—most homeowners here have wrestled with a sudden drip, a sagging shingle, or that sneaky wind‑whipped gust that tears a patch of roof right after a sunny day.
But what if I told you that fixing the problem doesn't have to mean endless calls, vague estimates, or waiting weeks for a crew to show up?
Think about it this way: a solid roof is like a trusted friend who never lets you down, and finding the right repair partner is the first step to keeping that friendship strong.
In Virginia Beach, the salty air and occasional storms make roof wear a daily reality, so the right repair strategy is part prevention, part quick action.
So, how do we separate the noise from the real solutions? First, we need to recognize the signs that say, “Hey, my roof needs attention now,” before a tiny leak turns into a costly water disaster.
Here are a few red flags that most locals notice: missing shingles, rusted flashing, or a sudden rise in your energy bill because heat is escaping through a compromised roof.
And when you spot any of those, the next move is to call a local pro who knows the coastal climate inside out—someone who can assess the damage, recommend the right materials, and get the job done without breaking the bank.
You're probably wondering whether a simple patch will hold up against the next nor'easter, right?
Honestly, a temporary fix can buy you time, but a proper repair that matches the original roofing system is what will stand up to salty breezes and heavy rain for years.
That’s why many Virginia Beach families choose a contractor who offers both roof repair and a clear maintenance plan, so you’re never left guessing about the next step.
Imagine this: after a weekend storm, you step outside, see the sky clear, and realize your roof is still solid, your home dry, and you didn’t have to scramble for a last‑minute solution.
Sounds good, right? Let’s dive in and explore exactly what to look for, how to evaluate repair options, and the simple checklist that will give you confidence every time the clouds roll in.
TL;DR
If your Virginia Beach roof is leaking, sagging, or letting heat escape, you need a fast, reliable fix that lasts through salty breezes and nor'easters.
We’ll show you how to spot the warning signs, choose the right contractor, and follow a simple checklist so your home stays dry and comfortable.
Step 1: Identify Common Roof Damage in Virginia Beach
Alright, picture this: you’re stepping onto your porch after a rainstorm, and you notice a few shingles are curling like the edges of an old newspaper. That little visual cue is often the first whisper that your roof needs some love.
Does it feel like you’re guessing whether the problem is big or small? You’re not alone—most of us in Virginia Beach learn to read the roof’s body language the hard way.
Here’s a quick video that walks you through the most common visual clues, so you can spot trouble before the next nor'easter hits.
After you watch that, grab a notebook and follow these three checkpoints. We’ll keep it simple: shingles, flashing, and interior signs.
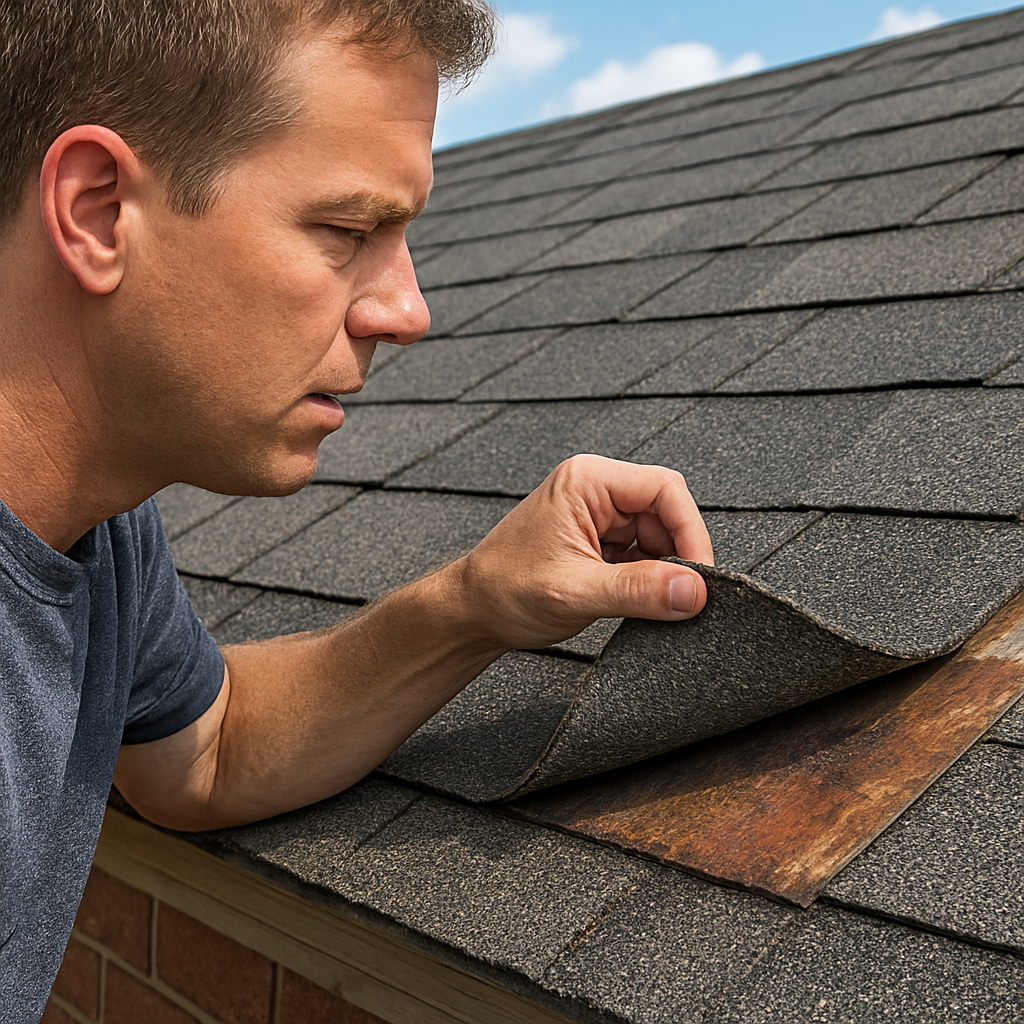
1. Shingles – the first line of defense
Missing or cracked shingles are the most obvious red flag. In coastal Virginia Beach, the salty air can accelerate granule loss, making shingles brittle. Look for:
Curling or buckling edges
Granules clumped in gutters
Cracks where a shingle has split in two
If you spot any of these, it’s time to schedule a repair. Think of it like changing a tire before you’re stalled on the highway.
2. Flashing and drainage – keep water out
Flashing is the metal strip that seals joints around chimneys, vents, and roof edges. Rusted or loose flashing lets water sneak in, especially during those high‑tide storms.
One way to prevent water pooling is to ensure your roof’s drainage works like a well‑designed culvert system. For a deeper dive on proper drainage design, check out this guide on driveway culvert installation for coastal properties. The principles are surprisingly similar—keep the flow moving and avoid stagnation.
3. Inside the house – subtle but telling signs
Sometimes the roof’s distress shows up on the ceiling before you even notice an external problem. Look for water stains, moldy patches, or a sudden rise in your heating bill because warm air is escaping.
When water does manage to get inside, you’ll need to dry those walls quickly to prevent structural damage. This step‑by‑step guide on drying walls after a leak explains safe methods that won’t compromise your drywall.
And if you’re wondering whether a roof repair could also improve your outdoor comfort, think about it this way: a solid roof reduces drafts, which means your patio stays warmer on cool evenings. For inspiration on making the most of those evenings, see this article on outdoor heating tips for a cozy terrace .
Before you climb onto the ladder, grab a few simple tools: a flashlight, a sturdy pair of gloves, and, if you can, a moisture meter. The meter will beep when it detects hidden wet spots behind the shingles—perfect for spotting a leak that isn’t obvious from the surface. Even a basic screwdriver can help you pry a loose shingle just enough to peek underneath without causing damage.
Now that you’ve got the visual checklist, the next step is to walk the roof (or hire a qualified pro) and verify each item. Take photos, note the exact locations, and prioritize the most urgent fixes—usually anything that’s actively leaking or missing.
When you’ve gathered all that info, you’ll be ready to move on to Step 2: Choosing the right contractor who knows how to work with coastal materials and can give you a warranty that actually means something. And that peace of mind? It’s priceless when the next storm rolls in.
Step 2: Assess Whether DIY Repair Is Viable
Okay, you’ve scoped the damage and you’re wondering if you can roll up your sleeves and fix it yourself. Before you grab a ladder, let’s pause and ask: do you have the right tools, the know‑how, and the safety net?
Ask yourself these three quick questions
1. How complex is the problem?A single cracked shingle or a loose vent pipe? That’s often a weekend‑project for a handy homeowner. But a sagging deck, widespread granule loss, or corroded flashing? Those usually need a pro who knows structural nuances.
2. What’s the safety factor?Working on a roof in Virginia Beach means dealing with wind, salt spray, and sometimes slippery surfaces after a rain. If you’re not comfortable with heights or don’t have a sturdy harness, it’s safer to call a licensed crew.
3. Are permits or inspections required?The city’s Owner‑Occupied Home Rehabilitation program notes that only licensed Class A or B contractors can submit proposals for major roof work Virginia Beach housing rehabilitation program . If your fix crosses the line into structural repair, you’ll likely need a permit and a professional’s sign‑off.
When DIY makes sense
If you answered “yes” to a simple shingle swap, you’re probably good to go. Grab a replacement shingle that matches your roof’s color, a pry bar, roofing cement, and a hammer. Follow these steps:
Lay a ladder on stable ground; have a friend hold it.
Slide the damaged shingle out gently.
Slide the new shingle into place, nail it with two fasteners, and seal the edges.
Press roofing cement around the nail heads to keep water out.
That whole process takes about an hour, and you’ll save a few hundred dollars.
When to call in the pros
Now picture this: you’re looking at a rusted flashing section that’s eaten through metal, or you see the roof deck sagging under water‑logged plywood. Those are red flags that DIY could turn into a costly mistake. Professional roofers bring:
Specialty tools like pneumatic nail guns and moisture meters.
Knowledge of local building codes and the ability to pull permits.
Liability insurance that protects you if something goes wrong.
In those cases, the extra expense is worth avoiding future water damage, mold, or a failing roof deck.
Quick decision checklist
Use this short checklist before you decide. If any answer is “no” or “unsure,” schedule a free inspection with a licensed Virginia Beach roofer.
Factor | DIY Viable? | Notes |
Skill level | Basic to moderate | Simple shingle or vent replacement |
Safety risk | Low if ladder work only | Avoid steep slopes, wet surfaces |
Permits needed | Usually no for minor fixes | Structural repairs require a licensed contractor |
Bottom line: if you’re comfortable with a ladder, have the right materials, and the repair is purely cosmetic, DIY can be a win. Anything beyond that—especially anything that could affect the roof’s structural integrity—should be left to the pros who are familiar with Virginia Beach’s salty air and building codes.
So, what’s your next move? Grab that checklist, walk the roof one more time, and if you hit any of the “call‑the‑pro” boxes, give LGFMH Construction a quick call for a free, no‑obligation assessment. You’ll get peace of mind, and your roof will stay solid through the next nor’easter.
Step 3: Choose the Right Roofing Contractor in Virginia Beach
Alright, you’ve figured out what’s broken and whether DIY makes sense. Now comes the part that most homeowners dread: picking a contractor you can actually trust to handle your roof repair Virginia Beach style.
It feels a bit like a blind date, doesn’t it? You’re hoping the person shows up on time, knows the right moves, and doesn’t leave a mess behind. The good news is there are concrete ways to turn that nervous guesswork into a confident decision.
What to Look for in a Contractor
First, verify the basics: a current Virginia Beach business license, a Class A or B roofing license, and solid liability insurance. Those three items are non‑negotiable because they protect you if anything goes sideways on the job.
License and Insurance
Ask to see a copy of the license and insurance certificate before the first handshake. A reputable pro will hand them over without hesitation. If they can’t, walk away – that’s a red flag louder than a storm warning.
Local Experience with Virginia Beach Weather
The salty air and occasional nor’easters aren’t just talk; they actually eat away at roofing materials faster than inland locations. Look for a contractor who’s worked on homes right here on the coast, because they’ll know the best corrosion‑resistant flashing, the right ventilation gaps, and how to seal around wind‑uplift.
In fact, a quick Google search of the company’s past projects can reveal if they’ve handled the exact type of roof you have – whether it’s asphalt shingles, metal panels, or a mixed system.
Questions to Ask Before You Sign
Don’t be shy. Here are the five questions that separate the pros from the “maybe‑later‑you‑call‑back” crowd:
How long have you been roofing in Virginia Beach?
Can you provide three recent references from homes with similar roof styles?
What warranty do you offer on materials and workmanship?
Will you handle permits and inspections for me?
How do you protect my property during the repair (e.g., tarps, clean‑up schedule)?
If the answers are vague or the contractor flips the script, that’s a cue to keep looking.
Red Flags to Watch Out For
Below are the warning signs that should make you hit the panic button:
Extremely low estimates that seem too good to be true.
Requests for full payment up front, especially via cash.
Lack of a written contract with clear scope, timeline, and payment schedule.
Reluctance to provide a written warranty or to name the manufacturer of the roofing material.
When you see any of these, politely thank them for their time and move on. Your roof—and your peace of mind—are worth the extra effort.
Getting the Right Estimate
A solid estimate breaks down labor, materials, disposal fees, and any permit costs. It should also include a line item for “weather mitigation” if the contractor plans to work during a season when rain or wind is common.
Once you have a few estimates, compare them side‑by‑side. The cheapest isn’t always the best, but a wildly higher price without clear justification should raise questions.
For a deeper dive into the selection process, check out our comprehensive guide to choosing a roofing contractor . It walks you through the exact checklist we just covered, plus a few extra tips on negotiating scope changes.
And if you’re thinking about tackling other exterior upgrades while you’re at it—maybe a new driveway or a culvert repair—there’s a handy resource that walks you through those projects step by step. Take a look at this practical guide for driveway culvert installation to see how you can coordinate multiple projects without stepping on each other's toes.
Bottom line: the right contractor will be licensed, insured, locally experienced, transparent with pricing, and willing to answer every question you throw at them. When you find that match, you’ll feel a weight lift off your shoulders, and your roof repair Virginia Beach project will move from “I’m nervous” to “We’ve got this.”
So, grab that checklist, call a few vetted pros, and start narrowing down your choices. In a few days you’ll have a contract in hand, a clear timeline, and a roof that can brave the next salty gust without a sweat.
Step 4: Understand the Cost Breakdown for Roof Repair in Virginia Beach
Okay, you’ve found a contractor you trust – now the big question is: what exactly are you paying for? Roof repair isn’t a single line‑item; it’s a handful of components that add up, and knowing each piece helps you avoid surprise invoices.
1. Labor – the hands behind the ladder
Most Virginia Beach roofers charge by the hour or by the square foot. The hourly rate typically ranges from $30 to $75 depending on experience and the difficulty of the job. A simple shingle swap might be a couple of hours, while replacing a section of flashing or repairing a sagging deck could easily double that time.
Tip: ask for a detailed labor breakdown. If the estimate lumps “labor” into one vague number, request a line‑item that shows how many hours each crew member will spend on your specific repair.
2. Materials – the stuff that actually shields your home
Materials are where costs can swing wildly. Asphalt shingles, the most common choice here, run about $70 to $120 per square (100 sq ft). If you need a more durable option—like metal panels or impact‑resistant shingles—prices can climb to $150‑$250 per square.
Don’t forget the little guys: roofing felt, underlayment, flashings, and sealants. A bundle of aluminum flashing for a vent pipe might be $15‑$30, but rust‑inhibiting primer adds another $5‑$10 per foot.
Real‑world example: the Martinez family discovered a corroded vent pipe after a nor’easter. Replacing the vent and flashing cost them $420 in materials—$250 for the vent, $120 for flashing, and $50 for sealant.
3. Disposal & Cleanup – the hidden but necessary expense
Old shingles don’t just disappear. Most contractors charge a disposal fee, usually $30‑$50 per ton, and that can add $100‑$200 to a typical repair. If you have a large area or multiple layers of roofing, expect the top end of that range.
Pro tip: ask whether the contractor recycles the old material. Some companies get a rebate from recycling centers, which can shave a few dollars off your bill.
4. Permits & Inspection Fees
Virginia Beach requires a permit for any repair that involves structural changes—think replacing a sagging deck or altering roof pitch. Permit fees are modest, often $50‑$150, but they’re mandatory and save you headaches later.
One homeowner, Carlos, tried to skip the permit to save $80, only to get a stop‑work order from the city. He ended up paying the fee plus a $200 penalty. Lesson learned: it’s cheaper to do it right the first time.
5. Warranty and Insurance – protecting your investment
Many reputable roofers include a workmanship warranty—usually 1‑5 years—at no extra cost. Some will charge a small premium for an extended warranty, often $100‑$300, which can be worthwhile if you’re planning other exterior work soon.
Make sure the contractor’s liability insurance covers any accidental damage. A clause stating “no hidden insurance charges” keeps the final number transparent.
Quick Cost‑Breakdown Checklist
Ask for labor hours and hourly rates.
Get a per‑square‑foot material quote, including any specialty items.
Confirm disposal fees and whether recycling is included.
Verify permit costs and who handles the paperwork.
Clarify warranty length and any optional extension fees.
When you line up these numbers side‑by‑side, you’ll see where the bulk of your budget goes and where you might be able to trim a few dollars without sacrificing quality.
Bottom line: a thorough cost breakdown turns “roof repair virginia beach” from a vague fear into a clear, manageable plan. Grab your notebook, ask the right questions, and you’ll walk away with a fair price and a roof that can weather the next storm with confidence.
Step 5: Prevent Future Damage with Proper Maintenance
Alright, you’ve got the repair done and the roof is back in business. But here’s the thing—if you don’t keep up with regular care, that fresh fix can turn into a fresh headache faster than a tide rolls in.
Why maintenance matters in Virginia Beach
Think about the salty air that kisses our coastline every day. Those tiny salt crystals settle on shingles, flashing, and gutters, slowly eating away at the material. Add the occasional nor’easter, and you’ve got wind‑driven rain that can pry loose a shingle you just replaced.
According to local roofing pros, homes that schedule a semi‑annual check see 30% fewer emergency repairs than those that wait for a leak to appear.
Quick‑fire maintenance checklist
Grab a notepad and run through these steps twice a year—once in spring after the storm season, and once in fall before the winter winds pick up.
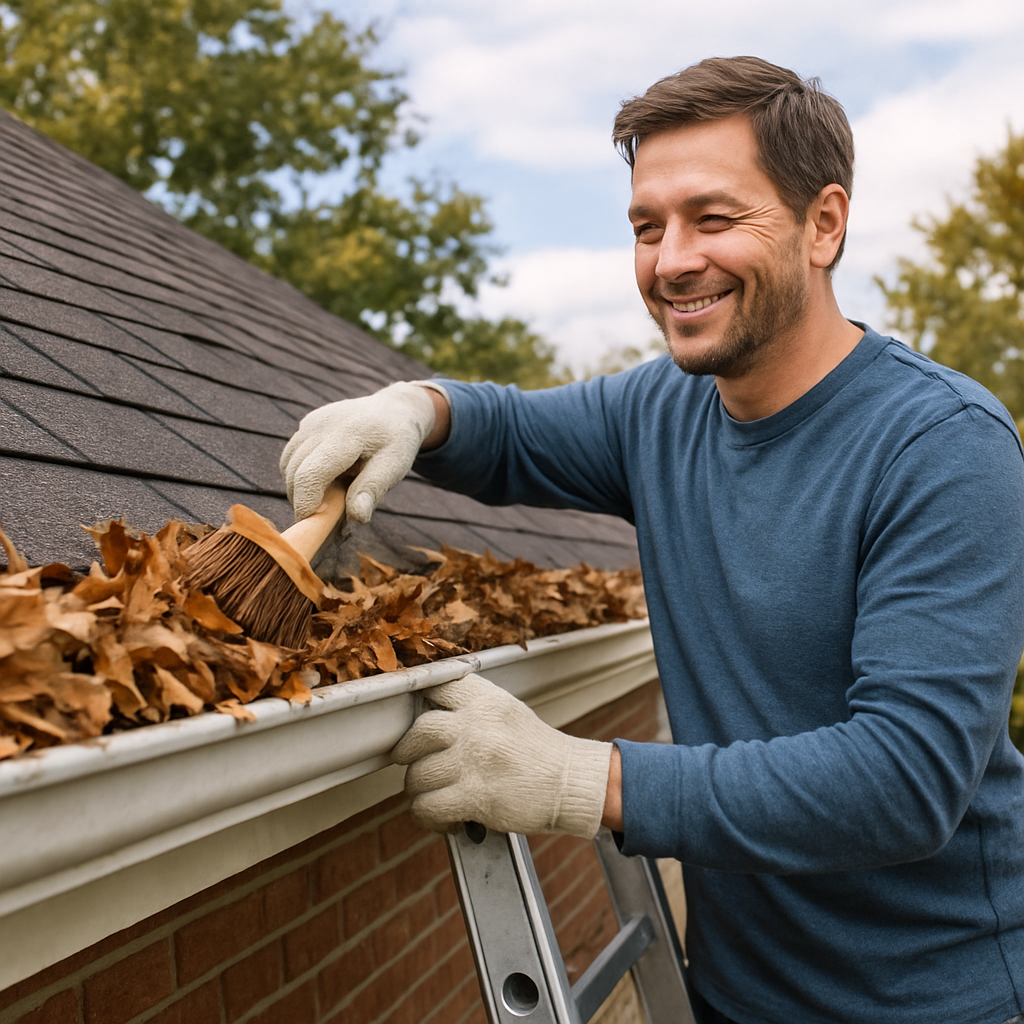
Clear the gutters.Remove leaves, twigs, and that dark granule dust that can clog flow. A blocked gutter forces water onto the roof deck, accelerating rot.
Inspect flashing.Look for rust, loose seams, or missing caulk around chimneys, vents, and skylights. A quick brush with a wire brush and a fresh bead of silicone sealant can stop a leak before it starts.
Spot‑check shingle integrity.Walk the perimeter (or use binoculars) and note any lifted or cracked shingles. Replace a single damaged piece right away; it’s cheaper than tearing out a whole section later.
Check attic ventilation.Open the attic hatch and make sure there’s a steady stream of air moving. Stagnant heat can warp the roof deck and shorten shingle life.
Watch for moss or algae.In damp spots, a thin green film can hold moisture against the roof surface. A gentle scrub with a low‑pH cleaner does the trick.
Does that sound like a lot? It’s really just five minutes of focused attention—plus a little extra time if you spot something odd.
Real‑world examples
Take the Ramirez family. After a 2022 nor’easter, they noticed water stains in their attic. Instead of waiting for a full‑blown leak, they called their roofer for a post‑repair inspection. The tech found a tiny gap where a vent pipe flashing had shifted. A quick reseal saved the Ramirezes $1,200 in water‑damage repairs later that summer.
Or consider Jeff, who lives two blocks from the ocean. He started a habit of cleaning his gutters every October. Last winter, a heavy rainstorm dumped three inches of water in just an hour, but his gutters channeled it away without overflow. Jeff avoided a costly roof deck soak that his neighbor, who skipped gutter cleaning, still deals with.
Pro tips for long‑lasting protection
•Schedule a professional inspection.Even if you’re diligent, a licensed roofer can spot hidden issues—like subtle delamination under the shingles—that the naked eye misses. Aim for a free inspection at least once every two years.
•Invest in corrosion‑resistant flashing.In a salt‑scented environment, aluminum or copper flashing outlasts standard steel. The upfront cost is a fraction of what you’d spend fixing rust later.
•Apply a roof coating.A clear, UV‑stable coating adds a protective barrier that repels water and reduces heat buildup, extending shingle life by up to 15%.
•Document everything.Snap photos after each maintenance visit and keep receipts. When it’s time for warranty work or insurance claims, that paperwork proves you’ve been a responsible homeowner.
Creating your own maintenance calendar
Grab a wall calendar or set reminders on your phone. Mark these dates:
Mid‑March: Gutter clean, flashing check, shingle walk‑around.
Mid‑May: Attic ventilation verification, moss/ algae treatment if needed.
Mid‑September: Second gutter clean, look for storm damage.
Mid‑November: Final pre‑winter inspection—focus on flashings and roof coating.
If you prefer digital tools, a simple spreadsheet with columns for “Task,” “Date,” “Notes,” and “Completed?” works wonders. The key is consistency, not perfection.
So, what’s the bottom line? A little preventive love now keeps the roof repair Virginia Beach nightmare at bay later. A few minutes each season, a quick call to a trusted roofer, and a habit of documenting what you’ve done—those are the habits that turn a roof from a ticking time bomb into a reliable shield for your home.
Ready to lock in that peace of mind? Start by setting a reminder for this weekend’s gutter sweep. Your future self will thank you.
Step 6: File Insurance Claims Correctly After Roof Damage
After the storm passes and the crew has patched the hole, the next thing most homeowners dread is dealing with the insurance company.
But you don’t have to feel lost. A clear, organized claim can shave weeks off the payout timeline and keep the repair money flowing right when you need it.
Gather Evidence While the Damage Is Fresh
First, pull out your phone and start snapping. Get wide shots of the whole roof, then zoom in on each broken shingle, cracked flashing, or sagging deck. A quick video walking the perimeter while you narrate what you see—“shingles lifted near the chimney, water pooling in the gutter”—adds context that a static photo can’t convey.
And don’t forget the interior. Open the attic, photograph any wet insulation, mold spots, or drips on the rafters. Those images become the bridge between the outside damage and the inside water intrusion your insurer will ask about.
Document Every Expense Right Away
Every receipt is gold. Whether you bought a tarp for emergency protection, paid a plumber to prevent further water damage, or even covered a night’s hotel stay because the ceiling was unsafe, write down the date, amount, and why you spent it.
Create a simple spreadsheet—column for date, item, cost, and a link to the scanned receipt. This habit not only helps you stay organized, it gives the adjuster a ready‑made audit trail.
Notify Your Insurer Promptly and Follow Their Process
Most policies require you to report the loss within 24‑48 hours. Give them a call, mention the storm date, and ask for the claim number. Then ask whether they prefer a digital portal or email for uploading photos and receipts.
But don’t just wait for the adjuster to show up. Many insurers will send a third‑party inspector, and they’ll base their estimate on what you’ve already submitted. The more you feed them early, the less you’ll need to chase later.
Work With a Roofing Pro Who Understands Claims
A reputable roofer—like the team at LGFMH Construction—can produce a detailed repair estimate that breaks down labor, materials, and permits. That line‑item list is the language insurers love because it shows you’re not asking for a “new roof” when only a few shingles need replacing.
Real‑world example: the Martinez family in Virginia Beach had a blown‑off shingle and a rusted vent pipe after a nor’easter. Their roofer gave a $1,200 estimate with itemized costs. When they submitted that to the insurer, the claim was approved in ten days instead of the usual three weeks.
Submit the Claim and Follow Up Strategically
Upload all photos, receipts, and the contractor’s estimate in one batch. In the cover note, write a brief summary: date of storm, type of damage, steps you’ve taken, and the total amount you’re requesting.
And then set a reminder to call the adjuster every three to five days. A polite “just checking on the status” often nudges the process forward without sounding pushy.
What to Do If the Adjuster Lowers Your Payout
If the adjuster offers less than your documented costs, ask for a written explanation. Compare their numbers to your spreadsheet. Often the gap comes from a missed line item—like disposal fees or a permit cost—that you can point out.
If the dispute stalls, you can request an independent third‑party inspection. Most policies allow it, and the extra report can tip the scales back in your favor.
Bottom line: the insurance claim is just another step in the roof repair journey, and it works best when you treat it like a project—plan, document, communicate, and follow up. With a solid photo log, a tidy expense sheet, and a trusted roofer by your side, you’ll turn the paperwork headache into a smooth path back to a safe, dry home.
FAQ
What’s the first thing I should do when I notice a leak after a storm in Virginia Beach?
First, grab your phone and snap a quick photo of the water spot and any obvious damage on the roof. Then, move any valuables away from the leak and place a bucket or tarp to catch drips. After you’ve contained the immediate mess, call a local roofer—like LGFMH Construction—so they can inspect the site before the next rain hits.
How can I tell if a shingle needs to be replaced or just resealed?
If a shingle is cracked, curling, or missing chunks, it’s time for a replacement—water will slip through those gaps no matter how many sealant strips you add. A shingle that’s just a little lifted or has a small crack can often be resealed with roofing cement and a fresh nail. Walk the roof (or use binoculars) and compare the damaged piece to its neighbors; matching color and texture are good clues.
Do I need a permit for roof repair in Virginia Beach, and when?
Virginia Beach requires a permit whenever you’re altering the roof’s structure—think replacing a sagging deck, changing the roof pitch, or installing new flashing that affects load‑bearing areas. Small cosmetic fixes, like swapping out a few shingles, usually don’t need one. To stay on the safe side, ask your contractor to pull the permit; they’ll handle the paperwork and you’ll avoid a nasty stop‑work order down the road.
What’s the best way to choose a roofing contractor for roof repair Virginia Beach?
Start by verifying the contractor’s local license, insurance, and a track record of work on coastal homes. Ask for three recent references and actually call them—listen for stories about how the crew handled salty air, wind uplift, and fast‑track repairs. A written, itemized estimate is a non‑negotiable checkpoint; it shows the pros understand your specific damage and won’t surprise you with hidden fees later.
How often should I schedule roof inspections to avoid costly emergency repairs?
Most Virginia Beach homeowners find a twice‑a‑year check works wonders—once in early spring after winter storms, and again in late fall before the nor’easter season. Mark those dates on your calendar, grab a ladder, and do a quick visual sweep: gutters, flashing, and any lifted shingles. If you spot something off, call a roofer within a week; catching a small issue now saves you from a roof collapse later.
Can I handle minor roof repairs myself, or should I always call a pro?
If the job is limited to swapping a single shingle or sealing a tiny crack, you can probably DIY it with a ladder, a pry bar, and some roofing cement. Safety is the deal‑breaker, though—if the roof is steep, wet, or you’re uncomfortable at height, call a licensed crew. Remember, a professional brings tools like a moisture meter and liability insurance that protect you if something goes sideways.
What documentation should I keep for insurance claims after roof repair?
Start a digital folder the day you discover damage. Save every photo and video, label them with dates and a brief note (e.g., “shingles lifted near chimney”). Keep all receipts—tarp, emergency lodging, contractor estimate, and disposal fees—in a spreadsheet that tracks date, amount, and purpose. When you file, attach the folder link and a concise cover note; the more organized you are, the smoother the adjuster’s review.
Conclusion
We've walked you through spotting trouble, deciding DIY vs pro, picking the right contractor, budgeting, maintaining, and filing insurance. If any of those steps felt overwhelming, remember you don't have to tackle them all at once.
So, what’s the next move? Grab a notebook, mark the upcoming gutter‑cleaning date, and schedule that free inspection we mentioned earlier. A quick call to LGFMH Construction can lock in a qualified crew who knows Virginia Beach’s salty air and storm patterns.
Think about the peace of mind you’ll get when you know your roof can handle the next nor’easter without a drip. That confidence is worth the few minutes you invest today.
Here’s a tiny checklist to keep you on track:
Take photos of any damage and date them.
Save receipts for materials, tarp, or temporary lodging.
Verify your contractor’s license, insurance, and local experience.
Plan a semi‑annual visual sweep—spring and fall.
File insurance paperwork promptly, using the photo log.
Stick to this routine and you’ll turn roof repair Virginia Beach from a dreaded emergency into a manageable project. Ready to protect your home? Give LGFMH Construction a call and let the pros handle the heavy lifting while you enjoy a dry, worry‑free roof right now.


Comments