Comprehensive Sheet Rock Guide for DIY and Professionals
- William McKracherne
- Feb 22
- 18 min read

Ever walked into a room and felt that the walls just… something's off, like the surface isn't quite right?
Maybe the plaster looks uneven, or you hear a hollow thump when you tap a corner. That's the moment many homeowners realize they need to rethink the whole wall system, and sheet rock is usually the hero that saves the day.
Sheet rock, also known as drywall, is the go‑to material for smooth, paint‑ready walls in almost every renovation. It’s lightweight enough for DIYers yet sturdy enough for professional installers, which is why you’ll hear it whispered in every home‑improvement conversation.
But why does sheet rock matter so much? Think about the last time you tried to hang a picture on a cracked plaster wall – the screw barely held, and the whole thing wobbled. With a proper sheet rock installation, that same wall becomes a solid canvas for shelves, art, or even a bold accent paint.
In our experience at LGFMH Construction, the biggest mistake we see is skipping the prep work. A clean, dry surface, proper taping, and the right number of screws make the difference between a wall that lasts years and one that needs constant touch‑ups.
And if you’ve ever tried to sand a rough patch yourself, you know how frustrating it can be. The good news? Sheet rock joints are designed to be sanded smooth with just a few passes of a fine‑grit block, turning rough edges into a seamless finish.
So, what should you keep in mind before you even pick up a utility knife? First, measure twice and cut once – the panels come in standard 4 × 8 ft sheets, but you’ll often need to trim them to fit windows or doors. Second, choose the right thickness: ¼ in for ceilings, ½ in for most walls, and ⅝ in when you need extra fire resistance or sound control.
Picture this: you’re renovating a kitchen and the old plaster is crumbling. Swapping it out for sheet rock not only gives you a fresh, paint‑ready surface, but it also improves insulation and reduces drafts, making the space more comfortable year‑round.
Finally, remember that a good installation isn’t just about the panels themselves. Proper taping, mudding, and sanding are the finishing touches that turn a rough project into a polished result you’ll be proud of.
Ready to see how sheet rock can transform your next project? Let’s dive deeper into the step‑by‑step process, tools you’ll need, and common pitfalls to avoid.
TL;DR
If you’re tired of cracked plaster and uneven walls, sheet rock gives you a smooth, paint‑ready surface that’s easy to install, budget‑friendly and durable. We’ll walk you through choosing the right thickness, cutting, taping, mudding and sanding for DIY homeowners so you can finish any room confidently, without costly mistakes.
Step 1: Assess Your Project Needs
Before you even grab a utility knife, take a moment to picture the finished room. Does the wall need to be perfectly smooth for a gallery‑style art piece? Or are you just trying to patch up a drafty hallway? Figuring out the end goal helps you decide how much sheet rock you actually need, and whether you’ll need fire‑rated or moisture‑resistant panels.
First, walk the space with a flashlight in hand. Look for any existing damage – water stains, loose plaster, or squeaky joints. Those little clues tell you if the substrate is sound enough to hold new sheet rock or if you’ll have to strip back to studs. In our experience, catching a hidden leak early saves you from a future headache where the drywall would just soak up the moisture and warp.
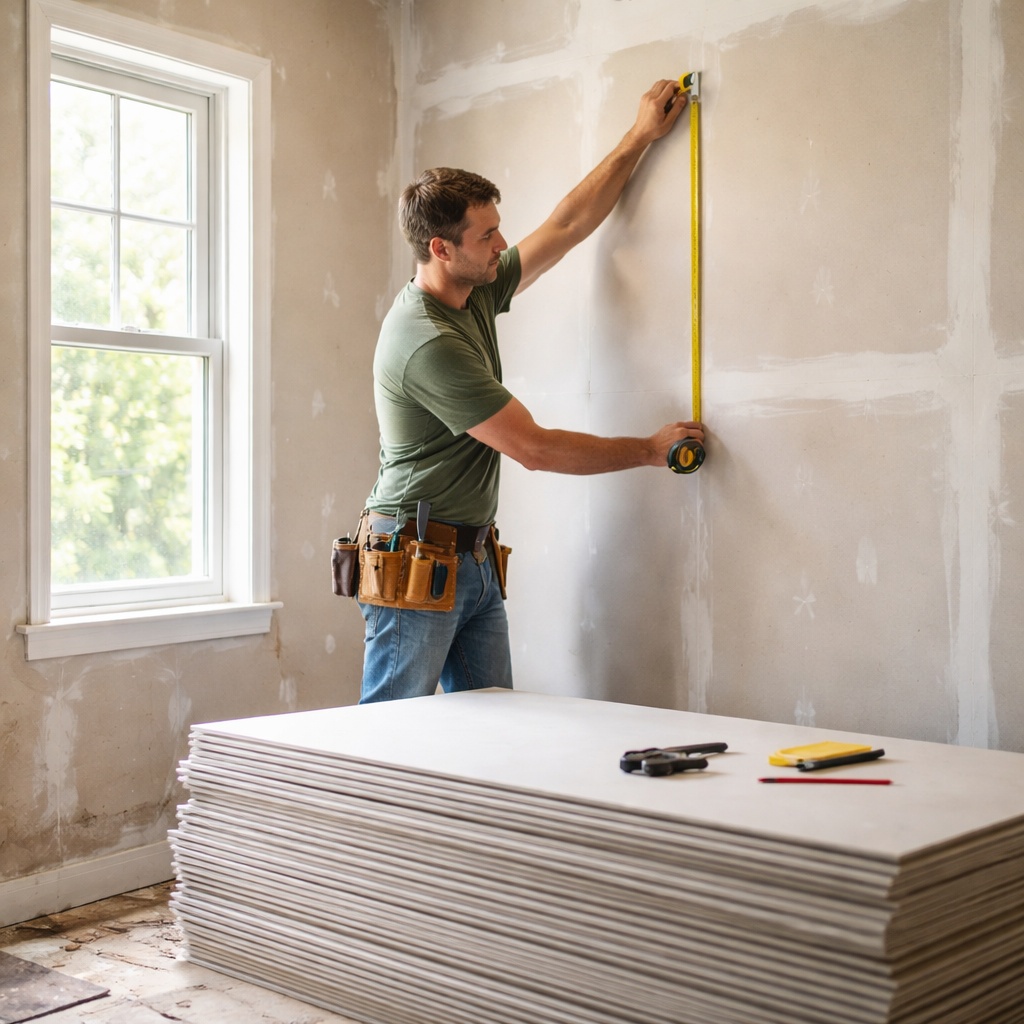
Measure twice, cut once (but also think about future changes)
Grab a tape measure and jot down the width and height of each wall section. Write the numbers down on a sketch; it feels more real than a mental note. Add a few extra inches on each edge – you’ll thank yourself when you’re cutting the sheets later. If you’re planning to add crown molding or a built‑in bookshelf, factor that in now; otherwise you’ll end up with a lot of wasted off‑cuts.
Next, decide on thickness. Most interior walls get ½‑in sheet rock; ceilings usually need ¼‑in, but if you live in a high‑humidity area or want extra sound control, ⅝‑in can be a game‑changer. A quick rule of thumb: heavier panels mean fewer seams, which means less mudding and sanding later.
Budget and timeline check
Set a realistic budget for the material, fasteners, and joint compound. A good rule is to allocate about 10 % of the total material cost for waste – you’ll always have a few stray pieces. Then, think about how long you can keep the space open. If you’re on a tight schedule, you might want to order pre‑cut panels for windows and doors; it speeds up the install but adds a little cost.
While you’re at it, consider the paperwork side of things. Some municipalities require a permit for major wall work, especially if you’re changing fire‑rated assemblies. A quick call to your local building department can clear that up before you waste a Saturday on the ladder.
Need a deeper dive into the whole process? Check out A Complete Guide to Installing Sheetrock for DIY Home Renovations – it walks you through every step from prep to finish.
Once you have your measurements, thickness, and budget sorted, it’s time to think about the little details that make a big difference. For instance, do you want a smooth finish or a slightly textured one? A smooth surface is perfect for modern paint jobs, while a subtle texture can hide minor imperfections.
Speaking of details, don’t forget the paperwork that goes behind the scenes of a remodel. Ordering custom‑printed job sheets, material checklists, and safety signage can keep the crew organized and on‑track. A reliable partner for those forms is JiffyPrintOnline, which offers affordable, ready‑to‑use templates for construction projects.
And when the walls are up, you’ll probably want to highlight them with some tasteful lighting. A professional lighting installer like LED Artistry can help you choose fixtures that accentuate the fresh sheet rock surface without blowing your budget.
To recap, the assessment phase is all about answering three questions: What is the end look you want? What are the physical constraints of the space? And how much can you realistically spend and time? Nail down these answers, and the rest of the sheet rock journey becomes a lot less intimidating.
Step 2: Choose the Right Sheet Rock Type
Let’s map this to your space. The right sheet rock type isn’t a luxury; it’s the foundation for a durable, paint-ready finish. So how do you pick without overthinking it?
Thickness basics: ceilings, walls, and fire/sound considerations
For ceilings, 1/4‑inch board is common because it’s light and easy to work with. For most walls, 1/2‑inch drywall is the workhorse that balances strength and ease of finishing. If you’re chasing extra fire resistance or sound control, a 5/8‑inch board often makes sense.
In spaces with higher moisture, like bathrooms or basements prone to humidity, you’ll often see moisture‑resistant boards or even cement boards used behind tile. These aren’t always needed for every wall, but they change how you finish and tape later, so plan ahead.
Common board types you’ll encounter
Standard gypsum board (the plain old drywall) is what most interior walls use. It’s cheap, easy to work with, and accepts mud and tape well. Type X is the fire‑rated version; it’s thicker and slows flame spread, which can help with safety codes in garages or bedrooms near mechanical rooms.
Moisture‑resistant (MR) boards are green or purple in some regions. They hold up better in bathrooms or kitchens where humidity spikes happen. Blueboard is a finish board designed for plaster finishes; it’s a bit more specialized but can give you a premium look with the right finish. Cement board, often used behind tile in showers and tub surrounds, won’t rot or warp when wet.
Special‑use boards and good finishing practices
If you’re chasing quieter walls, consider an acoustic board or adding a resilient channel before hanging drywall. This helps dampen sound between rooms without adding massive layers. For high‑wear walls (entryways, hallways), a tougher gypsum core may reduce denting and maintenance.
Weight matters, too. Heavier boards require different fasteners and sometimes a sturdier framework. Planning ahead prevents callbacks for re‑screwing and re‑taping later.
Decision framework: which board should you pick?
Ask yourself these quick questions: Is there moisture in the space? Do codes require a higher fire rating? How important is sound isolation? Will you finish with smooth paint or a textured plaster look? Budget and handling limits also matter—thicker boards cost more, but they might save time later by reducing taping and sanding.
In our experience, the biggest mistake is choosing a board without considering finishing. You might pick a great board, only to realize it needs a different mud, tape, or texture. So, what should you do next?
Take a moment to walk the room and note moisture, doors, and fixtures. Then compare board types against those notes before you buy. If you want a deeper dive into installation compatibility with these boards, here’s a thorough guide that covers the full process: A Complete Guide to Installing Sheetrock for DIY Home Renovations.
And if you’d like a quick on‑site check, LGFMH Construction can confirm the right board type for your space and help you plan the finishing steps—so you’re not guessing through weeks of work. So, what’s your room’s first move?
Step 3: Proper Cutting and Shaping Techniques
Ever stood in front of a 4×8 sheet and thought, “How am I supposed to make this fit around the window without ruining the whole wall?” That hesitation is totally normal – we’ve all been there, knife in hand, wondering if we’ll end up with a jagged edge or a perfect seam.
First thing’s first: safety. Grab a pair of safety glasses, a dust mask, and a sturdy utility knife with a fresh blade. A dull blade is the fastest way to snag the paper face and leave a ragged line you’ll regret later.
Measure twice, mark once. Use a straightedge or a carpenter’s T‑square to draw a clean line where you’ll cut. Most pros use a pencil that’s easy to see on the gypsum but won’t leave a permanent mark. If you’re working near a ceiling joist or a pipe, double‑check your measurements – a mis‑cut can mean re‑screwing the whole board.
Here’s a quick trick: score the paper side first, then snap the board along the line. You’ll hear a satisfying “pop” when the gypsum breaks cleanly. After the snap, flip the board over and cut the back side with the utility knife to clean up the edge. That extra cut gives you a smooth, square edge ready for taping.
What about those odd shapes around outlets or recessed lighting? Instead of wrestling with a giant sheet, cut a smaller “template” piece first. Lay a piece of cardboard over the opening, trace the shape, and cut the drywall to match. It’s a tiny step that saves a lot of frustration.
Now, let’s talk about trimming around windows and doors. Most interior doors are 32‑in wide, but rough openings can vary. Measure the rough opening, subtract about 1/8‑in on each side for a snug fit, then cut the board to size. A good rule of thumb: if you’re off by a millimeter, you can always sand the edge, but if you’re off by an inch, you’ll need a new piece.
Got a curved wall or a radius around a fireplace? A jigsaw with a fine‑toothed blade works wonders. Cut the drywall in a few passes, letting the blade do the work rather than forcing it. You’ll end up with a smoother curve and less chance of cracking the board.
When you’ve finished cutting, it’s time to shape the edges for a tight joint. Use a sanding block or a hand‑held rasp to knock down any high spots. The goal is a flush surface so the joint compound can sit evenly – no high points that will show through paint later.
One more pro tip: before you start hanging the cut pieces, lay them on the floor and step back. Does the layout look natural? Sometimes rotating a board 90 degrees can give you a better grain direction and fewer seams.
And if you’re ever unsure about a tricky cut, our complete sheetrock installation guide walks you through every scenario with photos and step‑by‑step instructions.
Finally, remember to clean up the dust as you go. A damp rag on the cut edge removes gypsum particles that could interfere with the joint tape later. Plus, a tidy workspace keeps you from tripping over scraps and losing focus.
So, what’s the next move? Grab that utility knife, make your first score line, and watch the board split like a charm. Once you’ve mastered cutting and shaping, the rest of the drywall process – taping, mudding, sanding – becomes a breeze.
Step 4: Hanging Sheet Rock Safely
Hanging sheet rock is where the wall finally starts to take shape. It’s also where mistakes pop up if you rush the layout or skip safety gear.
Before you touch a sheet, lay out a quick plan. Locate the studs, map the layout, and decide how many sheets you’ll actually need. You don’t want to be juggling panels mid‑room, or you’ll curse the waviness on the joint line later.
Here's what to do for solid, clean results:
Use a stud finder to mark every stud line and chalk the layout so edges align with studs.
If you’re hanging from the ceiling, lift the sheet with a helper or a drywall lift and clip it into place at the corner first.
Drive screws along the edges first, about 8 inches apart, then roughly every 12 inches in the field. Don’t over‑tighten; you’ll strip the drywall and create dimples that show when you mud.
Stagger seams between adjacent sheets to keep joints away from a single straight line, which reduces crack propagation over time.
Cut openings around outlets, switches, and soffits with a template. Score the face, snap the panel, then trim the back edge for a crisp fit.
For curved or irregular edges, keep a few scrap pieces handy to test fit before you commit a full sheet.
When dealing with large or heavy panels, recruit a helper or rent a drywall lift to prevent drops and misalignment.
For ceilings, watch for sag risk. Use a longer sheet or add temporary supports at the seam while you secure it, then double‑check plumb and level. You'll thank yourself when the first coat of mud goes on and you're not chasing tiny gaps.
Safety first: wear eye protection, a dust mask, and gloves. Gypsum dust hides in corners and high spots, so keep your work area tidy and vacuum as you go. A clean space isn’t just safer — it makes it easier to see where the next fastener belongs.
Our experience at LGFMH Construction has shown that fasteners, spacing, and clean edges are what separate quick‑and‑messy jobs from durable finishes. Take a little extra time on the hang and your mud taping will feel like a breeze instead of a fight.
Crucially, always verify that each sheet lies flat and flush with the adjacent panels. If a sheet sits high at a joint, re‑seat it with a couple more screws near the seam and ensure there’s no gap behind the tape. Small adjustments now prevent bigger problems later.
Ready to dive deeper into finishing after hanging? Our comprehensive guide walks you through taping, mudding, and sanding with practical, real‑world tips. A Complete Guide to Installing Sheetrock for DIY Home Renovations.
So, what should you do next? Grab the first sheet with a partner, line it up, and start secure. If you’re unsure, slow down and double‑check your layout—a short pause now saves a lot of sanding later. You’ve got this, and the finished wall will be worth the extra care.
Step 5: Taping, Mudding, and Finishing
You’ve hung the last sheet and checked it twice. Now comes the part that makes a room look finished—taping, mudding, and sanding. It might feel tedious, but this is where the wall goes from rough to ready.
In our experience at LGFMH Construction, the taping and mud work is what makes a durable finish stick. The goal isn’t a perfect seam in a hurry; it’s a seamless joint you can paint over without noticing where two sheets meet.
Taping: paper vs mesh
Paper joint tape is the workhorse for most rooms. It’s cheap, it doesn’t shrink, and it embeds cleanly into a thin bed of mud. Fiberglass mesh tape is handy for quick repairs or awkward angles, but it often needs a setting-type mud or an extra pass to avoid fish‑eye or bubbles.
When you’re finishing a high-traffic wall, starting with paper tape and using multiple thin coats usually yields the cleanest result. If you’re patching a corner or repairing a damaged seam, mesh can save time—just plan for an extra coat to smooth the weave.
Mudding options
All‑purpose joint compound is the go‑to for most coats. It’s forgiving, sands well, and accepts paint smoothly. For faster work in damp spaces or if you want a quicker second coat, setting‑type mud cures hard and minimizes shrinkage, though it costs a bit more and requires mixing correctly.
Lightweight mud is great for the final coats because it sands easily and helps feather edges. Use it for the last pass so you don’t fight heavy patches after you’ve already sanded. The trick is to apply very thin layers and let each one dry fully before the next pass.
Embedding tape and first coat tips
Start by laying a thin bed of mud along the seam, then press the tape into it with a steady hand. Use just enough mud to cover the tape and avoid squeeze‑out. Run a flat 6– to 12‑inch knife along the seam to embed the tape and smooth the surface.
After that, apply a light first coat over the joints, using long, even strokes. Don’t gob it on; you’re building a feathered edge that disappears when painted. Let it dry completely before you sand.
Second coat, feathering, and third coat
The second coat should be wider than the first, 8–12 inches, to start feathering the edge. This is where you blend the seam into the surrounding drywall. A third, even lighter coat seals the finish. If you see ridges, you’ve gone too thick—sand lightly and re‑coat as needed.
Sanding, priming, and final prep
Sand with a light touch, using a sanding block and 120– to 150‑grit paper. A damp sponge can knock down fine dust between coats. Wipe the wall clean, then prime before you paint. A good primer helps seal the mud and reveals any remaining low spots.
Item | Option/Tool | Notes |
Tape | Paper joint tape | Best long-term adhesion; embed in a thin mud bed. |
Tape | Fiberglass mesh tape | Quick repairs; may need extra coats to smooth weave. |
Mud | All-purpose joint compound | Workhorse for first and intermediate coats; sands well. |
Mud | Setting-type joint compound | Cures faster; reduces shrinkage—great in humid spaces. |
For a deeper dive into the full process, check out A Complete Guide to Installing Sheetrock for DIY Home Renovations.
So, what should you do next? Grab the tools, take your time, and keep thin layers coming. You’ve got this—each deliberate pass makes the final paint job easier and more durable.
Step 6: Sanding, Texturing, and Painting
Okay, mud is dry and the room suddenly feels closer to done. Sanding, texturing, and painting are where the finish line starts to show. This is the moment you see the wall become a real surface you’ll live with for years.
First up, sanding smart. Use a sanding block or pole sander with 120–150 grit paper. Light, even passes. You’re chasing a smooth plane, not a shiny mirror. If you see ridges, don’t dig in—feather them out with several gentle passes. Between coats, wipe with a damp sponge to catch dust and keep the surface ready for the next layer. A quick vacuum around the edges after sanding helps keep the workspace sane and the dust from settling back onto the mud.
Consistency matters. Don’t rush to paint right after the last sanding. A clean, dry surface takes paint better and reduces the chance of peeling. Think of it like prepping a canvas: the better you prep, the better the painting will look. If you skip this, you’ll see tiny flaws pop up in bright light and you’ll end up chasing them for hours.
Texturing choices. You can go smooth, but most homes benefit from a controlled texture that hides minor flaws. Light orange-peel is a popular, forgiving option. A soft knockdown after spraying a fine texture can give you a subtle, modern look. If you’re aiming for a smoother feel, skip texture and go straight to a fine skim coat, then a meticulous final sand. Use a texture sprayer or a wide-knive technique to control depth—practice on scrap first. Remember, texture isn’t a fixture; it can be adjusted room by room to balance light and shadow.
Tips for different rooms. Bathrooms and basements sometimes benefit from a slightly heavier texture to conceal moisture variability. In living spaces with bright light, a uniform texture helps prevent glare and tiny surface imperfections from catching your eye. The texture choice shapes how you sand and how many coats of mud you’ll apply. If a room has mixed lighting, texture can actually mask slight irregularities that jump out in certain angles.
Paining prep basics. Before you paint, wipe again with a tack cloth and make sure there’s no residual dust. Prime properly—thin coats of a quality primer seal the mud, reduce suction, and reveal any last low spots. If you’re dealing with a bright color or a challenging stain, consider tinted primer for better coverage and fewer coats. Use a quality roller and a sharp brush for clean edges along tape lines to keep things crisp.
Coats, drying times, and technique. Plan for multiple thin coats rather than one thick one. Each coat should dry fully before the next—this minimizes cracking and ensures a durable finish. If you’re layering on a darker shade, step back and assess whether you need a second primer coat or an extra seal before the final paint.
Safety and environment. Work in a ventilated space, wear a mask, and take breaks. Dust from sanding lingers; a little patience goes a long way toward a dust-free finish. In our experience at LGFMH Construction, taking the time to clean as you go saves you hours of sanding later and yields a sturdier, paint-ready surface.
Want a deeper dive? For a detailed, photo-guided process, check out our thorough guide that walks you through every step of sheetrock finishing: A Complete Guide to Installing Sheetrock for DIY Home Renovations.
So, what should you do next? Start with a plan: pick your texture style, gather the right grit, and commit to thin, even coats. You’ll be amazed how small, patient passes turn rough patches into a smooth, paint-ready surface you’ll be proud of.
FAQ
What is sheet rock and how does it differ from traditional plaster?
Sheet rock, also called drywall, is a gypsum core sandwiched between two paper faces that comes in large 4 × 8‑foot panels. Traditional plaster is a wet mixture of lime or gypsum that you apply in multiple coats over lath. Because sheet rock arrives pre‑formed, you skip the messy mixing and labor‑intensive skim coats. The result is a faster, flatter surface that's easier to sand, tape, and finish.
How thick should sheet rock be for interior walls versus ceilings?
For most interior walls a ½‑inch panel is the sweet spot – it’s sturdy enough to hold screws without sagging and thin enough to cut easily. Ceiling applications often benefit from a 5/8‑inch board because the extra thickness reduces flex on joists and helps prevent cracks in high‑traffic rooms. If you have unusually long spans or want extra sound control, stepping up to 5/8‑inch on walls isn’t a bad idea.
Do I need a vapor barrier when installing sheet rock in a bathroom?
In a bathroom the key is moisture management, not a full‑blown vapor barrier behind every sheet. A moisture‑resistant “green” board works well for the walls, and installing a thin polyethylene sheet (¼‑inch) on the studs behind the drywall adds an extra line of defense. Make sure the barrier is sealed around fixtures, and always pair it with proper ventilation to keep humidity in check.
What are the common mistakes beginners make when taping and mudding sheet rock?
One big slip is applying too much mud on the first coat – it looks solid, but it shrinks and cracks as it dries. Beginners also forget to feather the edges, leaving a visible ridge that shows up under paint. Skipping the light sanding between coats or using the wrong tape (mesh on a flat wall) are other culprits. Take your time, use a 6‑inch knife for the embed, then step up to a wider blade for the finish.
How can I tell if my sheet rock is ready for paint?
Run your hand over the surface; it should feel uniformly smooth without any raised ridges or soft spots. Look at the wall under bright light – any dark lines indicate leftover mud that needs a quick sand. Also check the corners; the tape should be invisible, and screw dimples must be filled flush. If you can see a consistent matte sheen after a light coat of primer, you’re good to go.
Can I install sheet rock myself, or should I hire professionals like LGFMH Construction?
You can definitely tackle the basics – measuring, cutting, and hanging the panels are fairly straightforward with a helper and a few tools. The tricky part comes with taping, mudding, and sanding to a paint‑ready finish; that’s where experience saves hours and prevents costly touch‑ups. If you’re on a tight schedule or want a flawless result, bringing in a crew that specializes in interior repairs can be a smart investment.
What maintenance does sheet rock require after it’s painted?
Once the paint has cured, the wall mostly takes care of itself. Keep an eye on high‑traffic zones – a small dent or nail hole can be patched with a thin skim of joint compound and a quick sand. In humid areas, watch for any bubbling paint, which can signal moisture getting behind the drywall. A yearly light cleaning with a soft cloth will keep dust from building up in the seams.
Conclusion
After walking through everything from sizing your project to sanding the final coat, the picture is clear: sheet rock can turn a tired room into a smooth, paint‑ready canvas without breaking the bank.
Remember the basics – measure twice, pick the right thickness, cut cleanly, and give each mud coat the time it needs to dry. Those small habits save hours of rework and keep cracks at bay.
And if you ever hit a snag – a stubborn seam, a tight corner, or just a lack of time – you don’t have to go it alone. Teams like LGFMH Construction specialize in the whole finish, from hanging to the final paint, so you can focus on living in the space instead of wrestling with drywall.
So, what’s the next step? Grab your tape measure, sketch a quick layout, and order a couple of extra sheets for that inevitable waste factor. A little prep now means a flawless wall later.
In short, sheet rock isn’t magic, but with the right approach it feels that way. Your home will thank you with quieter rooms, better insulation, and walls that actually look professional.
Take a moment now to jot down the three things you’ll check before you start – board type, screw spacing, and mud drying time. Those checkpoints become your safety net and keep the project on track.


Comments