Essential Guide to Deck Replacements: Planning, Materials, and Installation
- William McKracherne
- Jan 16
- 20 min read

Ever stood on a deck that's more splinter than sanctuary and thought, 'I need a fresh start?' You're not alone. Deck replacements feel like a big decision, especially when that porch has seen everything from backyard BBQs to late‑night dog runs.
We get it—your deck is where family gathers, kids learn to ride bikes, and you sip morning coffee while watching the sunrise. When the boards start rotting or the joists wobble, the whole vibe shifts from cozy to stressful.
So why bother with a full replacement instead of patching? A single repair might hold for a season, but over time the hidden damage spreads, leading to uneven surfaces, water leaks, and costly fixes down the road.
In our experience at LGFMH Construction, the moment we see consistent rot or warped lumber, we recommend a complete deck replacement. It’s like swapping out a worn‑out sofa—you get comfort, safety, and a look that lasts years.
A fresh deck isn’t just about aesthetics; it’s an investment in your home’s value. Real estate surveys show that a well‑maintained outdoor space can add up to 5 % to a property’s resale price, especially in neighborhoods where outdoor living is a lifestyle.
But the process doesn’t have to be overwhelming. First, assess the scope: is the framing compromised? Are the fasteners corroded? A quick visual check can answer most of those questions before you call a pro.
Next, think about materials. Pressure‑treated lumber, composite decking, and tropical hardwood each have pros and cons. Pressure‑treated is budget‑friendly, composite resists staining, and hardwood offers timeless charm—but all require proper installation to avoid future headaches.
Finally, plan for the future. Choose a deck design that accommodates your lifestyle—maybe a built‑in bench for lazy Sundays or a pergola for shade. Adding proper drainage and a high‑quality sealant now can save you countless repairs later.
Ready to turn that tired platform into a backyard retreat? Let’s walk through the steps, weigh the options, and set a realistic budget so you can enjoy a deck that’s built to last.
TL;DR
Deck replacements turn a tired, unsafe porch into a durable, stylish outdoor living space that boosts home value and lets you enjoy worry‑free gatherings. We’ll walk you through assessing damage, picking the right material, budgeting, and hiring trusted pros so the project stays on track and lasts for many comfortable years.
Step 1: Assess Your Existing Deck Condition
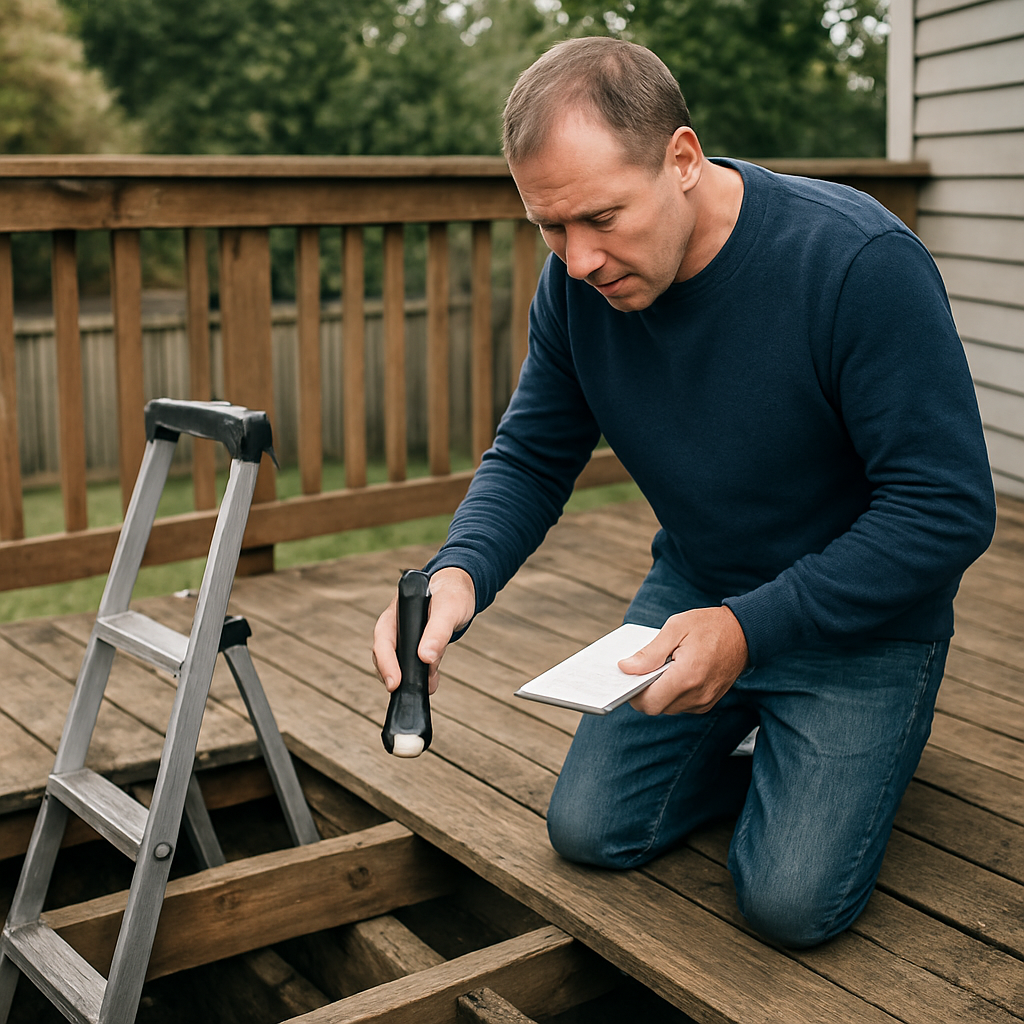
Before you even think about tearing out the old boards, you need to know exactly what you’re dealing with. A quick visual sweep can save you weeks of unnecessary demolition.
Grab a sturdy flashlight, a ladder, and a notepad. We’re going to treat this like a health check‑up for your deck – except the stethoscope is a hammer and the vitals are rot, warping, and loose fasteners.
Look for Surface Damage
Start on the top layer. Are there any splintered or soft spots that give under your weight? Check for discoloration, mold, or mildew – those are the tell‑tale signs of moisture getting into the wood.
If you spot a board that feels spongy, mark it. Even a single rotten plank can compromise the whole structure over time.
Check the Structure
Next, move to the joists and support beams. Use a screwdriver or a small pry bar to wiggle each joist. Any movement? That usually means the fasteners have loosened or the wood has split.
Remember, the deck’s skeleton should feel solid, not like a shaky table. When you hear creaking or notice sagging, write it down – that’s a red flag for potential structural failure.
Does the deck feel level? A deck that’s tilted more than a quarter inch over a four‑foot span could be suffering from foundation settlement.
Inspect Fasteners & Connections
Look at the nails, screws, and joist hangers. Are they rusted, bent, or missing? Corroded metal is a silent killer; it expands and forces the surrounding wood apart.
Pull out a few fasteners to see if the wood is holding firm. If the wood crumbles around the screw, that piece is beyond repair.
Quick tip: stainless steel or coated hardware can prolong the life of a replacement deck, especially in humid climates.
Take Notes & Photos
Document everything. Snap a photo of each problem area and jot down the exact location – “north side, 2‑ft from railing,” for example. This will make your quote request crystal clear and help contractors give you an accurate estimate.
Having a visual record also protects you from surprise costs later on. You’ll be able to point to the exact board that needs replacement, not just say “the deck looks bad.”
So, what does all this information give you? A clear picture of whether you’re looking at a few spot repairs or a full‑scale deck replacement.
Want a professional’s quick reference? The NYDOT deck evaluation guidelines break down the same steps with illustrated examples – handy if you’re a visual learner.
Once you’ve compiled your list, you’ll be ready to move onto the next phase: choosing the right material and figuring out the budget.
Here’s a short video that walks you through a typical deck inspection. It shows the tools you need and the exact spots to check.
Take a moment after the video to compare what you see on your own deck. Does the inspector spot the same issues you noted?
Armed with your checklist and photos, you can now approach a contractor with confidence. They'll know exactly which boards are compromised, which joists need reinforcement, and whether a simple repair will suffice or a full deck replacement is the smarter move.
And remember, catching rot early can save you thousands in replacement costs down the line. It’s better to spend a few hours now than to deal with a collapsing deck later.
Ready to move forward? The next step is all about picking the right material for your lifestyle and budget.
Step 2: Choose the Right Replacement Materials
Now that you’ve got a solid picture of what’s wrong with your current deck, it’s time to think about what you actually want under your feet.
Do you picture a low‑maintenance surface you can walk on barefoot in the summer, or are you a wood‑lover who enjoys the smell of fresh‑cut cedar every time you step outside? Your answer will steer every material decision.
Match the material to your lifestyle
If you entertain a lot—think grill parties, kids’ birthday bashes, or a dog that loves to chase a ball—you’ll want something that resists splintering, fading, and moisture. Composite decking and PVC boards shine in that arena because they don’t swell or rot when rain hits the joists.
On the other hand, if you cherish the classic look of natural wood and don’t mind a yearly sanding and sealing routine, premium hardwoods like ipe or cedar can give you that timeless feel.
And what about climate? In humid zones, a material that tolerates constant moisture will save you headaches. In hotter regions, lighter‑colored boards stay cooler under the sun.
Quick rundown of the most common options
Pressure‑treated pine– the budget‑friendly workhorse. It’s chemically treated to slow rot, but over time it will still warp, crack, and need regular staining. If you’re watching every dollar, it’s a decent starter, but plan for future upkeep.
Traditional softwoods and hardwoods– cedar, redwood, ipe, mahogany. They give you that authentic wood grain, but expect a maintenance schedule every 1–3 years: sanding, staining, sealing. Hardwood holds up longer than softwood, yet both will eventually need a refresh.
Composite decking– a blend of wood fibers and recycled plastic. The boards look like wood, feel smoother, and most manufacturers wrap a full cap around every edge, keeping moisture out. The upfront cost is higher than pressure‑treated pine, but you’ll save on sealants and sandpaper down the road. TimberTech’s deck material guide breaks down the pros and cons in detail.
PVC decking– 100 % polymer, no wood core. It’s the toughest on the market, virtually maintenance‑free, and stays cooler than most composites. It’s a solid pick for decks near pools or in rainy climates. The trade‑off is a higher price tag, though it can rival premium hardwoods like ipe.
How to balance budget and performance
Start by setting a realistic per‑square‑foot budget. Then line up the materials that fall within that range. For many homeowners, a mid‑tier composite offers the sweet spot: looks close to wood, low upkeep, and a warranty that lasts 20‑25 years.
Don’t forget hidden costs. Fasteners, hidden joist reinforcement, and a quality sealant (if you choose wood) can add up. A quick spreadsheet that lists material cost, estimated maintenance per year, and lifespan will reveal the true “price‑per‑year.”
One tip we’ve seen work: combine a wood border with a composite interior. You get the visual appeal of wood where it matters most—along the railing—and the durability of composite where foot traffic is heaviest.
Make your final decision
Ask yourself three questions before you sign off on a material:
Do I want to spend time maintaining this deck, or would I rather pay more now for less work later?
How does this material hold up in my local weather patterns?
Will this choice add value to my home if I sell in a few years?
Write down the answers, match them with the material chart above, and you’ll have a clear direction.
If you still feel stuck, reaching out to a local pro—like LGFMH Construction—can give you a personalized recommendation based on your exact deck size and usage patterns.
If you prefer a quick visual overview, check out this YouTube video on deck material options .
Step 3: Budget Planning and Cost Estimates
Start with a master spreadsheet
Grab a blank spreadsheet and list every line item you can think of – from the decking boards themselves to the tiny stainless‑steel screws that hold them together. Put columns for material cost, labor, permits, and a "maintenance per year" estimate. It looks nerdy at first, but once the numbers line up you’ll see the real price‑per‑year of your deck replacement.
Tip: color‑code the rows. Green for items you’re comfortable handling yourself, orange for things you’ll probably hire out, and red for hidden costs you might have missed.
Break down the major cost buckets
Materials.This is where the deck’s personality is born – composite, hardwood, pressure‑treated pine, or even a mix of wood border and composite interior. Pull the per‑square‑foot price from the supplier quote and multiply by your total deck area.
Fasteners & accessories.The cheap stuff can add up fast. Galvanized screws, hidden joist hangers, and specialty railing components (like cable deck railing) often get overlooked until the contractor walks in with a surprise invoice.
Labor.If you’re DIY‑savvy, subtract the hours you’ll spend and apply your own hourly rate. If not, research local labor rates – they usually range from $30 to $50 per linear foot for deck work, but complex designs (stairs, multi‑level decks) can push that higher.
Permits & inspections.Most municipalities require a building permit for a deck over a certain size. Call your city’s building department, note the fee, and add a small buffer for possible plan revisions.
Don’t forget the railing
Railing isn’t just a safety requirement; it’s a design statement. Cable deck railing, for example, looks sleek and keeps your view unobstructed, but the cost varies by frame material and cable type. The cable deck railing cost guide breaks down aluminum frames at $50‑$80 per linear foot and stainless‑steel cable at $1‑$3 per foot, so you can plug those numbers straight into your spreadsheet.
Remember to factor in the extra labor for tensioning the cables – professionals usually charge $30‑$50 per linear foot for installation, which can be a sizable chunk if you have a long perimeter.
Account for long‑term upkeep
Even the most low‑maintenance composite deck will need an occasional deep clean, and wood will demand sealing every few years. Estimate the annual maintenance cost (often 1‑2 % of the initial material cost) and add it to your "price‑per‑year" column. Over a 20‑year lifespan that extra $200 a year becomes a $4,000 consideration.
And here’s a little mental shortcut: take the total cost, divide by the expected lifespan, then add your yearly upkeep. If the result feels higher than you’d comfortably spend each year on a home improvement, you might need to scale back on premium finishes.
Build in a contingency
No budget survives a surprise. Set aside 10‑15 % of the total projected cost for unexpected items – maybe hidden rot you didn’t see in the inspection, or a change in code that adds a new stair tread. It feels like a safety net, and it keeps the project from stalling when the unknown pops up.
When the numbers finally settle, you’ll have a clear, realistic budget that matches both your design dreams and your wallet’s reality.
Actionable checklist
Measure your deck’s square footage and perimeter.
Gather material quotes (deck boards, railing, fasteners).
Research local labor rates and permit fees.
Enter everything into a spreadsheet with columns for cost, lifespan, and annual maintenance.
Add a 10‑15 % contingency row.
Review the "price‑per‑year" figure – does it fit your budget?
Once you’ve ticked these boxes, you’ll walk into the next step – hiring the right crew – with confidence that the numbers won’t surprise you later.
Step 4: Hire Contractors vs DIY – Pros and Cons
Okay, you’ve scoped the damage, picked a material, and crunched the numbers. Now the big question: do you roll up your sleeves and do it yourself, or bring in a pro? Both routes can get the job done, but they each come with their own set of trade‑offs. Let’s walk through the real‑world pros and cons so you can decide what feels right for your deck replacements project.
Why DIY can feel amazing
First off, there’s a certain thrill in watching a brand‑new deck emerge from a pile of boards you hauled yourself. You save on labor – that’s usually 30‑50 % of the total cost – and you gain a hands‑on understanding of how the structure works. If you’ve already tackled a fence or a patio, the learning curve isn’t as steep.
Imagine a weekend in late summer when the kids are home from school. You cut the joists, fasten the rails, and by Sunday night the whole family is already testing the new surface with a backyard game of frisbee. That sense of ownership is priceless.
DIY pitfalls you can’t ignore
But the flip side is safety and code compliance. A mis‑drilled joist hanger or an uneven footings can turn a beautiful deck into a liability fast. In Virginia Beach, local building codes require a permit for decks over 200 sq ft and specific spacing for fasteners. If you miss a step, you might have to redo work or even face fines.
And let’s be honest: most homeowners underestimate the time commitment. A 400‑sq‑ft composite deck can easily eat 3‑4 full weekends, especially when weather throws a curveball. That’s time you could be spending with family, not wrestling with a power drill.
When hiring a contractor makes sense
Professional crews bring expertise, insurance, and a guaranteed timeline. In our experience at LGFMH Construction, a licensed contractor can finish a standard‑size deck in 7‑10 days, whereas a DIY effort might stretch to three weeks. They also know the local permitting process and can pull the paperwork for you.
Real‑world example: a homeowner in Chesapeake wanted a multi‑level deck with built‑in lighting. The DIY route would have required electrical permits, specialized tools, and a steep learning curve. By hiring a pro, the project stayed on schedule, and the homeowner avoided costly re‑work when the electrician flagged a code issue.
Cons of going pro
The obvious downside is cost. Labor rates in the Hampton Roads area hover around $45‑$60 per hour, and a full deck replacement can easily push the total bill past $15,000 for premium materials. That’s a big chunk of a homeowner’s renovation budget.
There’s also a loss of control. You’ll be relying on someone else’s timeline and communication style. Some clients feel a little uneasy handing over their backyard vision to a third party – especially if they’ve never managed a construction crew before.
Actionable decision‑making checklist
Factor | DIY | Hire Contractor |
Cost | Save 30‑50 % on labor; material‑only budget | Higher upfront cost; includes permits, insurance |
Time | 3‑4 weekends + weather delays | 7‑10 days, crew manages schedule |
Skill/Code | Self‑learned; risk of non‑compliance | Licensed pros, code‑approved work |
Use this quick matrix to score your own situation. Give each factor a rating from 1 (low) to 5 (high) and add them up. If the DIY total beats the contractor total, you might be ready to go solo. If not, budgeting for a professional team is the safer bet.
Tips from the field
1.Get three quotes.Even if you think you’ll do it yourself, seeing professional numbers helps you gauge realistic labor costs.
2.Check references.A contractor with a solid portfolio of deck replacements will have fewer surprise issues.
3.Set a clear scope.Write down exactly what you want – railing style, lighting, stair dimensions – and stick to it. Scope creep is the #1 budget killer.
4.Consider a hybrid approach.Do the demolition and demolition cleanup yourself, then hire a crew for the precise framing and finish work. You get cost savings without sacrificing quality.
5.Don’t forget insurance.If you DIY, make sure your homeowner’s policy covers accidental damage. Contractors usually carry their own liability insurance, which protects you from third‑party claims.
Bottom line: there’s no one‑size‑fits‑all answer. We’ve seen families thrive on DIY decks, and we’ve also watched homeowners avoid costly re‑work by hiring a seasoned crew. We recommend you weigh the pros and cons, run the checklist, and then trust your gut.
For a deeper dive into the whole deck replacement journey – from design to maintenance – check out our Comprehensive Guide to Building and Maintaining Decks . And if you’re curious about turning that unused garage space into a cozy loft while you’re at it, take a look at this Creative Garage Apartment Ideas for Every Budget – it’s a neat side project that many deck owners end up loving.
Step 5: Installation Process and Timeline
Alright, you’ve nailed down the budget and chosen the material, so now it’s time to watch the deck come together. The installation phase is where the vision turns into a place you’ll actually sit on, and a realistic timeline can keep the stress down.
1. Clear the area and set up a safe work zone
First thing’s first: remove any furniture, planters, or leftover wood from the old deck. You’ll want a clean, level surface for the new footings. Lay down a few heavy‑duty tarps to protect your lawn, and mark the perimeter with spray paint so the crew knows where the new deck ends.
Tip: double‑check local code for setbacks – most cities require a few inches of clearance from property lines.
2. Install footings and ledger board
Concrete footings are poured first, usually in 12‑inch diameter holes drilled 36‑inches deep (or deeper if your soil is sandy). Once the concrete cures, attach the ledger board to your house using pressure‑treated lag bolts and a flashing tape to keep water out.
We’ve seen homeowners save a day or two by using pre‑cast footings that the crew can drop in with a small crane. The MDTA’s Bay Bridge deck replacement project used a similar pre‑cast approach to keep traffic disruptions low, and the same principle works in a backyard.
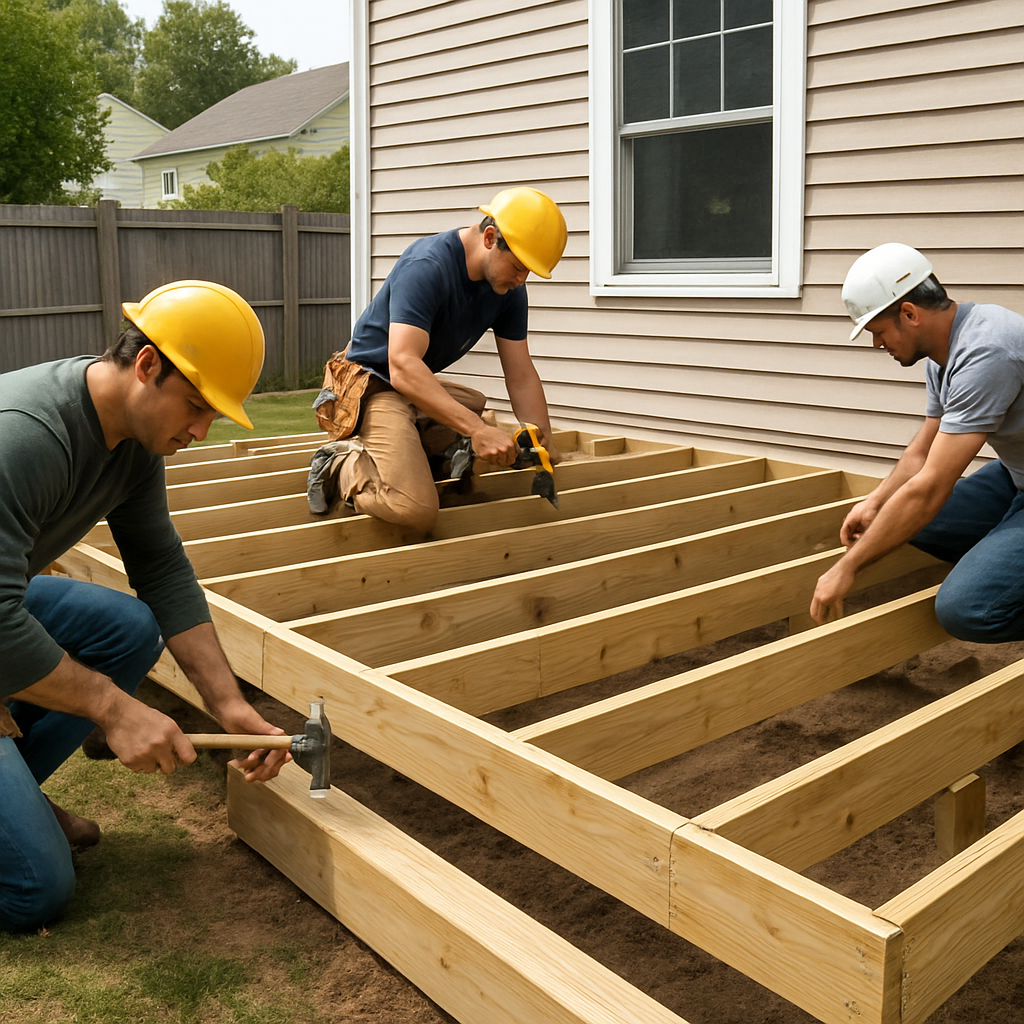
3. Frame the substructure
Now the joists go in. Most residential decks follow a 16‑inch on‑center spacing, but if you’re using a wider board you might bump that to 24 inches. Install blocking between joists every 4‑6 feet to stiffen the frame.
Quick check: run a level along each joist and make sure there’s no sag. If you spot a dip, add a shim and re‑secure the fastener before moving on.
4. Lay the decking boards
Whether you’re using composite, PVC, or a hardwood, the board‑laying method is similar. Start at the house and work outward, leaving a ¼‑inch gap for expansion. Hidden‑fastener systems like TimberTech’s Cortex® top‑down clips let you snap boards together without visible screws, which speeds up the job and gives a cleaner look.
For a deeper dive on hidden‑fastener installation, check out TimberTech’s deck replacement guide . It walks you through the exact sequence of laying, fastening, and trimming the edges.
5. Add railings, stairs, and final touches
Railings are usually the last piece because they need a solid, finished deck to attach to. Follow the manufacturer’s recommended post spacing (often 4 inches on center) and use stainless‑steel fasteners for corrosion resistance.
Stairs are built as a separate framing module – think of them as a mini‑deck that meets the ground at a comfortable rise/run ratio (7‑inch rise, 11‑inch run works for most adults).
Give everything a final sweep, apply a protective sealant if you’re using wood, and walk the deck with a flashlight to spot any loose screws.
Timeline snapshot
Day 1‑2: Demolition, site clearing, and layout marking.
Day 3‑5: Footings poured, ledger installed, concrete cure.
Day 6‑9: Joist and blocking installation, level checks.
Day 10‑13: Deck board installation using hidden‑fastener system.
Day 14‑16: Railings, stairs, and final clean‑up.
In practice, a 400‑sq‑ft deck with composite boards often wraps up in about two weeks if the crew is full‑time and the weather cooperates. Bad rain or a delayed permit can push the schedule out by a few days, so always add a buffer.
And that’s it – you’ve walked through the whole installation process, from digging footings to polishing the final railing. If you keep the checklist handy and stick to the timeline, you’ll avoid the “why is my deck not finished yet?” panic that many DIYers hit.
Step 6: Post‑Replacement Maintenance Tips
Why maintenance matters
Congrats, you’ve got a brand‑new deck after a full deck replacement. But the job isn’t over – a deck that’s cared for will stay safe and beautiful for decades, while a neglected one can start sagging, warping, or attracting mold within a season.
Think about the last time you skipped a car oil change. It still runs, but you’re betting on luck. Your deck deserves the same respect.
Monthly quick‑check checklist
Set a reminder on your phone for the first Saturday of every month. Grab a flashlight, a soft brush, and a notepad. Walk the surface and ask yourself:
Do any boards feel spongy or loose?
Are screws or hidden fasteners sticking out?
Is there debris or leaf buildup in the joist pockets?
If you spot a problem, tighten the fastener or replace the board before water seeps in. It only takes a few minutes, and you’ll avoid a costly repair later.
Seasonal deep‑care routine
Spring and fall are the best times for a deeper clean. Sweep away pollen, twigs, and any lingering construction dust. Then give the deck a gentle scrub with a mix of warm water and a mild deck‑safe soap.
After it dries, apply a protective sealant if you chose a wood product. For composite or PVC decks, a clear “re‑coat” isn’t necessary, but a quick rinse will keep the surface looking fresh.
TimberTech’s maintenance guide offers a step‑by‑step rundown of the right cleaning tools and sealant intervals, which works well for most modern decking materials TimberTech maintenance guide .
Protecting fasteners and hardware
Fasteners are the silent heroes of any deck. Stainless‑steel or coated screws resist rust, but they can still loosen over time. When you’re doing your monthly walk‑through, give each screw a gentle twist with a screwdriver – you’ll feel if it’s snug or if it’s starting to back‑out.
If you notice corrosion on any hardware, replace it right away. It’s a cheap swap that saves you from a board that might split later.
Cleaning tricks that actually work
Ever tried a pressure washer on a composite deck? Too much pressure can damage the cap. Instead, use a hose with a spray nozzle set to medium pressure, and let the water do the work while you sweep with a soft bristle brush.
For stubborn stains – think BBQ grease or pet urine – a solution of one part white vinegar to three parts water works wonders. Apply, let it sit for five minutes, then rinse.
When to call the pros
If you spot a board that’s rotting through to the joist, or if the deck has settled more than a quarter inch over a four‑foot span, that’s a red flag that goes beyond DIY fixes. In our experience at LGFMH Construction, catching those issues early and having a pro reinforce the substructure saves homeowners from a full‑deck redo down the road.
Also, if you’re planning to add heavy planters, a hot tub, or a pergola, it’s worth getting a quick structural assessment. The extra load can change the fastener schedule and may require additional joist blocking.
Actionable take‑away
Write down your monthly and seasonal tasks in a simple checklist, set calendar alerts, and treat the deck like you would a weekly houseplant – a little attention now prevents a big problem later.
Stick to the routine, and your deck replacement will keep looking like the day it was installed for years to come.
FAQ
How do I know if my deck actually needs a full replacement versus a repair?
The first clue is whether the damage is isolated or spreads through the structure. If you spot a few splintered boards, loose fasteners, or a small patch of rot, a targeted repair will usually do the trick. But when multiple joists are compromised, the decking sags more than a quarter‑inch over a few feet, or water is constantly seeping into the framing, you’re looking at a full deck replacement. In those cases fixing the symptom won’t stop the problem from resurfacing later.
What’s the best time of year to start a deck replacement project?
The ideal window for a deck replacement is when the weather is mild and dry. Spring after the last frost gives you comfortable temperatures for mixing concrete, while early fall offers lower humidity, which helps sealants cure properly. Trying to pour footings in the middle of a humid summer can trap moisture in the concrete, and a winter start risks frozen ground and delayed inspections. Aim for a three‑to‑four‑week stretch with consistent 50‑70°F days for the smoothest progress.
How much does a typical deck replacement cost and what factors drive the price?
The price tag on a deck replacement varies widely, but most homeowners see a range between $15,000 and $30,000 for a 400‑sq‑ft area. Material choice is the biggest driver: pressure‑treated pine sits at the low end, while premium composite or exotic hardwood can double the board cost. Labor, permits, and any required joist reinforcement add another 30‑40 % on top. To stay on budget, break the project into material, labor, and contingency line items and track each as you get quotes.
Can I do a deck replacement myself, or should I hire a contractor?
Doing a deck replacement yourself can be rewarding, but it also demands a solid grasp of code requirements, proper footings, and safe framing practices. If you’re comfortable with a power drill, can read a building permit, and have a crew for the heavy lifting, you can shave 30‑50 % off the labor cost. Most first‑time owners, however, run into hidden issues—like uneven soil or unexpected rot—that quickly balloon the timeline. When in doubt, get at least a structural consultation from a licensed contractor; a few hours of expert advice often prevents costly re‑work later.
What materials should I consider for a low‑maintenance deck replacement?
For homeowners who want to spend more time relaxing than sanding, low‑maintenance options are a clear win. Today’s best‑selling composite boards combine wood‑look fibers with recycled plastic, so they won’t splinter, warp, or need annual sealing. PVC decking goes a step further—100 % polymer, virtually stain‑free, and it stays cool under the summer sun. If you prefer a natural look but dread upkeep, choose a high‑density hardwood like ipe and pair it with a penetrating oil finish; you’ll still need a re‑oil every two to three years, but the board life stretches 20‑30 years.
How long does a deck replacement usually take from demolition to final finish?
A typical deck replacement moves through five phases and usually spans two to three weeks, assuming good weather and a clear permit. Day 1‑2 is demolition and site prep; you’ll strip the old boards, clean the joists, and mark the new footprint. Days 3‑5 cover footings and ledger installation, followed by concrete cure. Days 6‑9 are for framing—laying joists, blocking, and double‑checking level. Days 10‑13 see the decking boards go down, and the final four days are reserved for railing, stairs, and a thorough clean‑up. Any delays—rain, inspections, or material back‑order—add extra buffer time.
What maintenance should I plan for after my deck replacement to keep it looking fresh?
After the new deck is in place, a simple maintenance rhythm keeps it looking brand new for years. Start with a monthly walk‑through: check for loose screws, splintered edges, and any standing water that could trap moisture. In spring and fall, give the surface a gentle scrub with a mild soap solution and rinse thoroughly; avoid high‑pressure washers on composite boards. Apply a UV‑blocking sealant to wood decks every 12‑18 months, and re‑oil exotic hardwoods on a two‑year cycle. Consistent care costs pennies a month but prevents expensive repairs down the road.
Conclusion
We've walked you through every step of a deck replacement, from spotting rot to picking the perfect material and budgeting the whole project.
So, what’s the bottom line? A well‑planned replacement saves you time, money, and future headaches, while giving your backyard a fresh, usable space you’ll actually want to spend time in.
Remember to do a quick monthly walk‑through, scrub the surface twice a year, and keep an eye on fasteners – those tiny screws are the silent heroes that hold everything together.
If you’re still on the fence about DIY versus hiring pros, use the decision matrix we gave you, weigh your skill set, and don’t forget that a licensed crew brings insurance and code‑compliance peace of mind.
In our experience, homeowners who combine a solid budget spreadsheet with a trusted contractor finish their decks in about two weeks and spend less than half the time troubleshooting later.
Ready to take the next step? Grab your notes, schedule a quick on‑site estimate, and let LGFMH Construction help turn that plan into a finished deck you’ll be proud of.
And remember, a deck isn’t just wood and fasteners – it’s the backdrop for summer barbecues, family game nights, and those quiet moments watching the sunset.


Comments