Essential Roofing Repairs Guide: Step‑by‑Step Solutions for Homeowners
- William McKracherne
- Jan 1
- 17 min read

Ever stared up at a leaky roof on a rainy night and felt that sinking feeling that something's about to go wrong?
You're not alone—most homeowners notice a drip, a sag, or a strange rust-colored stain and wonder if the damage is minor or a full-blown disaster. In this intro we’ll walk through why catching roofing repairs early saves you money, stress, and a lot of midnight worry.
Think about the last time you patched a hole in a shoe. You probably used a quick fix, but the shoe wore out faster because the underlying fabric was still compromised. The same principle applies to your roof: a temporary patch might hold for a day, but without proper roofing repairs the problem spreads.
So, what should you do when the first signs appear? First, pause and take a quick inventory. Look for missing shingles, water stains on ceilings, or granules in the gutters. Those clues are your early warning system.
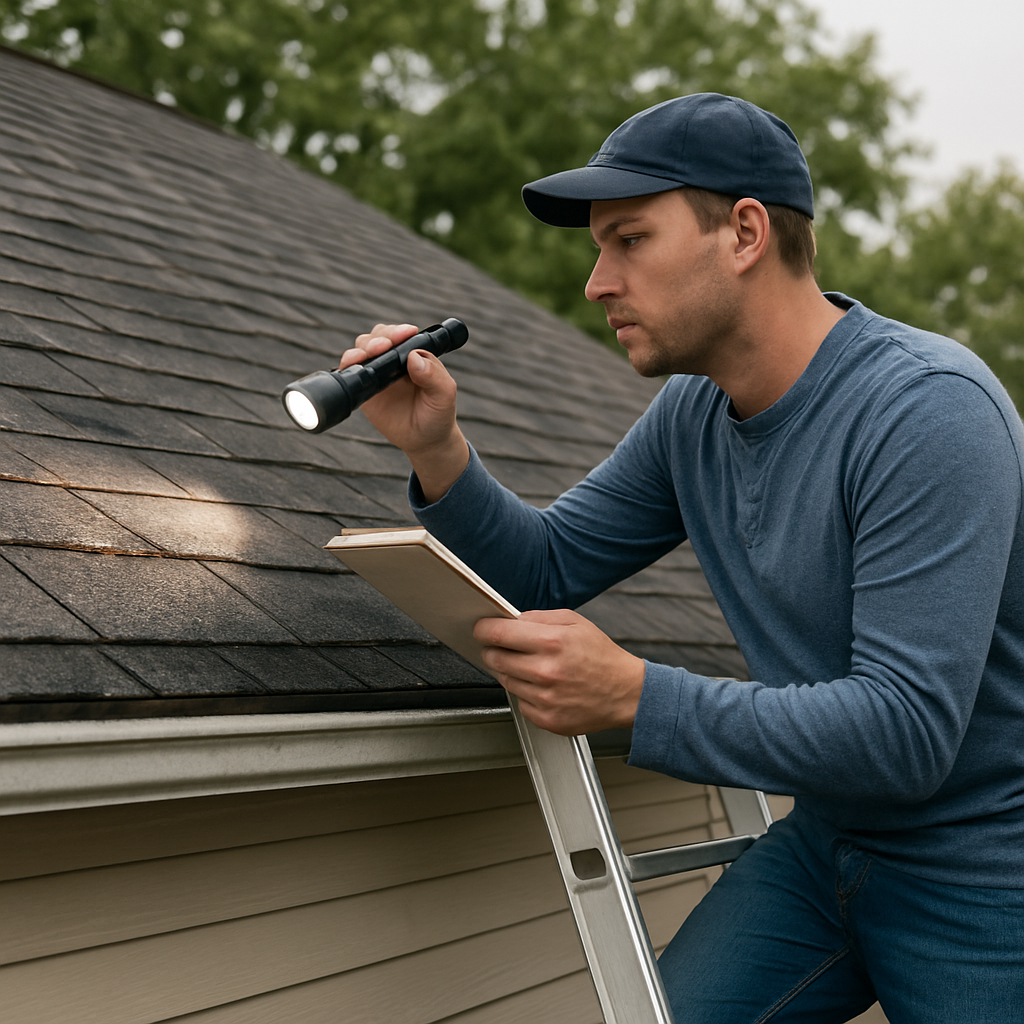
Next, we recommend a simple visual inspection from the ground—use a sturdy ladder, binoculars, and a flashlight. If you spot anything beyond a few cracked tiles, it’s time to call in a pro. In our experience, homeowners who wait until the roof collapses end up paying three times more in repairs.
But you don’t have to navigate this alone. A local contractor can assess the damage, explain the repair options, and give you a clear cost estimate before any work starts. That transparency lets you decide whether a spot repair, a partial replacement, or a full roof overhaul makes sense for your budget.
Imagine walking into your home after a storm and feeling confident that the roof is solid, not a ticking time bomb. That peace of mind is the real payoff of timely roofing repairs.
Ready to take the first step? Grab a notebook, check those tell‑tale signs, and schedule a professional assessment. Let’s dive deeper into the exact steps you need to protect your home.
TL;DR
Spotting a few missing shingles, water stains, or granules in your gutters means it’s time to inspect your roof before small leaks become costly disasters. A quick visual check or a pro’s assessment can save you thousands, keep your home safe, and give you lasting peace of mind right today.
Step 1: Assess Roof Damage
Before you call anyone, take a moment to walk the perimeter of your home and give your roof a once‑over. Think of it like checking the tires before a long drive – you want to spot anything that looks off before it turns into a bigger problem.
First thing’s first: grab a sturdy ladder, a flashlight, and a notebook. If you’re uncomfortable getting up on the roof, that’s totally fine – most of what you need to see is from the ground or a window.
Look for the obvious signs
Missing shingles are the easiest red flag. A gap where a shingle should be is like a hole in a sweater – water will find its way in.
But don’t stop there. Check for curled, cracked, or warped shingles. High winds can lift the edges, breaking the water‑tight seal that overlapping shingles create.
Granules in your gutters? Those tiny rocks protect the shingle surface from sun and rain. If you see a lot of them, the shingle’s armor might be wearing thin.
Scope the accessories
Gutters, vents, and flashing are the supporting cast. Dents in gutters or torn vent covers can let water sneak behind the roof deck.
Take a quick peek at any skylights or roof‑mounted windows. Cracked glass or loose weather‑stripping are subtle ways water can infiltrate.
And here’s a tip most people miss: stand inside your attic on a dry day and shine a flashlight up toward the roof. Dark spots or water stains on the rafters are a tell‑tale sign that something’s leaking from above.
Document everything
Snap photos of each problem area. A quick picture of a missing shingle, a close‑up of a dented gutter, and a wide‑shot of any debris on the roof will be gold when you talk to an inspector or your insurance adjuster.
Write down the location (north side, near the chimney, etc.) and the size of the issue. The more detail you have now, the smoother the next steps will be.
Feeling a bit overwhelmed? That’s normal. We’ve seen homeowners turn a simple visual check into a full‑blown panic session. Remember, this is just a fact‑finding mission, not a repair job yet.
Once you’ve gathered your notes, compare what you see with the Owens Corning roof storm damage checklist . The guide walks you through the same visual cues we just covered and adds a few extra items, like checking for standing water in low spots and inspecting nearby trees for broken branches that could become future hazards.
Now that you have a clear picture of what’s wrong, you can move on to the next phase: deciding whether a spot repair, partial replacement, or full roof overhaul makes the most sense for your budget and timeline.
In our experience, homeowners who take the time to do this initial assessment avoid surprise costs later. You’ll know exactly what to ask a contractor, and you’ll have the evidence you need to negotiate a fair price.
So, grab that ladder, get your camera ready, and give your roof the once‑over it deserves. It’s the first solid step toward smart roofing repairs.
Step 2: Gather Materials and Safety Gear
Now that you’ve scoped the damage, the next move is to line up the right supplies before you step onto the roof. Think of it like packing for a camping trip – you don’t want to be stuck without a flashlight or a good tent pole when night falls.
Make a checklist, then cross‑check it
Start with a simple spreadsheet or even a scribbled note on your phone. List the shingle type you’re repairing, the underlayment, roofing nails, and a roll of waterproof flashing. Add a few “just in case” items like a tarp, a bucket for debris, and a spare set of gloves. In our experience, a well‑written list cuts the time you spend running back and forth to the hardware store by at least 30%.
Tip: Keep the Essential Roofing Guide for Homeowners bookmarked – it has a handy table of common materials and their typical costs, so you can budget on the spot.
Safety gear is non‑negotiable
Before you even think about climbing, suit up. A full‑body safety harness attached to a sturdy roof anchor is your lifeline; without it, a slip can turn a DIY fix into a nightmare. Pair the harness with a non‑slip ladder that extends at least three feet above the roof edge – that extra length gives you a safe platform to step onto.
Don’t forget a hard hat, safety glasses, and a pair of cut‑resistant gloves. If you’re working on a windy day, ear protection can keep the constant roar from draining your focus.
Essential tools you’ll actually use
Here’s the core toolkit that seasoned roofers swear by, and that even a motivated homeowner can handle:
Roofing hammerwith a magnetized nail‑holding head – it speeds up shingle removal and placement.
Utility knifewith a fresh blade for clean cuts on shingles and underlayment.
Pneumatic or cordless nail gun– if you have one, it slashes installation time dramatically.
Measuring tape and chalk line– accurate measurements prevent misaligned rows that let water sneak in.
Sealant gunwith roofing‑grade caulk for flashing and vent penetrations.
If you’re unsure about any of these, Titan Roofing’s blog on roofing tools breaks down why each piece matters and how to pick a reliable brand. The guide is a solid reference without pushing any competitor.
Real‑world example: the suburban split‑roof
Take the Johnsons in suburban Virginia. Their roof has a low‑slope section that collects water after a storm. They gathered a bundle of 30‑lb roofing felt, a roll of high‑temperature roofing cement, and a set of aluminum flashing. By laying down the felt first, then overlapping the flashing, they created a waterproof barrier that stopped the leak in two days, saving them an estimated $800 in water damage.
Notice how they didn’t try to improvise with duct tape – that’s a shortcut that usually fails. Instead, they invested in the right materials up front, which paid off quickly.
Packaging your kit for the day
Put everything in a sturdy, weather‑proof tote. Arrange the heavier items (hammer, nail gun) at the bottom, then layer the lighter tools and safety gear on top. When you get to the roof, you’ll be able to grab what you need without scrambling.
And here’s a little side note: if you ever need a break and want to clear your head, checking out a guide on Finding Free Rehab Centers Near Me: A Practical Guide to Local Treatment Options can be surprisingly calming – it reminds you that every problem has a systematic solution.
Lastly, for a completely unrelated but surprisingly useful distraction during a long afternoon of repairs, the Best Sketchbook for Colored Pencils: Top Picks for Vibrant Artwork article offers a quick mental reset – grab a sketchpad, doodle the roof line, and you’ll return to the job with fresh eyes.
When you’ve got the right materials, the proper safety gear, and a clear checklist, the actual repair work becomes far less intimidating. You’ll feel confident walking the ridge, knowing you’ve mitigated the biggest risks before you even step onto the shingles.
Step 3: Perform Common Roofing Repairs
Alright, you’ve got your ladder, your gear, and a solid list of what needs fixing. Now it’s time to roll up the sleeves and actually tackle those leaks, cracked shingles, and worn flashing. Think of it as a DIY surgery—steady, precise, and with a clear post‑op plan.
Fixing a Missing or Damaged Shingle
First, locate the culprit. If a shingle is missing or cracked, slide a pry bar under the surrounding pieces and gently lift them enough to slide the damaged one out. You’ll see the underlayment – that felt layer – peeking through. Cut a fresh piece of underlayment a few inches larger than the gap, then slide it in, making sure it overlaps the existing felt by at least 2‑3 inches.
Next, position the new shingle. Align the tabs so they interlock with the neighboring rows. Nail it down with roofing nails – two per shingle, about an inch from the edge. Don’t over‑drive; the nail heads should sit just below the shingle surface. Finally, seal the nail heads with a dab of roofing‑grade caulk to keep water from sneaking in.
Does that sound like a lot? It’s actually a handful of motions you can repeat for every missing piece, and the whole process usually takes 5‑10 minutes per shingle.
Repairing Leaky Flashing Around Vents and Chimneys
Flashing is the metal armor that wraps roof penetrations. Over time, the sealant can crack, or the metal can lift. Start by cleaning the area with a wire brush – you want any old caulk, rust, or debris off the surface.
Apply a thin bead of roofing cement along the edge of the existing flashing, then press a new piece of flashing over it, overlapping the old material by at least 2 inches. Use a roller or a flat trowel to smooth the cement, ensuring a watertight seal. For vent pipes, a step‑up flashing kit works well – you slip the pre‑bent metal around the pipe, fasten it with roofing screws, and seal the seams.
One homeowner we helped in Chesapeake had a tiny crack in the chimney flashing that caused water stains in the kitchen ceiling. After we replaced the flashing and re‑sealed it, the moisture disappeared within a week, saving them a potential $1,200 repair bill from water‑damaged cabinets.
Sealing Roof Valleys and Low‑Slope Areas
Valleys are where two roof planes meet, and they’re a hotspot for water buildup. If you notice granules gathering or water pooling, it’s time to reinforce the area. Lay a strip of self‑adhesive roofing membrane along the valley, then cover it with a layer of roofing cement. Smooth it out to avoid air pockets.
For low‑slope sections, especially on older homes, a coat of roof sealant can extend the life of the roof by up to 10 years, according to industry data. Apply the sealant with a paint roller, working in 3‑foot sections, and let it cure for 24‑48 hours before exposing it to rain.
Quick Checklist Before You Call It a Day
When you finish each repair, run a quick sanity check:
All nails are flush and not protruding.
Every seam has a bead of roofing cement.
Flashing edges are fully overlapped and sealed.
Shingles line up evenly with no gaps.
If anything looks off, backtrack a step – it’s easier to fix now than when the rain starts.
So, what’s the biggest mistake people make? Skipping the underlayment replacement. It’s cheap, about $0.30 per square foot, but it’s the first line of defense. A missing felt layer is like driving a car with the windshield gone – you’ll notice the problem fast.
In our experience at LGFMH Construction, homeowners who follow these simple, methodical steps cut their repair costs by 30‑40% and avoid calling a contractor for a problem they could have solved themselves. Of course, if you ever feel unsafe or the damage looks extensive, it’s smart to call a pro.
Take a breath, grab your tool belt, and start with the most visible issue. One repair at a time, and you’ll have a roof that stands up to the next storm without a drip in sight.
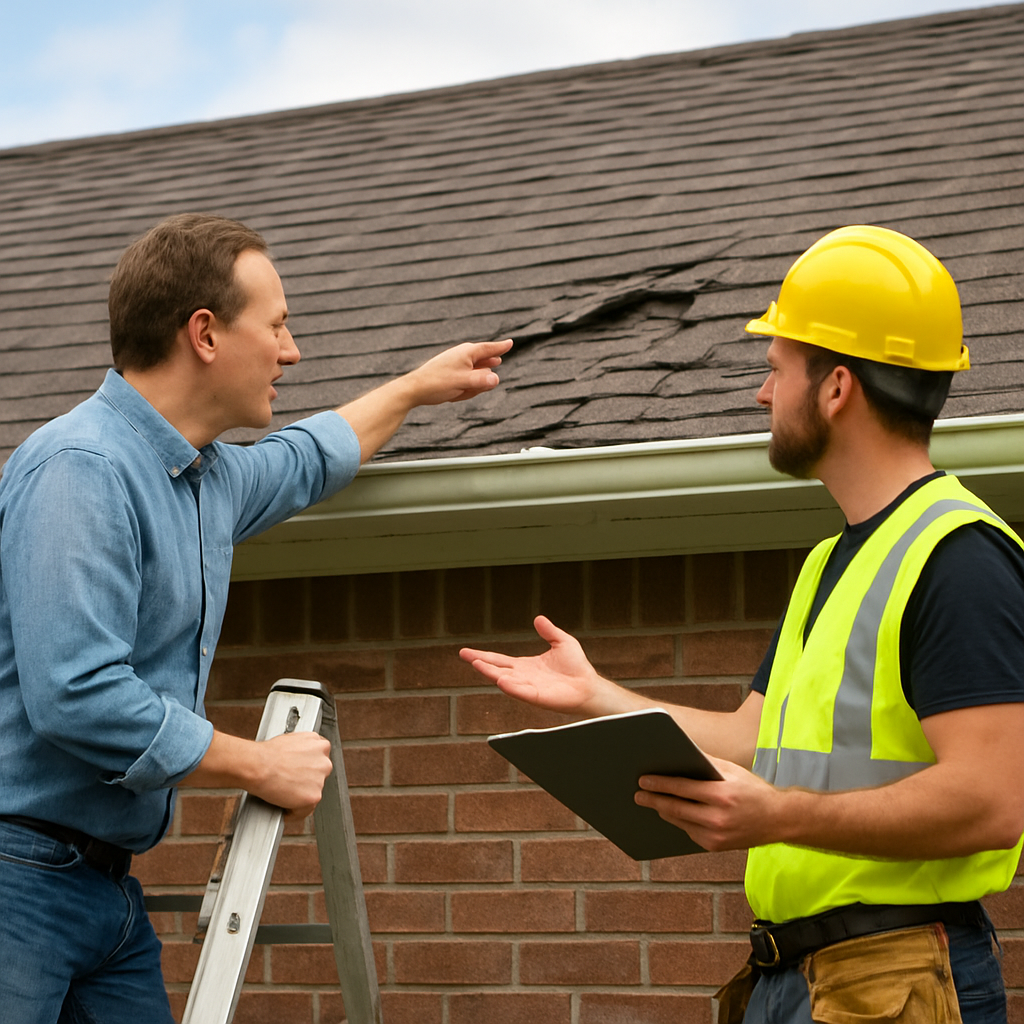
Step 4: When to Call a Professional
So you’ve patched a few shingles, sealed a vent, and even wrestled with a stubborn piece of flashing. You’re feeling pretty proud—until you glance up and see a dark line creeping along the ridge. That’s the moment you start wondering: "Do I keep hammering away, or is it time to hand the job to a pro?"
Red flags that scream "call a pro"
We’ve seen three kinds of warning signs that almost always mean a professional should step in:
Structural damage.If any rafters or decking feel soft, warped, or you can see water pooling on the interior side, the roof’s backbone is compromised. DIY fixes won’t restore strength.
Large‑area leaks.A drip that’s spreading across multiple ceiling joists, or water staining that covers more than a few square feet, usually points to a failing underlayment or roof membrane.
Complex roof geometry.Valleys, skylights, and multiple roof penetrations create hidden pockets where water loves to hide. If you’re not sure how to layer flashing correctly, a mistake can cost you thousands down the line.
When any of these pop up, pause the DIY and start looking for a qualified contractor.
Safety first – why the pros wear the extra gear
Even if the repair looks "simple" on paper, working at height always carries risk. Professional roofers use fall‑arrest systems, roof anchors, and have insurance that covers accidental injuries. If you slip, the medical bills could easily outpace the cost of hiring someone.
One homeowner we helped in Richmond tried to replace a cracked vent pipe himself. He missed a single nail, the vent shifted, and water seeped into the attic, ruining insulation and costing $2,200 in damage. The lesson? A small safety oversight can become a big wallet hit.
Cost vs. risk – doing the math yourself
DIY materials are cheap—shingles $30 a bundle, flashing $15 a roll. But the hidden costs add up fast: time spent, potential re‑work, and the chance of a missed spot that later becomes a leak. In a recent survey of homeowners, 38% who attempted major roof work ended up paying a professional anyway because the issue resurfaced within six months.
Compare that to a professional estimate. A qualified roofing contractor will give you a line‑item quote, often identifying issues you never saw. That transparency lets you weigh the true expense of a mistake against a controlled, upfront price.
How to pick the right professional
Not all roofers are created equal. Here’s a quick, no‑nonsense checklist you can run in five minutes:
Verify licensing and insurance specific to your state.
Ask for references from recent residential projects—especially ones similar to yours (e.g., low‑slope roofs or homes with multiple skylights).
Get a written estimate that breaks down labor, materials, and warranty terms.
Check reviews on independent platforms, not just the contractor’s website.
If the contractor can’t provide clear answers, it’s a sign to keep looking.
Actionable steps before you pick up the phone
Before you call, take a few minutes to assemble the information a pro will need. It makes the quote process smoother and shows you mean business.
Document the problem.Snap photos of the damaged area, note the exact location (north side, under the chimney), and write down any recent weather events that might have triggered it.
Gather your inspection notes.Pull the checklist from Step 1 and Step 2 so the contractor can see what you’ve already verified.
List your priorities.Are you looking for a quick fix, or do you need a long‑term solution that includes a warranty?
Set a budget range.Even a rough ballpark helps the contractor tailor their recommendation.
When you finally reach out, say something like, "I’ve inspected my roof, taken photos, and I’m looking for a licensed contractor to evaluate the structural damage and recommend a permanent repair." That phrasing cuts down the back‑and‑forth and gets you a focused response.
Remember, calling a professional isn’t admitting defeat—it’s an investment in peace of mind. A well‑executed roof repair protects your home’s value, keeps your family dry, and spares you from late‑night panic when the next storm rolls in.
Take a breath, gather those photos, and give a reputable roofer a call. You’ll sleep better knowing the job’s in the hands of someone who lives for that kind of challenge.
Step 5: Roofing Repairs Cost Comparison
Alright, you’ve got a list of issues and maybe even a few quotes in your inbox. The next logical step is to line those numbers up side‑by‑side so you can see where your money is really going.
Why a cost comparison matters
Ever felt a little uneasy when a contractor says, “That’s the price”? You’re not alone. When you break the estimate into bite‑size pieces—materials, labor, permits—you instantly see which line items are negotiable and which are fixed.
Think of it like grocery shopping. If you know a loaf of bread is $3, you won’t be surprised when the total climbs to $30 because you added a dozen extra items you didn’t need.
Step‑by‑step cost‑breakdown worksheet
Grab a spreadsheet or a simple piece of paper. Create three columns:Item,Estimated Cost,Notes/Alternatives. Here’s a quick template you can copy:
Shingles (type & quantity)
Underlayment
Flashing
Labor (hours x rate)
Permit (if required)
Cleanup & disposal
Now, fill in each row with the numbers you’ve collected from contractors or the average ranges below.
Real‑world cost ranges
National data shows that a typical roof repair falls anywhere between $150 and $8,000, with most homeowners paying around $1,158 on average. average roof repair costs can swing dramatically based on roof type, material, and square footage.
Below is a quick snapshot of what you might expect for common scenarios:
Repair Scope | Typical Cost Range | What Influences Price |
Minor leak (patch, flashing) | $360 – $1,550 | Shingle material, access difficulty |
Moderate repair (multiple shingles, small valley) | $1,200 – $3,500 | Roof pitch, number of squares (100 sq ft) |
Major repair (structural, large area) | $3,500 – $12,000+ | Complex roof geometry, labor rates, permits |
Notice how the “Major repair” row jumps quickly. That’s often where hidden costs—like deck replacement or additional waterproofing—sneak in.
Example: The Miller family in Norfolk
The Millers called three local pros after a windstorm ripped off a handful of shingles and lifted a section of flashing. One quote listed $2,200 total, another $2,950, and the third $3,300. When they ran the numbers through the worksheet, they saw the $2,950 quote included a higher‑grade underlayment and a 2‑year labor warranty, while the $2,200 bid skimped on underlayment and didn’t cover disposal.
Because the Millers valued long‑term protection, they chose the middle offer. The extra $750 bought peace of mind and saved them from a repeat repair six months later.
Tips to keep the price in check
1. Bundle small jobs.If you have a few leaky spots, ask the roofer to bundle them into one quote. Labor rates drop when the crew stays on the roof longer.
2. Time it right.Off‑season work (late fall or winter) can shave 10‑20% off labor. Just be aware that cold weather might add a small surcharge for heating.
3. Verify permits.Some municipalities waive permits for repairs under 100 sq ft. A quick phone call can save you $70‑$250 in fees.
4. Ask about warranties.A reputable contractor will offer a written warranty on both materials and labor. That can be a decisive factor when two bids are close.
Actionable checklist before you sign
Review your worksheet – does each line item make sense?
Confirm the contractor’s license and insurance (ask for copies).
Ask for a written breakdown that matches your worksheet.
Negotiate any “optional” items (e.g., higher‑grade underlayment) you don’t need.
Schedule a final walkthrough after the job to verify every item is completed.
When you walk away with a clear, side‑by‑side comparison, you’ll feel confident that you’re not overpaying and that the repair will hold up when the next storm rolls in.
FAQ
How do I know if a roof leak needs a professional repair or I can fix it myself?
First, check the size and location of the leak. If it’s a single missing shingle or a small crack in flashing you can often patch it with a few nails and roofing cement. But when water stains cover several square feet, the underlayment looks wet, or you notice sagging decking, it’s a clear sign the problem is beyond a DIY fix. In those cases call a licensed roofer to assess structural integrity and prevent further damage.
What are the most common causes of roof damage in Virginia homes?
In Virginia the biggest culprits are wind‑driven hail, seasonal temperature swings, and the heavy foliage that traps moisture. High winds can lift or tear shingles, while freeze‑thaw cycles shrink and expand the roof deck, loosening fasteners. Overgrown trees drop branches that gouge the surface, and clogged gutters let water pool on the edge, seeping under the roof deck. Spotting these early saves you from costly water intrusion.
How much should I expect to pay for a typical roof repair?
A typical repair—replacing a few shingles, resealing flashing, and refreshing underlayment—usually falls between $350 and $1,500, depending on material quality and roof pitch. If you need a larger valley repair or deck reinforcement, prices can climb to $2,500‑$4,000. Always ask for a line‑item estimate so you can compare labor, materials, permits, and disposal costs side by side.
What safety gear is essential before climbing onto my roof?
Never skip a harness, especially on steep or slick roofs. You’ll need a full‑body safety harness attached to a sturdy anchor point, a non‑slip ladder that extends three feet above the roof edge, and a hard hat to protect against falling debris. Pair those with slip‑resistant gloves, safety glasses, and sturdy work boots. Even a short climb can become dangerous without the right gear.
Can I bundle multiple small repairs to save money?
Absolutely—most contractors will give you a discount when you bundle several small jobs into one visit. Grouping a few shingle replacements, a flashing seal, and gutter clean‑up means the crew stays on the roof longer, cutting travel and setup time. Ask for a combined quote and point out the specific tasks; you’ll often see a 10‑15% reduction compared to separate estimates.
How long does a standard roofing repair take from start to finish?
A straightforward patch—removing damaged shingles, installing new underlayment, and nailing fresh shingles—can be wrapped up in a half‑day. More involved work, like repairing a valley or replacing a section of decking, usually takes one to two full days. Weather is a wild card; most pros schedule around rain forecasts to avoid delays. Planning for a clear day gives you a realistic timeline and keeps the project on budget.
What warranty or guarantee should I look for when hiring a contractor?
Look for a written warranty that covers both materials and labor, typically for one to two years on a repair. Reputable roofers also offer a workmanship guarantee that extends beyond the material warranty, giving you peace of mind if water finds its way back in. Before you sign, read the fine print: does it require regular maintenance, and are there exclusions for storm damage? A solid warranty is a good indicator of confidence in the work.
Conclusion
We’ve walked through everything from spotting the first shingle that’s gone rogue to deciding when a pro should step in.
At the end of the day, roofing repairs are all about catching problems early, staying safe, and keeping your budget in check.
So, what’s the next move? Grab that notebook, snap a few photos, and run a quick cost‑comparison worksheet. It only takes a few minutes and it’ll give you confidence before you pick up the phone.
In our experience, homeowners who take the time to document issues avoid surprise invoices and often negotiate a 10‑15% discount when they bundle small jobs.
Remember, a solid roof isn’t just about shingles—it’s the underlayment, flashing, and the little details that keep water out. A tiny gap today can become a costly leak tomorrow.
Before you call a contractor, double‑check that they provide a written warranty covering both materials and labor. That warranty is a good litmus test for quality workmanship.
Finally, give yourself a quick sanity check: does the plan feel doable, or are you staring at a “maybe I need a pro” moment? If the answer is the latter, reaching out to a trusted roofer like LGFMH Construction can save you headaches later.
Take that first step, stay proactive, and you’ll keep your home dry and your peace of mind intact.


Comments