Exploring Valleys: A Comprehensive Guide to Types, Formation, and Travel Adventures
- William McKracherne
- Feb 19
- 18 min read

Imagine standing on the ridge of your house, rain pounding the roof, and you notice water spilling into a low‑lying groove instead of sliding cleanly off. That groove is a roof valley, the hidden channel where two roof planes meet, and if it’s not handled right, it can become a slow‑drip disaster.
You’re not the first homeowner to wonder why water keeps finding its way into the attic after a storm. In many Virginia Beach homes we’ve seen gutters overflow simply because the valley wasn’t flashed correctly, or because debris builds up faster than anyone expects.
So what can you actually do to keep those valleys from turning into leaks? First, make sure the metal flashing is installed with a slight under‑lap beneath the shingles – that little overlap is the first line of defence against water infiltration. Second, schedule a regular clean‑out of the valley gutters; a handful of leaves or twigs can act like a dam and force water back onto the roof surface.
Here’s a quick checklist you can run through after any heavy rain: 1️⃣ Walk the roof edge and look for standing water in the valleys. 2️⃣ Check the flashing seams for rust or gaps. 3️⃣ Clear out any debris with a garden hose or a soft brush – never use a pressure washer directly on the shingles. 4️⃣ Inspect the downspouts attached to the valleys; they should discharge at least 3‑4 feet away from the foundation.
If you’re not comfortable climbing a ladder, that’s where a professional roof‑valley service can save you time and money. At LGFMH Construction we pair our roof installation expertise with precision flashing to seal those V‑shaped joints, and we back our work with a 10‑year warranty so you can sleep through the next storm without a worry.
Take a moment now to glance at the valleys on your own home. Spot a dark line or a small puddle? Jot it down, and when you call a pro, mention exactly what you saw – the more detail you give, the faster they can diagnose and fix the issue.
TL;DR
If you’ve spotted water or rusted flashing in your roof’s valleys, a clean‑out and proper sealing can stop leaks before they damage your home.
We’ve seen homeowners save time and money by checking valleys after storms, clearing debris with a hose, and calling LGFMH Construction for flashing repairs with warranty.
Understanding Valley Types
When you first glance up at a roof, you might not notice the little V‑shaped channels that run along the seams – those are the valleys, and they come in a few distinct flavors.
Knowing which type you have is the first step toward keeping water where it belongs: out of your attic and away from your walls.
After you’ve watched the quick video above, let’s break down the most common valley configurations you’ll see on Virginia Beach homes.
Open Valleys
An open valley is the classic “V” you picture when you think of a roof valley. Two shingles meet at a 90‑degree angle and the metal flashing sits right on top, exposed to the elements.
They’re popular because they’re easy for contractors to install and they’re forgiving when it comes to debris – a little leaf can slide right down the channel.
But the flip side is that the flashing is constantly battling wind, rain, and UV. Over time you might notice rust or a thin line of water tracking along the seam.
Closed Valleys
Closed valleys hide the metal underneath the shingles. The installer cuts a V‑shaped notch in the roofing felt, slides the flashing in, and then shingle over it.
This looks cleaner and gives the valley a bit more protection from the weather, which is why you’ll often see them on higher‑end homes or on roofs with architectural shingles.
The downside? If the shingle cuts aren’t perfect, water can sneak behind the shingles and sit in the hidden channel – a sneaky source of attic leaks.
Box Valleys
Box valleys are like a miniature gutter built right into the roof. The two roof planes form a rectangular trough, and a dedicated metal box (often called a “valley box”) runs the length of the valley.
They’re great for steep roofs or where the valley runs a long distance, because the box can carry a larger volume of water without overflowing.
On the other hand, box valleys require precise welding and regular cleaning; a buildup of pine needles can turn that sleek trough into a water‑dam.
Sidewall Valleys
Sidewall valleys occur when a roof plane meets a vertical wall, like a chimney or a garage sidewall. The valley follows the side of the wall rather than a roof‑to‑roof junction.
Because the wall can expand and contract with temperature changes, the flashing must be flexible enough to move without cracking.
If the flashing is too rigid, you’ll see cracks that let moisture seep in – a common culprit behind mysterious attic stains.
So, how do you figure out which valley type you have? Grab a ladder (or call a pro if you’re uneasy), walk along the roof edge, and look for the metal profile.
Do you see a thin strip of metal sitting on top of the shingles? That’s an open valley. If the metal is tucked under a seam of shingles, you’re likely dealing with a closed valley. A rectangular metal box? You’ve got a box valley. And if the valley runs next to a wall, it’s a sidewall valley.
Once you’ve identified the type, the maintenance routine changes a bit.
Open valleys:spray them down with a hose after each big storm and check the flashing for rust.
Closed valleys:lift a few shingles near the valley (or have a pro do it) to inspect the hidden flashing for gaps.
Box valleys:clear debris with a soft brush; a garden hose can push out anything that’s stuck.
Sidewall valleys:ensure the flashing has a slight under‑lap against the wall and re‑seal any cracks with a high‑quality roofing sealant.
In our experience, homeowners who schedule a semi‑annual valley inspection avoid most surprise leaks. It’s like a quick health check‑up for your roof.
And remember, if you ever feel unsure about the condition of a valley, a brief call to LGFMH Construction can save you hours of guesswork and a costly repair later.
How Valleys Form: Geological Processes
Ever stared at a deep V‑shaped cut in a hillside and wondered how Mother Nature carved it? You're not alone—most of us only see the pretty view, not the slow‑motion drama that shaped it over millions of years.
Fluvial Erosion: Rivers Do the Heavy Lifting
Rivers are the workhorses of valley creation. As water rushes downhill, it picks up sediment and grinds away the bedrock, gradually deepening and widening its channel. Over time, the river's meanders cut into the landscape, leaving behind a classic V‑shaped valley that we often picture in textbooks.
Think about a creek after a spring storm: the flow spikes, the current turns turbulent, and you can actually hear the river chewing through the soil. That same process, repeated year after year, sculpts a valley that can stretch for miles.
Glacial Sculpting: Ice Giants Carve Out U‑Shaped Valleys
If you've ever hiked in the Appalachians, you've probably seen a broad, flat‑bottomed valley that looks more like a giant trough than a sharp V. Those are the handiwork of glaciers.
During an ice age, massive sheets of ice slide down slopes, grinding the underlying rock with a built‑in sandpaper called moraine.
The result? A U‑shaped valley with steep sides and a relatively flat floor—perfect for a river to later occupy. In Virginia Beach, you won't find active glaciers, but ancient glacial activity from the Pleistocene left behind subtle landforms that influence modern drainage patterns.
Tectonic Uplift and Faulting: Raising the Stage
Valleys don't form in a vacuum; they need a stage to play on. When tectonic plates push against each other, they can lift mountain ranges, creating new gradients for water to flow. Fault lines can also drop blocks of crust, forming narrow rift valleys that later get filled by rivers or lakes.
Picture the East Coast’s Atlantic Coastal Plain—while it's relatively flat, subtle uplift and subsidence over thousands of years have guided how valleys develop and where water gathers.
Weathering: The Quiet Partner
Weathering might seem like a background actor, but it's essential. Freeze‑thaw cycles, chemical dissolution, and biological activity all weaken rock faces, making them easier for water and ice to erode. In coastal Virginia, salty air accelerates chemical weathering, softening limestone cliffs that eventually give way to new valleys.
So, when you see a valley, you're really looking at a team effort: water, ice, tectonics, and weather all pulling their weight.
Process | Primary Agent | Typical Valley Shape |
Fluvial erosion | Running water (rivers, streams) | V‑shaped |
Glacial carving | Moving ice sheets | U‑shaped |
Tectonic activity | Plate uplift & faulting | Rift or stepped valleys |
Now that you have a backstage pass to the forces shaping valleys, you can appreciate why a roof valley needs extra care—it's mimicking a natural water conduit, only on a much smaller scale.
Climate plays a sneaky role, too. In wetter years, rivers swell and erode faster, carving deeper cuts, while drought periods slow the process down. Human activities—like road cuts or deforestation—can accelerate erosion, reshaping valleys in just a few decades rather than millennia.
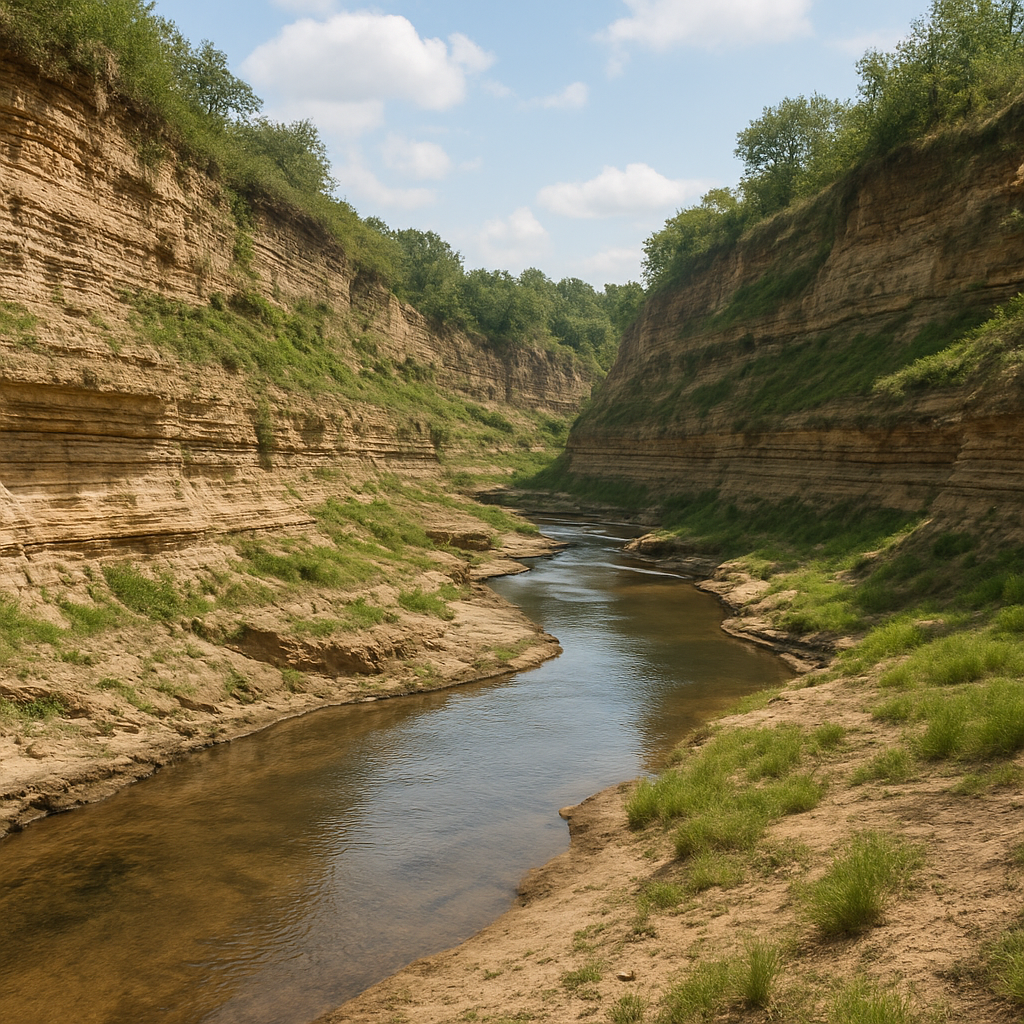
Valleys Around the World: Top Destinations to Explore
When you think about valleys, you probably picture a quiet dip between hills, but the world is full of valleys that feel like stepping into a storybook. Below are six standout spots that capture the drama of water, rock, and sky – and they’ll give you a fresh perspective on why the “valley” on your roof needs that extra care.

1. Lauterbrunnen Valley – Switzerland’s “Noisy Sources”
Nested in the Bernese Oberland, Lauterbrunnen boasts 72 waterfalls tumbling down sheer cliffs, the most famous being the 300‑metre Staubbach Fall. The valley’s classic U‑shape was carved by ancient glaciers, giving it those towering rock walls that look like nature’s own retaining walls.
Why it matters for homeowners: the same glacial forces that smooth a U‑shaped valley can teach us about water flow – let gravity do the work, but keep the channel clear. When you visit, take a short hike to the Trümmelbach waterfalls and notice how the water is funneled through tunnels – a reminder to keep your roof‑valley gutters free of debris.
Uller’s list of stunning valleys highlights Lauterbrunnen as a must‑see for its dramatic scenery and easy access from Interlaken.
2. Yosemite Valley – California’s Granite Canyon
Yosemite’s V‑shaped valley was sculpted by the Merced River and frozen‑in time by massive granite walls like El Capitan and Half Dome. With four million visitors a year, the valley balances heavy water flow with rugged rock – a natural lesson in handling high‑volume runoff.
Practical tip: When you’re there, stop at the valley floor and watch the river’s meanders. Notice how the riverbanks are lined with vegetation that slows erosion. On your roof, consider planting low‑profile shrubs near gutters to reduce wind‑driven debris.
3. Valley of the Ten Peaks – Canada’s Alpine Mirror
Located in Banff National Park, this U‑shaped valley cradles Moraine Lake, a sapphire‑blue mirror that reflects ten towering quartzite peaks. The valley was shaped by glacial carving during the last ice age, leaving a flat floor perfect for a lake.
Actionable step: If you’re planning a trip, drive the Icefields Parkway early in the morning to beat the crowds, then hike the Consolation Lakes trail for a perspective on how water pools in low‑lying basins. The calm water teaches us the value of a well‑designed, level roof‑valley that lets water glide away without pooling.
4. Barun Valley – Nepal’s Himalayan Treasure
Hidden within Makalu‑Barun National Park, this valley rises from tropical forest to alpine meadow, crossing 3,000 m of elevation. The valley’s steep sidewalls channel waterfalls that feed into the Arun River, creating a series of micro‑climates.
Takeaway for home upkeep: The rapid change in elevation means intense rain in summer and snow in winter. A roof‑valley that’s properly flashed can handle both meltwater and heavy monsoon bursts. When you trek, bring a lightweight rain jacket and pack a reusable water bottle – the same preparation mindset works for seasonal roof inspections.
5. Harau Valley – Indonesia’s Canyon‑Like Oasis
On the island of Sumatra, Harau stretches between towering limestone cliffs and rice paddies, with waterfalls like Aka Bearayun dropping into crystal pools. The valley’s V‑shaped canyons are cut by the Harau River, creating natural corridors for wind and water.
Practical advice: Rent a bicycle to explore the valley’s length; the steady rhythm of pedalling mirrors the steady flow you want in a roof‑valley – no sudden stops, no blockages. After a ride, give your bike’s chain a quick clean – just as you’d clear leaves from a roof‑valley after a storm.
6. Siurana River Valley – Spain’s Climbing Playground
Perched in Catalonia’s Priorat region, Siurana’s river carves a dramatic gorge beneath an ancient Moorish castle. The valley’s steep limestone walls attract rock climbers from around the globe, and the river’s seasonal swell creates a vivid contrast between dry rock and roaring water.
Tip for homeowners: The cliffside’s exposure to wind and sun can accelerate flash corrosion. Inspect your roof‑valley flashing twice a year – once after the dry summer and once after the rainy autumn – to catch rust before it spreads.
Ready to turn inspiration into action? Here’s a quick checklist for any valley‑inspired roof‑valley project:
Inspect flashing for rust or gaps at least twice a year.
Clear debris from valley gutters after any storm; a garden hose works wonders.
Check that downspouts discharge at least 3 feet from the foundation.
Consider a protective sealant if you live in an area with heavy snowfall or monsoon rain.
Schedule a professional inspection if you notice standing water – a quick call can prevent a costly repair.
Each of these valleys shows how nature solves the same problem we face on our roofs: moving water efficiently while resisting wear. By borrowing a bit of their wisdom, you can keep your roof‑valley performing like a natural conduit for years to come.
Planning Your Valley Adventure: Practical Tips
Valleys are more than just a roof detail; they’re highways for water. If you plan them right, you’ll dodge leaks and headaches for years. So let’s map out a practical plan you can actually follow.
1) Do a seasonally aligned audit
After big storms or seasonal changes, take a quick walk along the valley line. Look for standing water, rust spots, or debris stuck in the gutters. A simple field check now saves big repairs later.
Note where water pools briefly or where shingle lines look darker from moisture. Mark those spots in a notebook or on your phone so you have a baseline for your next inspection. It’s not fancy, but it’s powerful.
2) Map out a maintenance calendar
Set a predictable rhythm for valley care. In our climate, that means a spring debris sweep, a mid‑summer check, and a fall pre‑winter inspection. Put it on the calendar so you don’t forget.
Kicking off a yearly routine with a simple reminder system—texts, calendar alerts, or a sticky note by the faucet—makes consistency easy. You’ll feel the difference when you’re not surprised by late‑season leaks.
3) Choose the right materials for your climate
Not every sealant or flashing works in every weather. If you live near salt air or frequent rain, pick products rated for moisture resistance and UV exposure. Ask a pro about underlayment options that complement your valley setup.
We’ve found that compatible combinations matter more than chasing the newest gadget. Using the right mix reduces maintenance and increases the odds your valley channel stays clear and dry well into 2026 and beyond.
4) Debris management strategy
Leaves, needles, and pinecones are water blockers in disguise. Clear valley gutters after storms, and keep a soft brush handy to lift stubborn debris. A garden hose on a low spray can flush the channel without harming shingles.
Establish a quick, repeatable routine: sweep, rinse, inspect. A tiny effort now prevents big clogs that force water back onto the roof surface.
5) Know when to call a pro
DIY fixes work for minor touch‑ups, but flashing work is tricky. If you notice persistent damp spots, discoloration, or pooling, schedule a professional inspection sooner rather than later. LGFMH Construction can assess flashing integrity and suggest a targeted plan you can follow without guesswork.
In our experience, a pro can pinpoint issues quickly and prevent costly repairs down the line. Platforms like LGFMH Construction make this easier by handling flashing upgrades and professional inspections as part of a smart maintenance approach.
6) Safety first
Ladder safety isn’t glamorous, but it saves lives. Wear non‑slip shoes, secure the ladder, and have a helper nearby if you’re not a confident climber. If you’re uncomfortable, put the ladder away and call a pro to handle the job.
When you finish a plan like this, you’ll sleep better knowing your valley isn’t the weak link in a heavy rain. Start with one valley in good light, jot down what you see, and build your plan from there.
Video Guide: Visual Tour of Iconic Valleys
Ever wonder why a quick clip of a mountain valley can make you rethink the tiny V‑shaped channel on your roof? That feeling is exactly what we aim for in our video guide – a visual tour that turns abstract concepts into something you can see, pause, and copy onto your own home.
The video walks you through three iconic valleys – the dramatic open‑valley of Lauterbrunnen in Switzerland, the rugged box‑valley of Yosemite’s high country, and the sleek sidewall‑valley that frames the historic Old Town district of Virginia Beach. Each stop is broken down into what the terrain looks like, how water moves there, and the exact roofing details you can mimic.
First, we zoom in on Lauterbrunnen’s cascade‑filled gorge. The video shows how the sheer rock walls funnel water into a single, narrow channel that never overflows because the valley floor is angled at roughly 45°. Translating that to your roof means setting the flashing with a consistent under‑lap of at least one shingle depth and keeping the slope steep enough that water never lingers.
Next, we hop to Yosemite’s box‑valley, where the water‑carrying “box” is literally a metal trough welded into the roof plane. The guide points out two data points: a box that’s 6 inches wide can handle up to 2,500 gallons per hour in a heavy storm, and the weld seams need a stainless‑steel sealant to survive the freeze‑thaw cycles common in the Sierra. On a Virginia Beach home, you can replicate that strength by choosing a pre‑formed valley box made of aluminum‑zinc alloy and sealing every joint with a high‑grade roofing sealant.
The third stop is a sidewall‑valley that hugs the older brick façades of the Old Town waterfront. The video pauses to show how the flashing is bent just enough to accommodate the thermal expansion of the brick, then wrapped with a self‑adhesive underlayment that acts like a cushion. The practical tip? Measure the wall’s temperature swing – in Virginia Beach it’s usually a 15‑degree swing between summer nights and winter mornings – and add a ¼‑inch extra overlap on the flashing to prevent cracks.
So, how do you turn those video moments into a checklist you can follow on the roof? Here’s a quick, five‑step action plan that mirrors the visual tour:
1️⃣ Snap a photo of each valley on your home, just like the video freezes a frame.
2️⃣ Measure the width of the channel; if it’s under 4 inches, treat it as an open valley and add a metal flashing with a 2‑inch under‑lap.
3️⃣ If the width exceeds 6 inches, consider a box‑valley replacement – order a prefabricated box that matches the measured span.
4️⃣ Check the adjacent wall material; for brick or stucco, add a flexible flashing strip with an extra ¼‑inch overlap as the video demonstrates.
5️⃣ Finish by spraying a low‑pressure garden hose through the valley to confirm water flows uninterrupted; note any pooling spots and reseal them immediately.
If you want the full visual reference, check out the short tour on YouTube – it walks you through each valley angle, shows the exact flashing placement, and even pauses for a slow‑motion replay of water rushing through a box‑valley. Watching those seconds saves you hours of guesswork, and you can replay any segment while you’re on the ladder.
Ecological Importance of Valleys
Valleys aren’t just pretty gaps between hills. They’re busy pipelines that guide water, nutrients, and life across landscapes. Understanding their role helps you see why taking care of valley areas on your property isn’t a vanity project—it's smart stewardship.
Think of a valley as a natural drainage system. Rain that hits the mountains collects and slows, then flows through a channel that supports streams, wetlands, and soil with richer structure. When these channels stay clear, they prevent erosion elsewhere and keep nearby yards healthier.
For a deeper look, see the ecological importance of valleys article from Flyriver.
Valleys also act as biodiversity corridors, letting plants and animals move through the landscape even when other habitats shrink. This connectivity supports pollination, pest control, and resilience against droughts.
Within valleys, microclimates emerge. Shelter from wind, steady shade, and the way sun hits valley floors create slightly warmer days in winter and cooler nights in summer. That buffering matters for crops, soils, and even the species that share your yard.
As the climate valleys article notes, these patterns help shape flood response and drought resilience across regions. In practical terms, that means valleys influence how groundwater recharges and how rainfall is stored in soils before it reaches rivers. For a concise overview of climate-driven valley dynamics, see the climate valleys article.
Beyond water, valleys shape soil health and nutrient cycles. When valleys are healthy, soils store more carbon, reduce erosion, and support lush vegetation that anchors slopes and filters runoff.
In coastal Virginia Beach, that ecological function translates into real protection for homes and yards. In our experience, keeping valley channels clear and the flashing well-sealed along roof valleys saves you from surprises. It's not just about leaks; it's about sustaining that natural water balance that shields foundations and gardens. At LGFMH Construction, we handle valley flashing upgrades as part of our exterior repairs; delivering dry, protected spaces year round.
Valleys as ecosystem engineers
Valleys support a suite of ecosystem services that people often overlook. They trap sediments that would otherwise clog streams, help recharge aquifers, and create microhabitats for frogs, insects, and songbirds. When you protect these spaces, through riparian buffers, native plants, or simply reducing compacted soils, you support a healthier neighborhood environment.
From a homeowner's perspective, that means practical steps on your property: sweep gutters, trim overhanging branches, and protect critical zones with native ground cover that holds soil while letting water percolate. A tiny habit here pays off when the next storm hits.
Schedule a semi-annual valley inspection to catch rust, gaps, or blockages early.
Keep debris out of valley gutters with a light brush and hose rinse after storms.
Ask a pro about proper flashing underlayment and under-lap details to ensure water flows away from the home.
Consider landscaping that reduces wind-blown debris near the roofline.
Looking ahead to 2026 and beyond, the ecological importance of valleys only grows as weather patterns shift. By treating valley maintenance as part of a broader water-management plan, you protect your home and the neighborhood. Valleys matter; caring for them is practical, protective, and empowering for homeowners.
Conclusion
We've walked through how valleys shape both the landscape outside and the tiny channels on your roof. When you treat those roof valleys the same way you respect a natural valley—by keeping them clear, sealed, and inspected—you protect your home from sneaky leaks.
So, what’s the next step? Grab a notebook, jot down the spots where water pools after a storm, and give those gutters a quick hose‑down. A semi‑annual check‑up, especially after the heavy summer rains, catches rust or debris before it becomes a costly repair.
In our experience, homeowners who blend a simple maintenance calendar with a call to a trusted pro—like LGFMH Construction—have saved time, money, and sleepless nights. We’ve seen the difference a properly flashed valley makes when the next storm rolls in.
Remember, valleys aren’t just a design detail; they’re the first line of defense against water damage. Treat them like the vital ecosystem they mimic, and your roof will thank you year after year.
Ready to take action? Give us a call or schedule a quick inspection, and let’s keep your valleys—and your home—dry and strong.
By staying on top of valley maintenance you not only protect your investment but also contribute to the neighborhood’s overall water health today.
FAQ
How often should I inspect the valleys on my roof?
We recommend a quick visual check at least twice a year – once in the spring after the leaves have fallen and again in the fall before the first big rain. During each walk‑around, look for standing water, rust spots, or debris clogging the valley gutters. If you notice any of those red flags, add a more detailed inspection sooner rather than waiting for a storm to expose the problem.
What signs tell me my roof valley needs repair?
Typical clues include dark streaks on shingles, rust on metal flashing, or water‑stained ceilings in the attic. You might also hear a faint dripping sound after a rain, or see moldy patches near the valley line. Those hints usually mean water is finding its way behind the shingles, so it’s time to reseal the flashing or replace damaged components before leaks spread.
Can I clean valley gutters myself, and what tools do I need?
Absolutely – a garden hose with a gentle spray, a soft‑bristled brush, and a sturdy ladder are all you really need. Start by removing large debris by hand, then use the hose to flush out finer material. Avoid pressure washers directly on shingles; they can lift the roofing material. If the gutter is hard to reach, a telescoping pole with a brush attachment can make the job safer and faster.
What’s the difference between open and closed valleys, and does maintenance differ?
Open valleys have the metal flashing exposed on top of the shingles, so they’re prone to rust and need regular flushing to keep the metal clear. Closed valleys tuck the flashing under the shingles, which protects it from the elements but makes inspection trickier – you may need to lift a few shingles or call a pro to peek at the hidden flashing. Both types benefit from semi‑annual debris removal, but open valleys usually require more frequent rust checks.
How does Virginia Beach weather affect valley maintenance?
Coastal humidity and occasional salt spray can accelerate metal corrosion, while summer thunderstorms dump a lot of rain in a short burst. That combo means you should watch for rust on flashing after a salty breeze and make sure the valley gutters can handle high‑volume flow. A post‑storm hose‑down in late summer helps prevent pine needles and sea‑weed from forming a dam that forces water back onto the roof.
When should I call a professional like LGFMH Construction for valley issues?
If you spot persistent pooling, notice rust that won’t wipe away, or feel uncomfortable climbing onto the roof, it’s time to reach out. A pro can safely lift shingles, reseal flashing, and ensure the valley meets local building codes. In our experience, catching a problem early and having a qualified contractor address it can save you thousands in future water‑damage repairs.


Comments