Garage Door Spring Replacement Cost: Step‑by‑Step Guide
- William McKracherne
- 12 minutes ago
- 7 min read

Most homeowners think a broken garage door spring means a huge bill. In fact, the average spend sits under $400. This guide walks you through every step you need to take, figuring out what you have, measuring it right, understanding price drivers, and getting the best quote.
Step 1: Identify Your Spring Type and Condition
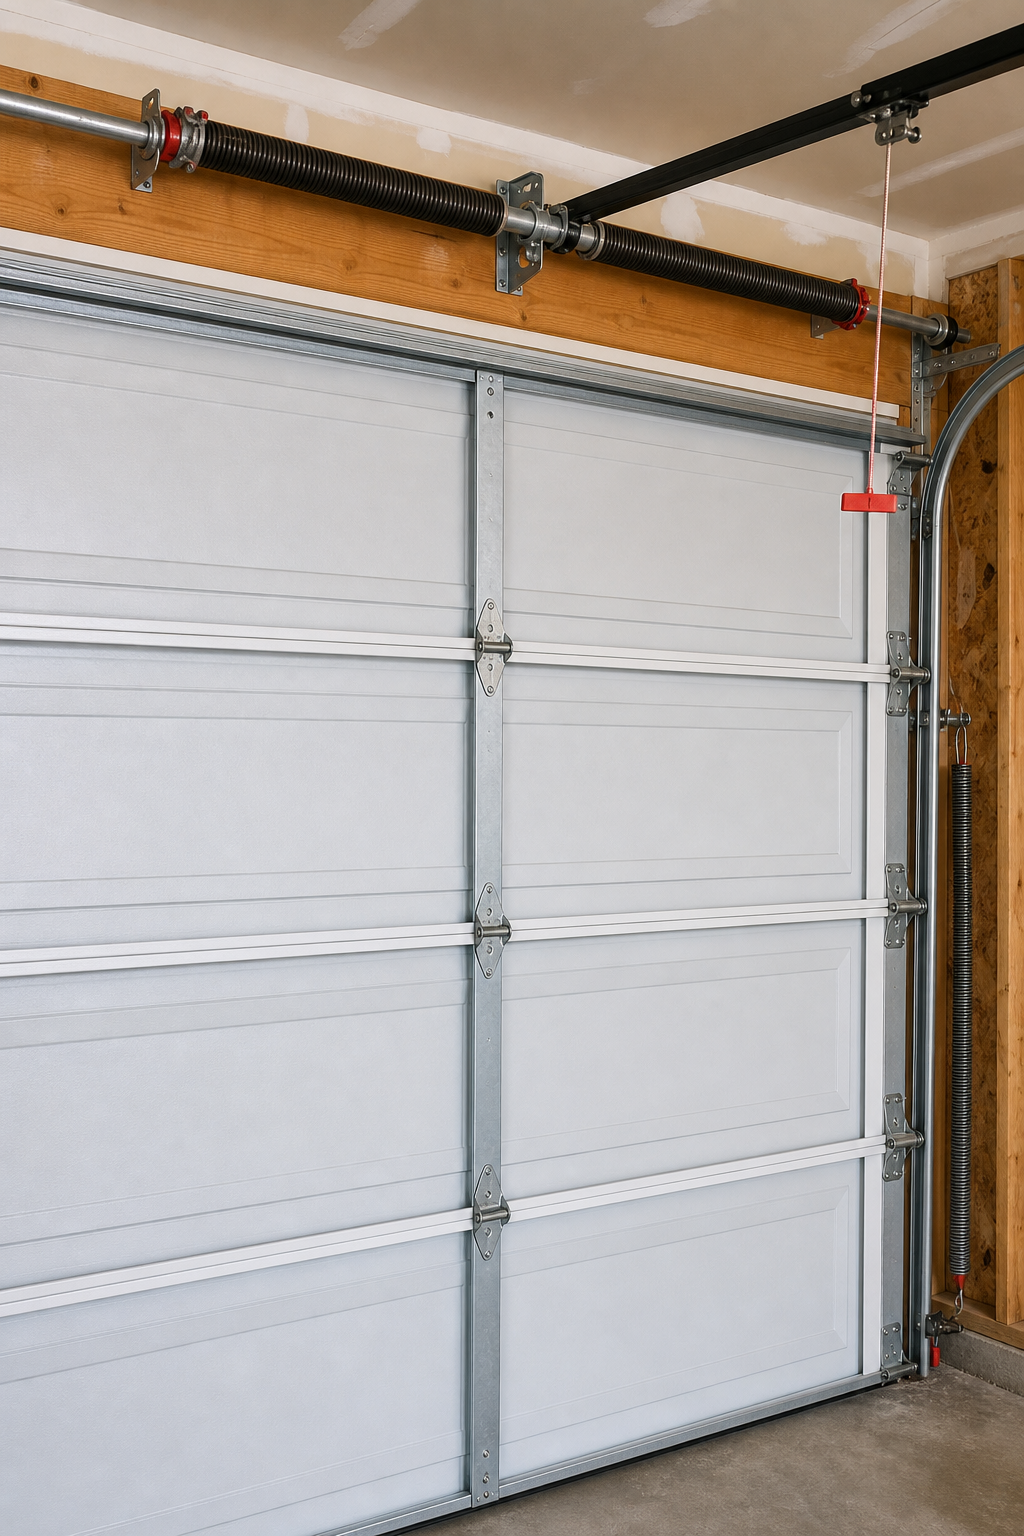
First, know which spring your door uses. There are two main families: extension springs and torsion springs. Extension springs stretch along the door’s side tracks. Torsion springs sit on a shaft above the door and twist to store energy. Wikipedia explains the mechanics in plain terms, so you can tell them apart just by looking.
Extension springs are attached at both ends to the track assembly. When the door closes, they stretch and pull the door back up. Torsion springs are coiled around a metal tube and use a drum to wind the cable. They tend to look cleaner because the hardware sits on the ceiling instead of the sides.
Why does this matter? The type dictates the safety gear you’ll need and the cost range. Torsion springs usually cost more but last longer. Extension springs are cheaper but need more hardware.
Next, check the condition. Look for rust, gaps in the coils, or a broken piece. If you see any of those signs, the spring is on its way out. Also listen for loud creaking when the door moves, another red flag.
Don’t try to wind a spring yourself. The tension is enough to cause serious injury. If you spot damage, move to the next step or call a pro.
Key Takeaway:Knowing whether you have a torsion or extension spring sets the stage for accurate sizing and safe handling.
When you’re ready, note the spring’s make and model if you can find a label. Many newer springs have a stamped part number. Write it down; it will help when you request quotes.
Lastly, consider the age of the spring. Most last 7‑10 years or about 10,000 cycles. If yours is older than that, you’re likely looking at a replacement rather than a repair.
Step 2: Measure Your Springs for Correct Sizing
Accurate measurements keep you from ordering the wrong part. For torsion springs, you’ll need three numbers: the wire size, the inside length, and the coil count. Extension springs need the overall length, the wire diameter, and the weight rating.
Start with the wire size. Use a caliper or a ruler to measure the thickness of the spring wire. It’s usually listed in millimeters or gauge numbers. If you can’t read it, compare the wire to a standard gauge chart you can find online.
Next, measure the inside length of a torsion spring. That’s the distance between the ends of the coil when the spring is relaxed. For extension springs, measure from end to end while the spring is still attached to the door.
Finally, count the coils. For torsion springs, count the number of complete turns from one end to the other. For extension springs, you’ll count the total number of loops you see.
Write all three numbers down on a piece of paper. Double‑check each measurement; a mistake can cost you an extra $100‑$200 in parts.
If you prefer video guidance, the following tutorial breaks down each measurement step. Watch it, pause, and follow along with your own door.
Pro Tip: Use a magnetic tape measure so the metal spring doesn’t slip off the hook.
When you have the numbers, you’re ready to compare them to the specs on replacement kits. Most kits list the compatible wire size, length, and coil count right on the box.
Step 3: Understand the Key Cost Factors
Now that you know what you have, let’s look at what drives the price. The three biggest buckets are labor, parts, and warranty.
Factor | Typical Range | What Affects It |
Labor | $150‑$225 | Location, technician experience, time of day |
Parts | $30‑$225 | Spring type, weight rating, brand |
Warranty | None‑to‑lifetime | Provider policy, spring quality |
According to the data collected from multiple service providers, the average labor charge sits at $191.67 while parts average $110. That puts the combined average at about $301.67. Some companies, like Interior & Exterior Repair Services, offer a flat‑rate $225 package that includes both labor and parts, undercutting the average.
359.38average total cost
The total cost you’ll see on a quote usually falls between $150 and $700. The high‑end numbers belong to premium high‑cycle torsion springs, which can reach $1,500 for a pair.

Why does the price swing so much? Heavy doors need stronger springs, and stronger springs are built from thicker wire. Also, some providers hide the labor vs. parts breakdown, so you only see a total range.When you compare quotes, ask for a line‑item breakdown. That lets you see if a provider is inflating labor or parts.Remember, the cheapest quote isn’t always the best. A low‑priced part may be a lower‑quality spring that fails early, costing you more in the long run.Step 4: Compare DIY vs Professional ReplacementDo it yourself or hire a pro? The choice hinges on safety, tools, and time.DIY kits start at $30‑$120 for the springs alone. You’ll need winding bars, a sturdy ladder, and safety glasses. The biggest risk is the stored tension. If you slip, the spring can snap and cause serious injury.The U.S. Census Bureau reports an average of 42 garage door injuries per year, many involving springs. Professional technicians have specialized tools that clamp the spring safely while they unwind it.Professionals also check related parts, cables, pulleys, and brackets. A worn cable can cause the door to fall even if the spring is new.On the cost side, hiring a pro adds $150‑$225 for labor. If you add a $225 flat‑rate package, you end up paying $360 total, still less than the average $359.38 you’d see from a broken‑down quote that separates parts and labor.Pro Tip: If you choose DIY, buy a torque‑wrench set that includes a spring‑winding bar. It will make the job safer and faster.Most homeowners opt for a pro because the risk outweighs the modest savings. If you’re comfortable with the tools and have a clear workspace, a DIY kit can work, but always wear protective gear and follow a step‑by‑step video.Step 5: Get Accurate Quotes from ProfessionalsGetting a solid quote starts with clear info. Call at least three local companies and give them the measurements you took in Step 2. Mention the spring type, wire size, length, and coil count.Ask each provider for a line‑item estimate. That means they’ll list labor, parts, and any service fees separately. A transparent quote helps you spot hidden fees.Don’t forget to ask about warranties. Some companies include a lifetime parts guarantee, while others only cover labor for a year.When you compare the numbers, look for these red flags:Labor cost that’s dramatically higher than the average $191.67.Parts price that seems too low, could be a low‑quality spring.No warranty or a warranty that only covers the installer, not the spring.Here’s a quick checklist you can print out before you call:Spring type and measurements.Desired warranty length.Preferred service window (weekday vs weekend).Any additional components you suspect might need replacement.Once you have at least three quotes, compare them side by side. The lowest total cost isn’t always the best, consider the warranty and the company’s reputation.For a trusted local option, LGFMH Construction offers a full repair service that includes a free safety inspection and a written warranty on both parts and labor. Their experience with interior and exterior repairs means they’ll check the surrounding hardware, not just the spring.Step 6: Evaluate Warranty and Service GuaranteesWarranty details can save you money down the road. Some providers only cover labor for 90 days, while others back the spring for life.American Home Shield notes that a typical garage door spring warranty covers the spring itself but not the door or tracks. That’s a good baseline, but you can find companies that go further.When you get a quote, ask these questions:Does the warranty cover the spring only, or also the cables and drums?Is the warranty transferable if I sell the house?What’s the process for filing a claim, phone call, online form, or in‑person visit?Pro Tip: Choose a provider that offers a written warranty with a clear expiration date. A verbal promise is hard to enforce.Also, check if the company offers a service guarantee, like a 24‑hour response time for emergencies. Fast service can prevent further damage if a spring snaps suddenly.Finally, keep all paperwork. Store the invoice and warranty documents in a folder with your other home‑maintenance records. When it’s time for the next seasonal check, you’ll have everything you need.Frequently Asked QuestionsWhat is the average cost to replace a garage door spring?The average total cost sits around $360, with labor averaging $191.67 and parts averaging $110. Prices can range from $150 for a basic extension spring to $1,500 for a premium high‑cycle torsion pair.How often should garage door springs be replaced?Most springs last 7‑10 years or about 10,000 cycles. If you notice gaps in the coils, rust, or the door feels heavy, it’s time to replace them. Regular visual checks each season help you catch wear early.Can I replace the springs myself?DIY is possible but risky. Springs store a lot of tension, enough to cause serious injury. If you lack winding bars and safety gear, it’s smarter to hire a professional who can handle the torque safely.What are the signs that a spring is failing?Listen for loud creaking, watch for the door not staying open, and look for visible gaps or rust on the coils. If the door drops suddenly when you open it, that’s a clear warning sign.Do home warranties cover garage door springs?Many home‑warranty plans, like those from American Home Shield, cover torsion springs but not the door itself. Check your policy’s fine print for coverage limits and any service fees.Is a flat‑rate quote better than separate labor and parts pricing?Flat‑rate pricing can be more transparent and often cheaper. A $225 flat‑rate package includes both parts and labor, which beats the combined average of $301.67 you’d see if labor and parts were billed separately.How do I choose a reliable garage door service?Look for companies with written warranties, clear line‑item quotes, and positive reviews. Ask friends for referrals and verify that the tech is licensed and insured.What should I do if my garage door springs break suddenly?Stay away from the door. Do not try to open it. Call a professional repair service right away. A broken spring can make the door drop fast, which is dangerous for anyone nearby.Choosing the right path for garage door spring replacement saves you time, money, and headaches. Start by identifying the spring type, measure it accurately, and understand the cost drivers. Compare DIY and professional options with safety in mind. Get clear, line‑item quotes and weigh warranty offers before you sign. When you follow each step, you’ll avoid surprise costs and keep your garage door working smoothly for years.If you need a trusted local pro, LGFMH Construction can handle the full job, from inspection to replacement, while giving you a written warranty. Their team knows how to keep the door balanced and safe.Now you’ve got the knowledge to make a smart decision. Measure, compare, and act. Your garage door will thank you.
"Attempting a garage door spring repair without proper tools is a gamble with your safety. The tension stored in a spring can exceed 1,000 lb." , Precision Door National Blog


Comments