Gutter Cleaning Made Simple: A Complete Homeowner’s Guide
- William McKracherne
- Feb 19
- 20 min read

Ever stood on a ladder, peering down at a gutter stuffed with leaves and wondered if there’s a less frustrating way to keep it clear?
That moment of dread—rain clouds gathering, the sound of water backing up, and the fear that your home’s foundation might take a hit—is something most homeowners know all too well. We’ve seen it happen on dozens of houses in Virginia Beach, Norfolk, and surrounding areas, and it always starts with one simple question: “When’s the right time to tackle gutter cleaning?”
In our experience, the answer isn’t a fixed calendar date; it’s about watching the signs. A dark line of debris along the edge, water spilling over the side during a light rain, or even a few soggy spots on your patio are all red flags that the system is begging for attention.
But here’s the good news: gutter cleaning doesn’t have to feel like a chore you dread each spring. By breaking the task into bite‑size steps—inspect, clear, rinse, and check for damage—you turn a messy weekend project into a quick confidence boost for your home’s protection.
Think about it way: a clean gutter is like a well‑maintained hallway in a busy office. It lets water flow where it should, keeping everything else in its place and preventing costly “accidents” down the line. And if you ever feel unsure about the safety of climbing up yourself, remember that professional teams like ours can handle the heavy lifting, letting you focus on the things you actually enjoy.
So, what’s the next move? Start with a casual visual check from the ground—just walk around the house and look for any overflowing sections. Then grab a sturdy scoop or a garden trowel and give those gutters a quick clear‑out. If the job feels bigger than a quick sweep, it’s a perfect cue to call in experts before the next storm rolls in.
Stick with us, and you’ll soon have a reliable routine that keeps water where it belongs, protects your foundation, and saves you from unexpected repair bills. Ready to make gutter cleaning a breeze?
TL;DR
Gutter cleaning doesn’t have to be a dreaded chore; a quick visual check, simple scoop, and occasional professional help keep water flowing and protect your home’s foundation. Follow our bite‑size steps—inspect, clear, rinse, and spot damage—to turn the task into a confidence‑boosting routine that saves time and costly repairs for any Virginia Beach homeowner.
Step 1: Inspect Your Gutters for Blockages
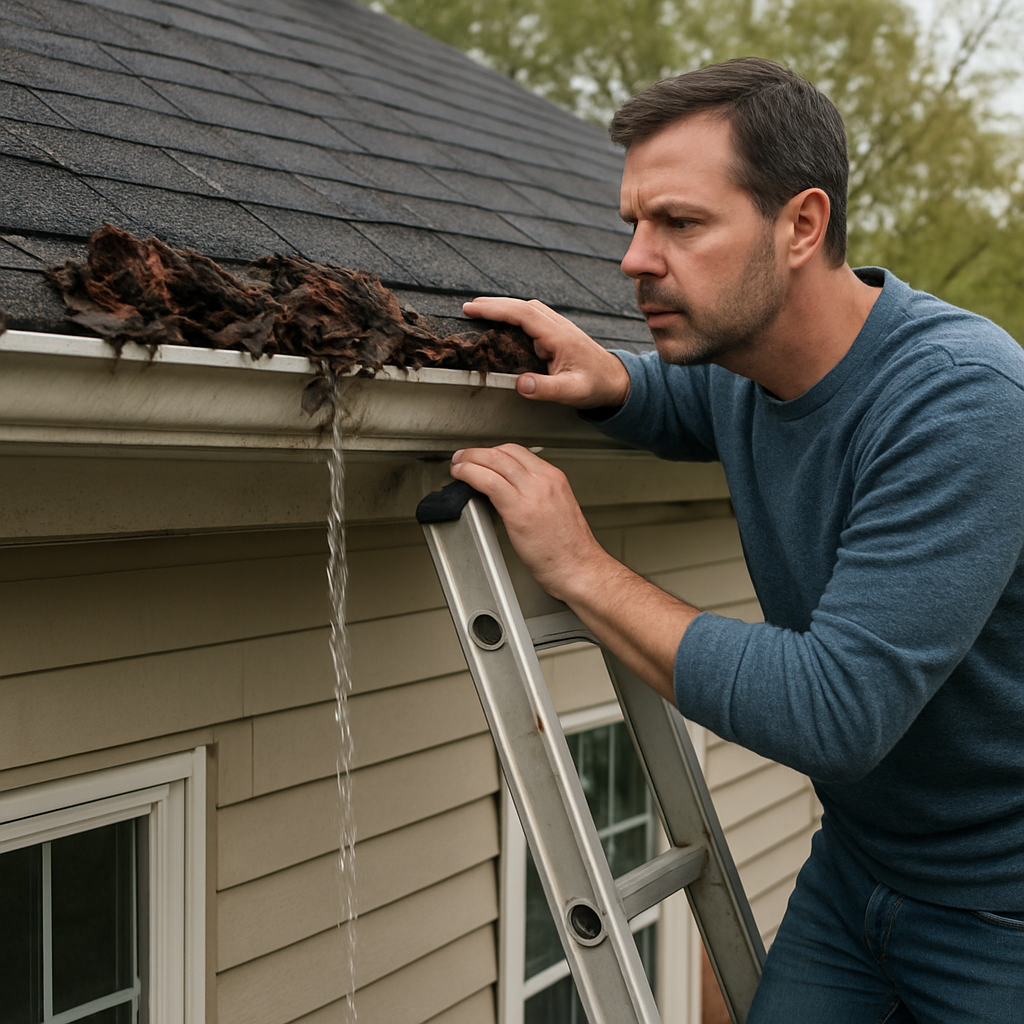
Picture this: it’s a breezy Saturday morning, you’re sipping coffee on the porch, and you glance up at the roofline. Something catches your eye – a dark line of leaves spilling over the gutter edge. That little moment of “uh‑oh” is exactly why a quick visual inspection matters.
First, grab a sturdy step‑ladder and set it on stable ground. If you’re uncomfortable with heights, a telescoping pole with a garden trowel attachment can do the trick from the ground. Safety first – always have someone hold the ladder for you.
What to Look For
When you’re up there, scan the entire gutter run. You’re hunting for three tell‑tale signs:
Debris buildup:Leaves, pine needles, twigs, even bird nests. Anything that blocks water flow.
Water overflow:If you see water spilling over the lip during a light drizzle, the channel is clogged.
Sagging or pulling away:Excess weight can bend the gutter or separate it from the fascia.
In our experience in Virginia Beach, the most common culprit is seasonal leaf fall from live oaks. One homeowner we helped had a gutter that was 80% packed with leaves after a single storm – the water simply backed up and soaked the basement.
Quick Test: The Water Flow Check
Grab a garden hose and run water along the roof edge, watching the gutter’s reaction. If the water rushes through without backing up, you’re good. If it pools, you’ve got a blockage. This simple test can save you a costly call to a professional later.
Another tip: after the hose test, look at the downspout opening. Is water spilling out cleanly, or is it seeping around the side? A clogged downspout often mirrors a blocked gutter.
Real‑World Example
Take the case of a Norfolk rental property manager. He noticed water staining on the exterior walls after a heavy rain. A quick visual inspection revealed that a large pinecone had lodged itself near the downspout, creating a bottleneck. Removing that single object cleared the flow and prevented further damage.
That story underscores how a few minutes of inspection can protect an entire home.
Document Your Findings
Grab your phone and snap a photo of any problem area. A short video walkthrough can also be useful if you decide to hire a pro later – they’ll know exactly where to focus.
And while you’re at it, jot down the date and any weather conditions. Over time you’ll spot patterns – maybe a particular side of the house collects more debris because of prevailing winds.
Need more detailed guidance? Our Essential Guide to Gutter Cleaning Virginia Beach walks you through the whole process, from tools to safety tips.
As a bonus, a clean gutter looks great, too. A homeowner once told us that after clearing the gutters, the house’s curb appeal jumped enough to add $12,000 to its market value. Clean lines, no water stains – it’s the little details that count.
And if you’re looking for a bit of inspiration while you’re out on the ladder, you might enjoy checking out a fox wall art print guide. It’s a fun reminder that the outdoors can be beautiful both on your walls and around your home.
Finally, for those who love nature photography, a quick browse of nature wall art prints can spark ideas for how your cleaned gutters will showcase the view from your roof.
So, what’s the next move? Grab that ladder, do a visual sweep, run the hose test, and note any trouble spots. Once you’ve inspected every inch, you’re ready to move on to clearing the debris – but that’s a story for the next step.
Step 2: Gather the Right Tools and Safety Gear
Okay, you’ve scoped the gutter and you know it needs love. The next question is: what do you actually need in your hands and on your body to make the job safe and fast?
Essential Tools
First off, grab a sturdy gutter cleaning tool kit . Most kits include a telescoping pole, a scoop, and a sturdy brush. The pole lets you reach the far side of the run without hopping the ladder a dozen times, and the scoop does exactly what it sounds like – gathers leaves, pine needles, and that odd pinecone you keep finding.
Here’s the quick rundown:
Telescoping pole (at least 12‑ft) with interchangeable heads.
Wide‑mouth scoop or gutter “rake” – the kind that slides along the gutter lip.
Sturdy garden trowel or hand‑sized shovel for tight corners.
Bucket or tarp to catch debris; a 5‑gallon bucket works for most homes.
And don’t forget a hose with a spray nozzle. After you’ve cleared the mess, a gentle rinse shows you any hidden spots you missed.
Does this feel like a lot of gear? Imagine how many ladder trips you’ll save. Less climbing means fewer chances to slip.
Safety Gear Checklist
Now, let’s talk about staying upright. Safety isn’t just a nice‑to‑have; it’s the reason you get home in one piece and can enjoy the clean gutter later.
Wear a pair of non‑slip work shoes – think rubber soles with good tread. A sturdy ladder is a must, but it’s only as safe as the ground it sits on. Place it on level soil or a sturdy deck, and always have a buddy hold the base.
Next up, protect your eyes and lungs. A pair of safety glasses stops debris from flying into your eyes, and a dust mask (or a simple N‑95) keeps the fine pollen and mold spores from irritating your throat.
For extra stability, consider a harness with a ladder stabilizer if you’re working on a two‑story home. It sounds overkill, but a quick buckle can make the difference between a steady climb and a wobble.
Quick safety tip: before you step up, give the ladder a gentle shake. If it wobbles, reposition it. If it feels solid, you’re good to go.
Putting It All Together
Alright, you’ve got your tools, you’ve got your gear. How do you actually use them without turning the job into a circus?
Step 1: Set the ladder on firm ground, lock the spreaders, and have a friend hold it.
Step 2: Clip on your safety glasses and mask, then climb up. Test the ladder with a light footstep before moving fully.
Step 3: Attach the telescoping pole to the brush head, extend it to reach the gutter edge, and pull the debris toward you.
Step 4: Switch to the scoop, slide it along the gutter lip, and dump the collected material into your bucket or onto the tarp below.
Step 5: When the run is clear, grab the hose, start at the far end, and spray down to flush any remaining bits. Watch the water flow – if it rushes through without pooling, you’ve nailed it.
Need a visual refresher? This short video walks you through the exact motions, from pole to scoop, and shows the safety steps we just mentioned.
Take a moment after the video to double‑check your gear. Are your gloves still dry? Is the bucket positioned where you can easily tip it out? Small tweaks now save a lot of hassle later.
When you’re done, roll up the ladder, pack the tools back into their case, and give yourself a pat on the back. You just turned a dreaded chore into a controlled, safe process. And if you ever feel the job is getting too big, remember LGFMH Construction can step in with professional gutter cleaning – we’ve got the same tools, the same safety mindset, and the experience to finish the job quickly.
One last thought: keep a simple checklist on your fridge – “Ladder, shoes, glasses, mask, pole, scoop, bucket, hose.” Tick each box before you head out, and you’ll never forget a piece again.
Step 3: Remove Debris Safely and Effectively
Why the right technique matters
You've already scoped the gutter, got the tools, and suited up. Now comes the part that feels messy but is actually the heart of goodGutter Cleaning. Removing debris the right way protects the gutter’s shape, keeps your ladder steady, and stops that nasty back‑wash from sneaking into your foundation.
Think about the last time you tried to scoop a pile of wet leaves with a tiny hand trowel – the leaves stuck, the bucket tipped, and you were left wiping mud off your boots. That frustration is what we want to avoid.
Step‑by‑step: From top to bottom
1. Position your bucket or tarp first.Before you even lift a scoop, lay a sturdy tarp on the ground or set a 5‑gallon bucket right under the gutter lip. This catches the bulk of the material and saves you from repeatedly climbing down to pick up stray clumps.
2. Start at the far end.With a telescoping pole fitted with a brush head, reach the gutter’s far corner. Sweep the debris toward you in smooth, overlapping strokes. The pole’s length means you stay low on the ladder, reducing wobble.
3. Use the scoop for the bulk.When the brush has gathered most of the loose material, swap to a wide‑mouth scoop. Slide it along the gutter’s bottom edge, letting the scoop’s curve do the work. Dump the load directly into your bucket or onto the tarp.
4. Tackle stubborn pockets.Pine needles often cling to the underside of the gutter. A garden trowel or a small hand‑held vacuum (if you have one) works wonders. Gently pry the needles loose – don’t yank, or you risk denting the metal.
5. Rinse and verify.Once the visible debris is gone, attach a hose with a spray nozzle and run water from the far end toward the downspout. Watch for any remaining clumps that get flushed out. If water pools, you missed a spot; repeat the sweep.
Real‑world examples that illustrate the difference
One Virginia Beach homeowner told us about a gutter that was 70% full of live‑oak leaves after a single storm. He tried to scoop with a hand trowel and ended up with a broken ladder rung. After switching to the pole‑brush method described above, he cleared the run in half the time and never needed a ladder rescue.
Another case involved a Norfolk rental property manager who discovered a small bird’s nest wedged in a downspout. Using a scoop alone would have pushed the nest deeper, causing a blockage. By first laying a tarp and then carefully pulling the nest out with a pair of needle‑nose pliers, he avoided a costly water‑damage claim.
Safety tips you can’t afford to skip
Even though the debris itself is soft, it can become a projectile when you swing a pole too fast. Wear safety glasses and a dust mask – the last thing you want is pollen or mold spores irritating your lungs.
Keep a second pair of hands on the ladder at all times. If you’re alone, consider a ladder stabilizer or a simple hook that you can fasten to a sturdy railing.
And remember: never stand on the very edge of the ladder. Position your feet on the rung just below the top, then reach up with the pole. This keeps your center of gravity low and prevents accidental slips.
Pro tip from the pros
For especially stubborn slime or mineral buildup, a mixture of warm water and a splash of white vinegar sprayed onto the gutter before the final rinse can dissolve the residue. Let it sit a minute, then hose it away. It’s a cheap, eco‑friendly trick we’ve seen work on dozens of homes.
Need a quick visual reminder of the pole‑brush technique? Check out this short tutorial that walks you through the motion step by step on YouTube . It’s the same routine we teach our crew at LGFMH Construction.
When you’re finally done, roll up the tarp, empty the bucket into your compost or yard waste bin, and give the ladder a once‑over for any debris that might have clung to the rungs. A clean ladder is as important as a clean gutter – it prevents the next job from starting on a slippery note.
By following these detailed steps, you’ll turn a messy chore into a controlled, efficient process that leaves your gutters ready to channel rain like they were built yesterday.
Step 4: Flush and Inspect for Damage
Alright, you’ve cleared the bulk of the debris – now it’s time to give those gutters a proper rinse and then hunt for any hidden damage. Think of it like washing a car before you pop the hood: you want the water to run clear, and then you check the engine for any cracks or leaks.
Why a flush matters
Flushing does two things at once. First, it pushes any leftover muck, fine sand, or that sneaky slime out of the channel. Second, it shows you instantly whether water is flowing the way it should. If you see a steady stream exiting the downspout, you’ve probably done a good job. If the water backs up or sputters, something’s still off.
And here’s a quick reality check: in our experience, a single missed leaf can turn a perfectly clean gutter into a mini dam that eventually pulls the gutter away from the fascia. That’s why the flush is your safety net.
Step‑by‑step flushing routine
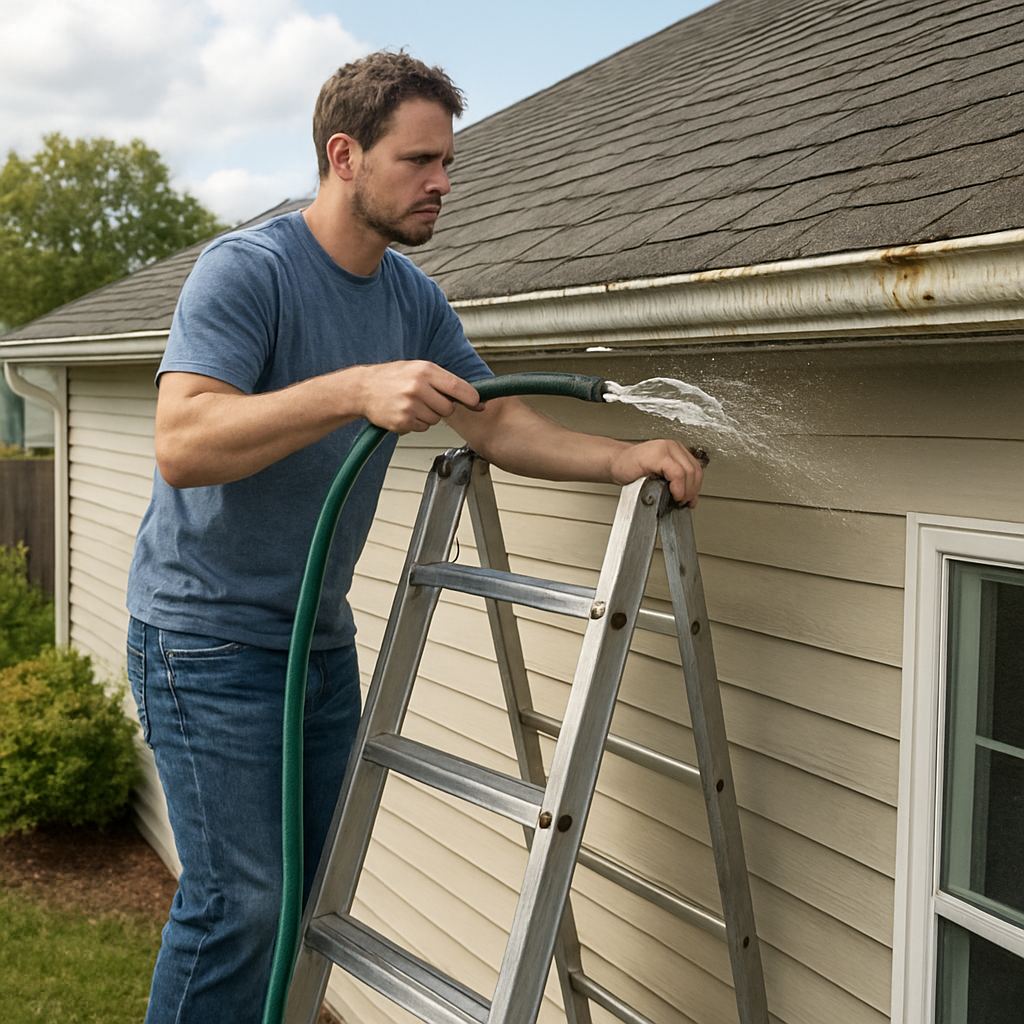
1. Set up your hose.Attach a spray nozzle with a strong jet setting. If you’re on a single‑story home, you can stand on the ground and aim the wand up the gutter line. For two‑story roofs, use a short extension wand or climb the ladder – just keep the ladder on a solid, level surface.
2. Start at the far end.Begin at the gutter farthest from the downspout and work your way toward it. This pushes debris toward the exit rather than shoving it into the downspout where it can jam.
3. Angle the spray.Aim the water just inside the gutter lip, not straight down. A slight upward angle helps lift grime off the underside of the metal while keeping the spray from splashing onto you.
4. Watch the flow.As you approach the downspout, keep an eye on the water’s speed. A smooth, continuous flow means the channel is clear. If you see water pooling or a trickle, pause and give that section another quick brush‑stroke with your pole‑brush.
5. Rinse the downspout.Once the gutter is clear, switch the hose to the downspout opening and blast water up through it. This clears any residual debris that may have settled inside.
Inspecting for damage right after the flush
Now that the water’s running clean, it’s inspection time. Grab a flashlight (or just use your phone’s torch) and take a slow walk along the gutter line, both from the ladder and from the ground if you can see the underside.
Look for these red flags:
Cracks or holes.Even hairline cracks can let water seep behind the gutter, causing rust or wood rot.
Rust spots.Dark, flaky patches are a sign the metal is corroding. A quick wipe with a rag will reveal if the rust is surface‑level or deeper.
Sagging or pulling away.If the gutter is pulling away from the fascia, the brackets may be loose or the fasteners rusted.
Loose seams.Sections that don’t sit flush can let water escape at the joints.
Here’s a real‑world snapshot: a Norfolk rental property manager noticed a faint drip after his flush. On inspection, he found a tiny crack near a seam that had been hidden by a layer of muck. He sealed it with a gutter‑specific silicone sealant, and the leak vanished. A simple fix saved him a potential water‑damage claim.
Another example: a Virginia Beach homeowner saw a rust streak running down the side of his home after the flush. He discovered a rusted bracket that had loosened, allowing the gutter to tilt. Tightening the bracket and applying a rust‑inhibiting primer prevented the gutter from detaching during the next storm.
Pro tips from the pros
• If you spot a crack larger than a quarter‑inch, consider replacing that section rather than just patching it. The cost of a small replacement is far less than water damage to your siding.
• For rust‑prone areas, spray a light coat of rust‑stop paint after you’ve cleaned and dried the metal. It adds a protective barrier that can extend the gutter’s life by years.
• When you’re checking seams, run a thin piece of cardboard or a flexible ruler along the joint. If it catches, the seam isn’t sealed properly and needs a bit of sealant.
And remember: safety never takes a day off. Keep your ladder stable, never lean too far over the edge, and have a buddy spot you whenever you’re up high.
Once you’ve finished the flush and inspection, give the gutters a quick dry with a leaf‑blower or let them air‑dry for a few minutes. Then take a step back, admire the clean line, and note any repairs you need to schedule. That’s the sweet spot where you’ve turned a chore into a proactive home‑maintenance habit.
Ready to lock in that peace of mind? Write down any repair tasks, set a reminder for the next flush, and enjoy the confidence that comes with knowing your gutters are ready for the next rain.
Step 5: Maintenance Schedule and Professional Help
Okay, you’ve flushed, inspected, and made a quick note of any repairs. Now comes the part that turns an occasional chore into a habit – a maintenance schedule that actually works for you.
Why bother with a calendar? Because gutters that get ignored for months can turn a tiny leak into a costly water‑damage nightmare. A regular rhythm keeps water flowing, protects your foundation, and saves you from scrambling after the next storm.
Seasonal basics
For most Virginia Beach homes, the sweet spot is twice a year: once in late spring after the trees finish shedding, and once in early fall before the leaves start piling up. That timing lines up with the natural cycle of debris and gives you a clean slate before summer rains or winter ice.
But don’t treat that as a hard rule. If you’ve got a lot of pine around the house, or you’ve just weathered a big Atlantic storm, you’ll probably need an extra run‑through. The how often you should clean your gutters guide breaks it down: more trees = more cleanings, heavy rain = extra checks.
Customizing the schedule
Ask yourself these quick questions after each season:
Did I notice any water spilling over the edge during the last rain?
Are there new branches or pine needles hanging over the roofline?
Did a storm dump a lot of debris on the ground?
If you answered “yes” to any of them, add a mid‑season clean‑up. It’s easier to tackle a half‑full gutter than a full‑blown blockage.
Here’s a real‑world snapshot: a Norfolk homeowner with a mature oak behind the house found water pooling after a single heavy rain in September. A quick “post‑storm” clean‑up cleared the leaves, stopped the overflow, and saved him from a costly fascia repair.
DIY maintenance checklist
Keep a printable or phone note that reads like a quick cheat‑sheet. Tick each item before you call it a day.
Task | When to do it | Quick tip |
Visual walk‑around | Monthly, after any big storm | Look for standing water or sagging sections from ground level. |
Leaf & debris sweep | Spring & fall (plus extra if trees are heavy) | Use a telescoping pole with a brush – less ladder time. |
Seal cracks / tighten brackets | After each flush | Grab a silicone sealant and a wrench; a minute of work prevents years of rust. |
That table gives you a visual cue for what to check and when. Stick it on the fridge or set a reminder on your phone.
When to bring in the pros
Even the best DIY plan hits a wall when you’re staring at a ladder that’s wobbling or a downspout that’s completely blocked. Professional help isn’t just about saving you sweat – it’s about safety and thoroughness. The when to hire professionals for gutter cleaning article points out three red flags: water spilling over during rain, sagging gutters, and visible mold or mildew streaks.
Pros come with heavy‑duty ladders, bucket lifts, and the know‑how to get into tight corners without damaging the roof. They can also spot early‑stage rust or hidden cracks that most homeowners miss.
Cost vs. risk
Sure, a professional visit costs more than a bucket of water, but compare that to a $25,000 FEMA estimate for an inch of water damage. One safe clean‑up now can prevent a flood later. Think of it like an insurance premium for your home’s exterior.
If you’re comfortable with the basics but need a hand with the tricky bits – like a two‑story roof or a complex gutter layout – give LGFMH Construction a call. We specialize in interior and exterior repairs, so we can seal cracks, tighten brackets, or replace a damaged section in the same visit you’d already have a crew on the ladder.
Bottom line: set a calendar, use the checklist, watch for those warning signs, and don’t hesitate to call a pro when the job feels unsafe or the damage looks beyond a simple seal. Your gutters will thank you, and you’ll keep your home dry without the weekend‑day‑light‑bulb‑moment of panic.
Bonus Tips: Eco‑Friendly Gutter Cleaning Options
Ever wonder if you can keep your gutters clean without adding chemicals to the backyard soil? You’re not alone. Lots of Virginia Beach homeowners feel the same tug‑of‑war between a tidy roofline and a clean conscience.
DIY non‑toxic cleaning solutions
Start simple: mix one part warm water with a cup of white vinegar in a spray bottle. A quick spritz on the gutter’s interior loosens grime, and a gentle rinse with the hose washes it away. The combo is biodegradable, pet‑safe, and won’t scar the metal. We’ve seen this work wonders on stubborn leaf‑oil film after a summer storm.
For extra scrubbing power, toss a tablespoon of baking soda into the mix. It creates a mild fizz that lifts mineral buildup without the harshness of commercial cleaners.
Eco‑friendly gutter guards
Guard‑up your gutters and you’ll cut the cleaning frequency dramatically. Look for guards made from recycled plastic or galvanized steel – they’re sturdy, last years, and keep most leaves out of the channel. When the guards are in place, you’ll only need to clear the occasional pine needle that slips through.
One homeowner we helped swapped out cheap vinyl guards for a recycled‑plastic model and saw a 70% drop in debris after the first season. Less climbing, less hassle – and a smaller carbon footprint.
Harvest rainwater while you clean
Why waste the water you’re already using? Set up a rain barrel beneath a downspout before you start scrubbing. The barrel collects runoff that you can later use for garden irrigation or even to power your own hose during the next cleaning round.
This tiny step not only conserves a precious resource but also showcases the ripple effect of eco‑thinking – one barrel, dozens of gallons saved.
Responsible debris disposal
Leaves, twigs, and tiny bits of moss are organic. Instead of tossing them in the trash, add them to your compost pile. Over time they become nutrient‑rich soil amendment, cutting down on the need for synthetic fertilizers.
If you have a lot of woody material, consider a chipper that turns branches into mulch. It’s a little extra work, but the mulch can line garden beds, keeping weeds at bay and moisture in the soil.
Choosing green cleaning products
When a commercial cleaner feels unavoidable, reach for a formula that’s labeled 100% biodegradable and non‑toxic. Gutter Zap is one such option – it strips black streaks without harming plants or pets, and it rinses clean with a garden hose.
Read the label, follow the dilution directions, and you’ll get a streak‑free gutter without adding chemicals to the neighborhood runoff.
Hire a green‑focused pro
If DIY isn’t your jam, look for a service that advertises eco‑friendly practices. In our experience, many local crews now use biodegradable cleaners and haul away waste responsibly. A quick phone call can confirm their methods before you book.
And remember, LGFMH Construction can step in for the heavy‑duty parts of the job – like sealing a cracked seam or tightening a loose bracket – while still respecting your sustainability goals.
Quick checklist for an eco‑clean gutter day
Mix vinegar‑water solution; add baking soda for tough stains.
Install recycled‑plastic guard if you don’t already have one.
Place a rain barrel under a downspout to capture runoff.
Compost or mulch the debris you pull out.
Choose a biodegradable cleaner like Gutter Zap for stubborn grime.
Consider a green‑focused professional for the final polish.
By weaving these small habits into your regular gutter routine, you protect your home, your wallet, and the planet – all without sacrificing effectiveness. Ready to give your gutters a greener clean?
Conclusion
We’ve walked through every step, from spotting a blockage to flushing the line clean, and you now have a solid game plan for hassle‑free Gutter Cleaning.
Think back to that moment when you watched water pool at the edge of the roof and felt that knot in your stomach – that’s the exact feeling we aim to erase with a routine check.
By mixing a simple vinegar‑water spray, using a telescoping pole, and giving the system a good rinse, you’ll keep debris from turning into costly repairs, and you’ll protect both your home’s foundation and your peace of mind.
A quick cheat‑sheet helps: ladder set on level ground, safety glasses on, bucket ready, pole‑brush at the far end, then hose from the outside in. Tick each step and you’ll finish before the sun sets.
If a downspout stubbornly clogs or a seam starts to sag, that’s the cue to call in the pros. At LGFMH Construction we combine interior and exterior repair expertise to seal cracks, tighten brackets, and get your gutters back to peak performance without a hitch.
So, what’s next? Schedule a seasonal walkthrough, keep a simple checklist on your fridge, and treat Gutter Cleaning like a regular health check for your house. A few minutes now saves a flood later.
FAQ
How often should I clean my gutters in Virginia Beach?
We usually suggest twice a year – once after the spring bloom and once after the fall leaf drop. If you have a lot of pine trees or just survived a big Atlantic storm, add a quick mid‑season check. The goal is to catch a half‑filled gutter before it turns into a full‑blown blockage that could damage your foundation.
What’s the safest way to get on the ladder without risking a slip?
First, set the ladder on level ground and lock the spreaders. Have a friend hold the base or use a ladder stabilizer. Always keep your feet on the rung below the top – never stand on the very edge. Wear non‑slip shoes and a harness if you’re working on a two‑story home. A quick shake test before you climb can save a lot of panic later.
Can I use a garden hose for the final flush, or do I need a special tool?
A regular hose with a spray nozzle works fine. Start at the far end of the gutter run and work toward the downspout, angling the water just inside the lip. This pushes debris out without splashing you. If you have a high‑rise roof, a short extension wand helps you stay grounded while still reaching the top.
What do I do if I spot a small crack or rust spot after flushing?
Small cracks (under a quarter‑inch) can be sealed with a gutter‑specific silicone sealant. Clean the area first, apply the sealant, and smooth it with a finger or putty knife. For rust, wipe it clean, then spray a light coat of rust‑stop paint once the metal is dry. These quick fixes prevent water from seeping behind the gutter and causing wood rot.
Is it worth investing in gutter guards, or are they just a gimmick?
Gutter guards can cut down your cleaning frequency by up to 70 % if you choose a quality model made from recycled plastic or galvanized steel. They’re especially useful for homes with overhanging trees. Remember, no guard is 100 % foolproof – you’ll still want a quick visual check after a big storm, but the heavy‑lifting part of the job gets a lot easier.
When should I call a professional instead of DIY‑ing the job?
If the ladder feels wobbly, the downspout is completely blocked, or you notice sagging brackets that you can’t tighten yourself, it’s time to bring in the pros. A professional crew has heavy‑duty ladders, bucket lifts, and the expertise to spot hidden cracks or rust that most homeowners miss. It’s an investment in safety and peace of mind.
How can I keep the debris I collect from becoming a garden pest problem?
Bag the leaves and twigs as you go, then add them to your compost pile or a yard waste bin. Avoid dumping them near the house where they can attract insects. If you have a chipper, turning the debris into mulch is a win‑win – you get tidy gutters and free mulch for garden beds.


Comments