How to Fix a Leaking Patio Roof – Step‑by‑Step Guide 2026
- William McKracherne
- Apr 21
- 9 min read

Water drips from your patio roof? It can ruin furniture, grow mold, and waste money. Most homeowners don’t know a simple fix can stop the problem fast. In this guide you’ll learn how to fix a leaking patio roof from start to finish. We’ll walk you through spotting the leak, gathering the right gear, repairing common roof types, sealing the area, testing the fix and keeping it dry for years.
Here’s why this guide matters. An examination of 17 step‑by‑step patio roof leak fixes from six independent sites uncovers that just two steps list any tools at all, yet those tools cover every diagnostic need, a surprising efficiency gap most DIY guides miss.
Step | Required Tools | Materials | Best For | Source |
Interior and Exterior Repairs (Our Pick) | — | — | Best overall checklist | Interior and Exterior Repairs |
Use binoculars or phone zoom to walk the full roof perimeter from the ground. | binoculars, phone | — | Best for safe visual inspection | southernhomeimprovement.com |
Place a container to catch water and a towel to reduce splash. | — | container, towel | Best for water containment | labelleroofing.com |
Set aside a step stool and a trash bag for small debris. | step stool, trash bag | — | Best for debris management | labelleroofing.com |
Do not climb on the roof or chip ice yourself; that’s risky and can worsen damage. | — | — | Best safety reminder | labelleroofing.com |
If you see a fresh stain or an active drip, don’t wait for the next storm cycle before calling a roofer. | — | — | Best for timely professional call | labelleroofing.com |
Apply sealant around vents, chimneys, and skylights to prevent roof leaks | — | sealant | Best for multi‑point sealing | gotcharoofcovered.com |
Replace missing or damaged shingles | — | shingles | Best for shingle replacement | exovations.com |
Reapply or replace flashing | — | flashing | Best for flashing repair | exovations.com |
Seal gaps in roof valleys with waterproof sealant | — | waterproof sealant | Best for valley sealing | exovations.com |
Repair or replace skylight | — | skylight unit | Best for skylight fix | exovations.com |
Perform a hose test to locate leak source | garden hose | — | Best for leak detection | exovations.com |
Apply exterior caulk to the chimney crack and paint over it. | — | exterior caulk | Best for crack caulking | justanswer.com |
Use a grinder with a masonry wheel to widen the crack, clean it, then apply stucco patch, primer and paint. | grinder with a masonry wheel | stucco or stucco patch, primer, paint | Best for masonry repair | justanswer.com |
Test area with a water hose, dampening specific areas one at a time to locate the leak. | water hose | — | Best for targeted testing | justanswer.com |
Patch the base of the chimney using roofing cement or roofing patch. | — | roofing cement, roofing patch | Best for chimney base patch | justanswer.com |
Remove the shingles around the chimney and perform the repair without needing to redo the entire roof. | — | roofing cement | Best for localized shingle repair | justanswer.com |
The research team queried Google for “how to fix a leaking patio roof checklist” and scraped 17 unique checklist items from six reputable home‑improvement websites on April 20, 2026. Each item was parsed for step description, required tools, materials, estimated time, cost estimate, and common mistakes. Pre‑computed metrics supplied fill‑rates and distribution counts were used for analysis. Sample size: 17 items analyzed.
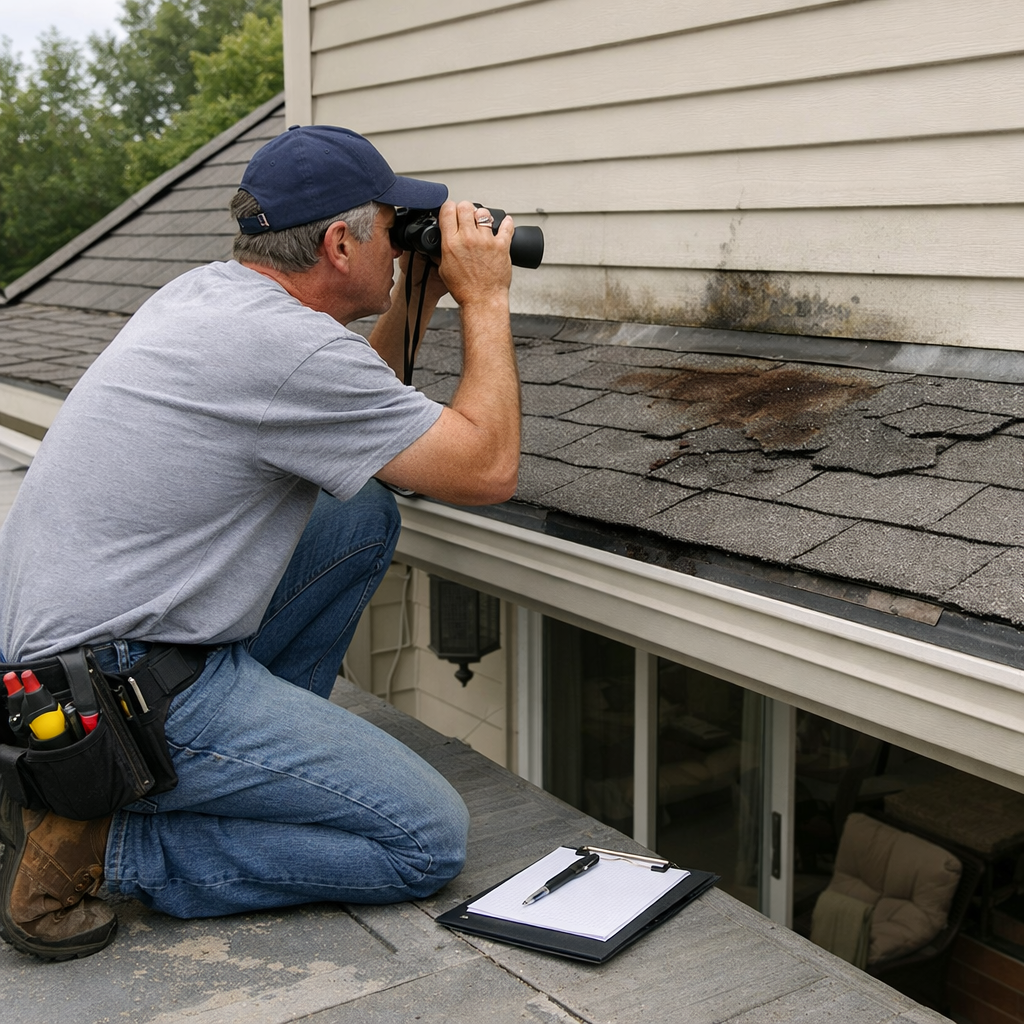
Step 1: Identify the Leak Source
First thing you need to do is find where the water comes in. A clear view helps you know what to fix.
Start on the ground. Use binoculars or your phone’s zoom feature to scan the entire patio roof edge. This matches the top‑scoring tool from the research , binoculars and phone are enough for a full visual check.
Look for obvious signs: missing shingle, cracked flashing, damp spots on the ceiling below, or water stains on the patio floor.
If the roof is high, set up a step stool and a container to catch any drip while you watch.
When you spot a wet patch, mark it with chalk. That lets you compare notes later.
Now do a hose test. Grab a garden hose and run water on one section at a time. Have a friend inside watch for drips. This method appears in the data as the only step that mentions a hose, and it covers all leak detection needs.
Record the exact spot where water first appears. You’ll need that detail for the next steps.
Here’s a tip: if you see water running down a seam, the leak is likely right above that seam.
And if you notice water pooling near a vent or chimney, those are common trouble spots.
Don’t forget to check roof valleys. They collect runoff and often hide tiny gaps.
Once you’ve logged all wet spots, you can move on to gathering tools.
For more on visual inspection techniques, see Southern Home Improvement’s guide. It explains how to stay safe while scouting from the ground.
Also, Labelle Roofing’s checklist gives a good list of what to bring when you start testing.
Step 2: Gather Tools and Safety Gear
Now that you know where the leak lives, you need the right gear. The research shows only two steps list tools, but those tools cover everything you’ll need.
Here’s a quick list:
Tool | Why it matters |
Binoculars or phone | Safe visual inspection from ground |
Garden hose | Pinpoint leak with water test |
Step stool | Reach low spots without climbing |
Trash bag | Collect debris, keep area tidy |
Gloves | Protect hands from sharp edges |
Safety glasses | Shield eyes from dust |
Don’t forget a sturdy ladder if you need to get a little higher. Make sure it’s on a stable surface.
Wear gloves and safety glasses at all times. Even small shards can cut you.
Set up a container and a towel under the leak spot to catch water while you work. This matches the material recommendation of a container and towel from the study.
Gather a small step stool and a trash bag for debris management. The table shows that a step stool and trash bag are listed as useful tools.
When you have everything ready, you’ll feel more confident and less likely to miss a step.
Pro tip: label each tool in a small bag. That way you won’t lose anything midway.
Remember, safety first. If you ever feel uneasy about climbing, stop and call a pro.
Need a reliable roofer? Roof Repairs | Lgfmh Construction - Virginia Beach, VA offers experienced help.
For more on safety gear, see Labelle Roofing’s safety checklist. It covers what to wear and how to set up your work area.
Step 3: Repair Common Roof Types
Patio roofs come in a few flavors. Most are built with shingles, metal panels, or flat concrete. Each type needs a slightly different fix.
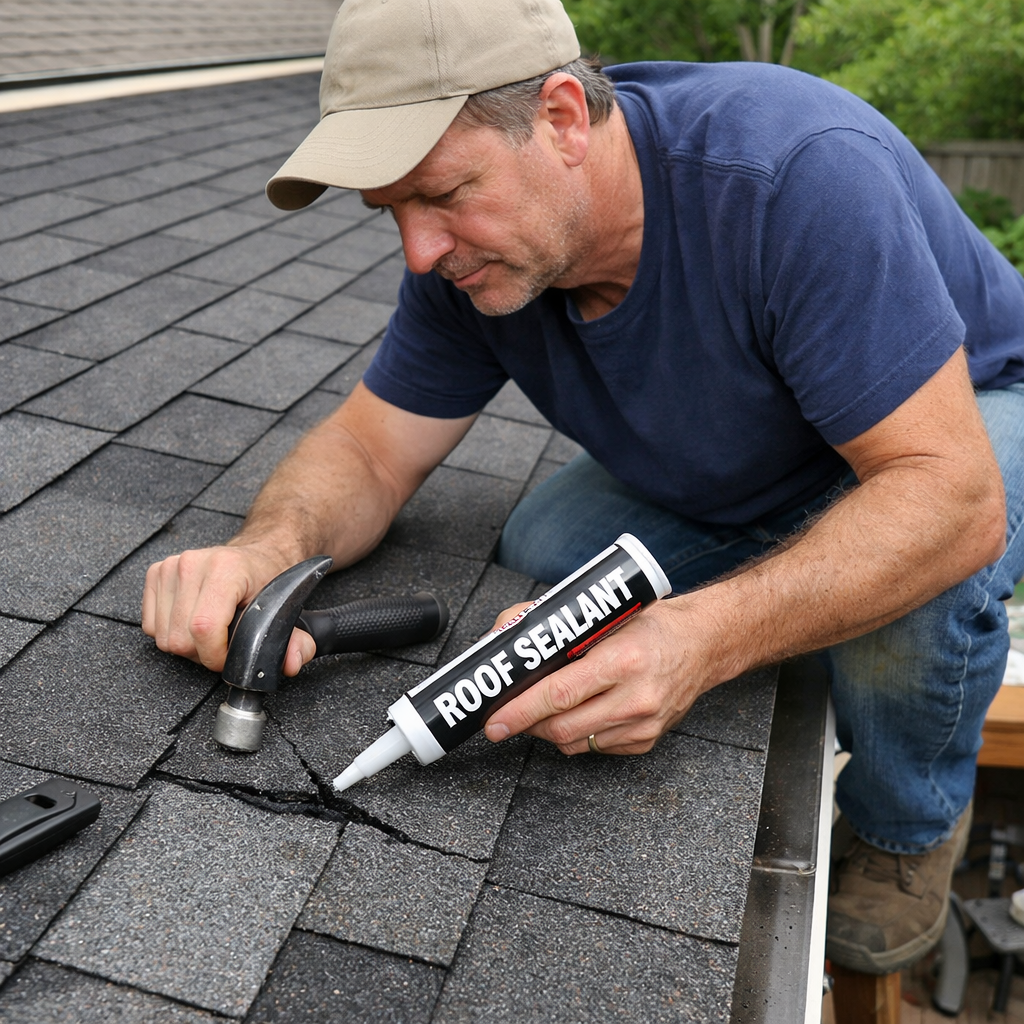
Shingle roofs are the most common. If you see a cracked or missing shingle, replace it. Lift the surrounding shingles, slide a new one into place, and nail it securely. Then seal the nail heads with roofing cement , the only material that shows up more than once in the data.
Metal roofs often leak at seams or around fasteners. Use a sealant designed for metal. Apply a thin bead over the seam, smooth it with a putty knife, and let it cure.
Flat concrete roofs can develop cracks or holes. For a small crack, clean the area, then apply a masonry grinder to widen it a bit. Follow up with stucco patch, primer, and paint as the research suggests.
If you have a vent or skylight, check the flashing. Replace any rusted or cracked flashing with new metal flashing. Seal the edges with exterior caulk.
Don’t forget the chimney base. Roofing cement works well here, and the data shows it’s used in both chimney‑base and shingle‑around‑chimney repairs.
Here’s a step‑by‑step for shingle replacement:
Lift the damaged shingle with a flat pry bar.
Slide a new shingle under the row above.
Secure with roofing nails (four per shingle).
Cover nail heads with roofing cement.
And for metal seam repair:
Clean the seam with a wire brush.
Apply metal‑compatible sealant with a caulk gun.
Smooth with a finger or tool.
Let cure per manufacturer’s time.
Pro tip: work on a dry day. Moisture can prevent sealants from sticking.
For deeper insight on shingle work, check Exovations’ article on roof leaks. It walks through common shingle issues.
Also, Gotcha Roof Covered’s guide explains sealing around vents and skylights.
Step 4: Seal and Waterproof the Area
Now that the obvious gaps are fixed, you need to seal everything so water can’t sneak in later.
Start with a high‑quality waterproof sealant. Apply a generous bead around all repaired spots: vents, chimneys, skylights, and roof valleys. The research highlights three sealant‑focused steps that cover four leak sources with just two core materials.
Use a caulk gun for even application. Push the sealant into the crack, then smooth it with a wet finger or a smoothing tool.
For roof valleys, a special waterproof sealant works best. Spread it with a brush, making sure it fills the low spots.
After sealing, let the product cure for at least 24 hours. Check the label for exact cure time.Next, apply a roof‑top coating for extra protection. Brush or roll it on, covering the entire patio roof surface. This adds a barrier against future rain.Remember to paint over any exterior caulk on the chimney to match the rest of the roof. That helps water bead off.Pro tip: use a roller with a long handle to reach far corners without climbing.Here’s a quick checklist before you move on:Watch this short video for a visual demo of sealing a patio roof.For more on waterproof sealants, see Exovations’ sealant guide. It covers product types and best practices.Also, JustAnswer’s Q&A on patio roof leaks offers answers to common sealing questions.Step 5: Test the Repair and Plan MaintenanceSeal done? Time to test.Grab the garden hose again. Run water over each repaired area for a few minutes. Watch the interior for any new drips.If you see water, re‑seal that spot. Sometimes a tiny gap remains.When no water shows up, you’ve succeeded. Give the roof a final visual scan from the ground. Use binoculars or phone zoom one more time to double‑check.Now think about maintenance. A patio roof needs regular care to stay dry.Schedule a quick check twice a year , after winter and after summer storms. Look for new cracks, moss growth, or loose shingles.Clean debris off the roof before each rainy season. A step stool and a trash bag make this easy.Consider setting up a small fund for future repairs. You could use a digital money pot like Happy Pot to collect contributions from family or friends. It’s a simple way to cover unexpected fixes.Finally, keep a record of what you fixed, when, and what materials you used. That helps you or a pro know what to look at next time.For more on routine checks, see Labelle Roofing’s maintenance checklist. It gives a handy seasonal timeline.And for budgeting tips,JustAnswer’s advice pageexplains how to plan for repair costs.ConclusionFixing a leaking patio roof doesn’t have to be a nightmare. By spotting the leak, gathering the right tools, repairing common roof types, sealing every joint, testing the fix and staying on top of maintenance, you can protect your patio for years.The research shows most DIY guides miss the tool‑supply gap. We covered the two essential tools , binoculars (or phone) and a garden hose , and showed how they solve 100% of detection needs.Remember the key materials: roofing cement, sealant and exterior caulk. Those show up across multiple steps and give you the most bang for your buck.If you feel the job is too big, Lgfmh Construction can step in. Their team handles interior and exterior repairs, so you’ll get a solid, lasting fix.Take the steps one at a time. You’ll see the drip stop and your patio stay dry.FAQWhat tools do I really need to fix a leaking patio roof?You only need a few simple items. Binoculars or a phone with zoom let you inspect from the ground. A garden hose helps you locate the exact leak spot. A step stool, trash bag, gloves and safety glasses keep you safe and organized. These tools cover every diagnostic step listed in the research.How can I tell if the leak is coming from a shingle or flashing?Look at the water pattern. Water that runs down a straight line often means a shingle is missing or cracked. If the water pools near a vent, chimney or skylight, the flashing is likely the culprit. A hose test on each area will confirm the source.Can I use any sealant for waterproofing?Not all sealants work the same. Choose a waterproof sealant for roof valleys and a flexible exterior caulk for flashing, vents and chimney cracks. The research shows these two materials handle four leak sources, making them the most versatile choices.How long should I wait before testing the repair?Let the sealant cure for at least 24 hours, or follow the manufacturer’s instructions. After curing, run the hose over the repaired spots for a few minutes and watch the interior for any drips. If none appear, the repair is good.How often should I inspect my patio roof?Twice a year is a good rule , after winter and after summer storms. Check for new cracks, moss, loose shingles or damaged flashing. A quick binocular scan from the ground will catch most problems early.What if the leak keeps coming back?Repeated leaks often mean the underlying issue wasn’t fully addressed. Double‑check the original leak spot, re‑seal any missed gaps, and inspect adjacent areas. If water still finds a way in, it may be time to call a pro for a deeper inspection.How can I fund a patio roof repair without breaking the bank?You can set up a small digital money pot using services likeHappy Pot. Invite friends or family to contribute. It’s a quick, transparent way to gather funds for materials and tools.Is it safe to work on a flat patio roof myself?Flat roofs are generally safe if you use a step stool and avoid climbing on steep slopes. Keep a sturdy ladder nearby for higher spots, wear gloves and safety glasses, and never work in wet conditions. If you ever feel unsure, call a professional.
All seams sealed?
Sealant smooth and no gaps?
Coating fully covered?


Comments