How to Fix a Sagging Deck Railing Joint: Step-by-Step Guide
- William McKracherne
- 7 days ago
- 8 min read

A sagging deck railing joint isn’t just an eyesore—it can make the whole deck feel wobbly. You’ve probably felt that give when you step onto the deck, and it worries you about safety.
First, spot the problem . Look for loose screws, cracked wood, or rusted brackets at the joint. If the wood is soft or the metal connector is bent, the joint will sag under weight.
Next, gather a few tools: a screwdriver, a drill, wood filler, rust inhibiting paint, and new brackets if needed. Tighten any loose screws; replace any that are stripped. For wood, drill a pilot hole, then drive a longer screw into solid framing. For metal, remove the old bracket, clean rust with a wire brush, and bolt on a fresh one.
After the joint is secured, reinforce it with a small piece of lumber or metal plate across the joint. Apply wood filler to any gaps, sand smooth, then paint with rust inhibiting paint to keep moisture out.
Finally, give the railing a quick test. Put weight on it and make sure it holds steady. Regularly check the bolts each season.
Need a full walkthrough of deck repairs? Check out the comprehensive deck repair guide for deeper tips.
Step 1: Inspect the Joint and Identify the Cause of Sag
First, walk up to the railing and give the joint a firm push. If it drops a few inches, you know the sag is real.
Look for the usual suspects: loose screws, cracked wood, rusted brackets, or a bent metal piece. A screw that spins loose or a wood piece that feels soft under your finger means the joint can't hold weight.
Grab a flashlight. Shine it into the joint and check the inside. See any gaps? Any water stains? Those tell you if rot or corrosion is eating the material. A rust spot that flakes away signals metal that needs replacement.
Now that you see the problem, decide what to fix. If the wood is soft, you’ll need to replace that piece or add a new support. If a metal bracket is bent, straighten it or swap it for a fresh one. Tighten any loose screws with a screwdriver, but if the screw head is stripped, pull it out and use a longer screw that reaches solid framing.

Once the joint looks solid, give it a quick test. Push down again, no drop means you’ve found the cause and fixed it. Many homeowners find that a careful inspection saves them time and money before they call in a pro. If you’d rather let experts handle it, LGFMH Construction offers interior and exterior repair services to make sure your deck stays safe. A sturdy joint means you can enjoy your deck without worrying about wobble.
Step 2: Gather Tools and Materials
Now that you know what’s wrong, it’s time to get the right tools. Having everything handy keeps the job moving and stops you from hunting for a missing piece mid‑repair.
Start with the basics: a Phillips‑head screwdriver, a cordless drill with a set of drill bits, and a set of wood screws that are a few inches longer than the ones you’re replacing. You’ll also need a hammer, a tape measure, and a level to make sure the rail sits straight.
For the wood side, grab some wood filler, sandpaper (medium grit works best), and a small putty knife. If the wood is rotten, have a piece of pressure‑treated lumber ready to splice in.
Metal brackets call for a wire brush, rust‑inhibiting paint, and a few new bolts. A small adjustable wrench makes tightening the bolts easier than a wrench that’s too big.
Don’t forget safety gear: safety glasses, work gloves, and a sturdy ladder or step‑stool. A drop cloth will catch dust and paint chips so your deck stays clean.
Before you start, check each tool. A dull drill bit or a screwdriver with a stripped tip will just make the job harder. If anything looks worn, swap it out now.
Here’s a quick checklist you can print or jot down:
Screwdriver (Phillips)
Cordless drill + bits
Wood screws (longer)
Hammer
Tape measure
Level
Wood filler & putty knife
Sandpaper (medium grit)
Pressure‑treated wood piece
Wire brush
Rust‑inhibiting paint
New bolts & adjustable wrench
Safety glasses, gloves, ladder
Having this list at hand saves time and keeps the repair smooth. Need more ideas on choosing the right deck materials? Check out our comprehensive deck building guide for deeper tips.
Step 3: Reinforce the Joint with Brackets or Screws
Now the joint is solid enough to hold the rail, but you still need extra help so it won’t sag again. You have two simple paths: bolt on a metal bracket, or add a wood block and screw it in. Which one feels right depends on how the rail looks. If the metal parts are still stiff, a bracket is quick. If the wood is soft, a block of pressure‑treated lumber gives the most support.
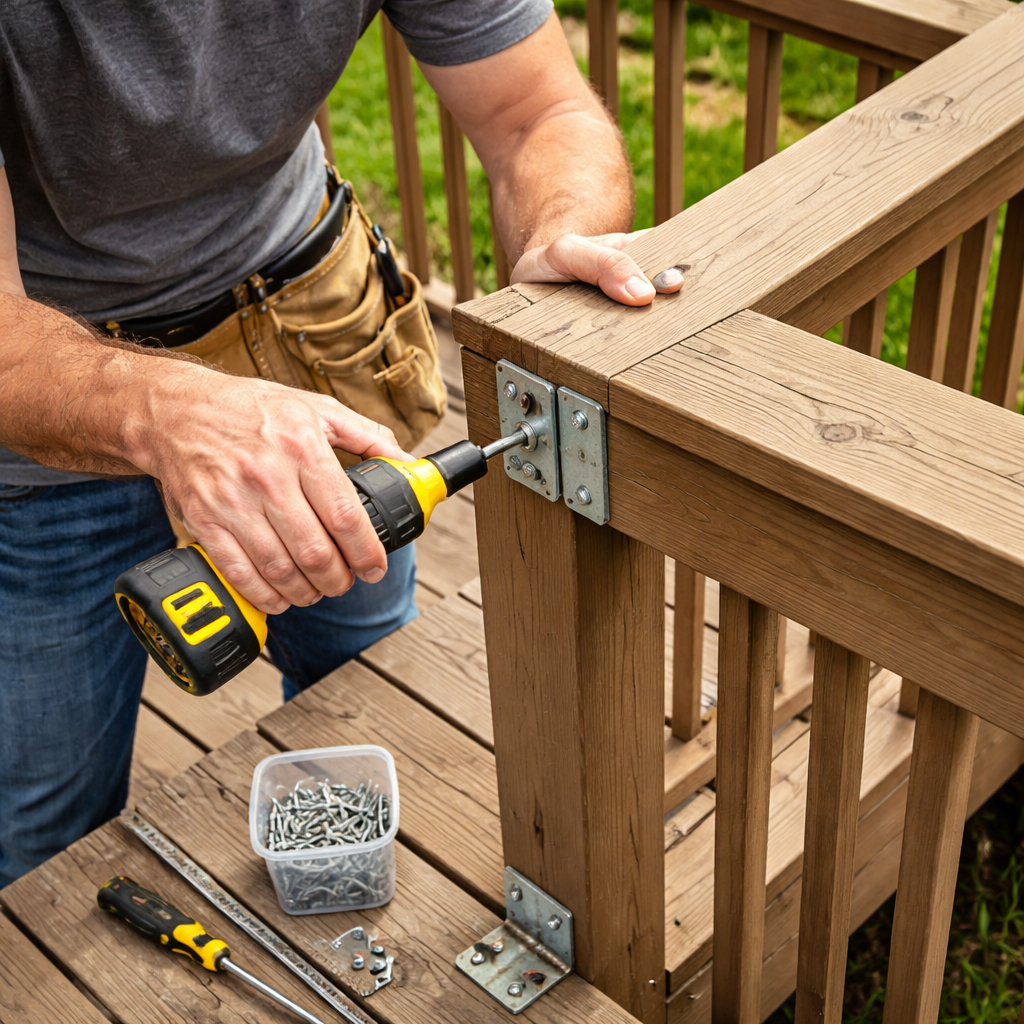
Metal bracket route: Grab a wire brush and scrape off any rust. Give the cleaned surface a coat of rust‑inhibiting paint – this stops new rust from forming. Line the bracket up with the existing holes, or mark fresh spots if the old ones are stripped. Drill a small pilot hole for each bolt, then slip the bolt through the bracket and into the wood. Tighten with an adjustable wrench until the rail sits flush. The bracket now shares the load and keeps the rail from wobbling.
Wood block route: Cut a piece of pressure‑treated lumber a little longer than the joint width. Sand the cut edge smooth so it sits flat. Drill two pilot holes near each end of the block – this stops the wood from splitting. Use stainless‑steel deck screws that are at least 2‑inches longer than the original fasteners. Drive the screws through the block and into the framing. The block acts like a little bridge that stops the rail from pulling apart.
Here’s a quick tip: pick screws that are at least 1‑inch longer than the original ones and space them about 6‑inches apart. If you use a washer under each screw head, the pressure spreads out and the wood won’t crack. For more detailed steps, check out the deck repair guide that walks you through each choice.
Give the joint a gentle shake after you finish. If it feels solid, you’re good to go. If it still moves, double‑check that the bolts are tight and that the block sits flush. A final once‑over with a level makes sure the rail is straight, and you’ll avoid future sag.
Option | Material | Notes |
Metal Bracket | Galvanized steel | Strong, needs rust‑inhibiting paint |
Wood Block | Pressure‑treated lumber | Matches wood, easy to cut to size |
Screw Type | Stainless steel deck screw | Longer than original, resists corrosion |
Step 4: Finish, Seal, and Test the Repair
Now that the joint is solid, you need to seal it so water and weather don’t sneak in.
Apply a weather‑proof seal
Grab a paintbrush or a small roller. Spread a thin coat of exterior‑grade wood sealant over the repaired area. Make sure you cover the screws, the wood block, and any exposed metal.
Tip: work in the shade or wait until the deck is cool. The seal dries faster in hot sun and can run.
Check the rail’s stability
Give the rail a firm push. It should feel stiff, not wobble. If you still feel movement, tighten the screws a bit more or add another washer.
Grab a level. Place it on the top of the rail and check that it reads level left‑to‑right. A straight rail looks right and stays strong.
Test with real weight
Lean on the rail with your body weight or set a 10‑pound bucket on it. Watch for any shift. If it holds, you’ve nailed the repair.
Do a quick walk along the deck. Listen for creaks. A quiet deck means the joint is sealed.
Finally, clean up any dust with a shop‑vac and store your tools where they’re easy to reach next time.
When you’re done, give the rail a light coat of exterior paint that matches the rest of the deck. The paint adds another barrier against moisture and keeps the look uniform.
Mark your calendar for a quick check each spring and fall. A brief look for loose screws or cracked seal will catch problems before they turn into another sag.
Now you know how to fix a sagging deck railing joint and keep it solid for years. For more tips on keeping your deck in top shape, check out our full guide to building and maintaining decks.
FAQ
How do I know if a deck railing joint is sagging?
Give the rail a gentle push with your hand. If it moves or wiggles, the joint is loose. Look for a visible gap between the post and the rail, or a screw that turns without resistance. You may also see rust or wood that feels soft when you press a screwdriver into it. Spotting these signs early saves you from bigger repairs later.
What basic tools do I need to fix a sagging deck railing joint?
You’ll need a Phillips screwdriver, a drill or impact driver, a socket set for bolts, a hammer, and a piece of scrap wood for a temporary block. A set of 3‑inch lag screws or stainless bolts works best for a strong hold. Grab some wood filler, sandpaper, and rust‑inhibiting paint to finish the job and keep moisture out.
How should I tighten loose screws or bolts on a railing?
First, clean any rust or debris from the screw head with a wire brush. Then, use the screwdriver or drill to turn the screw clockwise until it feels snug. If the screw strips, pull it out and replace it with a longer lag screw that reaches solid framing. Also, add a washer under the head to spread the load and prevent it from pulling through the wood.
When is it better to replace a bracket instead of just tightening it?
If the bracket is bent, cracked, or has rust that won’t come off, swapping it out is the safest move. A new bracket gives a fresh, flat surface for the screw to bite into. Also, if the old bracket shows signs of wear after several tightenings, a replacement will give the joint a longer life and keep the rail steady.
How often should I check my deck railing joints for looseness?
Do a quick visual and physical check at least twice a year - once in the spring after winter moisture and again in the fall before rainy season. If you notice any new cracks, rust, or a loose feel, tighten the fasteners right away. Keeping a small checklist on your phone helps you stay on track without missing a spot.
Can I protect the repaired joint so it doesn’t sag again?
After tightening or replacing hardware, coat the area with a rust‑inhibiting paint or clear exterior sealant. Wipe away dust with a damp rag before the coat goes on, then let it dry fully. The paint blocks water from getting into the wood or metal, which is the main cause of future sagging. A yearly touch up keeps the protection strong.
Conclusion
Fixing a sagging deck railing joint isn’t rocket science. You’ve seen the loose screw, the rusted bracket, the wood that feels soft. With the right tools and a few simple steps, you can make the rail feel solid again.
Remember the core steps: inspect the joint, tighten or replace fasteners, add a bracket or wood block for extra strength, then seal the area with rust‑inhibiting paint. A quick test with a hand push or a sandbag will tell you if it holds.
Set a reminder to check your deck twice a year – spring and fall work best. Spotting a new wobble early saves time and keeps your family safe.
If you’d rather have a pro handle it, LGFMH Construction offers repair services that cover every part of the process, from inspection to final seal.
So, what’s next? Grab your screwdriver, follow the steps, and enjoy a sturdy deck that stands up to the weather.


Comments