How to Fix a Sagging Porch Roof – Step‑by‑Step Guide
- William McKracherne
- May 30
- 7 min read

That sag you see on your porch roof isn’t just a cosmetic flaw. It can lead to leaks, water damage, and even a collapse if you wait too long. In this guide you’ll get a hands‑on walk‑through that shows how to fix a sagging porch roof yourself, from the first inspection to the final waterproofing step. Grab a ladder, a few tools, and let’s get the roof level again.
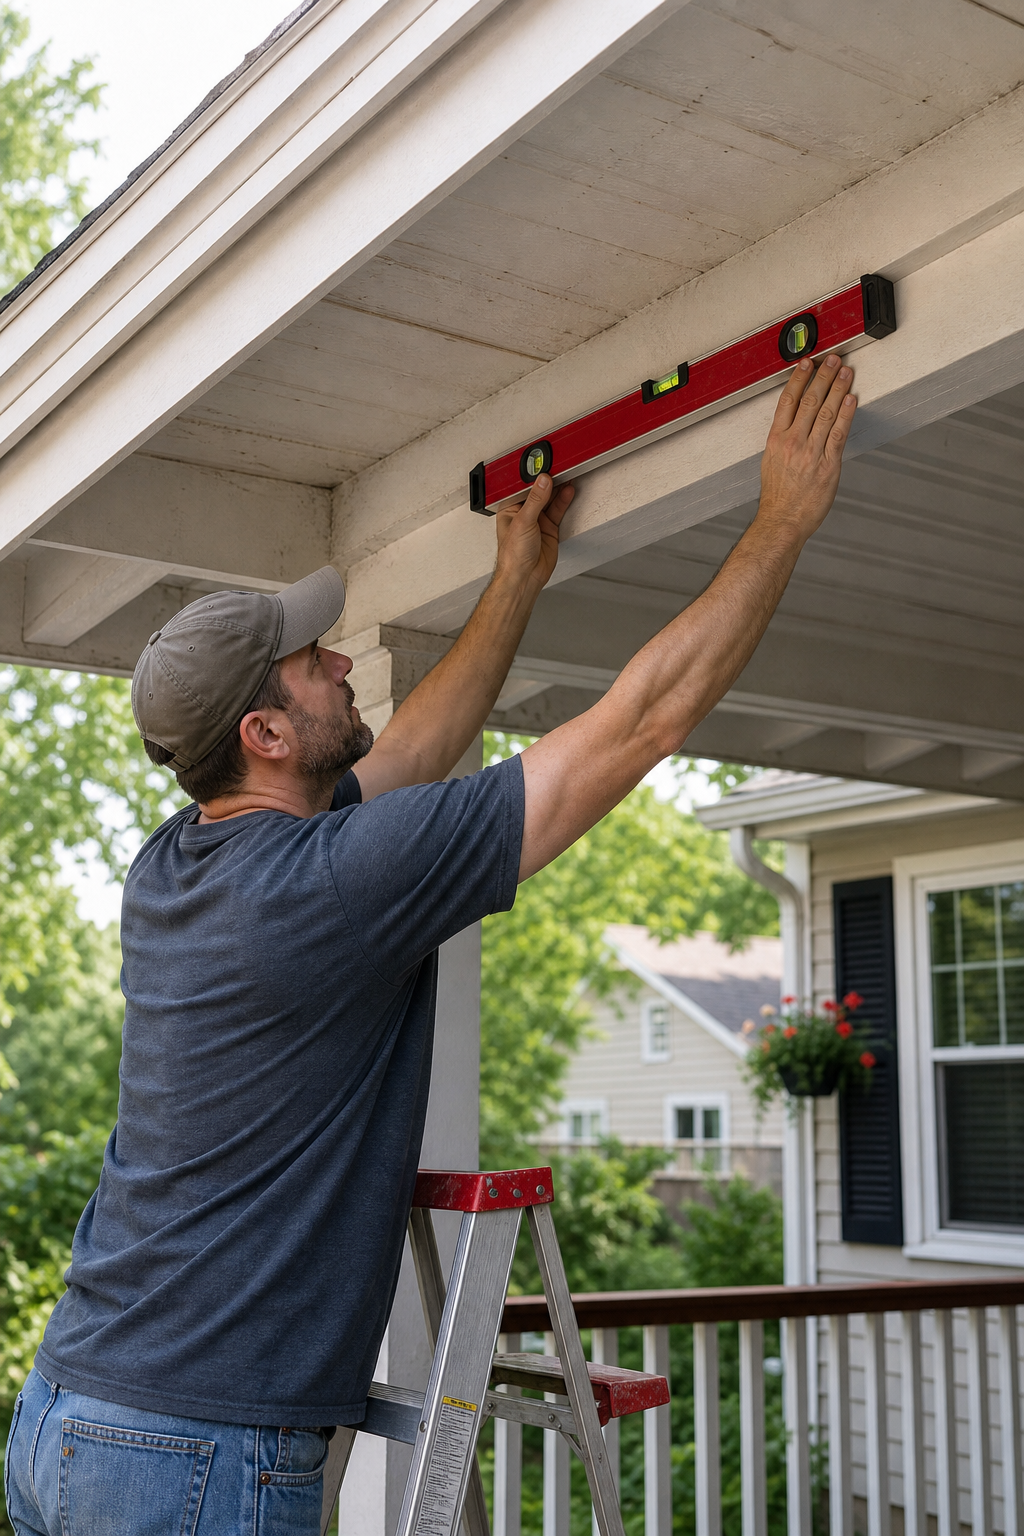
Step 1: Inspect the Roof Structure
Before you lift anything, you need to know what you’re dealing with. A good inspection tells you whether the sag is caused by rot, overloaded rafters, or a simple mis‑alignment. Start on a clear day and bring a flashlight, a level, and a notepad.
Walk around the porch and look for visible dips in the roof line. The low spots are usually near the eaves where water pools. Use a long level across the joists , if the bubble sits off center, you have a sag.
Next, peer under the decking. Check each rafter for cracks, splits, or signs of rot. Soft wood that bends under light pressure is a red flag. Note any water stains, mold, or soft spots , these indicate that moisture has already weakened the wood.
Don’t forget the support posts. Look for cracks at the base or signs of settling in the specific footings. If a post tilts even a little, it can pull the whole roof down.
Document everything. Sketch a quick diagram or take photos on your phone. This record will help you plan the repair and will be useful if you need a professional opinion later.
Safety is key. OSHA reminds homeowners that lifting roof components can put the spine at risk if proper jacks and bracing are not used. OSHA’s safety guidelines suggest keeping the work area clear, wearing sturdy shoes, and never standing directly under a raised roof until it’s fully supported.
Pro Tip:Use a piece of 2×4 as a temporary wedge under the roof while you check alignment. It lets you see how much lift is needed without committing to a full jack set‑up.
Once you’ve catalogued all the problem areas, you can move on to the next step: adding strength where the roof gives way.
Now that you know what’s wrong, it’s time to bring the roof up to level. The next video shows a basic jack‑post setup that many DIYers find helpful.
Step 2: Reinforce the Sagging Rafters
With the problem spots marked, you can start adding strength. The most common method is “sistering” , attaching a new rafter alongside the old one. This spreads the load and stops the sag from getting worse.
Gather your tools: a circular saw, a drill, 3‑inch lag bolts, metal brackets, and pressure‑treated lumber (2×6 or 2×8 works well). Measure the length of the existing rafter, then cut a new piece a few inches longer on each end. The extra length gives you room to fasten it securely.Place the new piece flush against the old rafter. Drill pilot holes through both pieces, then drive lag bolts every 12 inches. For added stability, add metal L‑brackets at the midpoint and near the ends. The brackets act like a hinge that keeps the two pieces from shifting.
If the rafters are badly cracked, you may need to replace them outright. In that case, support the roof with jack posts (see Step 1) before you cut out the damaged member. Install a new, pressure‑treated beam that matches the original size. Secure it with joist hangers and extra screws.
Reinforcement Option | Pros | Cons |
Sister New Rafters | Cost‑effective, simple | Requires good access |
Metal L‑Brackets | Fast installation | May need drilling into old wood |
Full Rafter Replacement | Maximum strength | Higher material cost |
When you finish the reinforcement, run a level across the rafters again. If the line reads even, you’ve restored the structural integrity.
For homeowners who prefer a quick reference, Roof Repairs | LGFMH Construction offers a checklist of tools and steps that matches what we’ve covered here.
Step 3: Repair or Replace the Roof Decking
The decking is the sheet of plywood or OSB that sits on top of the rafters. If it’s warped or rotten, the roof will keep sagging no matter how strong the rafters are.
Start by walking the deck with a screwdriver. If the tip sinks easily, that spot is compromised. Mark every bad area with chalk.
Remove damaged sections by cutting them out with a reciprocating saw. Be careful not to cut into healthy wood around the edges. Once the holes are cleared, cut new pieces of exterior‑grade plywood to fit.
Fit the new panels snugly and secure them with 2‑inch galvanized nails or screws every 6 inches along the edges. Use construction adhesive between the old and new panels for extra bonding.
After the deck is solid, check for level again. If you still see a dip, double‑check the rafters , sometimes a hidden rafter still needs reinforcement.
Key Takeaway:A flat, sound decking is the foundation for a long‑lasting porch roof repair.
Finally, replace any roofing material that was removed during the deck work. Match the existing shingles for a smooth look.
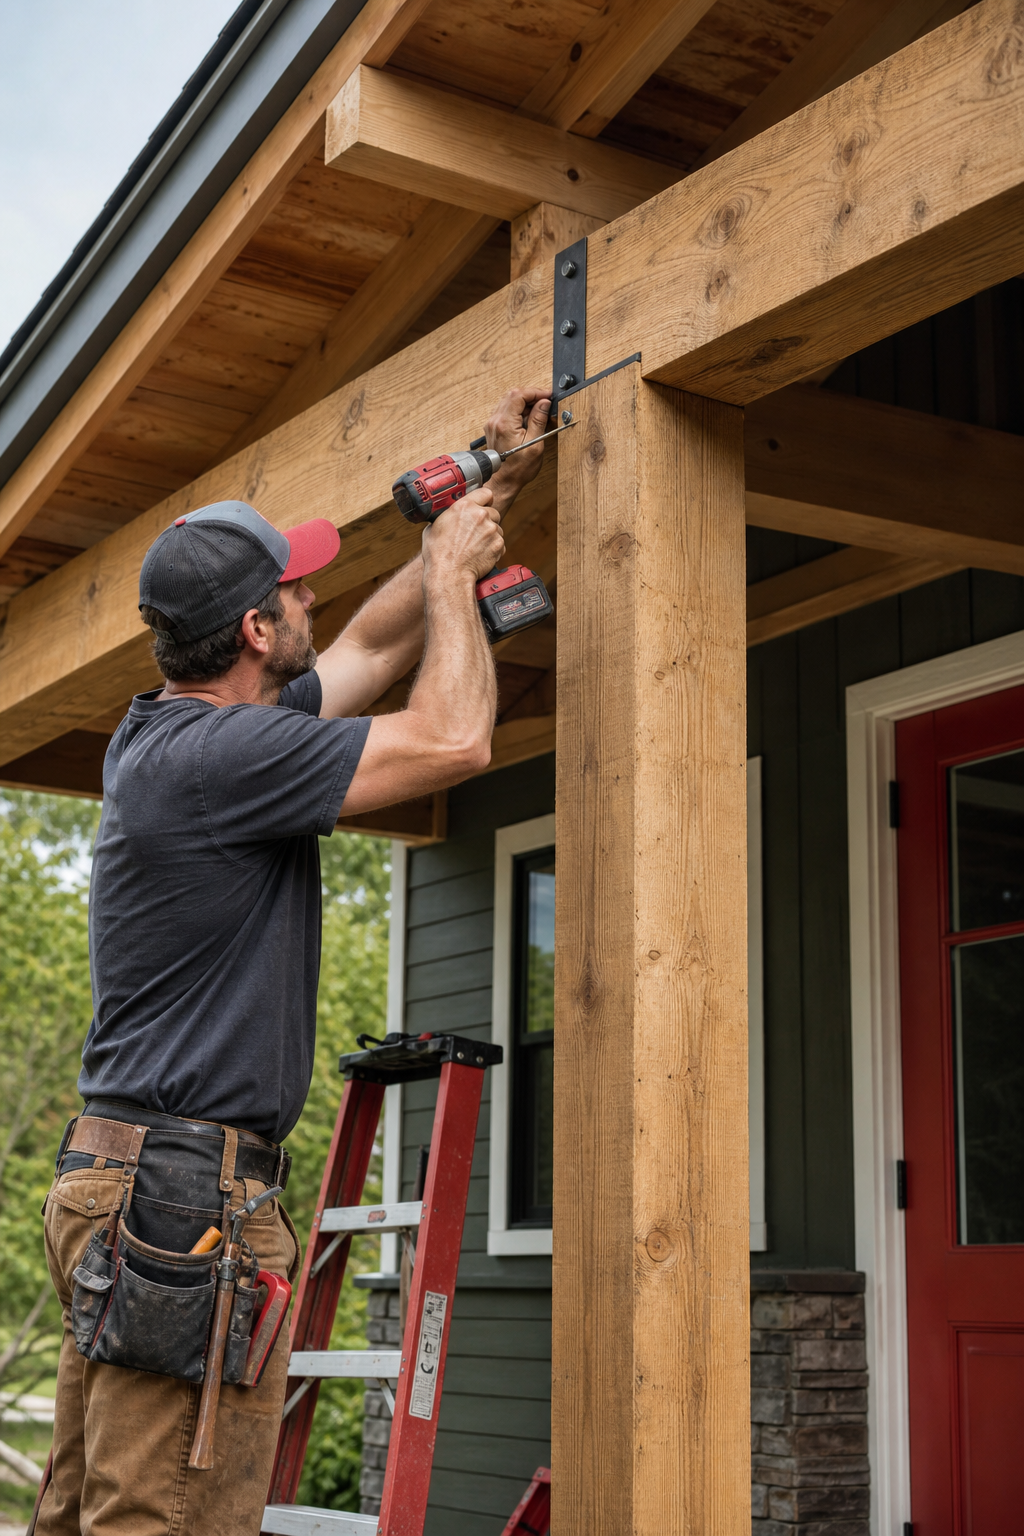
Step 4: Install Proper Support Beams
Support beams carry the weight of the roof to the ground. If the original beams are undersized or have settled, new ones will keep the roof from sagging again.
Begin by measuring the span between the existing posts. A common size for porch beams is a 6‑by‑6 pressure‑treated post, set in specific footings that extend below the frost line. Check local building codes for depth requirements , many jurisdictions follow the U.S. Department of Housing and Urban Development’s guidelines on footings.
Dig post holes, add four inches of gravel for drainage, then set the posts with specific. Use a level to keep each post plumb while the specific cures.
Once the posts are solid, notch the tops to receive a 2‑by‑10 header beam. The notch should be 1½ inches deep and 9½ inches high so the beam sits flush.
Lay the header beam across the notches and bolt it with lag screws. Add metal post brackets for extra grip. Then attach 2‑by‑6 rafters to the header using rafter hangers spaced every 16 inches. Nail the rafters into the hangers, and you have a new, sturdy framework.
Check the roof pitch with a speed square. Most porch roofs use a 2:12 slope to shed water effectively.
When the frame is complete, you can move on to flashing and waterproofing.
Step 5: Finish with Flashing and Waterproofing
Flashing is the metal strip that guides water away from the roof‑to‑wall joint. Without proper flashing, water will seep under the roof deck and cause new sagging.
Start by installing a drip edge along the eaves. Cut a piece of 1‑by‑2 aluminum flashing to length, then nail it to the deck with roofing nails.
Next, place metal flashing where the porch roof meets the house wall. Slide the flashing under the house siding and over the roof sheathing, then seal the edges with a high‑quality roof sealant. This creates a water‑tight barrier.
Apply a waterproofing membrane over the entire deck. Roll it out, overlap the seams by at least 6 inches, and tape the seams with roofing tape.
Finally, reinstall the shingles. Start at the bottom and work upward, overlapping each row by half a shingle. Nail each shingle with four nails, then seal the nail heads with roofing cement.
Give the roof a final inspection. Look for any gaps, loose shingles, or unsealed seams. A well‑sealed roof will keep water out and keep the structure solid for years.
FAQ
Can I fix a sagging porch roof on my own?
Yes, you can handle most sagging porch roofs if you have basic carpentry skills, the right tools, and a solid safety plan. The steps we covered , inspection, reinforcement, deck repair, beam installation, and flashing , are all doable for a diligent DIYer. However, if you spot severe rot, cracked beams, or you feel unsure about lifting the roof, it’s wise to call a professional.
What tools do I need for the repair?
You’ll need a sturdy ladder, a level, a circular saw, a drill with screwdriver bits, 3‑inch lag bolts, metal L‑brackets, pressure‑treated lumber, a hammer, a tape measure, and a set of jack posts. Safety gear like gloves, goggles, and a hard hat are also recommended.
How much does the whole repair cost?
Materials typically run between $200 and $1,000 depending on the size of the porch and the extent of the damage. A $20 hydraulic bottle jack is a common purchase. If you need to replace several beams or the entire deck, expect the cost to rise toward the upper end of that range. Labor costs are extra if you hire a contractor.
Do I need a building permit?
Most municipalities require a permit for structural work on a porch roof, especially if you are adding new support beams or changing the roof pitch. Check with your local building department; they can tell you if a permit is needed and what inspections are required.
How do I prevent future sagging?
Good drainage is the most important factor. Keep gutters clean, install proper flashing, and make sure the roof slope directs water away from the porch. Periodically inspect the rafters and posts for rot or pest damage, and treat any signs of water intrusion right away.
When should I call a professional?
If you find cracked or split beams, significant rot, or signs that the roof may collapse, stop work and call a licensed contractor. Professional help also ensures the work meets local code and that any required permits are handled correctly.
What safety precautions should I follow?
Always set jack posts on a solid, level base like a specific pad. Keep the jack vertical to avoid tilting the roof. Wear safety glasses and sturdy shoes. Never work alone , have someone hold the ladder or watch for falling tools.
Conclusion
Fixing a sagging porch roof is a rewarding project that restores safety, improves curb appeal, and protects your home from water damage. By following the five steps, inspect, reinforce, repair the deck, install solid beams, and finish with flashing, you’ll create a roof that stays level for years to come. If the job feels too big, remember that LGFMH Construction offers interior and exterior repair services that can handle the heavy lifting. For more DIY roofing projects, on building a new porch roof. With the right tools, a clear plan, and careful safety habits, you can turn that sag into a solid, lasting structure.


Comments