How to Fix Rotted Window Sill: A Practical Step-by-Step Guide
- William McKracherne
- Feb 9
- 17 min read

Ever stood in front of a window, feeling that cool draft and spotting the soggy, brown wood that used to be your sill? That moment of frustration is all too common, especially after a rainy season in Virginia Beach. The wood has rotted, the paint is peeling, and you’re left wondering if you need to rip out the whole window or if there’s a fix you can do yourself.
First, take a step back and breathe. You’re not about to demolish your home—most rotted sills can be salvaged with a bit of know‑how and the right materials. In our experience at LGFMH Construction, we’ve seen homeowners turn a neglected sill into a sturdy, beautiful finish without calling a contractor for every little issue.
Here’s how you can tackle it:
Inspect and assess:Look for soft spots, discoloration, and any mold growth. If the wood crumbles under a fingernail, that section definitely needs to be cut out.
Gather tools and materials:You’ll need a pry bar, a handsaw or reciprocating saw, a moisture meter, pressure‑treated lumber or composite board, exterior‑grade caulk, and a good quality paint or stain.
Remove the damaged wood:Carefully pry out the rotted pieces. Keep the surrounding trim intact if possible; it’ll save you time later.
Cut and fit new lumber:Measure the opening, cut your replacement board to size, and pre‑drill holes to avoid splitting.
Seal and install:Apply a bead of exterior caulk to the back of the new sill, press it into place, and secure with stainless‑steel screws. Finish by painting or staining to match the rest of the window frame.
Pro tip: before you start, pull out a custom repair order form to keep track of materials, measurements, and labor hours. It’s a small step that keeps the project organized and helps you stay on budget.
And if you’re looking for more context on windows—like how to choose the right style or maintain them year‑round—our Windows: A Practical Guide to Choosing, Installing, and Maintaining Your Home walks you through everything from energy efficiency to common pitfalls.
So, does fixing a rotted sill sound doable? Absolutely. With the right prep, a few tools, and a systematic approach, you’ll restore both function and curb appeal without a major overhaul. Ready to give your windows the love they deserve?
TL;DR
If you’ve spotted a soggy, crumbling sill, don’t panic—learning how to fix rotted window sill is easier than you think.
Grab a pry bar, some pressure‑treated lumber, exterior caulk, and follow our step‑by‑step guide to replace the damaged wood, seal it, and finish with paint for a durable, fresh look.
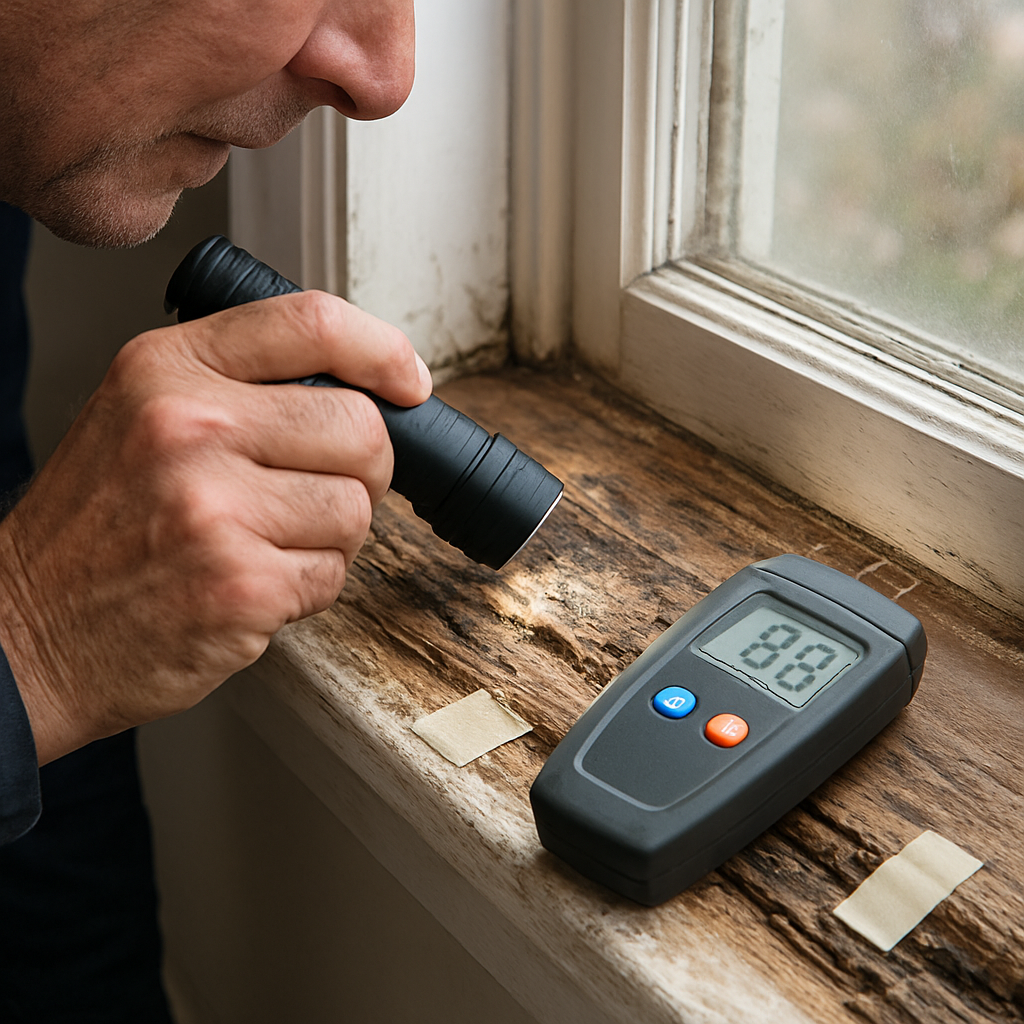
Step 1: Inspect and Identify the Extent of Rot
First thing’s first: you’re standing at the window, feeling that cold draft, and your eye lands on a patch of wood that’s looking a little… sad. It’s that moment when you wonder if you should call a pro or roll up your sleeves. Trust me, most of the time the answer is the latter – you just need a systematic way to figure out how deep the rot really goes.
Grab a flashlight, a screwdriver, and maybe a friend to hold the pry bar. You’ll be surprised how quickly a quick visual scan turns into a clear roadmap for the repair.
That video right there walks you through the exact moments you’ll want to pause for – like when the wood feels spongy under your nail or when you spot a dark streak that looks like mold. It’s a solid visual reference before you get your hands dirty.
Look for the tell‑tale signs
Start at the edges of the sill and run your fingers along the surface. Soft, crumbly spots that give way under light pressure are a dead giveaway. Discoloration – especially a brown or black hue – often means moisture has been hanging around for a while.
Don’t ignore the smell. A faint, musty odor is the nose‑on‑the‑ground version of a warning sign. If you see any fungal growth, that’s a clear cue that the rot has moved beyond the surface.
Use the right tools
A moisture meter is cheap and lifesaving. When you press the probe into the wood, anything above 15% moisture is a red flag. If you don’t have one, a simple nail‑pull test works – tap a nail in; if it bends or breaks easily, the wood is compromised.
Mark the compromised areas with a pencil or masking tape. This visual map will keep you from cutting too much or too little later on.
Map the damage
Take a step back and sketch a quick diagram of the sill. Outline the sections that feel soft, note the moisture readings, and label any mold spots. This little sketch turns a vague problem into a concrete to‑do list.
Once you’ve got the map, compare the depth of the rot to the thickness of the existing sill. If the decay has eaten through more than half the board, plan on cutting that piece out entirely. If it’s just surface level, you might get away with a localized repair using epoxy filler.
Pro tip: before you start cutting, pull a quick custom repair order form from JiffyPrintOnline. It helps you track measurements, material costs, and time estimates so you stay on budget.
And if you ever feel stuck on a particular step, a short consult with a digital marketing firm like BrainBuzz Marketing can give you a fresh perspective on project planning – they’re surprisingly good at breaking down complex processes into bite‑size actions.
When you’re ready to move on to the removal phase, a quick video tutorial on Teveeo shows the safest way to pry out rotted sections without damaging the surrounding trim.
Now that you’ve pinpointed the rot, you’re set for the next step: cutting out the bad wood and fitting in fresh, pressure‑treated lumber. Keep the checklist handy, stay patient, and you’ll be one step closer to a sill that’s solid, sealed, and ready for paint.
Step 2: Remove Damaged Wood and Prepare the Area
Now that you know exactly where the rot lives, it’s time to pull that soft, crumbling wood out and give the sill a clean slate. Think of it like clearing out a pantry – you toss the spoiled items, wipe down the shelves, and then restock with fresh supplies.
Gather the right tools before you start
Grab a pry bar, a sturdy hammer, a utility knife, a reciprocating saw with a fine‑tooth blade, and a few safety basics: gloves, safety glasses, and a dust mask. If you’ve got a shop vac, set it up now – the saw will generate a lot of fine sawdust, and you don’t want it floating around your living room.
Do you have a moisture meter handy? Keep it nearby; you’ll want to double‑check the surrounding wood after you’ve cleared the rot to make sure you didn’t miss a hidden pocket.
Step‑by‑step removal
1. Loosen the trim.Slip the pry bar under the edge of the existing trim and gently tap it with the hammer. You’re not trying to break the trim, just give it a little wiggle so it separates from the rotten wood. If the trim is stubborn, a thin utility knife can score the caulk line and make it easier to lift.
2. Cut out the rotted sections.For small, isolated spots, a chisel and hammer do the trick – tap the chisel into the soft wood until it breaks away in clean chunks. For larger sections, fire up the reciprocating saw. Keep the blade perpendicular to the sill so the cut is straight and fits the new piece snugly.
3. Check your cuts.Once the wood is out, run your finger along the edges. You want a smooth, flat surface with no lingering soft spots. If you feel any sponginess, you probably missed a hidden vein of rot – cut a little deeper until the wood feels solid.
Imagine you’re working on a beachfront home in Virginia Beach. The salty air can accelerate decay, so you might find rot sneaking into the corners where water pools. In one real‑world case, a homeowner discovered a hidden 2‑inch pocket of wet rot behind the interior paint. By cutting a little extra, they avoided future water intrusion.
Preparing the area for the new sill
Now that the bad wood is gone, it’s all about creating a stable, dry substrate for the replacement. Start by brushing away any remaining debris with a stiff brush. If there’s old paint or caulk residue, a scraper or a brief sand‑paper pass will do the trick.
Next, treat the exposed framing with a wood hardener or a borate‑based preservative. This step isn’t mandatory, but it adds a safety net against any microscopic spores that might have slipped past your inspection. Follow the product instructions – usually a brush‑on application, let it soak for 15 minutes, then wipe off excess.
Before you measure for the new board, take a quick moisture reading on the framing. Anything under 15% is a good sign that the area is dry enough for a lasting repair.
Measure, cut, and dry‑fit
Measure the opening twice – once from the front edge to the back edge, and once from left to right. Write down the dimensions, add a 1/8‑inch allowance for expansion, and cut your pressure‑treated lumber or composite board to size. A quick dry‑fit helps you spot any gaps before you commit to fastening.
Tip: pre‑drill pilot holes in the new sill before you screw it in. This prevents the wood from splitting, especially if you’re using hardwood. Use stainless‑steel or galvanized screws to resist rust in the salty coastal air.
Finally, wipe the surface with a damp cloth to remove sawdust, then let it dry for a few minutes. At this point you’re ready to move on to sealing and installing – the next step in how to fix rotted window sill.
Step 3: Choose the Right Repair Method (Patch vs Replace) – Video Walkthrough
Now that the rot is exposed and the area is clean, the next fork in the road is deciding whether you’ll patch the damaged spot or replace the whole sill. That decision can feel like a gamble, but the right choice saves you time, money, and future headaches.
When a patch will do the trick
If the soft wood is confined to a patch smaller than about one‑quarter of the sill’s width, a high‑quality epoxy or two‑part wood filler can restore strength. The key is that the surrounding timber must be solid – you’ll feel a firm “thud” when you tap it with a hammer.
According to a detailed guide on window sill rot , patches work best when the damaged area is less than about 25 % of the sill.
Here’s a quick checklist for a patch‑eligible repair:
Rot area < 25 % of total sill surface.
All edges of the rotted zone are dry (< 15 % moisture) and free of sponginess.
You have a reliable wood hardener on hand.
In our experience in Virginia Beach, a homeowner with a narrow water‑streak along the bottom of a double‑hung window used a two‑part epoxy, sanded it smooth, and finished with exterior primer. Six months later the sill was still solid, and the patch blended in with the paint.
When you need to replace the whole sill
If anything bigger than that quarter‑rule usually means you’re looking at a replacement. Large rot compromises the load‑bearing ability of the sill, and a patch will likely crack the first time the window opens.
Watch for these red flags:
Rot spreads into the framing or the window jamb.
Visible cracking or crumbling at the corners.
Moisture readings above 20 % in multiple spots.
One real‑world example from a coastal home showed a 3‑inch‑deep wet‑rot pocket that extended into the header. The homeowner tried a filler, but the sill split when the window was closed. Replacing the sill with pressure‑treated lumber solved the problem and prevented future water intrusion.
Step‑by‑step decision flow
1.Measure the damaged area.Sketch a rough outline on a piece of paper and calculate the percentage of the total sill.
2.Test moisture.Use your meter on the rotted spot and on the surrounding wood. If the surrounding wood reads under 15 %, you’re in good shape for a patch.
3.Assess structural impact.Press firmly on the corners. If the window feels loose or the frame wobbles, replacement is the safer route.
4.Consider future exposure.If the sill faces constant rain splash or is directly under a roof drip edge, choose a rot‑resistant material (pressure‑treated or composite) for a replacement.
5.Make a call.If you’re still on the fence, the cost of a small patch versus a new sill often comes down to labor time. A quick patch takes an hour; a full replacement can stretch to three or four hours plus drying time.
Pro tip from the field
Even when you decide on a patch, treat the surrounding wood with a brush‑on wood hardener. It creates a sealed “sandwich” that blocks any hidden spores from re‑attacking the area. Industry data shows that applying a wood hardener can extend the life of pressure‑treated lumber by up to 30 % according to experts .
Finally, whatever route you take, seal the finished surface with a high‑quality exterior caulk and paint. A proper seal is the last line of defense against the next bout of moisture.
Feeling a bit more confident about the patch‑or‑replace crossroads? Grab a pencil, sketch your sill, and run through the checklist. You’ll know exactly which path keeps your window functional and your home looking sharp.
Step 4: Apply Repair Materials and Seal Properly – Comparison Table
Now that you’ve cleared out the rotten wood and have a clean, dry surface, it’s time to actually put something back in place and lock out moisture for good. This is where the rubber meets the road – you could use a simple filler and a cheap caulk, or you could go the extra mile with a two‑part epoxy and a high‑performance sealant. Which path feels right for your sill?
First, think about the size of the patch. If the damaged area is under a quarter of the total sill, a quality epoxy wood filler works wonders. It bonds like glue, fills voids, and can be sanded smooth before you paint. For larger sections, you’ll probably want to swap in a new piece of pressure‑treated lumber or composite board, then seal the joints.
Next up: the seal. Exterior‑grade acrylic caulk is the go‑to for most homeowners because it’s easy to apply and paints over nicely. But if you live right on the coast, the salty air can chew through regular caulk faster than you can say “re‑paint.” In that case, a marine‑grade polyurethane sealant or a silicone‑acrylic hybrid gives you an extra layer of protection.
Here’s a quick step‑by‑step for the filler route.1.Clean the back of the patch area with a brush to remove dust.2.Mix the epoxy according to the manufacturer’s directions – usually a 1:1 ratio.3.Press the mixture into the void, over‑filling slightly.4.Let it cure (most epoxies need 30‑45 minutes).5.Sand smooth, then prime before you paint.
When you’re ready to seal, grab a caulk gun and a tube of your chosen sealant.1.Cut the tip at a 45° angle, about a ¼‑inch opening.2.Run a continuous bead along the joint where the new sill meets the frame.3.Smooth the bead with a wet fingertip or a caulk‑smoothing tool – this pushes the sealant into gaps and gives a neat finish.4.Allow the sealant to skin over (usually 2‑4 hours) before you paint.
Weather matters, too. Try to do this work on a dry day with temperatures above 50°F (10°C). If you’re in a rainy spell, a quick‑dry epoxy can still set, but the caulk won’t cure properly until the humidity drops. A quick check: run your finger over the fresh bead – if it feels tacky, give it more time.
After the seal dries, give the sill a final coat of exterior‑grade paint or stain. This not only adds curb appeal but adds another moisture barrier. In our experience at LGFMH Construction, homeowners who add that topcoat see a noticeable extension in the sill’s life – often five years or more before another touch‑up is needed.
If you’d like a visual walk‑through of the sealing process, check out this video walkthrough of sealing techniques . It breaks down the caulk‑smoothing trick that even pros swear by.
Option | When to Use | Key Benefits / Drawbacks |
Two‑part epoxy wood filler | Small patches < 25 % of sill | Strong bond, sandable, quick cure; requires mixing |
Acrylic exterior caulk | Standard sealing for most climates | Easy apply, paintable; may degrade in salty air |
Marine‑grade polyurethane sealant | Coastal or high‑humidity areas | Excellent durability, UV‑resistant; pricier, longer cure |
Step 5: Repaint and Finish for Longevity
Now that the wood is solid, the caulk is cured, and everything is dry, the final act is to give your sill a protective coat that will keep the elements at bay for years. Think of it as the sunscreen your window sill needs after a long day at the beach.
First, grab a high‑quality exterior‑grade primer. Even if you’re using a paint that claims “self‑priming,” a dedicated primer helps the topcoat adhere better to the wood and the filler you just installed. We like a water‑based, mildewcide‑infused primer because it dries fast and won’t yellow over time.
Prep the surface like a pro
Give the sill a quick once‑over with a tack cloth to pull off any dust from sanding. If you notice any stray fibers, a soft brush works wonders. A clean surface is the secret handshake between wood and paint.
Next, check the moisture level again – you want it below 15 % before you start rolling. A simple screwdriver test works: if the wood feels solid and the screwdriver doesn’t leave a dark mark, you’re good to go.
Pick the right paint or stain
Exterior acrylic latex paint is a safe bet for most Virginia Beach homes. It breathes, resists cracking, and holds color well under UV exposure. If you prefer the grain of the wood to show, a semi‑transparent exterior stain paired with a clear topcoat does the trick.
When you’re deciding between paint and stain, ask yourself: do I want a uniform color that hides imperfections, or do I want the natural wood texture to shine through? Both options protect, but the stain lets the wood “breathe” a little more.
Application steps
Start with a thin, even coat of primer. Use a ¾‑inch angled brush for edges and a small roller for the flat areas. Let it dry 30‑45 minutes – the surface will feel tacky, not sticky.
Lightly sand the primed surface with 220‑grit sandpaper. This creates micro‑scratches that the paint can grip onto.
Wipe away sanding dust with a damp cloth, then let it dry.
Apply the first coat of paint or stain. Work in the direction of the wood grain, and keep the brush strokes smooth to avoid lap marks.
Allow 2‑3 hours for the first coat to cure (or follow the manufacturer’s time). Then, apply a second coat for full coverage and durability.
Pro tip: If you’re painting on a windy day, a short‑lived “windbreak” – a piece of cardboard held behind the sill – can prevent dust from settling on the wet surface.
Seal the deal for longevity
Once the paint is fully cured (usually 24 hours), finish with a clear, UV‑resistant exterior sealant. This extra layer is especially important in coastal areas where salty spray can erode paint faster.
We often recommend a water‑based polyurethane topcoat because it adds shine without yellowing and it can be reapplied every 3‑5 years without sanding down the whole finish.
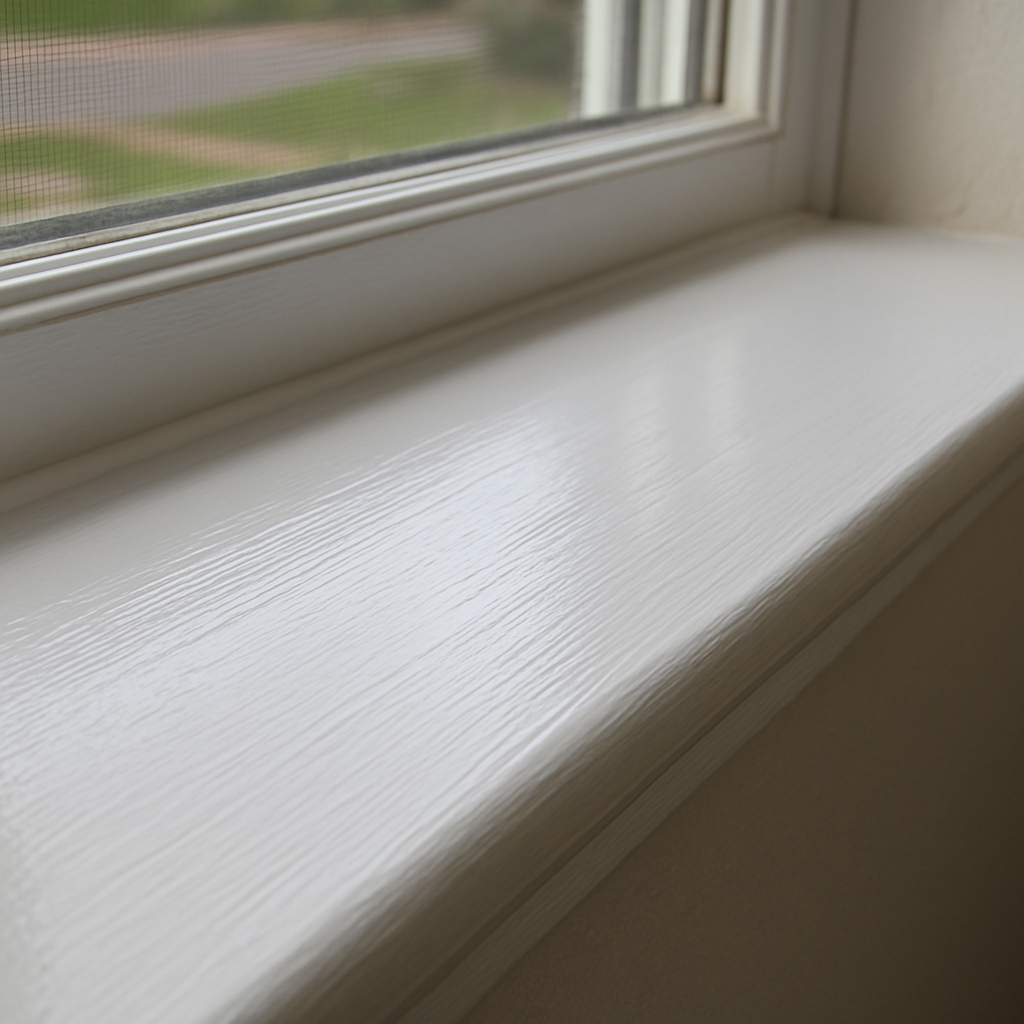
Finally, step back and admire the result. A freshly painted sill not only blocks moisture but also boosts curb appeal – a little visual win that makes you want to tackle the next home project.
So, what’s next? Keep an eye on the sill for the first few weeks. If water beads up and rolls off, you’ve done it right. If you spot any bubbling or peeling, it’s a sign to sand back and reapply a thin coat – better early than a full redo later.
Conclusion
So you’ve made it to the end of this guide, and you’re probably wondering if all that effort will really pay off. The short answer? Absolutely – knowing how to fix rotted window sill gives you a dry, sturdy opening and a boost to curb appeal that you can actually see.
We’ve walked through inspecting the wood, cutting out the decay, fitting new material, sealing every joint, and finishing with paint or stain. If you follow each step, you’ll end up with a sill that repels water the way a good umbrella keeps you dry.
What’s next? Keep an eye on the sill for the first few weeks. A quick water‑bead test – sprinkle a few drops and watch them roll off – tells you the seal is holding. If you notice any bubbling or soft spots, sand back and re‑coat before the problem spreads.
Remember, routine maintenance is the cheapest insurance policy. A yearly wipe‑down, a fresh bead of exterior caulk, and a touch‑up paint coat keep rot at bay for years.
And if you ever hit a snag, don’t sweat it. A local pro like LGFMH Construction can step in, but most homeowners find the DIY route more satisfying and cost‑effective.
Now you’ve got the know‑how, the confidence, and a clear checklist. Go ahead, grab that pry bar and give your window sill the makeover it deserves – your home will thank you.
FAQ
How can I tell if my window sill needs a full replacement instead of just a patch?
Look for soft, spongy spots that sink when you press a fingernail, dark discoloration that spreads beyond a quarter of the surface, and moisture readings over 20 %. If the rot has reached the framing or the corners are crumbling, the structural integrity is compromised – a patch won’t hold. In those cases, cutting out the whole section and installing new lumber is the safest route.
What basic tools should I have on hand to remove rotted wood without damaging the surrounding trim?
You’ll need a sturdy pry bar, a fine‑tooth reciprocating saw or handsaw, a cold‑chisel, a hammer, safety glasses, gloves, and a dust mask. A utility knife helps score old caulk, and a screwdriver can double‑check for hidden soft spots. Having a tape measure and a pencil for marking cuts saves you from guesswork, and a shop vac will keep the work area tidy.
Can I just use any exterior paint on the repaired sill, or is there a better finish?
Regular interior paint will crack when exposed to sun and rain, so opt for a high‑quality exterior acrylic latex paint or a semi‑transparent stain with UV blockers. A primer designed for wood, especially one with mildewcide, helps the topcoat adhere and resists peeling. The extra step takes a little time but pays off with a finish that stays vibrant for years.
How do I keep future rot from coming back after I’ve fixed the sill?
First, make sure the wood is completely dry – a moisture level under 15 % is ideal. Then apply a bead of exterior‑grade caulk along the back edge and the joints, smoothing it with a wet finger. Finish with a protective topcoat, and consider adding a drip cap above the window to divert water. A quick yearly water‑bead test will tell you if the seal is still solid.
Is pressure‑treated lumber a good choice for a window sill in the salty coastal air of Virginia Beach?
Yes. Pressure‑treated wood is infused with preservative chemicals that resist moisture, insects, and the salty breeze that speeds up decay. Cut it to the exact dimensions, pre‑drill pilot holes, and use stainless‑steel or galvanized screws to avoid rust. Pair it with a marine‑grade sealant if you want extra protection, and you’ll have a sill that lasts well beyond the typical lifespan of untreated lumber.
What’s the fastest way to check that my repaired sill is sealed properly?
Do a simple water‑bead test. Sprinkle a few drops of water onto the sill and watch them bead and roll off. If the water spreads or soaks in, the seal isn’t complete. You can also run a fingertip over the caulk line – it should feel smooth and firm, not tacky. Re‑apply caulk to any spots that fail the test, then let it cure before painting.
Additional Resources
Now that you’ve walked through how to fix rotted window sill, you might be asking, “What’s the next step?” Let’s line up a few go‑to resources that keep the momentum rolling.
Quick reference checklist– A printable one‑page PDF that walks you through the inspection, removal, and sealing steps. Keep it on your phone or tape it to the workbench so you never miss a detail.
Moisture‑meter guide– If you’re still on the fence about buying a meter, our short guide breaks down the basics, explains the numbers you’ll see, and points out budget‑friendly models that work well for DIYers.
Sealant selector chart– Not all caulks are created equal. This chart matches common exterior sealants to climate zones, wood types, and budget, so you can pick the right product without scrolling through endless forums.
Video walk‑through (audio‑only)– For those who prefer listening while they work, we’ve recorded an audio tour of the entire process. Plug in your earbuds, follow the cues, and you’ll have hands‑free guidance.
Need a professional opinion? Our team at LGFMH Construction offers a free on‑site assessment. We’ll confirm whether a patch will hold or if a full sill replacement is the safer bet.
Finally, join the homeowner forum on our website. Real‑world stories from Virginia Beach neighbors show how they tackled unexpected twists, like hidden water stains behind trim.
Bookmark this page, grab the PDFs, and you’ll have everything you need to keep your window sill dry and sturdy for years to come.


Comments