How to Fix Sagging Gutters: A Step‑by‑Step Home Repair Guide
- William McKracherne
- Dec 6, 2025
- 18 min read

Updated: Dec 15, 2025
Ever walked up to your house, stared at that droopy gutter, and thought, “That’s not supposed to look like a sad smile?”
You're not alone. Those sagging gutters are more than an eyesore; they’re a warning sign that water might be spilling over, soaking your fascia, or even sneaking into your foundation.
So, how do we turn that limp line back into a sturdy, water‑shedding channel? The trick is surprisingly simple: first, pinpoint the exact stretch that’s hanging low, then loosen the hangers, lift it back into place, and seal it up.
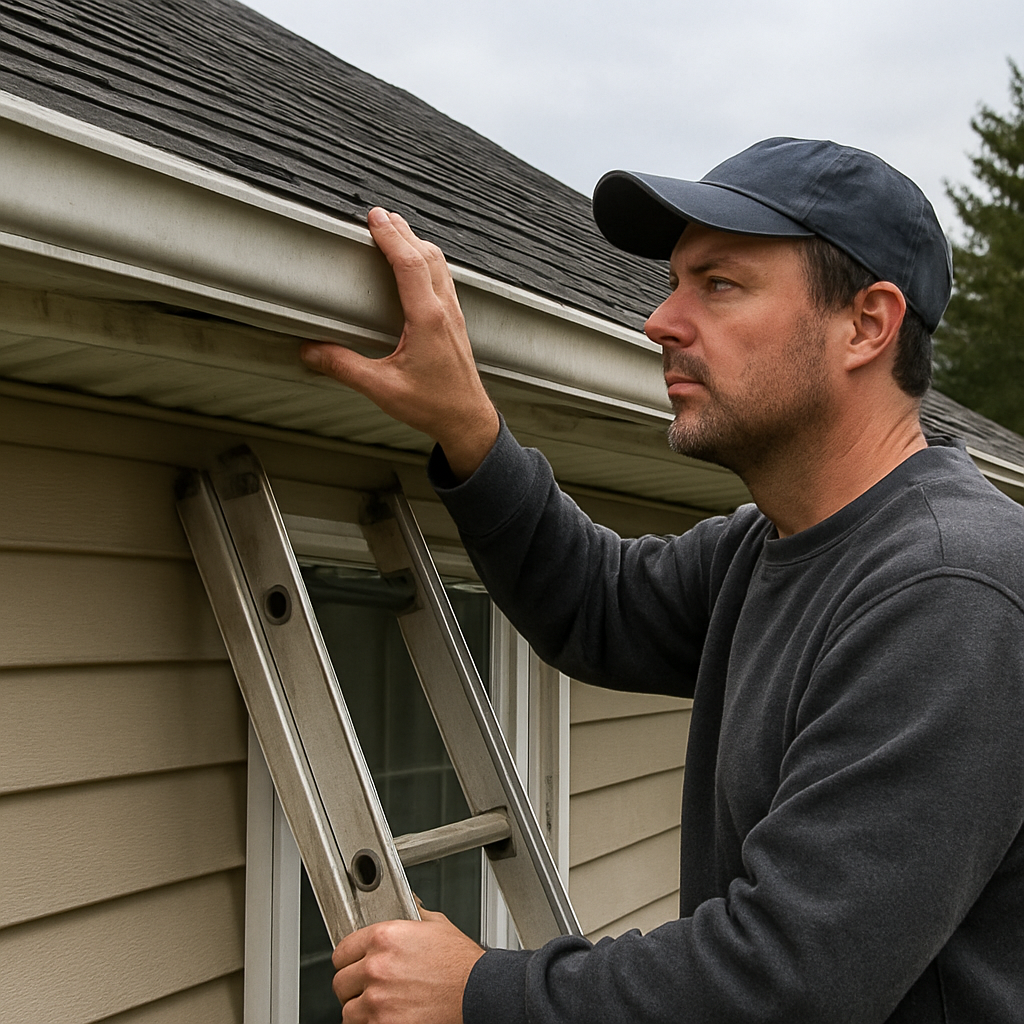
Here’s what I mean: climb a sturdy ladder, get a good look at the gutter profile, and run your hand along the length. The spot that sags will feel floppy, maybe even make a soft thud when you tap it. That’s your starting line.
Next, grab the hangers that are holding that section. They’re usually screwed into the roofline or the fascia board. Carefully unscrew them—don’t yank. Once they’re loose, you can gently pry the gutter upward. It’s a bit like coaxing a reluctant friend to stand up straight again.
Now, reposition the hanger brackets so they sit a few inches higher, aligning with the slope that guides water toward the downspout. Tighten the screws firmly, but not so tight that the metal warps.
And don’t forget the seal. A quick bead of silicone or gutter sealant along the seams will keep rain from leaking through the joints you just adjusted.
Give it a test run: grab a hose, pour water at the highest point, and watch it glide down to the downspout without any puddles forming beneath the repaired stretch.
Does that feel doable? Absolutely. Most homeowners can pull this off with a basic tool kit—screwdriver, ladder, and a tube of sealant.
Think of it as a tiny DIY victory that saves you from bigger, costlier repairs down the road. And if you ever feel stuck, a quick call to a local pro like LGFMH Construction can give you peace of mind.
Ready to give those gutters a lift? Let’s dive in and make that line straight again.
TL;DR
Learn how to fix sagging gutters by evaluating the low spot, quickly loosening the hangers, repositioning them, sealing the seams, and testing the flow today.
With just a screwdriver, ladder, and sealant you’ll lift the gutter back into place, prevent water damage, and enjoy a quick DIY victory for homeowners.
Step 1: Inspect Your Gutters for Sagging Causes
Before you start tightening anything, take a moment to really look at the gutter line and ask yourself, why is this section drooping?
The culprit is almost always a low spot where water pools, a loose hanger, or a sagging fascia that’s giving up under the weight.
Grab a sturdy ladder, step up, and run your hand along the run; you’ll feel a soft give where the metal has lost its pitch.
If you tap the sagging bit with a screwdriver handle, it often produces a dull thud instead of the crisp ping you hear on a tight section – that’s your cue to investigate further.
First, locate the exact low spot. It’s usually the middle of a run where the gutter sags enough to touch the ground or the side of the house.
Next, examine the hanger brackets. Look for stripped screw heads, rusted bolts, or brackets that have simply slid down the fascia.
Sometimes the problem isn’t the hanger at all – it’s a warped piece of fascia that’s pulling the gutter down. Give the board a gentle pry; if it flexes noticeably, you’ve found another piece to address.
Once you’ve pinpointed the sag, it’s time to loosen the hangers just enough to lift the gutter back into its proper slope. Use a screwdriver or a cordless drill, turn the screws counter‑clockwise just a half turn – you don’t want to strip the threads.
Now lift the gutter gently with both hands, aligning it with the ¼‑inch per foot pitch that directs water toward the downspout. If the bracket is low, reposition it a few inches higher on the fascia and retighten, being careful not to overtighten and warp the metal.
After you’ve secured the brackets, give the seam a bead of silicone or gutter sealant to keep any future leaks at bay – a small step that can save you from costly water damage.
If the sag was caused by prolonged water exposure, you might also want to read up on the water mitigation process to understand how to protect your home if moisture has already seeped in.
Seeing the lift in action can clear up a lot of uncertainty, so check out the quick walkthrough below.
Did you notice how the homeowner used a level to double‑check the slope? That extra step ensures water will flow smoothly all the way to the downspout, especially on longer runs.
If you prefer a visual checklist, here’s a quick reference you can print out and tape to your ladder.
Finally, give your work a test run. Grab a garden hose, start at the highest point of the repaired section, and watch the water glide down without forming puddles. If you see any drips, tighten the bracket a tad more or add a second sealant bead.
For more DIY inspiration and community tips, you can also browse the discussions on Addictik , where fellow homeowners share their gutter repair successes and pitfalls.
Once the water runs cleanly, you’ve completed Step 1 – inspecting and correcting the sag. The next steps will cover sealing the joints and confirming proper drainage, but you’ve already earned a small victory. If you’d rather have a pro handle the fine‑tuning, feel free to schedule a service through our Essential Guide to Gutter Cleaning Virginia Beach page for a quick quote.
Step 2: Tighten Loose Hangars and Brackets
Now that you’ve spotted the droopy spot and emptied the debris, it’s time to give the gutter some real support. Loose hangers are the silent culprits that let gravity do the heavy lifting—literally.
First, grab a sturdy ladder and a cordless drill or screwdriver. If you’re using a screwdriver, a Phillips‑head works best for most standard brackets. Position the ladder so you’re standing on a stable rung with both feet flat; safety first, right?
What to look for before you start tightening
Walk along the sagging section and locate each hanger. You’ll usually see a small metal bracket nailed or screwed into the fascia board, with a screw that sticks out to the gutter’s back edge. Check for three tell‑tale signs:
the screw spins freely without resistance,
the bracket is bent or cracked, and
the fascia around the screw looks soft or rotted.
If any of those show up, you’ve found a weak point that needs attention.
Step‑by‑step tightening process
1.Loosen, don’t yank.Turn the screw counter‑clockwise just enough to give the bracket a little wiggle. You’re not trying to pull the gutter off the house; you just need a little play so you can reposition it.
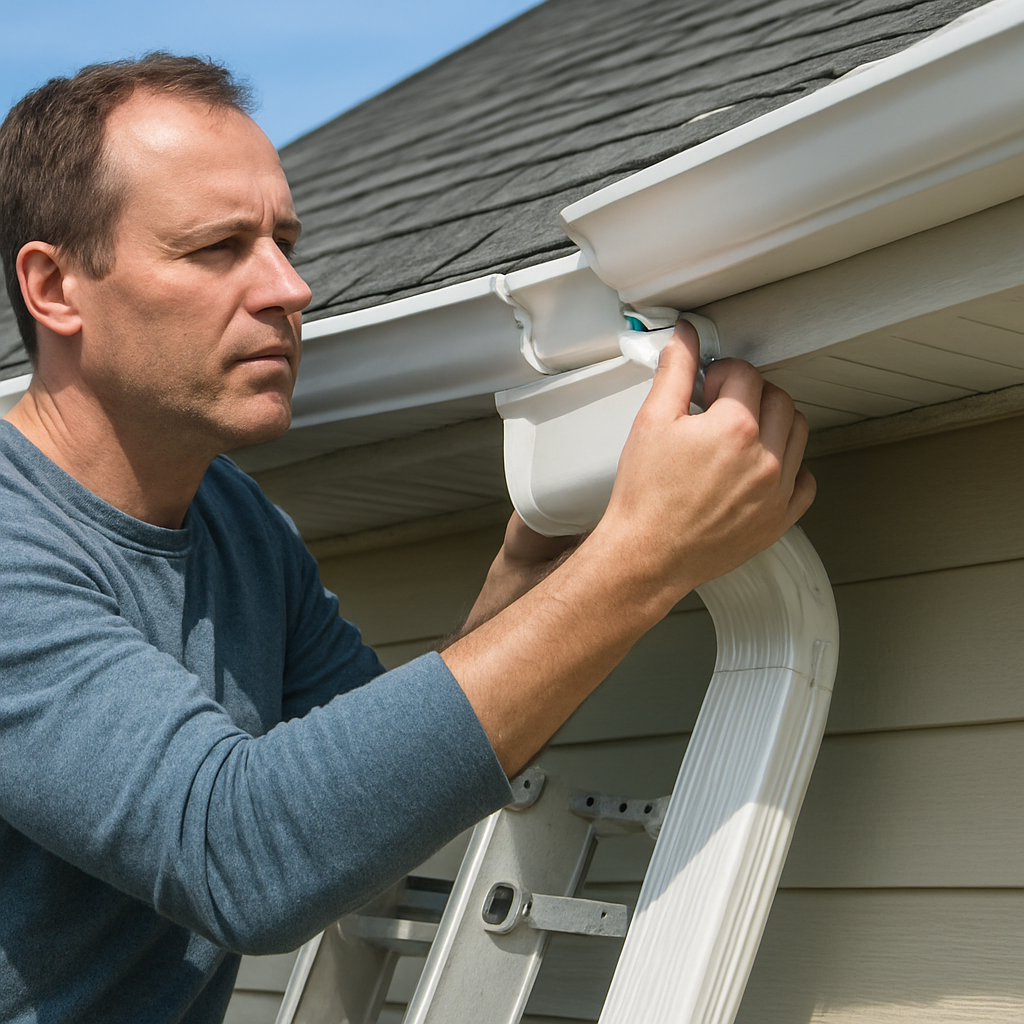
2.Lift the gutter back into the proper slope.Think of it like nudging a reluctant friend to sit up straight. Use a small pry bar or even a sturdy piece of wood to lever the gutter up until it aligns with the ¼‑inch‑per‑10‑feet pitch you measured earlier.
3.Reset the hanger.Slip the bracket back into its original hole—or better yet, a slightly higher spot on the fascia if the wood is still solid. This extra inch of height can make a big difference in drainage.
4.Secure with the right fastener.For wood that’s still in good shape, a stainless‑steel screw 1‑½ inches long works well. If the wood feels soft, drill a pilot hole first or switch to a lag bolt that’s 2 inches long. The longer fastener gives the bracket a stronger bite.
5.Repeat every 24‑30 inches.The roof‑medic guide recommends spacing brackets about every two to two‑and‑a‑half feet. If you’re fixing a ten‑foot run, you’ll likely need three to four brackets—more if the gutter is aluminum, which flexes more than vinyl.
Real‑world example: The Houston pine‑needle nightmare
One homeowner in Houston told us his gutters sagged after a single storm because a massive pile of pine needles acted like a concrete slab. After clearing the needles, we found two hangers that had twisted out of their holes. By lifting the gutter, adding a brand‑new bracket in the middle of the span, and using 2‑inch lag bolts, the gutter snapped back to a proper slope and stayed there even after the next heavy rain.
Another case in a coastal town showed that salty air can corrode screws faster than you’d think. The homeowner replaced all the original screws with stainless‑steel ones and added a couple of extra brackets near the downspout. The result? No more sag, and the gutters survived another winter without rust.
Pro tip: Use a level or a long straight board
Before you tighten the final screw, lay a 2‑by‑4 across the gutter and sight down the length. If the board tilts even a tiny bit toward the downspout, you’ve got the right pitch. A quick visual check can save you from re‑doing the work later.
And here’s a little secret most DIYers overlook: after you’ve tightened the screws, give the bracket a gentle “twist‑and‑pull” test. If it resists movement, you’ve got a solid hold. If it still wiggles, add a second screw or replace the bracket entirely.
When to call a pro
If you notice the fascia board is soft, crumbling, or you can’t get a firm grip on the screws, it’s time to bring in a professional. Re‑attaching a gutter to rotted wood without fixing the wood first is only a temporary fix, and the sag will return.
In most cases, though, a few minutes with a drill, a couple of new brackets, and a bit of patience will have your gutters standing proud again. Once every hanger feels tight, give the whole run a test run with a hose. If the water glides to the downspout without pooling, you’ve nailed it.
So, grab those tools, tighten those loose hangers, and watch your gutter go from a sagging slump to a straight‑arrow water channel. Your home will thank you when the next storm rolls in.
Step 3: Reinforce Gutters with Additional Supports
Now that the hangers are snug and the slope is right, you might be thinking, "Is that really enough?" The truth is, a single pair of brackets can hold up a short run, but longer spans or heavy climates often need a little extra love. Adding reinforcement turns a "good enough" fix into a long‑lasting solution.
Why add extra supports?
Gutters are constantly fighting gravity, wind, and the weight of leaves, rain, or even snow. When the original brackets are spaced too far apart – say, every 3‑4 feet instead of the recommended 2‑3 feet – the metal can flex, and the sag creeps back in. Reinforcement distributes the load, keeps the pitch steady, and gives you peace of mind during the next storm.
Think about a bookshelf that only has two screws holding each shelf. One heavy book and the whole thing bows. Adding a third screw stops the bowing dead in its tracks. The same idea applies to gutters.
Materials you’ll need
Heavy‑duty hanger brackets or hidden‑strap supports (stainless steel is best)
2‑inch lag bolts or 1½‑inch stainless screws
Drill with appropriate bit
Level or a straight 2×4
Silicone sealant (for sealing new holes)
All of these items are cheap at your local hardware store, and you’ll probably have most of them already from the earlier steps.
Step‑by‑step reinforcement
1. Locate the weak spots.Walk the gutter with a level laid across the bottom. Wherever the board tilts noticeably toward the downspout, mark that spot with a piece of tape.
2. Choose the support type.For aluminum or vinyl gutters, hidden‑strap brackets slide under the seam and clamp the side walls. For steel gutters, a simple “U‑shaped” hanger that wraps around the back edge works well. If you’re dealing with a particularly long run (over 12 feet), add a mid‑span bracket.
3. Drill pilot holes.If you’re screwing into wood fascia, pre‑drill a ½‑inch hole to prevent splitting. For siding or brick, use a masonry bit and a wall anchor.
4. Install the new bracket.Position it a half‑inch higher than the existing bracket – that extra height helps maintain the proper pitch. Screw it in tightly, but don’t over‑tighten; you want the metal to sit flush, not warp.
5. Test the pitch again.Lay the 2×4 across the gutter from the high point to the low point, check the drop with a level. If it reads about ¼ inch per 10 feet, you’re good. If it’s still low, add another support a few inches away and repeat.
6. Seal any new holes.Run a bead of silicone around the screw heads and any gaps where the bracket meets the fascia. This stops water from seeping into the wood and causing rot.
Real‑world examples
In a suburban home in Charlotte, the homeowner added a hidden‑strap bracket right under a sagging section that was 10 feet long. After the extra support, the gutter held its shape through a 2‑inch rainstorm without any new dips.
Another case in a coastal town showed that salty air corroded the original screws within a year. By swapping those out for stainless‑steel lag bolts and adding a mid‑span hanger, the gutter stayed level for over three years, even with frequent sea breezes.
Pro tip: Use “double‑up” on the corners
Corners bear a lot of stress because the gutter changes direction. Installing two brackets – one right at the corner and another a foot away – creates a mini‑frame that keeps the metal from pulling away. It’s a small extra step that pays off big time.
And here’s a little secret most DIYers miss: after you tighten the new bracket, give it a gentle “wiggle‑and‑pull.” If it resists movement, you’ve got a solid hold. If it still wiggles, add a second screw or consider a longer lag bolt.
When to call a pro
If the fascia is rotting, the wood is soft, or you’re dealing with a concrete or brick wall that needs special anchors, it’s smarter to let a professional handle the reinforcement. A pro can replace damaged fascia and install hidden‑strap systems that blend in with the house’s architecture.
Otherwise, with a few extra brackets and some careful tightening, you’ve turned a quick fix into a durable upgrade. Your gutters will stay level, your home stays dry, and you’ll have one more DIY win under your belt.
Step 4: Replace Damaged Sections or Realign Gutters
Okay, you’ve tightened the hangers and added a few extra brackets – nice work. But what if a piece of the gutter is bent, cracked, or just won’t stay level no matter how many times you shim the bracket? That’s the moment you move to the next phase: swapping out the bad section or nudging the whole line back into its proper groove.
Spot the section that’s truly out of whack
First, run your hand along the entire run again. You’ll feel a cold, hollow spot where the metal has lost its shape, or you might see a visible dip that a simple lift can’t fix. If the gutter is rusted through or the seam splits when you press, it’s time for a replacement piece.
And remember – a sag is often just a symptom. According to Abraham Roofing’s guide, loose brackets are the most common cause, but damaged sections can make those brackets work overtime and eventually fail.
Gather the right tools (you probably already have most of them)
You’ll need a ladder, a screwdriver or drill, a hacksaw or tin snips for metal gutters, a piece of new gutter that matches the old profile, silicone sealant, and a few extra lag bolts or stainless‑steel screws. Gloves are a must – those edges can be sharp.
Step‑by‑step: Removing the bad piece
1.Secure the ladder.Make sure it’s level and that someone can hold the base if you’re on a steep roof.
2.Unscrew the brackets.Loosen the screws that hold the damaged section in place. Don’t yank; give each bracket a little wiggle so the gutter slides out cleanly.
3.Cut away the old piece.If the gutter is metal, measure the length of the gap, then use a hacksaw or tin snips to cut the neighboring sections so the new piece will fit snugly. For vinyl, you can often snap the ends apart with a gentle tap of a rubber mallet.
4.Prep the opening.Clean any rust, old sealant, or debris from the ends. A quick wipe with a rag and a little sandpaper helps the new joint seal better.
Step‑by‑step: Installing the replacement
1.Slide the new segment in.Align the seams so the bottom edge sits level with the rest of the run. If you notice a slight angle, use a short piece of wood as a shim under the bracket to bring it up.
2.Re‑attach the brackets.Position the existing brackets back over the new piece, or add a fresh hanger if the old one looks tired. Screw them in tightly – a 1½‑inch stainless screw for wood, or a 2‑inch lag bolt if the fascia is a bit soft.
3.Seal the seams.Run a generous bead of silicone sealant along both sides of each joint. Smooth it with a gloved finger so water can’t seep behind the metal.
4.Test the pitch.Grab a 2×4, lay it across the new section, and check the slope with a level. You still want roughly a quarter‑inch drop per ten feet toward the downspout. If it’s low, add a tiny shim underneath the bracket and tighten again.
5.Give it a water test.Hook up a garden hose at the highest point and watch the flow. No puddles? You’ve nailed it.
That’s the whole process in a nutshell – evaluate, lift, replace, seal, and verify.
Seeing the steps in action can make the whole thing feel less intimidating, especially when you’re balancing on a ladder and trying not to drop a screwdriver.
One extra tip: if the damaged spot is near a corner, treat it like a mini‑reinforcement project. Install two brackets – one right at the corner and another a foot away – to create a little frame that holds the new piece steady. It’s the same “double‑up” trick we mentioned earlier, and it pays off big time when wind or heavy rain hits.
Finally, step back and give yourself a high‑five. You’ve just turned a leaky, sagging section into a solid, water‑tight channel. That’s the kind of DIY win that saves you from costly foundation repairs down the line.
Ready to tackle the next stretch? Keep the same mindset: assess, adjust, and seal. Your gutters will thank you every time a storm rolls through.
Step 5: Prevent Future Sagging – Maintenance Checklist
Alright, you’ve lifted, tightened, reinforced, and even swapped out a busted piece – now the real secret is keeping that gutter from drooping again.
The easiest way to do that is to treat your gutter system like a car: you don’t just fix the flat tire and forget it, you set up a routine check‑up so the next surprise never shows up.
So, what does a solid maintenance routine actually look like?
1. Visual Scan Every Spring and Fall
Grab a ladder, walk the entire run, and look for three tell‑tale signs: a low spot that still hangs, rusted screws, or debris that’s starting to pile up. You don’t need a magnifying glass – just a quick glance and a hand‑run along the edge will tell you if anything feels floppy.
When you spot a problem, note the exact location (e.g., “north‑west corner, 12 ft from the downspout”) so you can come back with the right tools.
2. Tighten & Replace Hangers Quarterly
Even brand‑new brackets can loosen after a few rainstorms. Grab a screwdriver or drill, give each screw a half‑turn, and listen for that satisfying “click” when the metal stops moving. If a screw spins freely, swap it for a stainless‑steel 1½‑inch fastener – the extra corrosion resistance pays off in humid climates.
Pro tip: after you tighten, give the bracket a gentle “wiggle‑and‑pull” test. If it still moves, add a second screw or a longer lag bolt.
3. Clean Out Debris Before Heavy Rains
Leaves, pine needles, and even small twigs act like a concrete slab on a gutter, adding weight that can pull the whole section down. Use a garden scoop or a hand‑rake to pull the bulk out, then follow up with a garden hose to flush the remaining slime.
In coastal towns, a quick rinse also helps wash away salty residue that accelerates rust.
4. Seal Joints After Every Adjustment
Whenever you move a bracket or replace a piece, run a bead of silicone sealant along both sides of the joint. Smooth it with a gloved finger – this creates a waterproof barrier and stops water from seeping behind the fascia, which could rot the wood and invite new sagging.
Think of the sealant as the “glue” that holds your effort together; without it, the gutter is just a fancy slide.
5. Schedule a Professional Check‑Up Twice a Year
Many homeowners skip this step, but a quick inspection from a gutter‑repair specialist can catch hidden corrosion or hidden wood rot before it becomes a sag. Family Gutter experts recommend scheduling regular gutter maintenance at least twice a year, ideally before the rainy season and after the leaves have fallen.
That professional visit doesn’t have to be a full overhaul – a 30‑minute walk‑through is enough to verify that your hangers are still tight and that no new leaks have appeared.
6. Document the Routine
Keep a simple spreadsheet or a notes app with columns for date, weather, observations, and actions taken. Over time you’ll see patterns – maybe your east side always sags after a June thunderstorm – and you can pre‑emptively add an extra bracket there.
Even a one‑line entry like “2025‑05‑12: tightened north‑west hanger, added silicone” saves you from guessing later.
Quick Reference Table
Task | Frequency | Key Action |
Visual scan for low spots | Spring & Fall | Walk the run, feel for floppiness, note location |
Tighten/replace hangers | Quarterly | Half‑turn each screw, replace any that spin freely with stainless‑steel fasteners |
Debris removal & flushing | Before heavy rain | Rake out leaves, hose down to clear residue |
Seal joints after work | After any adjustment | Apply silicone bead, smooth with gloved finger |
Professional inspection | Twice a year | Hire a gutter‑repair pro to verify brackets and check for hidden rot |
By turning these six items into a habit, you’re basically giving your gutter a “maintenance contract” with yourself. The next time a storm rolls in, the water will glide down the line like it’s on a well‑lubricated slide, and you won’t have to scramble for a ladder.
Remember, the whole point of fixing sagging gutters is to keep the water where it belongs – off your roof, off your foundation, and off your peace of mind. Follow this checklist, add a couple of extra brackets where you feel the weight, and you’ll never hear that dreaded “sagging gutter” sigh again.
Conclusion
So you’ve walked the ladder, lifted that droopy section, tightened the hangers, sealed the seams, and gave the whole line a little extra support. If you’re still wondering whether it really works, think about the last rain you watched glide straight into the downspout without a single puddle – that’s the proof.
Remember the core steps: locate the low spot, loosen the brackets, raise the gutter back to its proper pitch, re‑secure the hangers a touch higher, and finish with a bead of silicone. It sounds simple, but the difference between a sagging gutter and a steady water‑shedding channel is those few minutes you spent adjusting the brackets.
And don’t forget the habit side of things. A quick visual scan each spring, a quarterly tighten‑up, and a once‑a‑year professional glance keep the sag from creeping back. Think of it as a maintenance contract you write with yourself.
Does any part of the process feel shaky? Grab a friend, pull out that screwdriver, and give it another go – you’ll learn a lot just by doing it again.
Ready to lock in the results? Give LGFMH Construction a quick call or book online if you hit a wall you can’t climb. We’ll make sure your gutters stay level, your foundation stays dry, and you keep that peace of mind every time the clouds roll in.
FAQ
What’s the first thing I should check when I suspect a sagging gutter?
Start by walking the entire gutter line with a ladder and run your hand along the bottom edge. You’ll feel a low spot or notice a floppy section that doesn’t follow the roof’s slope. Look for visible gaps between the gutter and the fascia, rusted screws, or debris buildup. Spotting the exact spot lets you focus your lift on the right place.
How do I actually lift a sagging gutter back into its proper pitch?
Loosen the hanger screws just enough to give the bracket a little wiggle – don’t yank the whole piece. Then, using a small pry bar or a sturdy piece of wood, gently lever the gutter upward until it aligns with a ¼‑inch drop per 10 feet toward the downspout. Once it sits level, tighten the screws or replace them with stainless‑steel fasteners for extra grip.
When should I replace a hanger instead of re‑using it?
If a hanger is bent, cracked, or the screw spins freely after you try to tighten it, it’s time for a new bracket. A weak hanger will let the gutter sag again, even after you’ve adjusted the pitch. Swapping in a fresh stainless‑steel hanger gives you a solid anchor point and resists rust in humid climates.
Do I need to seal the joints after I’ve moved the gutter?
Absolutely. After you’ve repositioned the gutter and tightened the hangers, run a bead of silicone sealant along each joint and around the screw heads. Smooth it with a gloved finger so water can’t sneak behind the fascia. The sealant acts like a waterproof glue, keeping moisture out of the wood and preventing future rot that could cause another sag.
How often should I inspect my gutters to keep sagging at bay?
Make it a habit to do a quick visual scan each spring and fall. While you’re up there, feel for any floppiness, check that all screws are snug, and clear out leaves or pine needles that add extra weight. A quarterly tighten‑up of the hangers and an annual professional walk‑through are enough to catch issues before they become costly.
What if the fascia board behind the gutter is rotted?
Soft or crumbling fascia won’t hold screws well, so the gutter will keep sagging. In that case, replace the damaged wood or reinforce it with a backing board before you reinstall the hangers. Using a longer lag bolt or a wall anchor can also give the bracket a stronger bite, but don’t skip fixing the underlying rot – it’s the root of the problem.
When is it better to call a pro instead of DIY‑ing the fix?
If you encounter rusted fasteners that won’t budge, a fascia that’s soft all the way across, or you simply feel unsafe on a steep roof, bring in a professional. A gutter‑repair specialist can replace corroded hardware, add hidden‑strap supports, and ensure the pitch is spot‑on. A quick 30‑minute inspection can save you hours of trial‑and‑error and guarantee the job lasts for years.


Comments