How to Install a Garage Door Insulation Kit
- William McKracherne
- Jun 13
- 4 min read

Insulating your garage door is one of the easiest ways to make your garage more comfortable. It keeps the heat in during winter and out during summer. Plus, it cuts down on noise. Here's how to do it yourself with a garage door insulation kit.
Tools and Materials You’ll Need
Before you start, gather everything. Most insulation kits come with the panels and adhesive, but you'll need a few basic tools too.
Tool or Material | Why You Need It |
Garage door insulation kit | The main product – choose a kit that fits your door panel size |
Tape measure | Measure each panel accurately |
Utility knife | Cut insulation to size |
Straight edge or T-square | Guide for straight cuts |
Safety glasses | Protect your eyes from dust and debris |
Gloves | Keep hands safe from sharp edges |
Caulk or weatherstripping | Seal gaps after installation |
You can find most of these at any hardware store. If you need help choosing a kit, LGFMH Construction's blog has tips on picking the right one for your door. According to Wikipedia , insulated garage doors can reduce heat transfer by up to 70%.
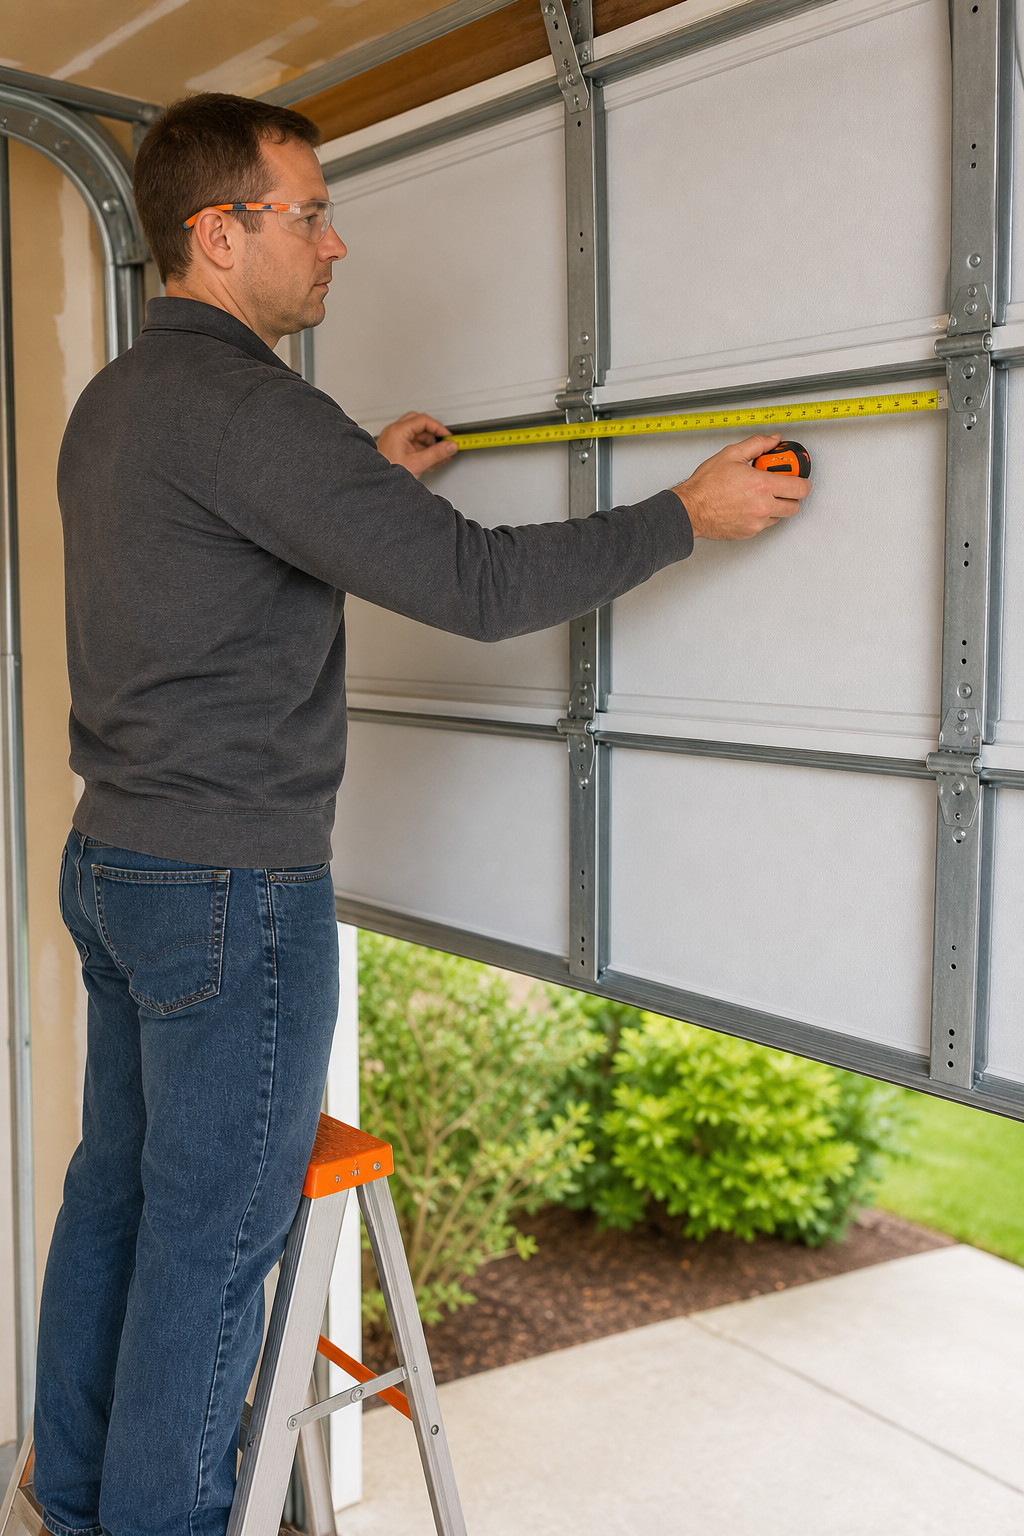
Step 1: Measure and Prepare the Garage Door
Start by cleaning the back of the garage door. Sweep off dirt and cobwebs. A clean surface helps the adhesive stick better. Then, measure each panel's width and height. Write down the measurements for each one. Don't assume all panels are the same size – they might vary slightly. The Pacific Northwest National Laboratory recommends measuring the depth of the panel channels too, so you know the maximum insulation thickness.
Next, disconnect the garage door opener using the emergency release cord. This lets you move the door manually. Lift the door about halfway and prop it open with clamps or a brace. You don't want it closing on you while you work.
Step 2: Cut Insulation Panels to Size
Lay the insulation panel on a flat surface. Use your measurements to mark the cut lines with a pencil and straight edge. For rigid foam boards, score along the line with a utility knife, then snap the board. For reflective foil kits, just cut with scissors or a knife. Work slowly to get clean edges. A sharp blade makes a big difference. If you're unsure, cut slightly bigger than needed – you can always trim more. But you can't add material back.
Step 3: Attach Insulation to the Door Panels
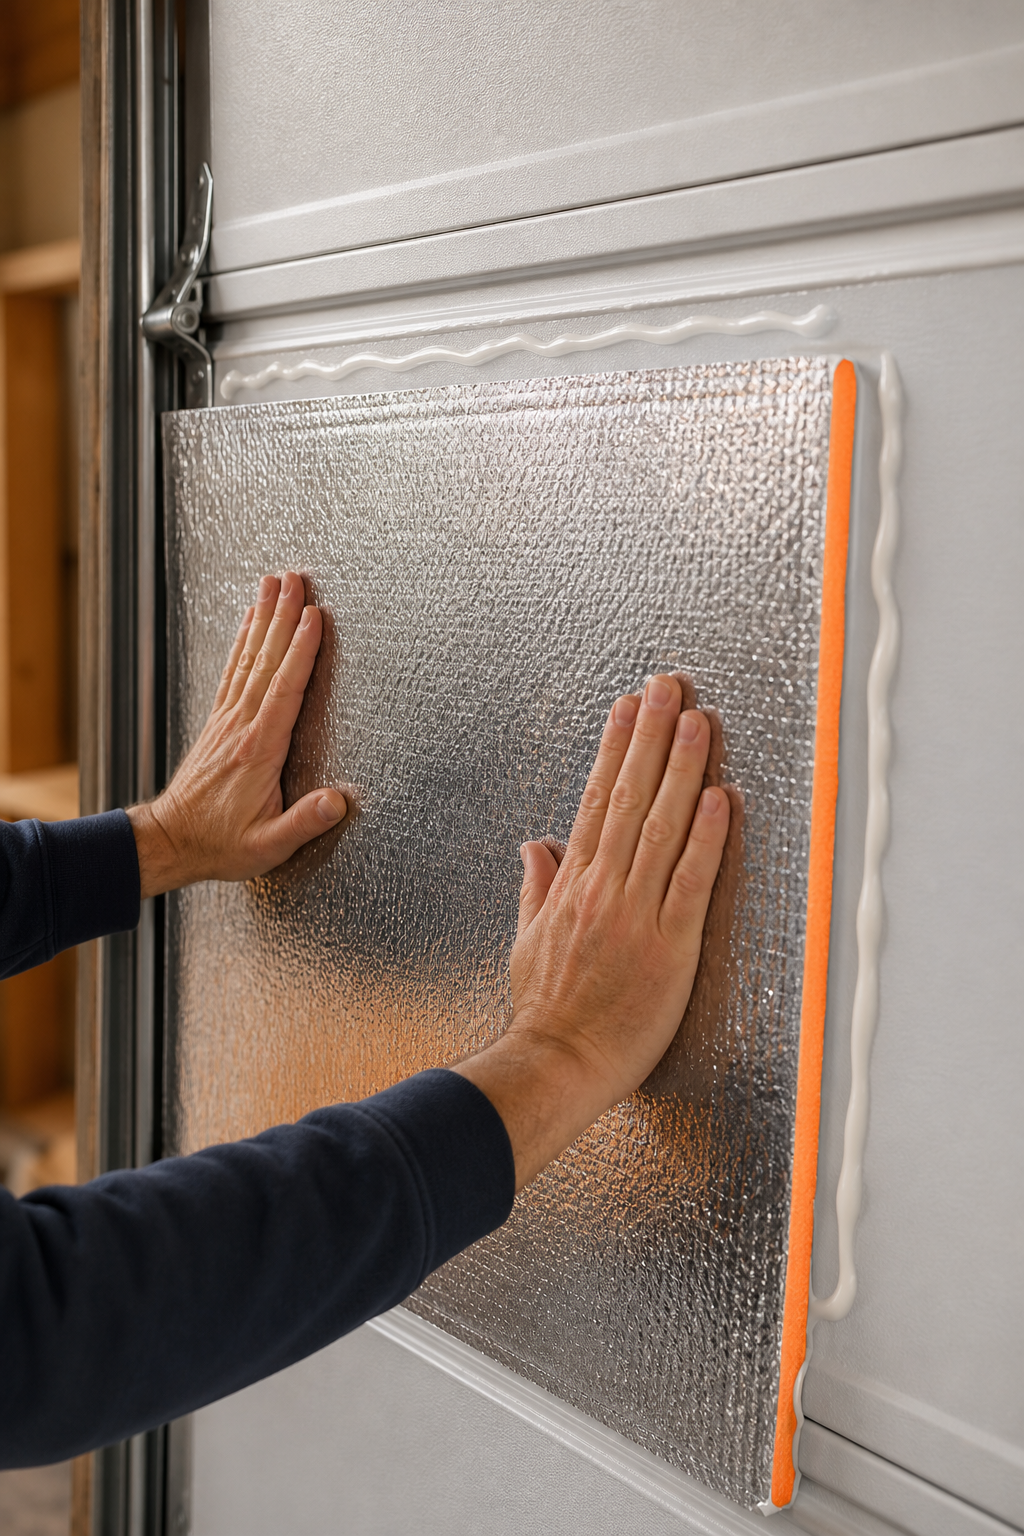
Most kits use double-sided tape or adhesive. Apply the adhesive to the back of the door panel according to the kit's instructions. Then press the insulation piece firmly into place. Start at one end and work your way across to avoid air bubbles. If your kit uses retaining pins or clips, install those too. Make sure the insulation sits flat and covers the entire panel. For metal doors with C-channel framing, you can slide the edges of the foam into the channels for a snug fit.
Step 4: Seal Edges and Gaps
Even with a perfect fit, there will be small gaps. Use a can of spray foam or caulk to fill them. Pay special attention to corners and along the edges of the panels. The PNNL guide suggests using canned spray foam for larger gaps and trimming it flush after it dries. Also, check the weatherstripping along the bottom of the door. If it's cracked or missing, replace it now. That seals the door when closed.
Step 5: Reattach Hardware and Test Operation
Once the insulation is secure and the sealant is dry, reconnect the garage door opener. Remove any clamps and lower the door. Test the operation manually first – lift and lower it by hand. It should move smoothly without sticking. Then test the opener. If the door feels heavy or struggles, the added weight might be too much. At LGFMH Construction , we recommend checking the spring tension. Insulation adds weight, and the springs may need adjustment. If the door doesn't stay in place when you release it at waist height, call a professional.
Frequently Asked Questions
How long does it take to install a garage door insulation kit?
Most installations take 2 to 4 hours. The time depends on the size of your door and the type of kit. First-timers might need a bit longer.
Can I install garage door insulation by myself?
Yes, it's a DIY-friendly project. You only need basic tools and some patience. The hardest part is measuring and cutting accurately.
Do I need to remove the garage door tracks?
No. You work on the door panels from the inside. No need to disassemble anything.
Will insulation make my garage door too heavy?
It adds some weight, usually 10 to 25 pounds. Most doors handle it fine, but you might need to adjust the spring tension if the door feels off.
What type of insulation kit is best?
Reflective foil kits are easy to install and work well in hot climates. Foam board kits offer higher R-values and better noise reduction. Pick based on your climate and budget.
Can I paint over the insulation?
Some reflective kits have a foil face that can't be painted. Foam board can be painted with latex paint if you use a primer first.
Conclusion
Installing a garage door insulation kit is a smart weekend project. You'll save on energy bills and make the garage more usable. If you run into trouble or need professional help, LGFMH Construction can assist with installation and spring adjustments. Grab your tools and get started.


Comments