How to Install a Gutter Guard for Heavy Rain – 2026 Guide
- William McKracherne
- Aug 10
- 7 min read

Heavy rain can flood your basement and ruin your yard. If you’ve ever watched water spill over the roof edge, you know the damage adds up fast. This guide shows you exactly how to install a gutter guard for heavy rain, from checking the roof to testing the final fit.
Even with a single detailed entry, the data shows that the only listed solution bundles scheduling with material sourcing, a rarity among gutter‑guard installation guides.
Table of Contents
Step 1: Assess Your Roof and Gather Tools
First, climb up safely and look at the roof line. Spot any loose shingles or cracked gutters. Fix those problems before you add anything on top. A solid base means the guard will stay put when the rain hits hard.
Next, list the tools you’ll need. You’ll want a sturdy ladder, a tape measure, a screwdriver or drill, safety gloves, and goggles. A garden hose helps you rinse the gutter before you start.
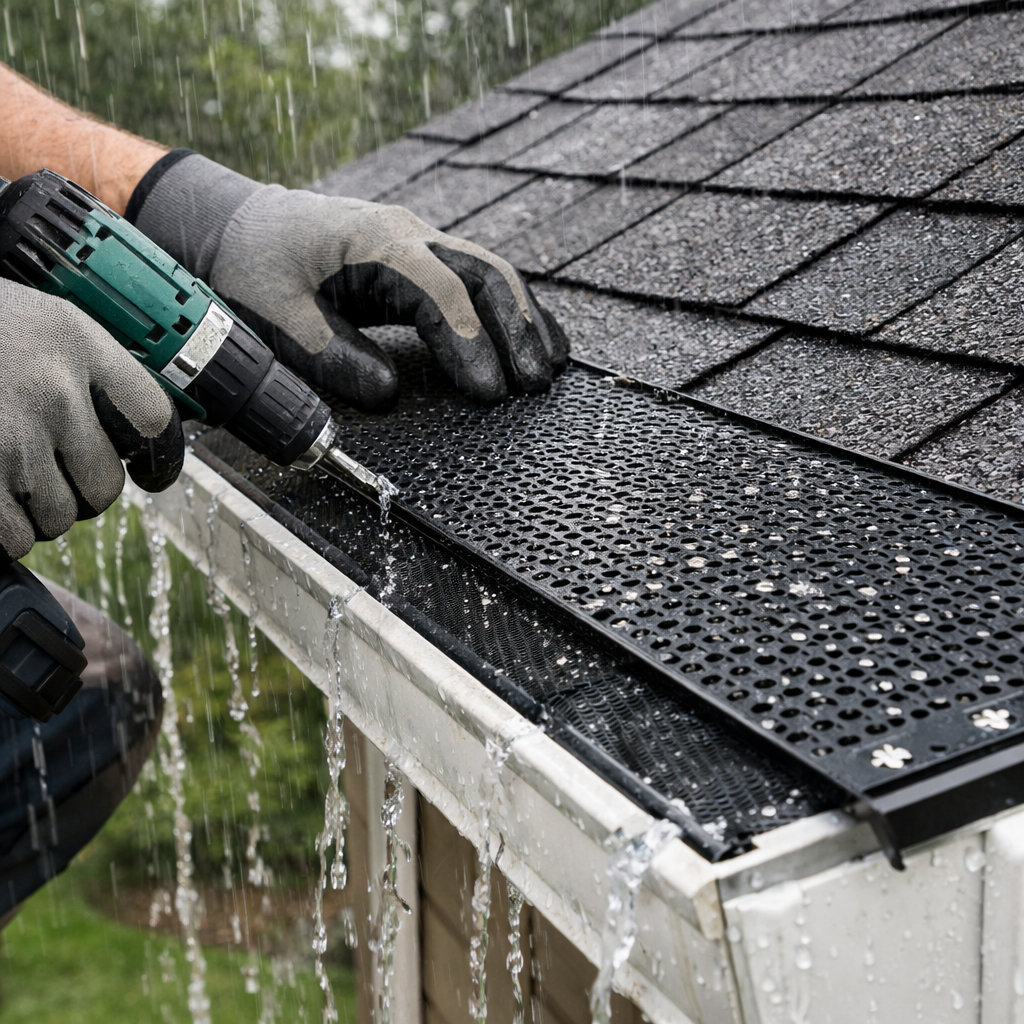
Here’s a quick checklist:
Ladder that reaches the gutter without overreaching
Measuring tape (at least 25 ft)
Drill with appropriate bits
Screwdriver set
Protective gloves and safety glasses
While you gather gear, give the gutters a thorough clean. Remove leaves, twigs, and any dirt. A clean surface lets the guard sit flat and prevents water from slipping under.
Pro Tip:Keep a small bucket on the ladder to catch debris as you clean. It saves you from climbing up twice.
For more on why cleaning matters, see Badgerland Exteriors’ guide on gutter‑guard basics.
Now that you have the tools and a clean gutter, you’re ready to measure.
Key Takeaway:A clean, well‑supported gutter is the foundation for a guard that survives heavy rain.
Bottom line:Inspect and prep the roof and gutter before you even think about the guard.
Step 2: Measure and Mark Gutter Lengths
Accurate measurements keep you from buying too much or too little material. Start at one end of the house and run the tape along the gutter’s outer edge. Write down each run’s length, including any corners.
Most homes have 5‑inch K‑style gutters. If you have a larger size, the GutterBrush chart will help you pick the right brush diameter. Measure from the back of the gutter to the outer tip , that gives you the true width.
When you reach a corner, add a few extra inches for overlap. Overlap prevents gaps where leaves can sneak through.
5‑inchis the most common gutter size for residential homes
Mark each cut line with a piece of chalk. The marks guide you when you trim the guard panels later.
Here’s a simple step‑by‑step:
Lay the tape on the gutter edge.
Record the length to the nearest inch.
Check for bends or sagging sections and note them.
Mark cut points with chalk.
If you’re unsure which brush size fits, GutterBrush’s sizing page walks you through the options.
Make sure you double‑check each number before you order material.
Key Takeaway:Measure twice, cut once , it saves time and money.
Bottom line:Precise measurements set the stage for a snug, leak‑free guard.
Step 3: Install Support Brackets
Support brackets hold the guard in place when rain pounds on it. Space them about 30 inches apart. This distance works for most residential gutters and gives the guard enough backing.
First, locate the existing gutter hanger spots. If they’re too far apart, add new brackets. Use a drill to make pilot holes, then screw the brackets in securely.
Make sure each bracket slopes slightly toward the downspout. The tilt helps water flow, especially when the rain is heavy.
After the brackets are in, give each one a quick shake. It should feel firm, not wobbly.
For material options, Spectra Gutter Systems notes that aluminum brackets are light, while steel brackets handle heavy snow better.
When you finish, step back and look at the line of brackets. They should form a straight, even row.
"The best time to start building gutters was yesterday."
Pro Tip:Use a level on the first bracket, then line up each subsequent bracket with the previous one to keep the run even.
Key Takeaway:Properly spaced brackets keep the guard steady under heavy rain.
Bottom line:Secure brackets give the guard the backbone it needs to survive storms.
Step 4: Attach Gutter Guard Panels
Now the fun part begins , snapping the guard panels onto the brackets. Most panels click into place, but some need screws or zip‑ties.
Start at one end of the gutter. Align the panel’s edge with the chalk mark you made earlier. Press it onto the bracket until you hear a click.
If the guard uses screws, drill a small pilot hole first, then drive the screw in just enough to hold it firm. Don’t over‑tighten, or you could crack the panel.
Overlap each panel by about an inch. Overlap stops water from slipping through the seams.
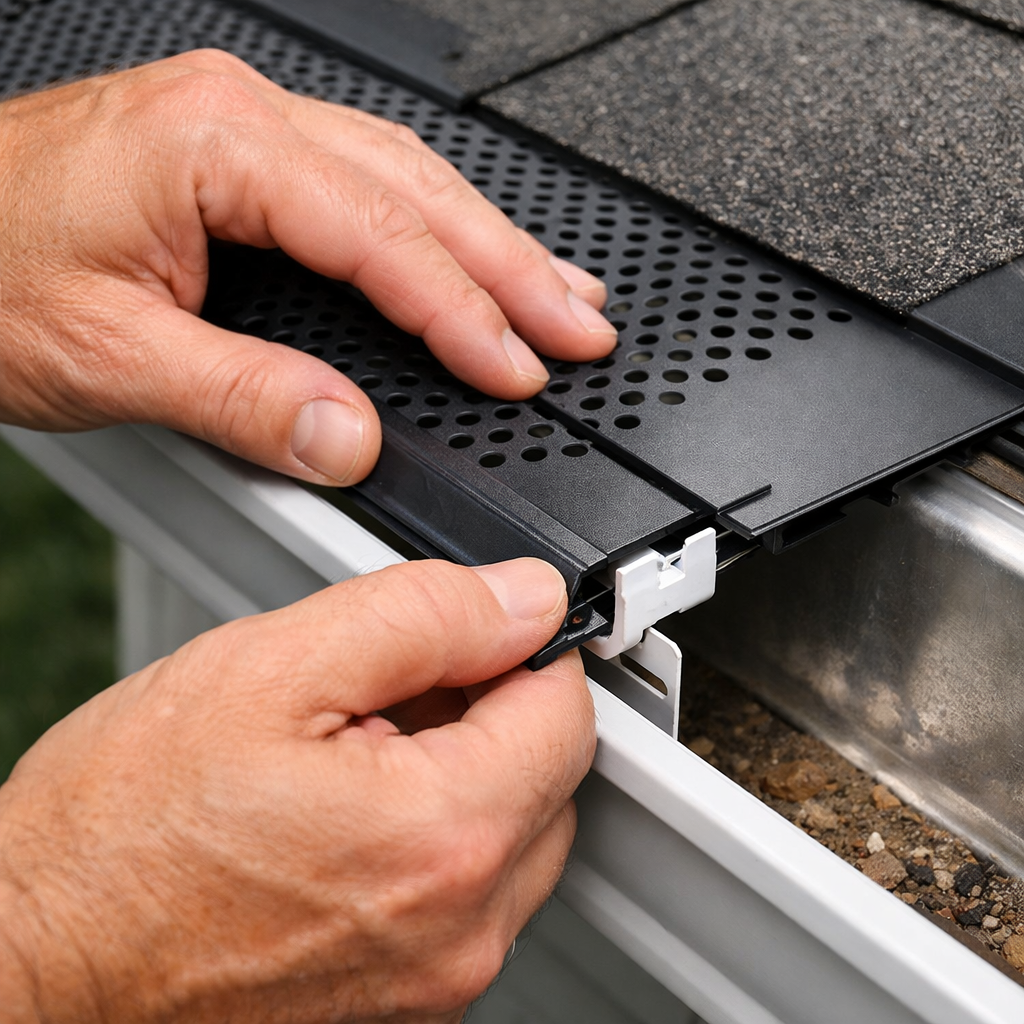
Once all panels are attached, run a gloved hand along the seams. Feel for any gaps. If you find a gap, add a small screw or a zip‑tie.
Roofby Rhino’s guide explains why overlapping is key for heavy rain protection.
After the panels are in place, give the whole run a gentle tap. The panels should stay put.
Pro Tip:Keep a spare set of screws on hand. If a panel feels loose, a quick screw can lock it down.
Key Takeaway:Overlapping and secure fasteners keep water out, even when the rain is relentless.
Bottom line:Proper attachment of panels creates a continuous barrier against debris.
Step 5: Secure, Seal, and Test for Heavy Rain
With the panels up, it’s time to seal any tiny gaps. Use a gutter‑seal silicone that works on metal and plastic. Apply a thin bead along each joint and let it cure for 24 hours.
Next, check the slope. Water should flow toward the downspout at a rate of about 1/4 inch per foot. If the slope is off, adjust a bracket or two.
Now test the system. Grab a garden hose and spray water at the roof edge, simulating a downpour. Watch the water flow through the guard and down the downspout. No leaks? No pooling? Good.
If water backs up, tighten the nearest bracket or reseal the joint.
Pro Tip:Test on a sunny day so you can see the water path clearly.
Key Takeaway:Sealing and testing guarantee the guard will hold up when real storms hit.
Bottom line:A final seal and water test confirm your guard can handle heavy rain.
Conclusion
Installing a gutter guard for heavy rain doesn’t have to be a mystery. Start by checking the roof, gather the right tools, measure each run, set up sturdy brackets, snap on the panels, seal the joints, and test with a hose. Follow each step, and you’ll cut down on cleaning, protect your foundation, and keep your home safe during the worst storms.
LGFMH Construction offers professional help if you hit a snag. Their team can provide the exact materials listed in the research table and handle the whole job from start to finish.
Ready to stop the rain from causing trouble? Give LGFMH a call or book online today and get your gutters rain‑ready.
FAQ
Can I install a gutter guard myself if I have a two‑story house?
Yes, you can, but safety is key. Use a sturdy ladder stabilizer, wear gloves and goggles, and have a friend hold the ladder. Measure each run carefully and follow the step‑by‑step guide. If you feel unsure about working at height, hiring a pro from LGFMH can keep you safe and ensure a proper fit.
What type of gutter guard works best for heavy rain?
Mesh guards are popular for heavy rain because they let water flow while keeping out leaves. Brush‑style guards also perform well when rain is intense, as the bristles allow water to pass quickly. Choose a product that fits your gutter width , the GutterBrush sizing chart helps you pick the right size.
How often should I check the guard after installation?
Inspect the guard at least twice a year , once in spring after the trees leaf out and once in fall before leaves drop. Look for loose panels, cracked seals, or debris that has built up at the edges. A quick hose test each season can catch problems early.
Do I need to seal the joints if my guard is made of aluminum?
Even aluminum guards benefit from a thin bead of silicone sealant at each joint. The seal stops water from sneaking behind the guard and protects against wind‑driven rain. Let the seal cure for a full day before testing with a hose.
What tools are essential for a DIY installation?
You’ll need a ladder, measuring tape, drill with bits, screwdriver, safety gloves, goggles, and a garden hose for testing. Optional tools include tin snips for cutting metal panels and a level for aligning brackets. Having all tools on hand saves time and keeps the project moving.
Will a gutter guard stop all debris from entering the gutter?
No guard can stop every tiny particle, but a well‑installed mesh or brush guard blocks the majority of leaves, twigs, and larger debris. Regular inspections will catch any small pieces that slip through. Over time, you’ll see far less buildup than with an unguarded gutter.
Aspect | Our Pick (Interior & Exterior Repairs) | Typical DIY Guide |
Scheduling | Call or text for a direct schedule | DIY guides leave it to you |
Material list | Exact list: shingles, gutters, roofing materials from Miles Smooth, supplies from ABC | Vague or generic lists |
Instruction clarity | Step‑by‑step with clear action phrase | Often missing detailed steps |


Comments