How to Install a Patio Door Sweep in 5 Steps
- William McKracherne
- Jun 7
- 8 min read

Your patio door is a major source of drafts, noise, and energy loss. A worn-out or missing door sweep is often the culprit. The good news? You can fix it yourself in under an hour. In this guide, I'll walk you through how to install a patio door sweep from start to finish. You'll learn what tools you need, how to remove the old one, measure and cut the new sweep, attach it securely, and test the seal. Let's get started.
Step 1: Gather Materials and Tools
Before you start, round up everything you'll need. Nothing's worse than stopping mid-job to hunt for a screwdriver. Here's what I recommend:
Tool / Material | Purpose | Notes |
New door sweep | Replaces the old one | Choose the right type: adjustable, dual-fin, or plain. Measure your door width first. |
Flathead screwdriver | Prying off old sweep | A sturdy one with a thin tip works best. |
Phillips head screwdriver | Removing and installing screws | Or a cordless drill with bits. |
Tape measure | Measuring door width | A 25-foot tape is fine. |
Pencil | Marking cut lines | Use a sharp pencil or a fine marker. |
Hacksaw or tin snips | Cutting the new sweep to size | Hacksaw for metal sweeps, tin snips for vinyl or rubber. |
Drill with bits | Pre-drilling holes (if needed) | A small bit (1/16) helps prevent splitting. |
Safety glasses | Protecting your eyes | Cutting metal or plastic can send debris flying. |
Optional: wood block | Hammering sweep into place | Protects the sweep from damage. |
Most door sweeps are sold in standard widths like 36 or 42 inches. You'll likely need to cut it down. Some sweeps are adjustable in height, which is great if your door isn’t perfectly level. Take a quick look at your old sweep , note how it was attached: screws, clips, or pressure fit. That will guide your removal.
A quality sweep makes a big difference. As Wikipedia explains , door sweeps seal the gap between the door and the threshold, blocking drafts, dust, and pests. Investing in a good one pays off in comfort and energy savings.
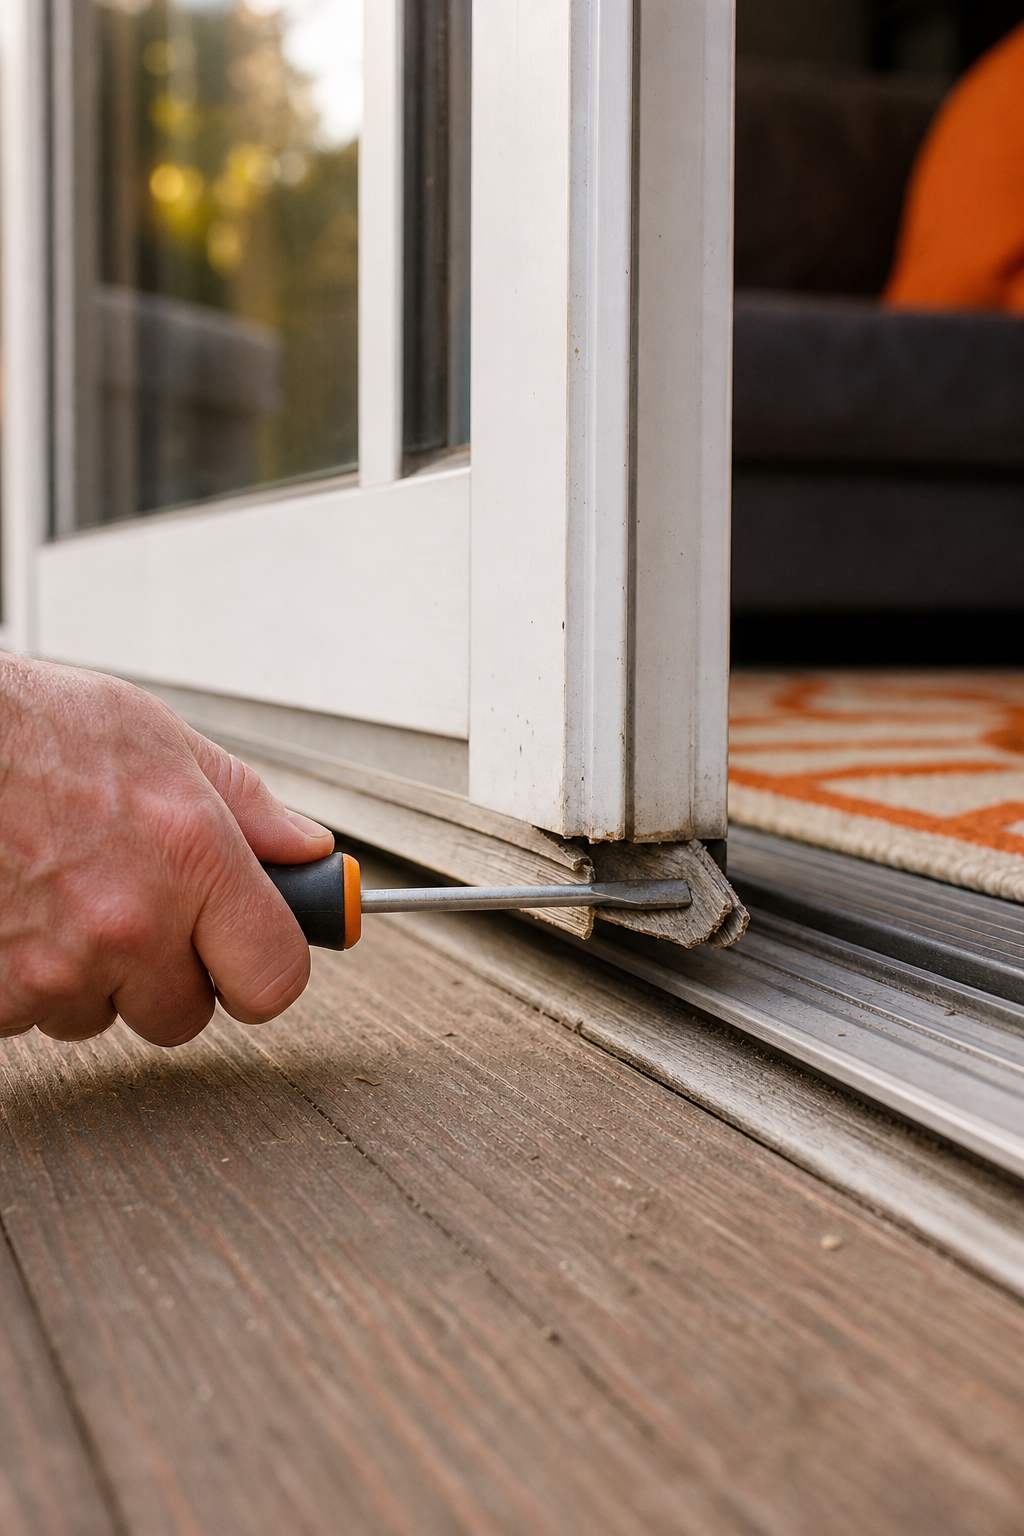
Step 2: Remove the Old Door Sweep
Start by opening the patio door wide so you can access the bottom edge easily. Examine how the old sweep is attached. Most are held by screws along the bottom face of the door. Some older sweeps might be stapled or clamped. If you see screws, use your Phillips screwdriver to remove them. Put them in a small dish so they don’t roll away.
If the sweep is stubborn, use a flathead screwdriver to gently pry it loose. Insert the tip under the sweep and twist. Work from one end to the other. Be careful not to scratch the door or the threshold. For sweeps that are nailed or stapled, you might need pliers to pull out fasteners. A YouTube tutorial by DIY Home Repair shows a similar process for sliding doors , the technique is the same.
Once the old sweep is off, clean the bottom of the door. Scrape off any old adhesive or debris with a putty knife. Wipe the area with a damp cloth. This ensures the new sweep sits flat. If you see any rot or damage under the sweep, address that now. It’s a good time to check for moisture issues.
Take a moment to measure the door width. Use your tape measure from one side to the other, at the bottom. Write down the measurement. You’ll need it for cutting the new sweep. If your door is wider than standard sweeps, you may need to order a custom length. For most doors, a 36-inch sweep works for a 36-inch door, but always double-check.
Step 3: Measure and Cut the New Sweep
Now that you have your door width, transfer that measurement to the new sweep. Use a pencil to mark the cut line. Remember: it’s better to cut a little long and trim later than to cut too short. A sweep that’s too short leaves a gap.
Lay the sweep on a flat surface. If it’s made of metal or vinyl, use a hacksaw or tin snips to cut along the mark. For a clean cut, go slowly and use steady pressure. A miter box can help keep the cut straight. If you’re using tin snips, they’re easier on thin sweeps but can leave burrs. File down any rough edges with a metal file or sandpaper.
For adjustable sweeps, you might need to separate the two pieces before cutting. Some have a rubber insert that slides out. Read the manufacturer’s instructions. Most sweeps come with a slip-on screw cover that you install after attaching the sweep. If your sweep has that, consider cutting it to the same size as the sweep.
Another tip from a detailed installation video: test fit the sweep before drilling. Slide it onto the door bottom without screws to see if it fits snugly. Adjust the cut if needed. This saves you from drilling holes that don’t line up.
Step 4: Attach the New Sweep
With the sweep cut to size, it’s time to install it. Position the sweep along the bottom of the door, aligning it with the edges. If your door has an existing groove or channel, fit the sweep into it. For sweeps that attach with screws, hold the sweep in place and mark the screw hole locations with a pencil.
Pre-drill holes to make driving screws easier. Use a small drill bit (1/16 inch) and drill through the sweep’s mounting holes into the door. Be careful not to drill too deep. Then, drive the screws in by hand or with a drill. Don’t overtighten , you want the sweep snug but not compressed. Over-tightening can warp the sweep or strip the holes.
If your sweep uses a pressure-fit design, you may need to hammer it onto the door with a wood block. Place the block against the sweep and tap it gently until it snaps into place. Some sweeps have a screw cover that slides over the mounting screws after installation. That cover can be tricky to slide on. A video by New Hardware shows using a wood block and hammer to gently coax the cover into place. Apply a little silicone lubricant to the cover’s channel if it’s too tight.
After attaching, check that the sweep contacts the threshold evenly. Open and close the door to see if it clears the threshold without scraping too hard. If it drags, you may need to adjust the height. Many sweeps allow vertical adjustment by loosening screws and sliding the sweep up or down. Fine-tune until the seal is snug but the door swings freely.
Step 5: Test and Adjust
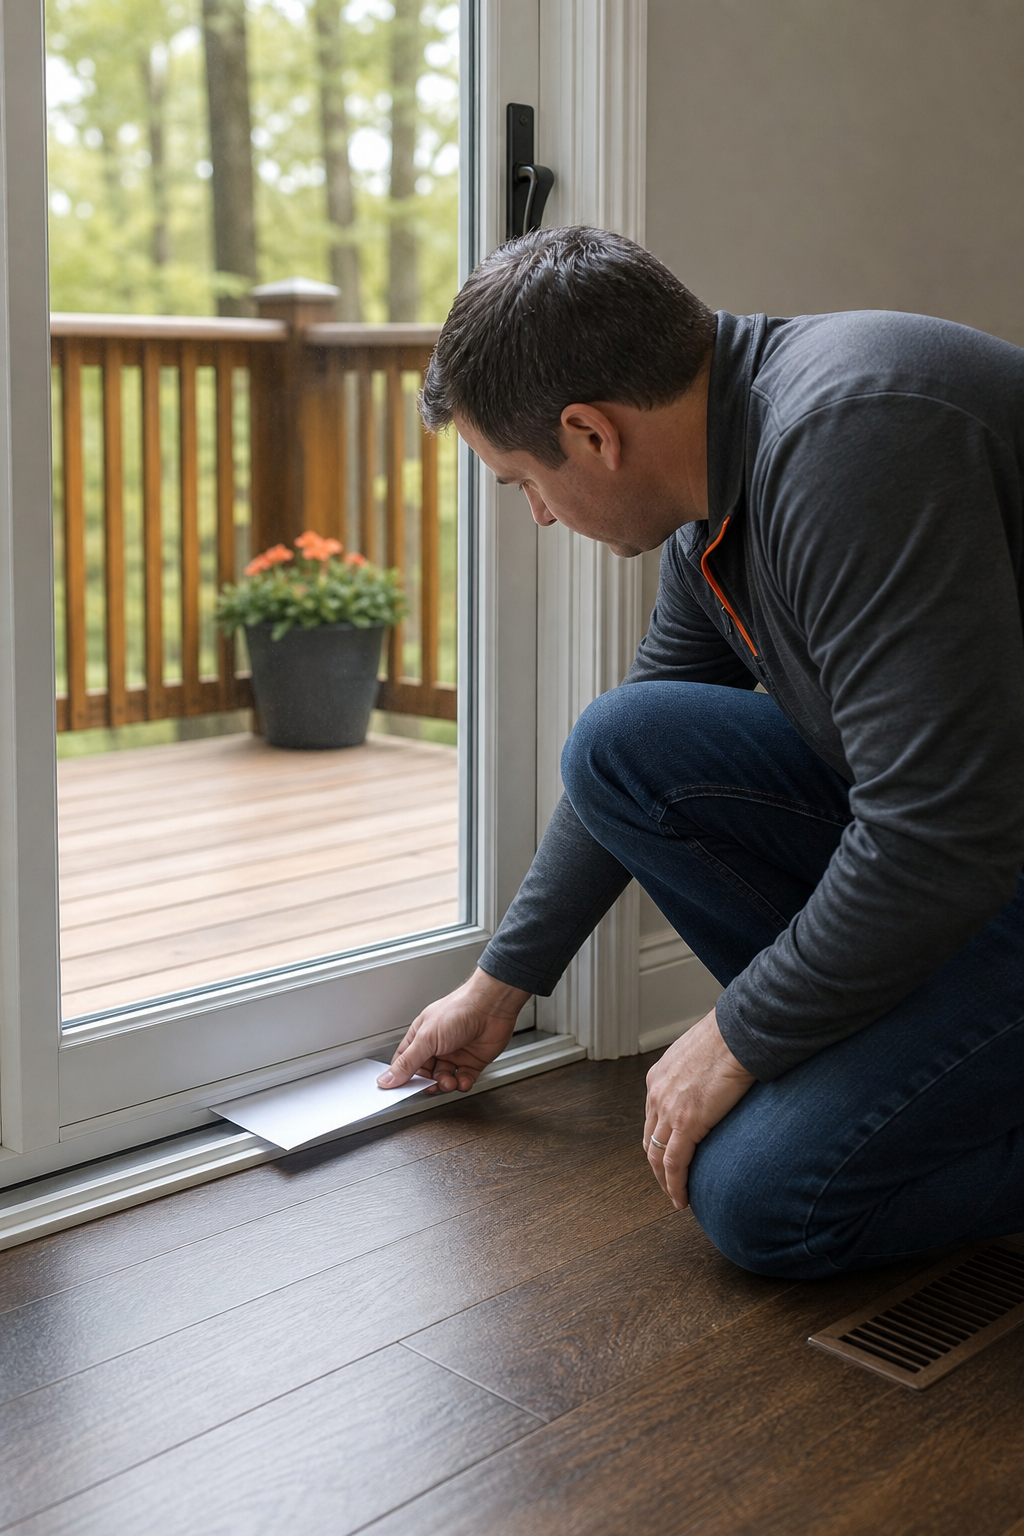
Close the door and inspect the gap from inside and out. Look for light coming through. A simple test: take a piece of paper and close it in the door. Try to pull the paper out. If it slides out easily, the seal is too loose. If it tears, the sweep is too tight. Aim for a moderate resistance. You can repeat this test at several points along the bottom.
If you find gaps, adjust the sweep. Loosen the screws, shift the sweep down slightly, and retighten. For adjustable sweeps, you can raise or lower the rubber fin. Some sweeps have two adjustment screws on the ends. According to the U.S. Department of Energy , proper weatherstripping can reduce energy loss by up to 15%. So getting the seal right matters.
Also check that the sweep doesn’t interfere with the door’s operation. If the door is hard to close or the sweep catches on the threshold, raise it slightly. For sliding patio doors, ensure the sweep doesn’t prevent the door from sliding smoothly. Lubricate the track if needed.
Finally, inspect the ends of the sweep. They should be flush with the door edges. If they stick out, trim them with a utility knife. Once you’re happy, lock the door and check again after a day , sometimes the seal settles. Enjoy your quieter, more energy-efficient home.
Frequently Asked Questions
How long does it take to install a patio door sweep?
For a typical DIYer, the whole process takes about 30 to 45 minutes. That includes gathering tools, removing the old sweep, measuring and cutting the new one, and attaching it. If you need to make adjustments or if the sweep is tricky to fit, allow up to an hour. No special skills are required, just patience.
Do I need to remove the door to install a new sweep?
No, you can install a new sweep with the door still hung. Just open the door fully to access the bottom edge. Removing the door is only necessary if the sweep is behind a threshold that you can't reach, or if you're replacing the entire threshold. For most patio doors, the sweep is easily accessible from the inside.
How do I choose the right door sweep?
Measure your door width first. Then consider the material: rubber or vinyl sweeps are flexible and durable for metal or wood doors. Aluminum sweeps with a rubber fin are common for exterior doors. Check the gap between your door and the threshold; if it's more than 1/2 inch, an adjustable sweep might be best. Also, look for sweeps that match the door color.
Can I install a door sweep on a sliding patio door?
Yes, sliding patio doors also have sweeps. Some are attached to the bottom of the sliding panel with screws. Others snap into a channel. The installation process is similar, but you might need to lift the panel slightly to access the bottom. Be extra careful not to damage the rollers. For sliding doors, a low-profile sweep is often better to avoid dragging on the track.
What if my old sweep left holes or damage?
If the old sweep screws left holes that are stripped or too big, fill them with wood filler or epoxy before installing the new sweep. Let it dry and sand smooth. For metal doors, you can use a larger screw or a self-tapping screw. If the door bottom is rotted, you may need to repair that first. Ignoring damage can cause the new sweep to fail prematurely.
How do I cut a metal door sweep without warping it?
Use a fine-tooth hacksaw and cut slowly. Clamp the sweep to a workbench to keep it stable. For aluminum sweeps, you can also use a miter saw with a non-ferrous blade. If using tin snips, start from the end and cut in a straight line. After cutting, file the edges smooth to remove any burrs that could scratch the door or threshold.
What if my sweep is too long after cutting?
If you cut the sweep a little too long, you can trim it with a utility knife or tin snips. But if it’s too short, you may need to buy a new one. That’s why it’s best to cut slightly longer initially and then fine-tune. Most sweeps allow a small adjustment by loosening screws and sliding the sweep sideways, but not much. Measure twice, cut once.
How often should I replace a patio door sweep?
Every 2 to 5 years, depending on weather exposure and use. Signs it needs replacement: visible cracks, chunks missing, or the sweep no longer makes contact with the threshold. Also, if you notice drafts, dust, or bugs coming in under the door, it’s time. Regular inspection during spring and fall helps catch wear early.
Conclusion
Installing a patio door sweep is a simple, cost-effective way to boost your home’s comfort and energy efficiency. You’ve now learned how to do it safely and correctly. Start by gathering the right tools and materials. Remove the old sweep carefully, measure your door accurately, cut the new sweep to size, attach it securely, and test the seal. With the right approach, you can finish the job in under an hour.
This DIY project can save you money on heating and cooling bills and keep unwanted pests out. If you encounter any issues beyond a simple sweep replacement , like a damaged threshold or a door that doesn’t close properly , it may be time to call a professional. At LGFMH Construction, we handle interior and exterior repairs and replacements. If you need expert help, you can book our services online .
Remember, a well-sealed door makes a big difference. Take the time to choose a quality sweep and install it properly. Your home will thank you with lower energy bills, less noise, and a more comfortable living space. If you found this guide helpful, share it with a friend who might need it. Happy DIY-ing!


Comments