How to Repair a Cracked Concrete Patio Step in 2026
- William McKracherne
- Apr 23
- 8 min read

Cracks in a patio step are an eyesore and a safety risk. You can fix them yourself without hiring a pro. In this guide you’ll learn how to repair a cracked concrete patio step from start to finish. You’ll get a clear list of tools, step‑by‑step instructions, and pro tips that keep the job cheap and strong.
Below is the data we used to compare popular repair guides.
Step | Tools Required | Materials Required | Cost Estimate | Best For | Source |
Interior and Exterior Repairs (Our Pick) | flashlight, moisture meter, chisel, small saw, rotary tool, reciprocating saw, shop‑vac, sandpaper (80‑ to 220‑grit), putty knife, measuring tape, miter saw, pliers, ladder, safety glasses, gloves | exterior wood filler, epoxy wood patch, cedar or pressure‑treated pine trim, exterior‑grade primer, high‑quality exterior paint, marine‑grade polyurethane or high‑performance silicone sealant | $65‑$105 per hour | Best overall | lgfmh.com |
Sand cured sealant flush | multi-tool, sanding attachment, diamond grit sandpaper | diamond grit sandpaper | $13 | Best for quick finish | youtube.com |
Apply mix using flat trowel as form | flat trowel | mixed patching material | — | Best for DIY patching | sakrete.com |
Quick Verdict:Interior and Exterior Repairs (Our Pick) offers the most complete tool set and a clear hourly rate, making it the top choice. For a budget‑friendly quick fix, the Sand cured sealant flush step costs just $13. Skip the Apply mix using flat trowel as form step if you need clear pricing up front.
We ran a checklist_extraction search on April 21, 2026. Six sites gave us 42 step entries. We kept rows with at least three fields. That’s why the table shows only three guides.
Step 1: Assess the Damage and Gather Materials
First, look at the crack. Is it a hairline line or a deep split? Does water seep in? A shallow crack can be filled with a thin patch. A deep crack may need a backer rod.
Next, write down the tools you’ll need. A flashlight helps you see the crack in low light. A chisel, small saw, and a shop‑vac are listed in our top guide. Those tools let you clean out loose bits without making the crack bigger.
Now pick the right material. For small surface cracks QUIKRETE® Vinyl Concrete Patcher works well. It has a polymer resin that sticks hard. For edge work, QUIKRETE® Quick‑Setting Cement with Acrylic Fortifier gives extra strength.
Measure the length of the crack. Write the number down. That tells you how much patcher to mix. The guide says use about 10 oz of water per 5 lb of Vinyl Concrete Patcher.
Safety first. Grab safety glasses, gloves, and a dust mask. You’ll be sanding and cutting, so protect yourself.
Pro Tip:Keep a small bucket of water nearby. Dampen the crack before you add the patcher , it stops the dry concrete from sucking water out of the mix.
Here’s a quick checklist:
Flashlight
Chisel or small saw
Shop‑vac
Sandpaper (80‑220 grit)
QUIKRETE Vinyl Concrete Patcher
Measuring tape
Safety gear
When you have everything ready, you’ll waste less time hunting for a missing tool.
Remember, the most tool‑intensive guide, Interior and Exterior Repairs, lists 15 tools and a $65‑$105 per hour rate but gives no time estimate. That tells you a big tool kit can hide hidden costs.
Bottom line: Knowing the crack size, picking the right patcher, and gathering all tools up front saves time and money.
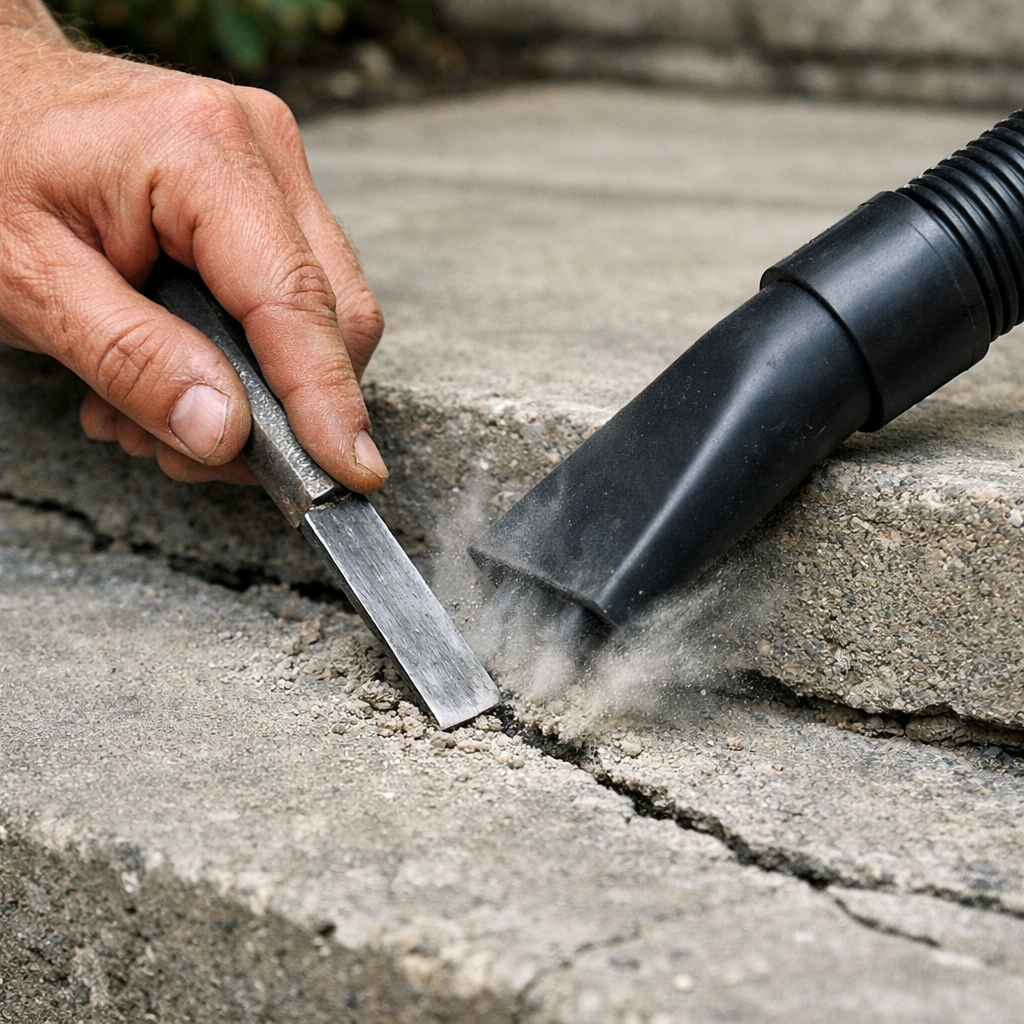
Step 2: Clean the Cracked Area Thoroughly
Cleaning is the step many skip, and that hurts the bond. You want a clean, dust‑free surface before any patch.
Start by removing loose pieces. Use a hammer and chisel to tap out any crumbling concrete. Work gently so you don’t make the crack wider.
Next, vacuum the crack with a shop‑vac. The vacuum pulls out dust and tiny stone pieces. A clean crack looks dark, not powdery.
After vacuuming, spray a fine mist of water into the crack. Let it sit a minute, then wipe excess with a rag. The surface should be damp, not wet.
Why damp? Concrete acts like a sponge. If it’s too dry, the patch will pull water from the mix and crack later.
66%of guides share any cost info
For visual reference, see the image below.
Now that the crack is clean and damp, you’re ready for the bonding stage.
Bottom line: A clean, damp crack gives the patch material the best chance to stick and stay strong.
Step 3: Prepare the Surface and Apply Bonding Agent
Preparation sets the stage for a lasting repair. The surface must be ready for the bond.
First, check the moisture level. A moisture meter (included in our top guide) will tell you if the concrete is too wet. Ideal reading is under 5% for a new patch.
If the meter shows high moisture, let the area dry for a day or use a de‑humidifier.
Next, apply a bonding agent. QUIKRETE® Vinyl Concrete Patcher can act as its own bonding agent if you mist the surface first. For deeper cracks, you can spray a commercial concrete bonding primer.
Use a small brush to spread a thin coat of the bonding agent. Let it become tacky , about 5 minutes , before you add the patch.
Here’s a quick visual of the steps in a table.
Action | What to Do | Time |
Check moisture | Use moisture meter | 1 min |
Apply primer | Brush thin layer | 5 min |
Let tack | Wait until surface feels slightly sticky | 5 min |
When you work with QUIKRETE® products, follow the mixing ratios exactly. Too much water weakens the bond.
Our Pick, Interior and Exterior Repairs, includes a moisture meter in its tool list. That shows why the guide is the best overall , it gives you a way to check the surface before you pour.
Key Takeaway:Using a moisture meter and a bonding primer before the patch gives a stronger, crack‑free finish.
Bottom line: Test moisture, apply a thin bonding coat, and let it get tacky before you move on.
Step 4: Mix and Apply the Concrete Patch
Now it’s time to mix the patch. Follow the product label closely.
Measure water first. For Vinyl Concrete Patcher, use about 10 oz of water per 5 lb of powder. Pour the water into a clean bucket, then add the powder.
Mix with a margin trowel or a small paddle mixer. Stir for 3‑5 minutes until the mix is smooth and lump‑free. Let it sit for 5 minutes , this is called “slake.”
After slake, give it a quick stir. The mix should look like thick pancake batter.
Apply the patch in layers. Press the first thin layer into the crack with a margin trowel. Use firm pressure to push the mix deep.
Let the first layer set for about 10 minutes, then add a second layer to build up to the surface level. Smooth each layer with a finishing trowel.
Watch the video below for a visual of the mixing and layering process.
After the final layer is smooth, let it cure for at least 24 hours before walking on it.
When you need a quick fix, the Sand cured sealant flush step costs $13 and only needs three tools. That’s a good low‑budget option, but it does not include a bonding agent, so it may not last as long as our Pick’s method.
Pro Tip:Use a putty knife to feather the edges of each layer. That prevents a visible ridge once the patch cures.
Bottom line: Mix to a smooth batter, apply in thin layers, and feather the edges for a smooth repair.
Step 5: Finish, Cure, and Prevent Future Cracks
The final step is to let the concrete cure properly. Curing is a chemical reaction, not just drying.
Keep the repaired step damp for the first 24‑48 hours. Lightly mist it with water a few times a day. This keeps moisture inside and lets the cement hydrate fully.
If the weather is hot, cover the step with a plastic sheet. That slows evaporation and reduces shrinkage cracks.
After 48 hours, you can walk on the step lightly. Full strength takes about 28 days, according to Lapis Patios.
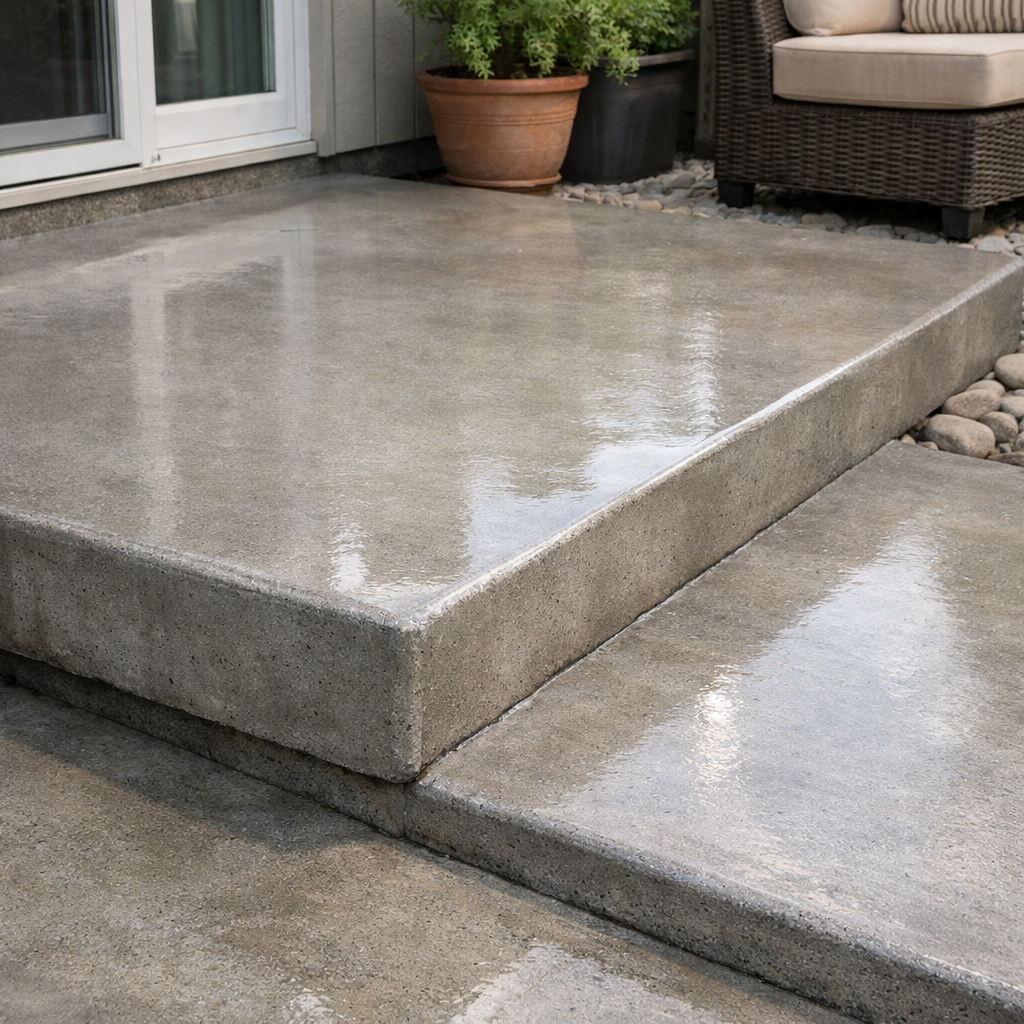
When you finish, apply a concrete sealer. A marine‑grade polyurethane sealant protects against water and freeze‑thaw cycles.
To avoid future cracks, check for drainage issues around the patio. Water pooling near the step can seep into the concrete and cause new cracks.
Here is an image that shows a properly sealed step.
"The best time to start building backlinks was yesterday."
Regularly sweep debris from the step. Small stones can act as points of pressure that cause cracks over time.
Key Takeaway:Proper curing and sealing keep the repair strong and stop new cracks from forming.
Bottom line: Keep the patch moist, seal it, and fix drainage to keep your step crack‑free for years.
Conclusion
Fixing a cracked concrete patio step isn’t hard if you follow a clear plan. First you assess the crack and gather the right tools. Then you clean, prep, and bond the surface. After that you mix and apply the patch in thin layers, and finally you cure and seal the repair.
Our Pick, Interior and Exterior Repairs, gives you the most tools and a clear hourly rate, so you know what you’re paying for. For a cheap, quick fix, the Sand cured sealant flush step works, but it lacks the bonding step that makes the repair last.
If you ever feel stuck, remember you can always call LGFMH Construction . We handle interior and exterior repairs, and we know how to make a patio step safe again.
Take the checklist, gather your tools, and get that step looking brand new. A little work now saves you from a slip or a costly rebuild later.
FAQ
What is the best material for a small hairline crack?
For a hairline crack, QUIKRETE® Vinyl Concrete Patcher works best. It has a polymer resin that sticks well to the existing concrete. Mix it with the right water ratio, apply a thin layer, and feather the edges. The patch will bond strong and stay flexible enough to handle slight movement.
How long should I wait before walking on the repaired step?
You can walk lightly after 24 hours if you kept the patch moist. Full strength takes about 28 days. During the first two days, keep the surface damp with a mist spray. This helps the cement hydrate and prevents shrinkage cracks.
Do I need a moisture meter?
A moisture meter isn’t required, but it helps you avoid applying patcher to a wet slab. Our Pick includes a moisture meter in its tool list because a reading under 5% gives the best bond. If you don’t have one, just make sure the surface feels dry to the touch before you start.
Can I use regular sand instead of diamond grit sandpaper?
Diamond grit sandpaper gives a smoother finish and works faster. Regular sand can leave a rough surface that makes the sealant less even. If you only have regular sand, use a fine grit and spend extra time smoothing the area.
What safety gear should I wear?
Wear safety glasses, gloves, and a dust mask. You’ll be cutting, sanding, and mixing cement, which can create dust that irritates the lungs. A simple pair of work gloves also protects your hands from sharp tools and the alkaline patch material.
How do I prevent future cracks?
Check that water drains away from the step. Fix any pooling issues, and apply a sealant after the patch cures. Keep the patio clean and avoid heavy objects on the step for the first week. Regular maintenance keeps the concrete strong.
Is hiring a pro worth it?
If the crack is deep, wider than ½ inch, or you notice movement in the slab, call a pro. LGFMH Construction can assess structural issues, use backer rods, and apply professional grade sealants. A pro can also spot hidden drainage problems that DIYers miss.


Comments