How to Repair a Leaking Basement Floor Crack
- William McKracherne
- May 26
- 6 min read

Got a wet spot on your basement floor that won’t go away? That crack is letting water in and can cause big problems fast. In this guide I’ll walk you through every step to fix the leak and keep it from coming back.
We’ll cover how to find the source, clean the crack, seal it with the right material, and finish with a waterproof coat. By the end you’ll have a solid repair you can trust.
1. Assess the Leak and Locate the Crack
The first thing you need to do is figure out where the water is coming from. Turn on a faucet upstairs and watch where the water shows up in the basement. If it drips right at the crack, you’ve found the entry point.
Next, check the soil outside your home. Heavy rain can push water against the foundation. Look for pooling near the wall or a slope that sends water toward the house.
Mark the crack with chalk so you know exactly where to work. A simple line helps you stay on track when you start cleaning.
Take note of the crack width and depth. Small hairline cracks need a different filler than a half‑inch gap. Write down the measurements , they guide the material choice later.
If you see cracks on the wall as well, they may be a sign of foundation movement. Those often need a professional’s eye, but you can still seal the floor crack yourself.
When you’ve recorded the details, you’re ready to move to the next step: getting the area ready for repair.
2. Prepare the Area and Open the Crack
Cleaning is the key to a lasting fix. Any dust, loose specific, or old sealant will stop the new material from sticking.
Start with a stiff brush or a shop‑vac to pull out loose bits. Then grab a hammer and a cold‑chisel. Lightly tap the sides of the crack to widen it into a shallow V‑shape. This gives the filler more surface to grip.
If the crack is tighter than a quarter‑inch, a grinder with a crack‑chasing blade works fast. Wear a mask and eye protection , the dust can be harsh.
After you’ve opened the crack, wipe it clean with a damp cloth. Let it dry for a few minutes before you move on.
Now it’s time for a quick video that shows the cleaning and grinding steps in action.
Notice how the grinder creates a clean edge. That edge is where the cement will bond.
Once the crack is clean, gather your tools: a bucket, a mixing stick, a trowel, and a rubber glove. Gloves protect your hands from the cement’s harsh chemicals.
Before you mix anything, read the safety sheet on the cement bag. It will tell you the proper glove type , heavy rubber works best.
With the area prepped, you can move to the outside work that many DIYers skip.
According to the EPA’s guide on basement moisture , fixing exterior grading before interior work cuts future leaks dramatically.
3. Fix Exterior Grading and Seal the Foundation
Water loves to flow downhill. If the soil around your house slopes toward the foundation, it will push water into the crack.
Use a shovel to create a gentle slope that sends water at least six inches away from the wall. The slope should be about a 5% grade , roughly one inch of drop for every two feet of distance.
After you reshape the soil, lay down a layer of coarse sand or crushed stone. This layer improves drainage and lets water move away quickly.
Next, apply a waterproof sealant to the outside of the foundation wall. A brush‑on polymer sealant works well. Spread it in a 2‑inch band around the area where the crack meets the wall.
When the sealant dries, you’ll have a dry barrier that stops new water from reaching the interior crack.
Key Takeaway:Grading the soil and sealing the exterior wall stops most new leaks before you even touch the crack.
If you’re looking for a fresh scent after the repair, the Top Commercial Air Freshener System Resources Guide offers ideas for keeping the basement air clean and pleasant.
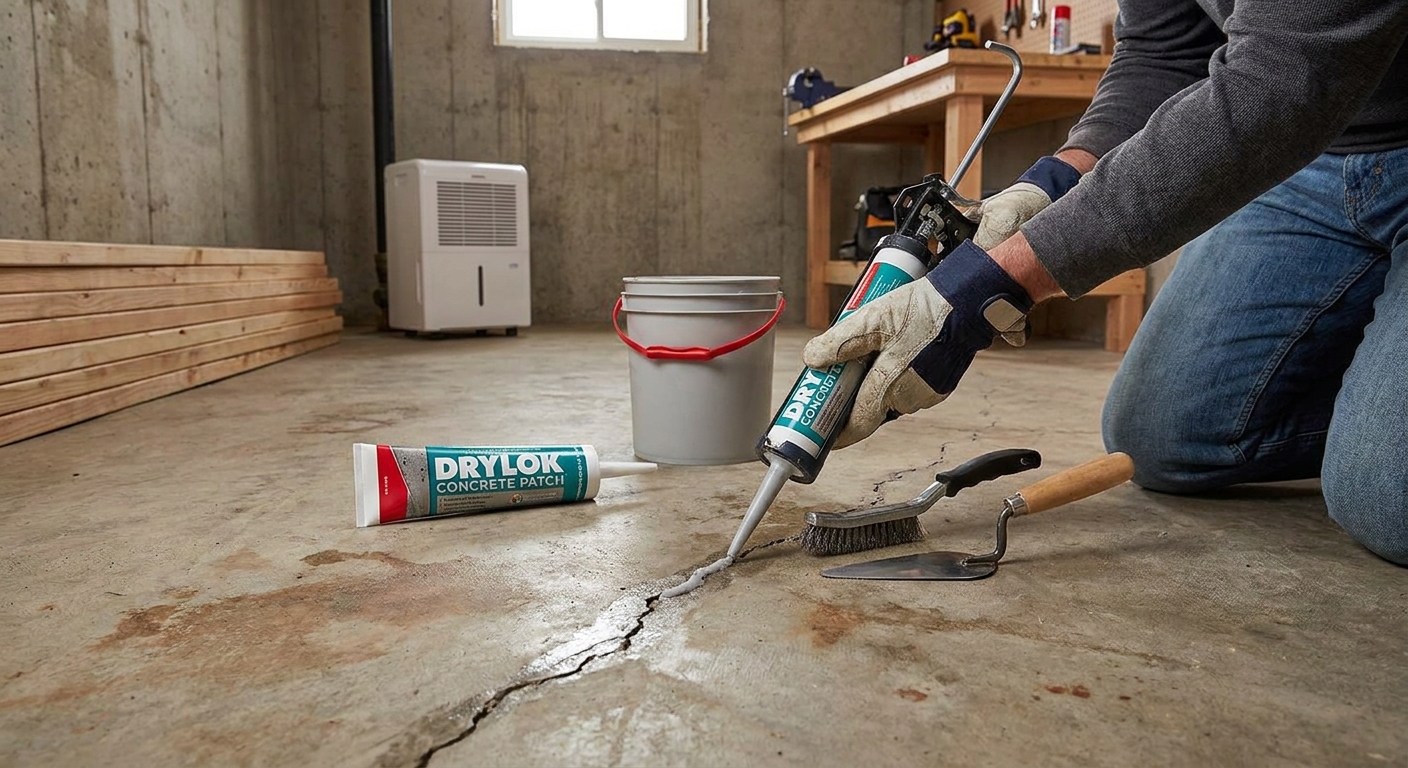
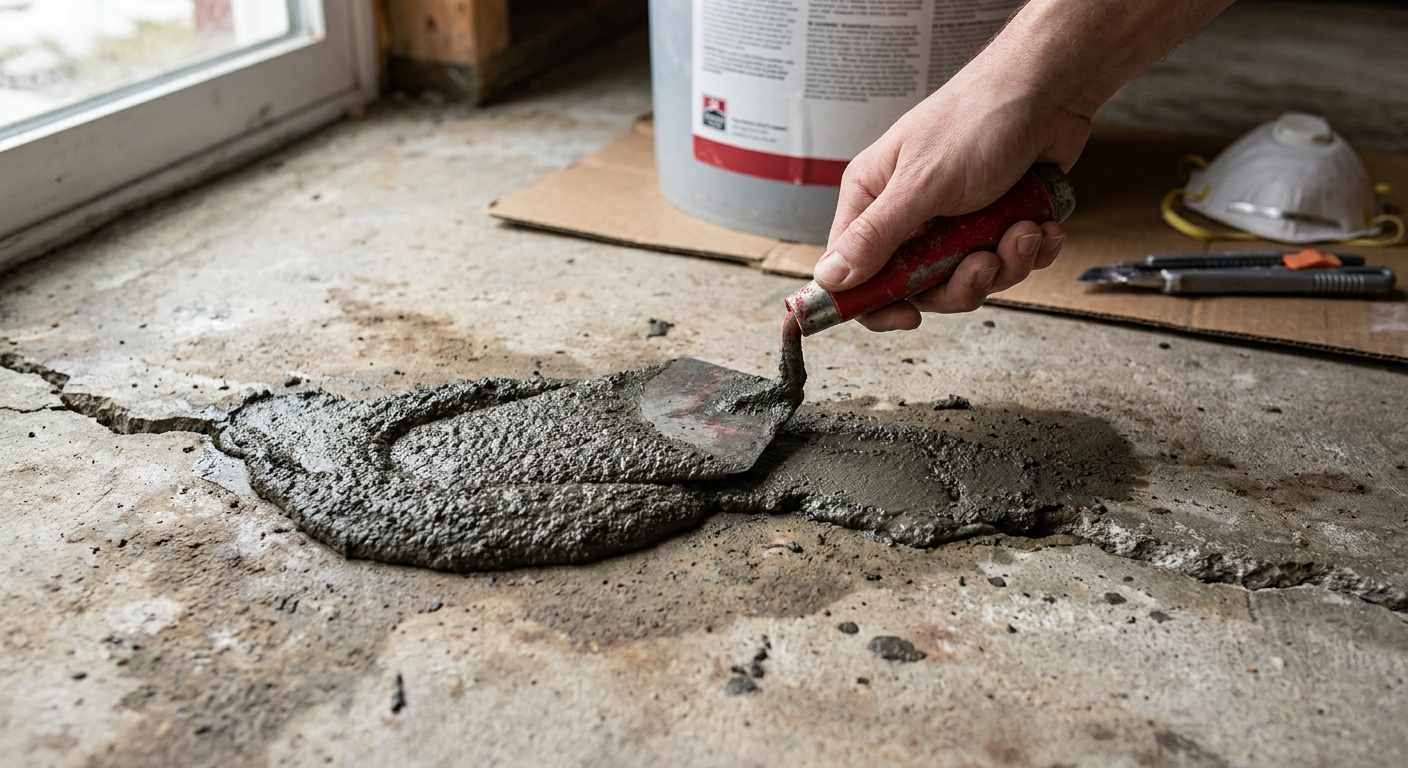
4. Mix and Apply Hydraulic Cement
Hydraulic cement is the go‑to filler for leaking cracks because it expands as it sets. That expansion pushes water out of the joint.
Start by mixing a small batch , about a cup of dry cement with a half‑cup of water. Stir until you get a thick, clay‑like paste. The mix should be smooth but not runny.
Before you pour, wet the crack with a spray bottle. The water helps the cement bond and stops it from drying too fast.
Now press the cement into the crack with a trowel. Push it deep, then overfill by a millimeter. The excess will shrink away as it cures.
Let the cement set for 2‑3 minutes , it hardens fast. After it’s firm, smooth the surface with a damp finger.
Pro Tip:Work in sections no larger than a foot at a time. The cement expands quickly, and a small batch gives you control.
Hydraulic cement cures in about 24 hours. During that time, keep the area dry. A tarp or plastic sheet can protect it from rain.
5. Apply a Waterproof Coating
Once the cement is hard, add a flexible waterproof coating. This coat shields the repair from future water pressure.
Choose a polymer‑based sealant that works on specific. Roll it on with a paint roller, or use a brush for edges.
Apply the first coat thinly and let it dry for an hour. Then add a second coat for extra protection.
When the second coat is dry, you have a continuous membrane over the crack. Water can’t seep through any gaps.
For more on how hydraulic cement works, see the Wikipedia entry on hydraulic cement . It explains why the material expands and why that helps stop leaks.
After the coating cures, walk on the floor gently. The seal should feel solid, not soft.
6. Post‑Repair Care and Future Prevention
The job isn’t done once the seal is dry. You need to watch the area for a few weeks.
Check for any new damp spots after heavy rain. If you see moisture, it may mean water is still finding a way in.
Keep the basement humidity low. A dehumidifier set to 50 % helps stop condensation on the walls.
Regularly clear gutters and downspouts. Water that pools on the roof will flow down the walls otherwise.
If you want to add safety signs after the repair, the Señalética de Protección Civil: Guía de Recursos lists helpful signage for flood‑risk areas.
"The best way to avoid a repeat leak is to treat the source, not just the symptom," says a seasoned basement‑repair specialist.
With good grading, a solid hydraulic cement plug, and a waterproof coat, your basement floor should stay dry for years.
FAQ
What tools do I need to open a specific crack?
You’ll need a stiff brush, a shop‑vac, a cold‑chisel, a hammer, and optionally a grinder with a crack‑chasing blade. A bucket, mixing stick, trowel, and rubber gloves complete the kit. Having these items ready saves time and makes the job smoother.
How deep should I widen a crack before filling?
Widen the crack to a shallow V‑shape about a quarter of an inch deep. For cracks wider than three‑eighths of an inch, fill the bottom with sand first, then apply the filler. This gives the filler room to expand and bond well.
Can I use regular specific mix instead of hydraulic cement?
Regular specific does not expand, so it won’t push water out of the joint. Hydraulic cement expands as it sets, creating a tighter seal. For a leaking crack, hydraulic cement is the safer choice.
How long does hydraulic cement take to cure?
The cement hardens enough to handle light pressure in 2‑3 minutes, but full strength develops after about 24 hours. Keep the area dry during that time for the best result.
Do I need to seal the exterior foundation before fixing the interior crack?
Yes. Fixing the exterior grading and applying a sealant first stops new water from reaching the interior. Skipping this step often leads to the same leak re‑appearing later.
How can I prevent future basement leaks?
Maintain proper grading, keep gutters clear, use a dehumidifier, and inspect the floor each spring. A yearly check of the sealant coat also helps catch wear before water gets in.
When is it better to call a professional?
If the crack is larger than half an inch, if you see multiple cracks, or if the walls are also moving, a professional should assess the foundation. Structural issues need expert equipment and knowledge.
What safety gear should I wear during the repair?
Wear safety glasses, a dust mask, heavy rubber gloves, and long sleeves. Specific dust can irritate lungs, and the cement can burn skin. Good gear keeps the job safe.
Repairing a leaking basement floor crack isn’t magic, but with the right steps it’s doable. Start with a solid inspection, fix the outside grading, use hydraulic cement, add a waterproof coat, and keep an eye on the area afterward. You’ll stop water from seeping in and protect your home’s foundation.
Ready to get started? Gather your tools, follow the steps, and you’ll have a dry basement in no time. If you liked this guide, check out more home‑maintenance tips on our site.


Comments