How to Repair a Leaking Chimney Crown: Step‑by‑Step Guide
- William McKracherne
- Jun 26
- 9 min read

Finding water on the inside of your chimney crown feels like a surprise leak from the sky. It’s not just a drip; it can ruin brick, cause mold, and waste heat.
First, check the crown for cracks or missing mortar. A simple visual walk with a flashlight often spots the problem fast. If you see a gap, clean out any loose debris and dry the area with a shop‑vac.
Next, mix a thin batch of hydraulic cement—one part cement to two parts sand works well. Press the mix into the crack with a trowel, smoothing it level with the surrounding crown. Let it cure for at least 24 hours before testing.
For larger gaps, you may need a pre‑formed crown patch. Cut the patch to fit, seal the edges with roofing sealant, then bolt it in place. A quick water test with a garden hose confirms the fix.
If you’re unsure about the right materials or want a quick, reliable fix, a local pro can help. Chimney Flashing Repair Cost Guide offers tips on budgeting for chimney work and deciding DIY vs hiring experts.
Finally, set a reminder to inspect the crown each fall. A short check can stop a small crack from becoming a big leak, keeping your home dry and warm.
Step 1: Inspect the Chimney Crown for Damage and Leaks
A wet crown is a silent alarm. Water finds the tiniest crack, slips down the flue, and can ruin brick, stir up mold, and bleed heat from your home.
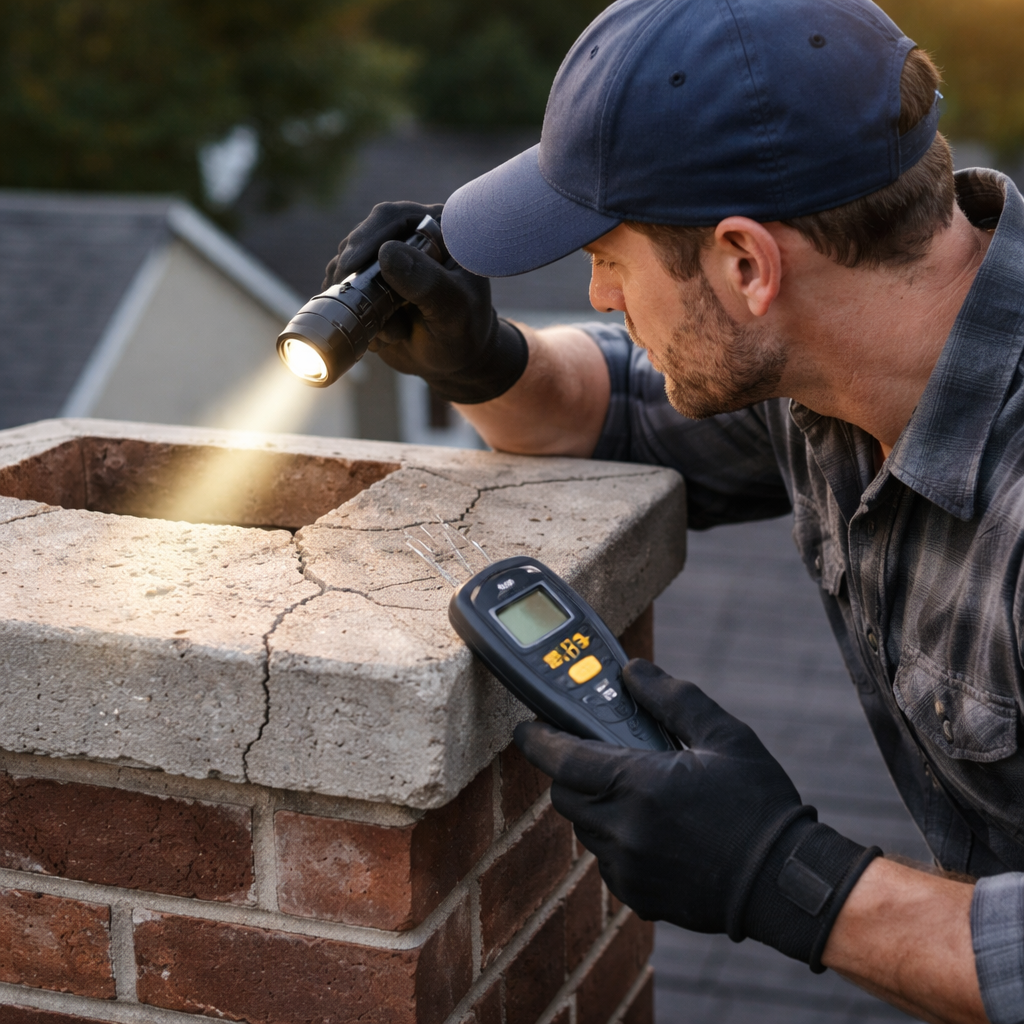
Start by pulling the ladder down safely and shining a flashlight over the crown. Scan every edge for cracks, crumbling mortar, or missing pieces. Watch the joint where the crown meets the flashing; this spot leaks most often.
If you feel a crack, run a fingertip along it. A dry crack feels sharp, a wet one feels cool. A quick swipe with a moisture meter can spot hidden dampness without guesswork.
When you’ve found a problem, clean the area. Brush away loose bits, then vacuum out dust and debris. Let the surface dry fully; use a shop-vac or let the sun bake it for a few hours. A clean, dry base lets hydraulic cement bond strong.
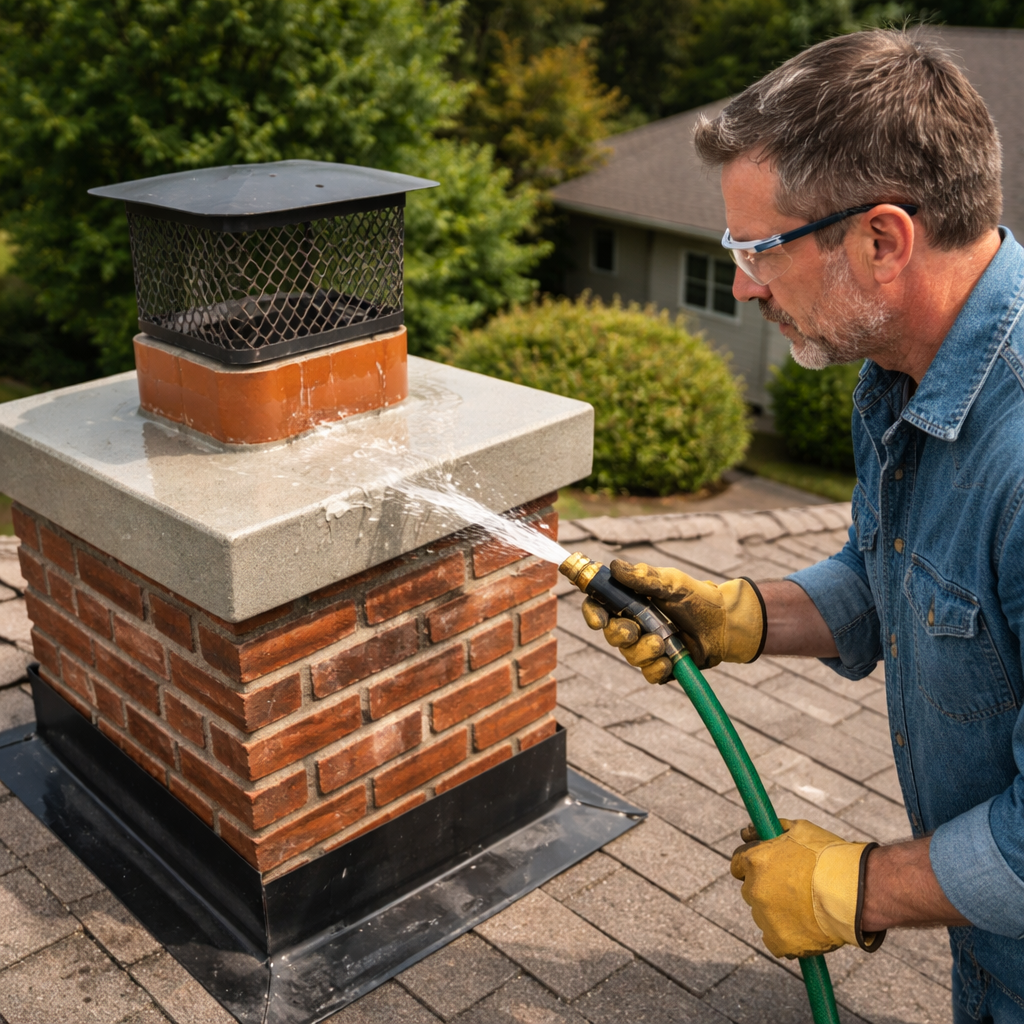
Next, do a simple water test. Spray a garden hose over the crown and watch for any drips inside the flue. If water finds its way in, mark the spot so you know where to apply the patch.
A quick visual check each autumn saves big repair bills later, and it only takes ten minutes.
When the crown looks even, you’ve stopped the leak before it spreads. Mark the date in your calendar so you’ll check again each fall. LGFMH Construction can step in if you need a pro repair, giving you peace of mind and a dry home. You’ll enjoy a cozy, dry house all winter long.
Step 2: Clean and Dry the Crown Area
First, sweep away any loose leaves, dust, or broken mortar with a stiff brush. A clean surface lets the repair material stick.
Next, grab a shop‑vac and suck out all the fine particles. If you don’t have a shop‑vac, a regular vacuum with a narrow nozzle works fine.
Now it’s time to dry. Use a leaf blower on low, or simply let the sun dry the crown for a few hours. Make sure the area is completely dry before you mix any cement.
Tip: If the weather’s damp, point a hair‑dryer at the crack for ten minutes. Warm air drives out moisture faster.
Once dry, give the crown a quick visual check. Look for any hidden cracks that might have been covered by debris. Spotting them now saves you a second repair later.
When you’re ready to seal the crack, a thin mix of hydraulic cement will bond best to a dry surface. Mix one part cement with two parts sand, apply with a trowel, and smooth level.
After the cement sets (about 24 hours), run the garden hose again to confirm the leak is gone. If you still see drips, repeat the cleaning and sealing steps.
Need to know how much the whole job might cost? Check the chimney flashing repair cost guide for budgeting tips.
Step 3: Apply a High‑Quality Sealant
Now the crown is clean and dry, so you can seal the crack. A good sealant stops water from sneaking back in.
Pick a sealant made for masonry – a silicone‑based or polymer‑enhanced product works best. Look for something labeled "high‑temperature" if your chimney gets hot. You’ll find a solid choice in the essential chimney repair guide.
Spread the sealant with a caulking gun or a small putty knife. Push it into the crack until it’s filled flush. Then smooth the surface with a wet finger or a plastic scraper. The goal is a thin, even bead that blends with the surrounding crown.
Let the sealant cure as the manufacturer says – usually 24 hours for full strength. Keep the area dry while it sets; a quick tarp or a sunny day helps.
After it’s hardened, run the garden hose over the crown again. No drips? You’ve nailed it. Still see moisture? Spot any missed spots and re‑apply a thin layer.
So, what should you do next? Keep a short checklist handy: clean, dry, seal, cure, test. A quick routine each fall saves big repairs later.
Step 4: Replace Cracked or Spalled Crown Sections (Video)
When the crown has a chunk missing or a crack that won’t hold cement, you need to swap out that piece. It sounds big, but the steps are simple.
Assess the damage
First, run a quick visual check. If the brick or concrete feels loose when you tap it, that part is ready to go. Mark the edges with chalk so you know where to cut.
Gather the right tools
You’ll need a chisel, a hammer, a pry bar, and a replacement block that matches the crown material. A small angle grinder can help smooth rough edges, but a hand chisel works fine for most homes.
Remove the broken piece
Start by loosening the surrounding mortar with the chisel. Work from the outside in, keeping the new piece size in mind. Use the pry bar to lift the broken section out gently. If the piece falls apart, that’s okay—just clean out the cavity.
Fit the new section
Dry‑fit the replacement block. It should sit flush with the rest of the crown. If it’s a tight squeeze, tap it lightly with a rubber mallet until it sits level.
Secure with mortar
Mix a batch of mortar that’s rated for high heat. Fill the gap around the new block, pressing firmly with a trowel. Smooth the surface so it blends with the surrounding crown. Let the mortar cure for at least 24 hours.
After the mortar sets, run a garden hose over the crown. No drips means you’ve sealed the leak. If you still see water, double‑check the joint and add a thin bead of sealant.
Need a deeper dive on how to match crown materials? Check our roof repair guide for homeowners for tips on choosing the right block and mortar.
Finally, give the repaired spot a quick wipe and note the date. A yearly check in the fall will catch any new cracks before they turn into costly leaks.
Step 5: Re‑coat and Protect – Sealant Comparison Table
Now that the crown is solid, you need a finish that keeps water out and stands up to heat. A good sealant is the last line of defense.
What to look for
Pick a product that can handle 2000 °F, sticks to masonry, and cures fast. You also want something you can spread with a brush or a caulking gun.
Before you spread any sealant, wipe the crown with a dry cloth. Dust or old caulk will stop the new product from sticking.
Apply the first bead in a thin line, then smooth it with a wet finger. Let it skin over for about 30 minutes before you add more.
If the crack is wide, add a second thin coat after the first one dries. This builds a stronger barrier.
Work when the temperature is above 50 °F and the sky is dry. Cold or rain will slow the cure.
Store leftover sealant in a sealed container and keep it out of direct sun. It will stay usable for months.
Use painter’s tape to mask the area around the crack. This keeps the sealant from spreading onto the bricks and makes cleanup easy.
Wear gloves and eye protection while you work. The chemicals can irritate skin, and a splash could sting your eyes.
For best results, let the sealant cure for at least 24 hours before the final hose test.
Sealant showdown
Sealant | Max Temp | Ease of Use | Notes |
Silicone‑based high‑temp sealant | 2000 °F | Easy – gun or brush | Good for small cracks, stays flexible |
Polymer‑enhanced acrylic | 1500 °F | Medium – needs trowel | Resists UV, ideal for larger joints |
Heat‑resistant roofing caulk | 2500 °F | Hard – apply with putty knife | Best for big gaps, longer cure time |
Run a hose test after the sealant cures. No drips means you’re good. If you see moisture, apply another thin coat.
Need more detail on choosing the right sealant? Check the essential chimney repairs guide for a deeper look.
Step 6: Final Inspection and Ongoing Maintenance
Now the seal is dry, it’s time to see if the job really held up. Grab a garden hose, set it to a gentle stream, and spray the crown just like you did in the test before. No drops on the brick or inside the flue? You’ve nailed it. If you still see water, wipe it dry, add a thin bead of sealant, and let it cure again.
Quick visual check
Walk around the chimney with a flashlight. Look for cracks that might have opened with temperature change. Spot any loose mortar? Fill it with a thin mix of cement and sand. A quick tap with a rubber mallet can tell you if the surface feels solid.
Seasonal maintenance routine
Mark your calendar for a fall walk‑through. A five‑minute check each year catches new cracks before they turn into leaks. Clear leaves, moss, and debris that can hold moisture against the crown.
While you’re up there, give the flashing a once‑over. If rust or gaps show, a small patch of high‑temp sealant will keep water from sneaking in.
Tip: Keep a small tube of the sealant you used on hand. A quick touch‑up in the spring can save a big repair later.
Need a deeper dive on spotting roof leaks that can affect your chimney? See the roof leak repair guide for more ideas.
Finally, note the date of your inspection on a piece of tape or in a home‑maintenance journal. When you see the date years later, you’ll know the job held up and you’ll feel confident that your chimney stays dry.
Conclusion
Fixing a leaking chimney crown isn’t magic. It’s just a few clear steps you can do yourself or hand off to pros.
First, spot any cracks, clean the area, and apply the right cement or sealant. Let it cure, then run a quick hose test.
Keep a reminder in your phone for a spring and fall check. A brief spray will catch new leaks before they grow.
If you’d rather skip the DIY steps, LGFMH Construction can handle the inspection and repair, giving you peace of mind.
Remember, a dry, sealed crown keeps your home warm, dry, and safe for years to come.
So, what’s next? Grab your ladder, run the hose test one more time, and mark the date. A little habit now saves you costly repairs later. A quick visual scan each season will keep the crown in shape and your family comfy.
FAQ
How can I tell if my chimney crown is leaking?
First, look for water stains inside the flue after a rain. Next, run a garden hose over the crown for a minute and watch the inside of the chimney. If you see damp spots or mineral streaks, the crown is letting water through. A dry crown will stay dry even after the hose test.
What tools do I need to repair a small crack in the crown?
You’ll need a sturdy ladder, a flashlight, a wire brush, a shop‑vac or dry rag, a mixing bucket, a trowel, and a caulking gun. A small putty knife helps smooth the cement. These items are cheap and easy to find at any hardware store. Having them ready saves time and keeps the job safe.
How do I mix and apply hydraulic cement for a crown repair?
Mix one part hydraulic cement with two parts dry sand in a bucket. Add just enough water to make a thin, paste‑like mix. Stir quickly; the cement sets fast. Press the mix into the crack with a trowel, packing it tight. Smooth the surface level with the surrounding crown. Let it cure for at least 24 hours before testing.
Can I use a pre‑formed patch for larger gaps, and how?
Yes. Cut the patch to fit the opening, then press it into place. Seal the edges with a roofing sealant or the same hydraulic cement you used for the crack. Bolt the patch if it comes with holes for fasteners. After the sealant cures, run a hose test to confirm no water gets through.
How long should I wait before testing the repair with water?
Most hydraulic cements need 24 hours to reach full strength. If you used a sealant, follow the manufacturer’s cure time—usually 24 hours as well. After the cure period, run a light hose spray over the repaired area for a minute. Look inside the flue; if no droplets appear, the repair held.
When should I call a professional instead of DIY?
If the crack is larger than a few inches, if the crown is cracked in many places, or if you feel unsafe on the ladder, it’s time to call a pro. A professional can replace spalled sections, check the flashing, and give you a warranty. LGFMH Construction offers full‑service crown inspections and repairs, so you get peace of mind.


Comments