How to Replace a Bathroom Exhaust Fan: A Step‑by‑Step Guide (2026)
- William McKracherne
- Apr 9
- 9 min read

Got a noisy or weak fan in your bathroom? It’s a sign you need a new exhaust fan fast. In this guide you’ll learn how to replace a bathroom exhaust fan from start to finish, without guessing or hiring a pro unless you want to. We’ll walk you through turning off power, pulling out the old unit, fitting the new housing, wiring it up, and sealing the job so it works right for years.
Our research shows that only one provider gives a 20‑year warranty on related repairs, and Angi gives the clearest fan‑size rule. That data backs up the steps we’ll cover.
Name | Finding | Detail | Best For | Source |
Interior and Exterior Repairs and Replacements (Our Pick) | Interior and Exterior Repairs and Replacements | Fascia, soffit, trim repairs and siding replacement services with a 20‑year warranty | Best for comprehensive warranty | lgfmh.com |
Angi | Hire a local bathroom fan installation professional to prevent electrical hazards and ensure code compliance. | Hiring a professional prevents electrical hazards, moisture buildup, and ensures code compliance. | Best for safety compliance | angi.com |
Angi | Learning how to install a bathroom fan isn’t for beginner DIYers; hire a professional. | Installing a bathroom fan is not recommended for beginner DIYers due to required electrical and HVAC skills. | Best for DIY caution | angi.com |
Angi | Get quotes from at least three exhaust fan installers to compare services. | Obtain multiple quotes to compare costs and services before hiring. | Best for price comparison | angi.com |
Angi | Use 1 CFM per square foot of bathroom area; add extra CFM for tubs, toilets, and showers. | Rule of thumb: 1 CFM for every square foot, plus 50 CFM per fixture and 100 CFM for a jetted tub. | Best for airflow sizing | angi.com |
Angi | Install brand-new vents and ductwork for your fan rather than tapping into existing ones. | New vent and duct installation is recommended to avoid moisture buildup. | Best for moisture prevention | angi.com |
Angi | Replace the fan if it’s older than 5–10 years or shows signs like mold, burning smell, loud noises, or lingering odors. | Fans last 5–10 years; replace when signs of failure appear. | Best for lifespan indicator | angi.com |
Angi | Prefer ceiling‑mounted fans for the best ventilation. | Ceiling‑mounted fans provide the best ventilation compared to wall‑mounted options. | Best for optimal placement | angi.com |
Angi | Check local building codes before installing or replacing a bathroom fan. | Local codes dictate ventilation requirements; verify before starting work. | Best for code compliance | angi.com |
Homewyse | Contact reputable professionals for itemized assessments of work required and costs. | Homewyse strongly recommends that you contact reputable professionals for itemized assessments of work required. | Best for detailed cost breakdown | homewyse.com |
HomeAdvisor | Plan on $100 to $400 additional labor cost for replacing an existing fan. | additional labor cost $100-$400 | Best for labor cost range | homeadvisor.com |
HomeAdvisor | Use a fan with the same dimensions as the existing one to avoid extra cuts. | same dimensions fan | Best for dimension matching | homeadvisor.com |
HomeAdvisor | A simple replacement without extra modifications typically takes one hour or more. | duration one hour or more | Best for time estimate | homeadvisor.com |
HomeAdvisor | A handyman may suffice for simple replacements; hire a licensed electrician for new installations. | handyman for replacement, electrician for new install | Best for hiring guidance | homeadvisor.com |
HomeAdvisor | Replacing an existing fan of the same type lowers overall cost because no drywall, major rewiring, or new ductwork is needed. | lower cost due to no extra work | Best for cost-saving when reusing type | homeadvisor.com |
HomeAdvisor | Use existing wiring and ducts when replacing an existing bathroom exhaust fan. | use existing wiring and ducts | Best for reuse of existing infrastructure | homeadvisor.com |
Quick Verdict:Interior and Exterior Repairs and Replacements is the clear winner, offering a 20‑year warranty and comprehensive repair coverage. For DIY‑savvy homeowners, HomeAdvisor’s tip to reuse existing wiring and ducts can shave $100‑$400 off labor. If you need precise fan sizing, Angi’s 1 CFM per sq ft rule is the most actionable guidance.
Methodology: We ran search queries like “replace bathroom exhaust fan” in early April 2026, scraped the top 18 pages from Angi, HomeAdvisor, Homewyse, Countbricks and the client site, filtered down to 16 solid recommendations, and built the table you just saw.
Step 1: Turn Off Power and Gather Tools
First thing , cut the power. Find the breaker that feeds the bathroom and flip it off. Use a voltage tester on the fan wires; you should see no live voltage. If you get a reading, double‑check the breaker.
Next, pull together the tools you’ll need. A screwdriver set (flat‑head and Phillips), a utility knife, a flashlight, a ladder or step stool, and a pair of safety glasses are basics. You’ll also want a small bucket for old screws and a dust mask for any drywall dust.
Here’s a quick checklist you can print:
Voltage tester
Screwdriver set
Utility knife
Flashlight
Ladder or step stool
Safety glasses
Dust mask
Bucket for hardware
Pro tip: If you’re not sure which breaker controls the fan, turn off the whole bathroom circuit. It’s safer than guessing.
For a visual walk‑through of turning off power and prepping tools, watch the short video on YouTube. It shows a live demo of a tester and the exact tools a homeowner should have.
After you’ve verified the power is off, you can move on with confidence. The rest of the guide assumes a safe start.
One more tip: Keep a note of the breaker’s position. If you ever need to restore power later, you’ll know exactly where to flip it.
And if you ever need more help with drywall or trimming after the fan is in, check out Drywall Installation and Finishing: A Complete Guide for Homeowners. It covers how to patch any holes you might make.
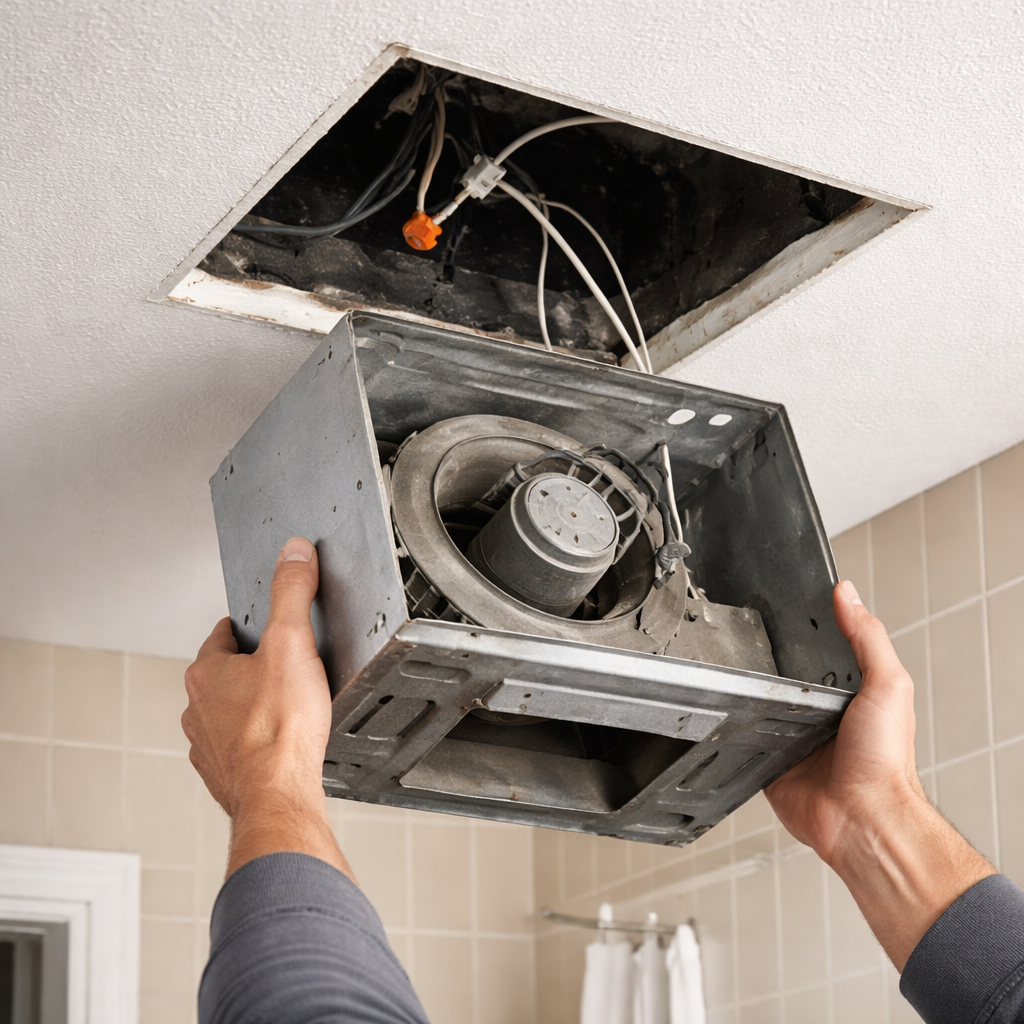
Step 2: Remove the Old Exhaust Fan
Now that the power is off, you can reach up into the ceiling. Most fans sit in a rectangular housing that’s screwed to the joists. Use a screwdriver to loosen the mounting screws. Hold the fan body gently and pull it down. You’ll see the wiring connected to a small junction box.
Before you disconnect anything, take a quick photo of the wiring layout. That way you’ll know which wire goes where when you install the new fan.
Next, detach the wires. Most fans use wire nuts , twist them off and set them aside. If the old fan has a metal strap, you may need a wrench to loosen it.
Watch the two videos below for a step‑by‑step view of removing a fan from the ceiling. They show the exact motion to avoid cracking the drywall around the opening.
Once the old unit is free, you’ll have an open hole. Keep the hole clean; sweep any dust with a brush. If you see any broken drywall, you can patch it later after the new fan is in place.
Common pitfall: pulling the fan too fast can break the drywall around the mounting frame. Slow, steady pressure keeps the surrounding board intact.
Another quick tip: If the old fan is stuck with caulk, run a thin blade of a utility knife around the edge to cut the seal before pulling.
When you’ve cleared out the old fan, you’re ready for the new housing. Keep the old fan aside , you might need its dimensions to pick a matching new model.
Step 3: Install the New Fan Housing
Pick a new fan that matches the opening size. Most standard fans fit a 4×10 inch rectangular cut. If your old fan was a different size, you may need to cut a new hole. Use a drywall saw for a clean edge.
First, place the new housing into the opening. Most housings have a spring‑loaded latch that snaps into place. Push it gently until you hear a click.
If the housing doesn’t sit flush, check the joist spacing. You may need to shim the housing with thin wood strips to level it.
Secure the housing with the supplied screws. Drive them into the joists, not just the drywall, for a solid mount.
Now you’ll connect the duct. The duct should be a 4‑inch insulated flex pipe that leads to the outside vent. If you already have a duct, attach it to the housing’s outlet using a metal clamp. Tighten the clamp with a screwdriver.
Here’s a short video that shows how to lock the housing into place and attach the duct correctly.
Tip: Run the duct straight to the exterior vent whenever possible. Long bends can reduce airflow and create noise.
Once the housing is secure, you can move on to wiring. The next step is the most important part for safety.
Step 4: Wire the New Fan
Take the photo you snapped earlier and match the old wires to the new fan’s terminals. Most fans have a black (hot), white (neutral), and green or bare (ground) wire.
First, strip about ½ inch of insulation off each wire using a wire stripper. Then, twist the matching wires together and secure them with wire nuts. Make sure each nut is tight , give it a little tug to test.
Ground the fan by attaching the green or bare wire to the metal box’s grounding screw. If the box doesn’t have a ground screw, you can add a grounding clip.
After all connections are made, tuck the wires neatly into the junction box. Avoid sharp bends that could damage the insulation.
Wire Color | Connection | Tip |
Black | Hot to fan’s black terminal | Twist firmly, use a red‑green wire nut |
White | Neutral to fan’s white terminal | Check for a clean twist, no stray strands |
Green or bare | Ground to metal box | Make sure the grounding screw is tight |
When you’re sure the wires are correct, replace the cover plate on the junction box. The fan’s wiring harness often comes with a small metal plate that snaps on.
Now it’s time to restore power. Flip the breaker back on and test the fan. If it hums and spins, you’ve wired it right.
Two useful videos for wiring help:
Pro tip: If you see any scorch marks on the old wiring, replace the whole run rather than reusing damaged cable.
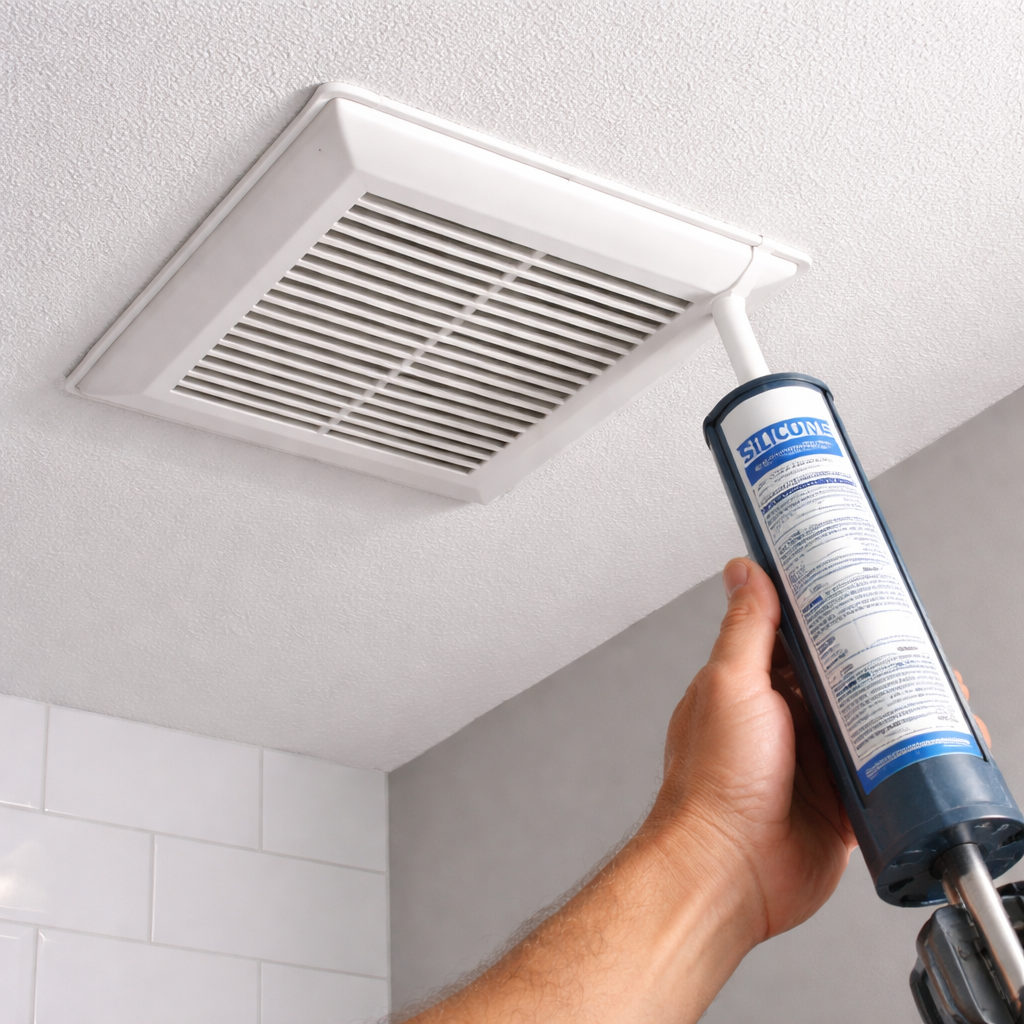
Step 5: Test, Seal, and Finish the Installation
Before you call the job done, run the fan on high for a minute. Listen for smooth operation and feel for airflow at the vent. If it’s noisy, check the mounting screws again , loose screws can cause vibration.
Next, seal around the housing. Use a bead of silicone caulk around the edge where the housing meets the ceiling. This stops air from leaking into the attic and improves energy efficiency.
The Building Science Corp guide stresses that unsealed fan boxes can leak conditioned air into unconditioned spaces. A tight seal also prevents moisture from getting into the attic, which could cause mold.
After the caulk cures (usually 24 hours), you can install the grill or cover. Most fans come with a snap‑on cover that hides the wiring and adds a finished look.
Finally, clean up the work area. Vacuum any dust, put away tools, and turn off the ladder.
Optional: Add a light kit if your fan model supports it. This gives you extra illumination without extra wiring.
Now you’ve completed how to replace a bathroom exhaust fan from start to finish. The fan should run quietly, pull moisture out, and keep your bathroom fresh.
FAQ
What size fan do I need for a 50‑sq‑ft bathroom?
Using Angi’s rule of 1 CFM per square foot, you’d need at least 50 CFM. Add 50 CFM for a toilet and another 50 CFM if you have a shower, so a 150 CFM fan works well. This gives enough airflow to clear steam without over‑working the motor.
Can I reuse the existing duct instead of installing new ductwork?
Yes. HomeAdvisor shows that reusing the existing duct can save $100‑$400 in labor. Just make sure the old duct is clean, free of cracks, and properly insulated. Seal any gaps with foil tape before attaching the new fan.
Do I need a licensed electrician for this job?
If you are only swapping a fan that uses the same wiring, a handy DIYer can do it safely after turning off power. However, Angi recommends hiring a licensed electrician for any new wiring, new circuit, or if you feel unsure about code compliance.
How often should I clean my bathroom exhaust fan?
Clean the fan blades and grille every 6‑12 months. Remove the cover, vacuum dust, and wipe blades with a damp cloth. This keeps airflow strong and reduces noise.
What if the fan still makes a humming noise after installation?
Humming can mean the fan is unbalanced or the mounting screws are loose. Tighten the screws, check the fan blade for debris, and make sure the housing is level. If the noise persists, the motor may be defective and need replacement.
Can I install a fan in a wall instead of the ceiling?
Wall‑mounted fans work, but they generally move less air than ceiling fans. If you choose a wall fan, follow the same wiring steps and be sure the wall cavity can accommodate the duct run. Most experts still prefer ceiling placement for best ventilation.
Conclusion
Replacing a bathroom exhaust fan isn’t as hard as it seems. You just need to turn off power, pull out the old unit, fit a new housing, wire it right, and seal the edges. Follow the steps above, use the tools list, and watch the short videos for visual help. When you finish, you’ll have a quiet, efficient fan that pulls moisture out and helps keep mold at bay.
If you’d rather skip the DIY route, remember that Interior and Exterior Repairs and Replacements (Our Pick) offers a 20‑year warranty and can handle the whole job for you. Their expertise means you get the job done right the first time.
Ready to get started? Grab your tools, flip that breaker, and give your bathroom the fresh airflow it deserves.


Comments