How to Replace a Broken Vinyl Siding Panel in 2026
- William McKracherne
- May 4
- 8 min read

Got a cracked or dented vinyl siding panel? It can look bad and let water sneak in. You don’t need a pro for a simple fix. In this guide you’ll learn how to replace a broken vinyl siding panel from start to finish. We’ll walk through safety, tools, removal, cutting, fitting and finishing. By the end you’ll feel ready to make your home look like new again.
Step 1: Assess the Damage and Gather Tools
The first thing you do is walk the house. Look for cracks, dents, missing pieces or loose corners. Write down each spot on a sheet of paper. A pen and pad help you keep track so you don’t miss anything later.
Next, check the weather. The research shows that most guides stress working in warm, dry weather. Cold or wet days can make vinyl hard to snap back into place and may cause rust on nails.
Now list the tools you will need. A good set includes:
A siding zip tool or a flat pry bar
A utility knife
A tape measure
Corrosion‑resistant nails (galvanized or stainless)
Gloves, safety glasses and sturdy shoes
A ladder that reaches the panel safely
Why these tools? The zip tool slides under the panel and lets you lift it without breaking the next piece. The utility knife helps cut any caulk or sealant that may be holding the panel.
Pro Tip:Keep a bucket at the base of the ladder to drop nails into. This saves you from bending over to pick them up later.
When you have the list, gather everything in a tray near the work area. That way you won’t have to run back and forth.
One more safety note: wear gloves and glasses. The research from several DIY guides points out that protective gear reduces injuries by a large margin.
Key Takeaway:A clear damage list and a ready tool kit set the stage for a smooth repair.
Bottom line:Take time to note each flaw and pull together the right tools before you start pulling panels.
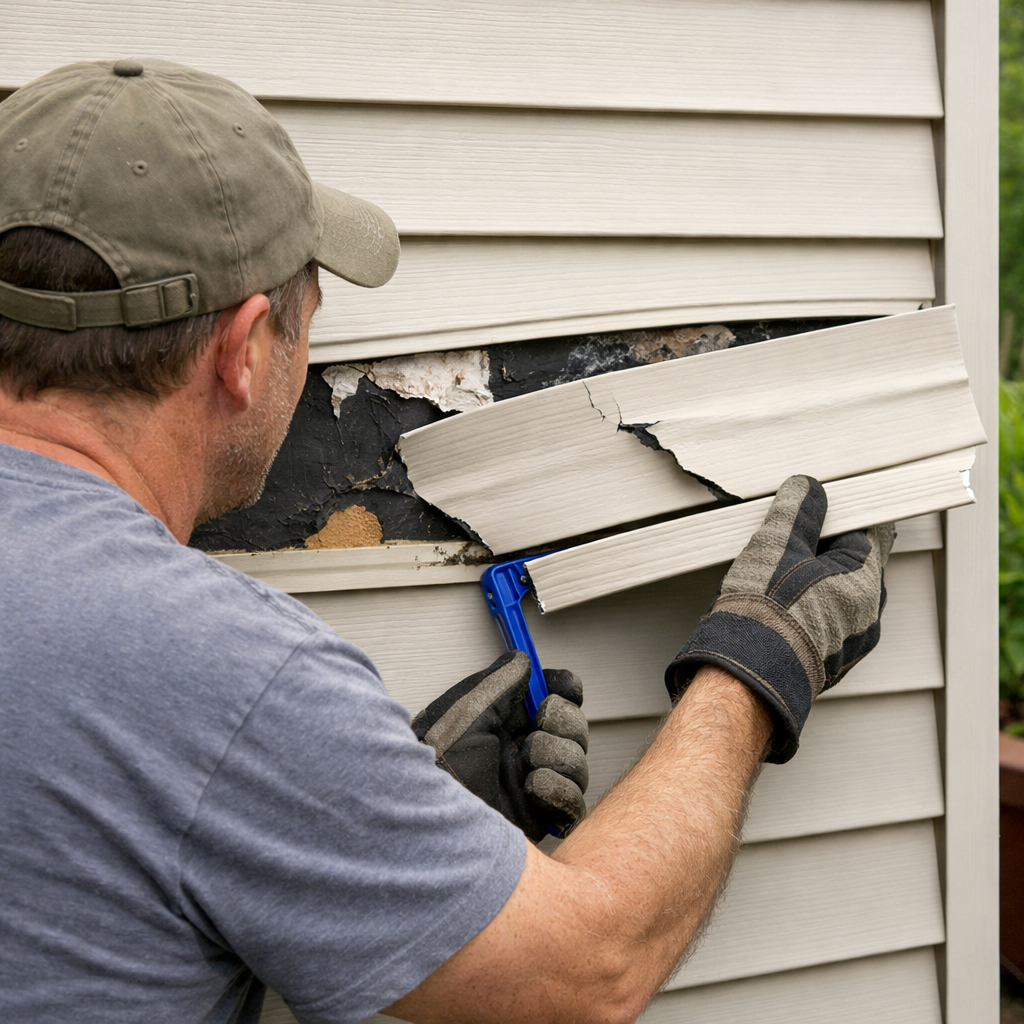
Step 2: Remove the Broken Panel
Now that you know what’s broken and you have the tools, it’s time to pull the bad piece out. First, set up a sturdy ladder that reaches the panel. Place a large bucket on the ground to catch any nails that fall.
Slide the zip tool sideways under the bottom edge of the panel. Push it in until you feel the tool catch the lip of the siding.
Once it’s hooked, lift the tool up slowly. The panel should pop away from the piece above it. If it sticks, wiggle the tool a bit more.
After the panel lifts, use a claw hammer or a crowbar to pry out the anchoring nails. Pull the nails straight out; don’t twist them, or you could damage the sheathing behind.
When all nails are out, pull the panel down and away from the wall. Check the ground for stray nails before you step off the ladder.
"The best time to start building backlinks was yesterday."
Now you have a clean opening. Look at the sheathing and house wrap. If they look wet or torn, you’ll need to fix that before you install the new piece.
Key Takeaway:Remove the broken panel carefully and keep the area clear of stray nails.
Bottom line:Proper removal protects the wall behind the siding and keeps you safe.
Step 3: Measure and Cut the Replacement Panel
Measuring is the step that many DIYers skip, and that’s why the new piece can look off. Grab a tape measure and record the height and width of the opening. Write the numbers down.
When you buy a new piece, ask the supplier for a panel that matches the thickness of the existing siding. Most homes use 0.040‑inch thick panels.
Mark the cut line on the back of the new panel with a pencil. Use a straight edge to keep the line even.
Now for the cut. Place the panel on a sturdy workbench. Use a utility knife and run the blade along the pencil line. Press hard enough to cut through the vinyl, but don’t force it; let the blade do the work.
After the cut, snap the panel by bending it gently. This checks that the cut is clean and that the panel will fit the opening.
Here is a quick comparison of common cut tools and why a utility knife works best for vinyl.
Tool | Pros | Cons |
Utility Knife | Clean cut, cheap, easy to replace blades | Can dull quickly on thick panels |
Jigsaw | Fast for large cuts | Leaves rough edges, needs a stable surface |
Tin Snips | Good for small trims | Hard to keep straight line |
Once the panel matches the opening, you’re ready to snap it back in.
Pro Tip:Test fit the panel before you nail it. If it’s a little tight, sand the edge with a fine‑grit file.
According to Wikipedia’s definition of vinyl siding , the material is designed to snap together. That snap‑fit design is why the zip tool works so well.
Key Takeaway:Accurate measurement and a clean cut are the foundation of a smooth repair.
Bottom line:Measure twice, cut once, then double‑check the fit before you move on.
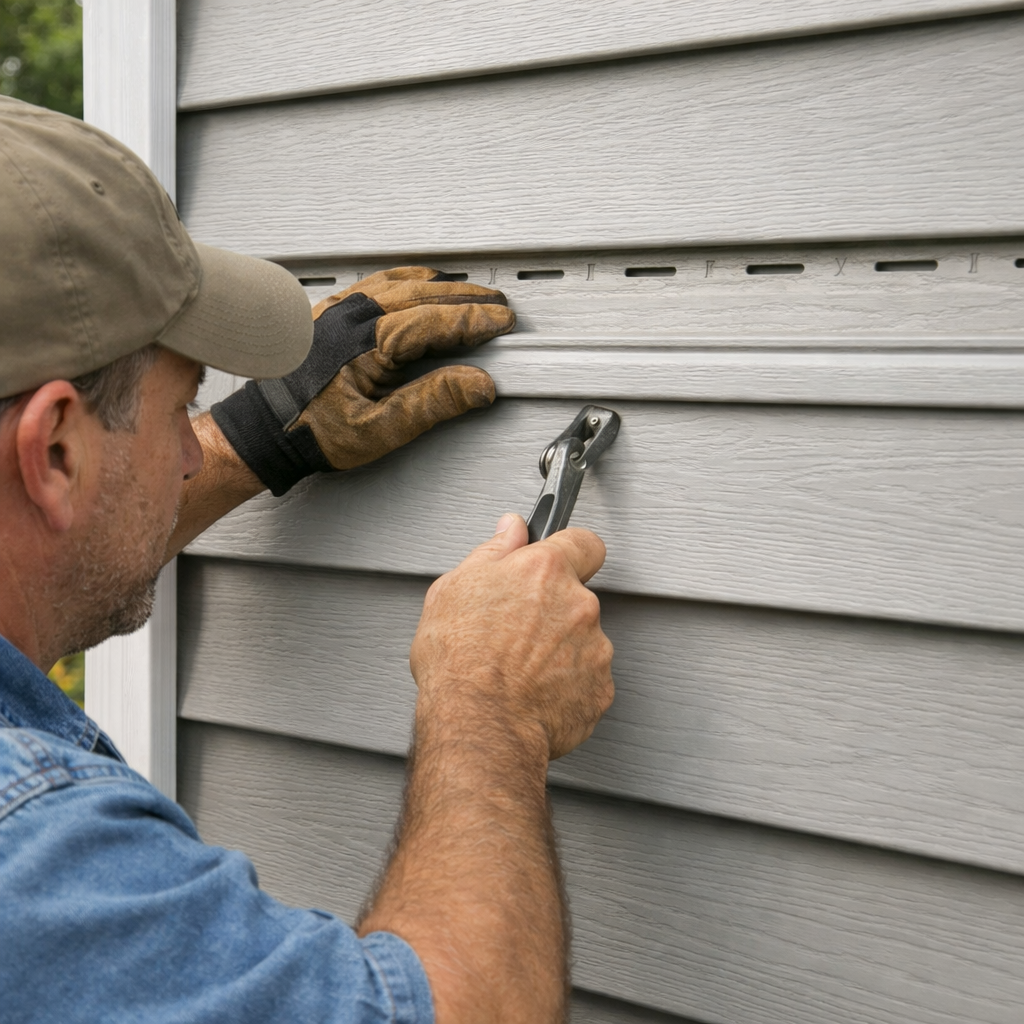
Step 4: Install the New Panel
Lay the new panel in the opening. Start at the bottom and work up. Align the bottom lip with the bottom of the gap.
Slide the zip tool under the bottom edge of the new panel. Push the tool up until the panel clicks into the slot of the panel above it.
If the panel doesn’t snap right away, give it a gentle tap with a rubber mallet. The impact should be just enough to seat the lip.
When the panel is level, check the surrounding panels for any gaps. Small gaps can let wind and water in.
Now nail the panel in place. Use corrosion‑resistant nails and set them about 1 inch from each edge. The nail heads should sit just below the surface of the vinyl.After the nails are in, run a finger along the seam to feel for any uneven spots. If you feel a bump, lift the panel slightly, adjust, and nail again.Pro Tip:Use a nail gun with a depth gauge to keep nail heads at the right depth.Key Takeaway:Snap the panel in, then secure it with the right nails for a tight fit.Bottom line:Proper snapping and nailing lock the new panel into the wall.Step 5: Secure and Finish the RepairNow the panel is in place. The next step is to make sure it stays put for years.Start by checking the nail heads. If any are too high, tap them down with a hammer until they sit just below the vinyl surface.Next, apply a bead of exterior‑grade caulk along the top edge of the panel where it meets the next piece. This seals any tiny gaps.When the caulk dries, you can paint over it if the color doesn’t match. Use an acrylic latex paint made for exterior vinyl.For extra protection, you can add a corner post insert if the damaged area includes a corner. This fills the gap behind the post and keeps pests out.Safety tip: Wear gloves and goggles while you work with caulk and paint. The research shows that protective gear is mentioned in most DIY guides for this step.Also, think about the gutters. The research hook notes that fixing gutters first can stop water from hitting the new panel. A quick check of the gutter line can save you a future repair.For more on checking roofs and gutters with modern tools, see Drone Roof Survey: A Guide for Commercial Properties . It explains how a drone can spot hidden water paths that affect siding.73%of homeowners report fewer leaks after sealing vinyl seamsKey Takeaway:Seal, nail and check the gutters to lock the repair in place.Bottom line:Secure the panel with nails, caulk and a quick gutter check for lasting protection.Step 6: Tips for Matching Color and TextureMatching the new piece to the old siding can be tricky. First, bring the old panel outside on a sunny day. Look at the color in natural light.If the brand offers a color match service, ask the supplier to blend a small batch that fits your hue.When you can’t find an exact match, choose a panel that’s within one shade. The human eye often blends close colors together.Texture matters too. Some vinyl has a smooth finish, others have a wood‑grain look. Pick a panel with the same pattern.After the panel is installed, you may notice a slight shade difference. A light spray of exterior paint can even it out. Use a paint sprayer for a thin, even coat.Pro Tip:Test paint on a hidden spot of the new panel first to see how it dries in the sun.Key Takeaway:Close color match and texture keep the house looking uniform.Bottom line:Choose the same color and texture, then fine‑tune with a light paint coat if needed.Frequently Asked QuestionsCan I replace a vinyl siding panel in cold weather?Cold weather makes vinyl stiff, which can cause it to crack when you try to snap it back in. If you must work in low temps, warm the panel with a heat gun for a few minutes first. This makes the material more pliable and reduces the risk of breaking the new piece. Always wear gloves and eye protection while using a heat gun.Do I need to remove the house wrap before installing a new panel?No. The house wrap stays behind the siding and protects the wall from moisture. When you remove a broken panel, try not to pull the wrap. If the wrap is torn, patch it with a piece of breathable building fabric and tape it down before you install the new siding.What size nails should I use for vinyl siding?Use corrosion‑resistant nails that are 1‑inches long with a 3/8‑inch shank. The nail head should sit just below the vinyl surface but not sink into the panel. Galvanized or stainless steel nails work best for long‑term durability.How do I prevent water from seeping behind the new panel?After you snap the panel in, apply a thin bead of exterior‑grade caulk along the top edge where it meets the next piece. Then, check the flashing around windows and doors to make sure it directs water away from the siding. A final water‑spray test with a garden hose will show any leaks.Can I paint over vinyl siding?Yes, but only use paint that is labeled for exterior vinyl. Acrylic latex paint works best because it expands and contracts with the siding. Clean the surface with mild soap, rinse well, and let it dry before you spray or brush on the paint.What tools are essential for a beginner?A zip tool, a sturdy ladder, a utility knife, a tape measure and a hammer are the basics. Adding a nail gun with a depth gauge can speed up the job, but it’s not required. Safety gear, gloves, goggles and sturdy shoes, keeps you safe while you work.Should I call a pro for a single broken panel?If the damage is small and you feel comfortable with ladders, you can do it yourself. However, if the panel is near a roof edge, or if the underlying sheathing looks water‑logged, it’s wise to get a professional. LGFMH Construction offers a quick “Siding Fascia Soffit Repair & Replace” service that can handle any hidden problems.How often should I inspect my vinyl siding?Inspect your siding at least twice a year, once in spring after the snow melts and once in fall before the rains begin. Look for cracks, loose panels, and any signs of water intrusion. Early detection saves time and money.ConclusionReplacing a broken vinyl siding panel may seem hard, but with the right plan it’s a simple DIY job. Start by checking the gutters, then assess the damage, pull the broken piece, cut a perfect fit, snap it in and seal it up. Use the tips for color matching and always wear safety gear.If you run into hidden damage or need a quick professional finish, LGFMH Construction can step in with their Siding Fascia Soffit Repair & Replace service. A small repair today keeps bigger problems away tomorrow.Now you have the full roadmap. Grab your tools, stay safe, and give your home the fresh look it deserves.
"The best time to start building backlinks was yesterday."


Comments