How to Replace a Rotted Sill Plate: A Step‑By‑Step Guide
- William McKracherne
- Mar 13
- 9 min read

A rotted sill plate can ruin the look of your home and let water sneak in. It’s the kind of problem that makes you want to grab a hammer and fix it right away.
In this guide you’ll see exactly how to replace a rotted sill plate step by step. We’ll cover the tools you need, how to remove the damaged wood, and the best way to install a fresh, sturdy piece that will keep out drafts.
By the end you’ll feel confident enough to tackle the job yourself, or know when to call a pro like LGFMH Construction for a quick, reliable fix. Ready to get your sill back in shape? Let’s get started.
You’ll also learn a couple of tricks for sealing the edges and checking for hidden rot, so the repair lasts for years.
Step 1: Assess the Damage and Plan Replacement
A rotted sill plate can turn a cozy home into a leaky mess fast. If you spot soft wood or water stains, you’re already on the right track to fix it.
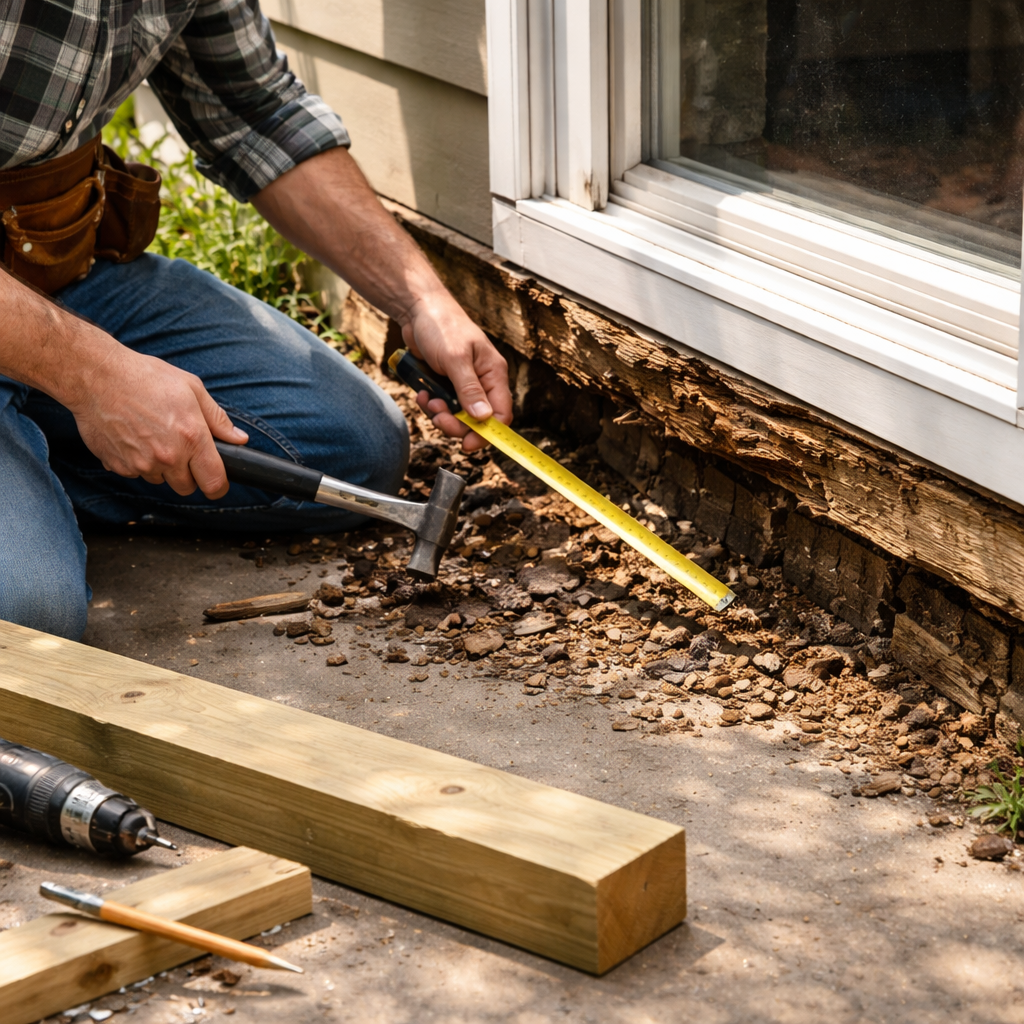
First, give a good look‑over. Tap it with a hammer – a dull thud means the wood is still solid, a hollow sound warns of rot. Check the area around the frame for mold or dampness. If you see any brown fuzz, that’s a sign the rot has spread.
So, what’s next? Grab a moisture meter if you have one, or simply press a screwdriver into the wood; it should bite cleanly. Any crumbly bits need to go.
Now map out your plan. Measure the length and depth of the damaged section. Write those numbers down – you’ll need exact cuts. Choose a replacement that matches the rest of your exterior; pressure‑treated lumber works well for most homes.
After you’ve got the measurements, double‑check for hidden rot behind trim or under siding. A quick pry with a flat‑head screwdriver can reveal trouble spots you might miss.
If you plan to add a touch of style, think about LED accent lighting. LED Artistry offers ideas that work with fresh sill plates and keep the look clean.
Choosing the right wood matters. Millena Flooring lists several rot‑resistant options that blend with older homes without breaking the budget.
Finally, track your repair timeline with a property‑management tool. Property Copilot lets you set reminders for sealing and future inspections.
Step 2: Gather Tools and Materials
Now that you know what kind of wood you need, it’s time to pull together the tools that will make the cut clean and safe.
Start with a circular saw that can handle a 2‑by‑6 board. A 7‑inch blade is plenty for most sill plates. If you only have a hand saw, make sure it’s sharp, a dull blade will snag and give you a rough edge.
You’ll use the level to check the new piece sits flat against the foundation. The tape measure helps you double‑check the length you marked earlier, and the pencil lets you trace cut lines.
Safety gear
Don’t skip eye protection and ear plugs. A dust mask keeps the fine saw dust from irritating your lungs, especially if you’re cutting pressure‑treated lumber.
Materials you’ll need
Buy a piece of pressure‑treated lumber that matches the depth of the old sill. Cut it a little longer than the measured gap; you can trim the excess later. Get construction adhesive and a few stainless‑steel shims, they let you fine‑tune the fit without forcing the wood.
If you prefer a low‑maintenance option, a rot‑resistant composite board works too. Just make sure the board’s thickness matches the original to keep the window flashing tight.
Before you head to the store, write a quick checklist: circular saw, blade, level, tape measure, pencil, safety glasses, ear plugs, dust mask, adhesive, shims, and the chosen lumber. A short list stops you from running back and forth.
Need a deeper dive on choosing the right wood? Check out LGFMH Construction’s guide on repairing a rotted door frame for tips that also apply to sill plates.
With everything in hand, you’ll waste less time setting up and more time getting that fresh sill in place.
Step 3: Remove the Rotted Sill Plate
Now the worst part is gone – the rotted piece. It’s time to pull it out so the new sill has a clean surface.
First, double‑check your safety gear. Gloves, goggles, and a dust mask keep you safe from splinters and saw dust.
Cut around the damage
Set your circular saw to a shallow depth, just enough to cut through the sill. Follow the pencil line you drew in Step 1. If the rot spreads into the framing, you may need to make a series of cuts to free a rectangular block.
Don’t force the saw; let the blade do the work. A slow, steady push reduces tear‑out and keeps the cut straight.
Break out the piece
Slide a pry bar or flat‑head screwdriver into the cut groove. Tap gently with a hammer until the wood starts to wiggle. Work the tool around the edges, loosening the piece little by little.
If the wood is stubborn, a reciprocating saw can help cut any hidden nails or screws that are holding it in place.
Clear the opening
Once the rotted board lifts out, use a shop vacuum to suck up dust and debris. Sweep away any loose shims or old adhesive.
Check the studs for damage. Any split or water‑soaked studs should be repaired before you install the new sill.
Tip: A quick moisture‑meter check now can save you a second round of rot later.
Before you set the new board, run a level across the opening. If the gap tilts even a little, add a shim under the low side. A snug, level fit stops drafts.
When the cavity is clean and dry, you’re ready for the fresh sill you measured earlier. Need a quick refresher on a similar repair? Take a look at our guide on how to repair a rotted door jamb for extra tips.
Step 4: Install the New Sill Plate
Now that the opening is clean and level, it's time to put the fresh sill plate in place.
First, dry‑fit the new board. Slip it into the gap and look for any high spots. If it rocks, slide a thin shim under the low side until the whole piece sits flat.
Tip: A quick check with a spirit level should show no more than a 1/16‑in. deviation.
Apply adhesive
Spread a bead of construction adhesive along the back of the sill. A thin line about the width of a pencil works well, enough to fill gaps but not so much that it squeezes out in big globs.
Press the board firmly into the opening. Hold it for a few seconds while the glue grabs.
Secure with fasteners
Drive 2‑in. wood screws through the sill and into each stud. Space the screws every 12 in. to keep the board from shifting later.
Pre‑drill pilot holes if the lumber is dense; that saves you from splitting the wood.
And if you hit a nail that’s already in the stud, pull it out with pliers before the screw goes in.
Seal the edges
Run a bead of exterior‑grade caulk where the sill meets the wall and the foundation. Smooth it with your finger or a caulk‑tool.
This stops drafts and keeps moisture from sneaking behind the new wood.
Does this feel like a lot? Remember, each step only takes a few minutes, and the result is a solid, draft‑free base for your window or door.
After the screws are in, give the adhesive a final squeeze and wipe any excess with a damp cloth. Then run the level once more to double‑check that the sill sits true. If you see a tiny gap, pack a little extra caulk and smooth it out.
Need more detail on attaching trims around a new threshold? Check out LGFMH Construction’s step‑by‑step guide on replacing an exterior door threshold for extra tips.
Item | Recommended choice | Notes |
Adhesive | Construction adhesive | Thin bead, pressure‑set 24 h |
Fasteners | 2‑in. wood screws | Every 12 in., pre‑drill if needed |
Shims | Stainless‑steel | Slide under low spots, trim excess |
Step 5: Reframe, Insulate, and Finish
Now the new board sits tight, but the job isn’t done until you lock out air and water. Start by pulling a piece of foam backer or rigid insulation and snug it against the bottom edge of the sill plate. A tight fit stops drafts from sneaking under the floor.
Seal every joint
Run a thin bead of silicone sealant where the flashing meets the board. Press it smooth with a fingertip – you’ll see a clean line that will stay flexible as the house moves. Next, check the corners. If you spot any gaps, fill them with the same sealant. A few extra seconds here saves you future leaks.
For extra peace of mind, add a strip of house‑wrap over the top edge before you reinstall the flashing. This extra layer acts like a rain guard and gives the flashing something solid to grip.
Final fasteners
Give the plate one more look over. If a screw feels loose, drive another one in right next to it. Space fasteners about 12 inches apart; that pattern keeps the board from shifting when the house settles.
When the seal looks good, step back and run your hand along the seams. You should feel a solid, even surface. If you hear a hollow thump, add another screw.
Need help with a nearby window sill? How to Fix Rotted Window Sill: A Practical Step‑by‑Step Guide walks you through that repair.
Once the frame is sealed, many homeowners think about new flooring. Millena Flooring offers hardwood installation that pairs well with a fresh sill plate.
Finally, clean up the site. Pull the shop‑vac, stash tools, and give the area a quick sweep. A tidy workspace means you’ll notice any missed spots right away.
Frequently Asked Questions
How can I tell if the sill plate needs to be replaced?
If the wood feels soft when you press it, that’s a sign it’s rotted. Look for dark spots, a musty smell, or cracks where water can get in. Any piece that crumbles or breaks easily should be swapped out. When you see these clues, you’ve found the point to start the replace job.
What tools should I have ready before I start?
You’ll need a pry bar, a hammer, a circular saw with a fine blade, a drill with a masonry bit, a level, a tape measure, and safety gear like gloves and goggles. A set of temporary jacks helps keep the joists steady while you work. Having all these items nearby stops you from pausing mid‑task.
Can I do the replacement myself, or is a pro better?
If you’re comfortable using power tools and can follow safety steps, you can do it yourself. The job mainly needs steady hands and the right fasteners. A pro can finish faster and spot hidden damage you might miss. Many homeowners start the job and call a pro if they hit unexpected rot.
How do I stop future rot after the new plate is in place?
First, lay a sheet of house‑wrap or a thin plastic barrier against the foundation. Then add a strip of wrap over the top edge before you put the flashing back on. Seal every joint with silicone sealant and check that screws are tight every 12 inches. These steps lock out water and air.
What’s the best way to seal the edges of the new sill plate?
Run a thin bead of silicone sealant where the flashing meets the board. Smooth it with your finger so it makes a clean line. Do the same around any corners or gaps you see. After the seal dries, run your hand along the edge – it should feel solid, not hollow.
How much should I expect to pay for a typical replacement?
The cost depends on the size of the plate and how much extra work is needed. You’ll pay for the pressure‑treated lumber, fasteners, flashing, and any sealant. Add a bit for renting temporary jacks if you don’t own them. Most DIY folks spend a few hundred dollars, while hiring a pro can run higher because of labor.
Conclusion
Replacing a rotted sill plate isn’t magic – it’s just careful steps that anyone can follow.
First, you spotted the soft wood, measured, and got the right pressure‑treated board. Then you set up jacks, pried out the bad piece, cleaned the opening, and wrapped the foundation. Next you dry‑fit the new plate, fasten it to the anchor bolts, and seal every joint with silicone. Finally you double‑check the screws, add a strip of house‑wrap, and tidy the site.
If any part feels shaky, pause and call a pro. LGFMH Construction can finish the job fast and make sure moisture stays out for years.
With this checklist in hand, you’ve got a solid plan to keep your home dry and safe.
Remember to check the seal each season and watch for water stains by the foundation; a quick touch‑up now can stop a big repair later.


Comments